> ## Documentation Index
> Fetch the complete documentation index at: https://knowledge.komo.tech/llms.txt
> Use this file to discover all available pages before exploring further.
# Amondo Card
> Instructions on how to embed Amondo imprints in your Engagement Hub
## Watch it come to life
## What is it?
The Amondo Card allows you to embed curated content from across all your business's social media platforms and display them in one, easy to manage, card.
## Things to note
* You will need to create an imprint through the [Amondo platform.](https://www.amondo.com/)
* Once you have created your Imprint through Amondo you will then need to copy and paste the embed link into the card in your Engagement Hub.
## How do I build one?
* [Step 1: Add an Amondo Card to your Engagement Hub](#step-1-add-an-amondo-card-to-your-engagement-hub)
* [Step 2: Paste in the Imprint ID](#step-2-paste-in-the-imprint-id)
* [Step 3: Publish your Card](#step-3-publish-your-card)
### Step 1: Add an Amondo card to your Hub
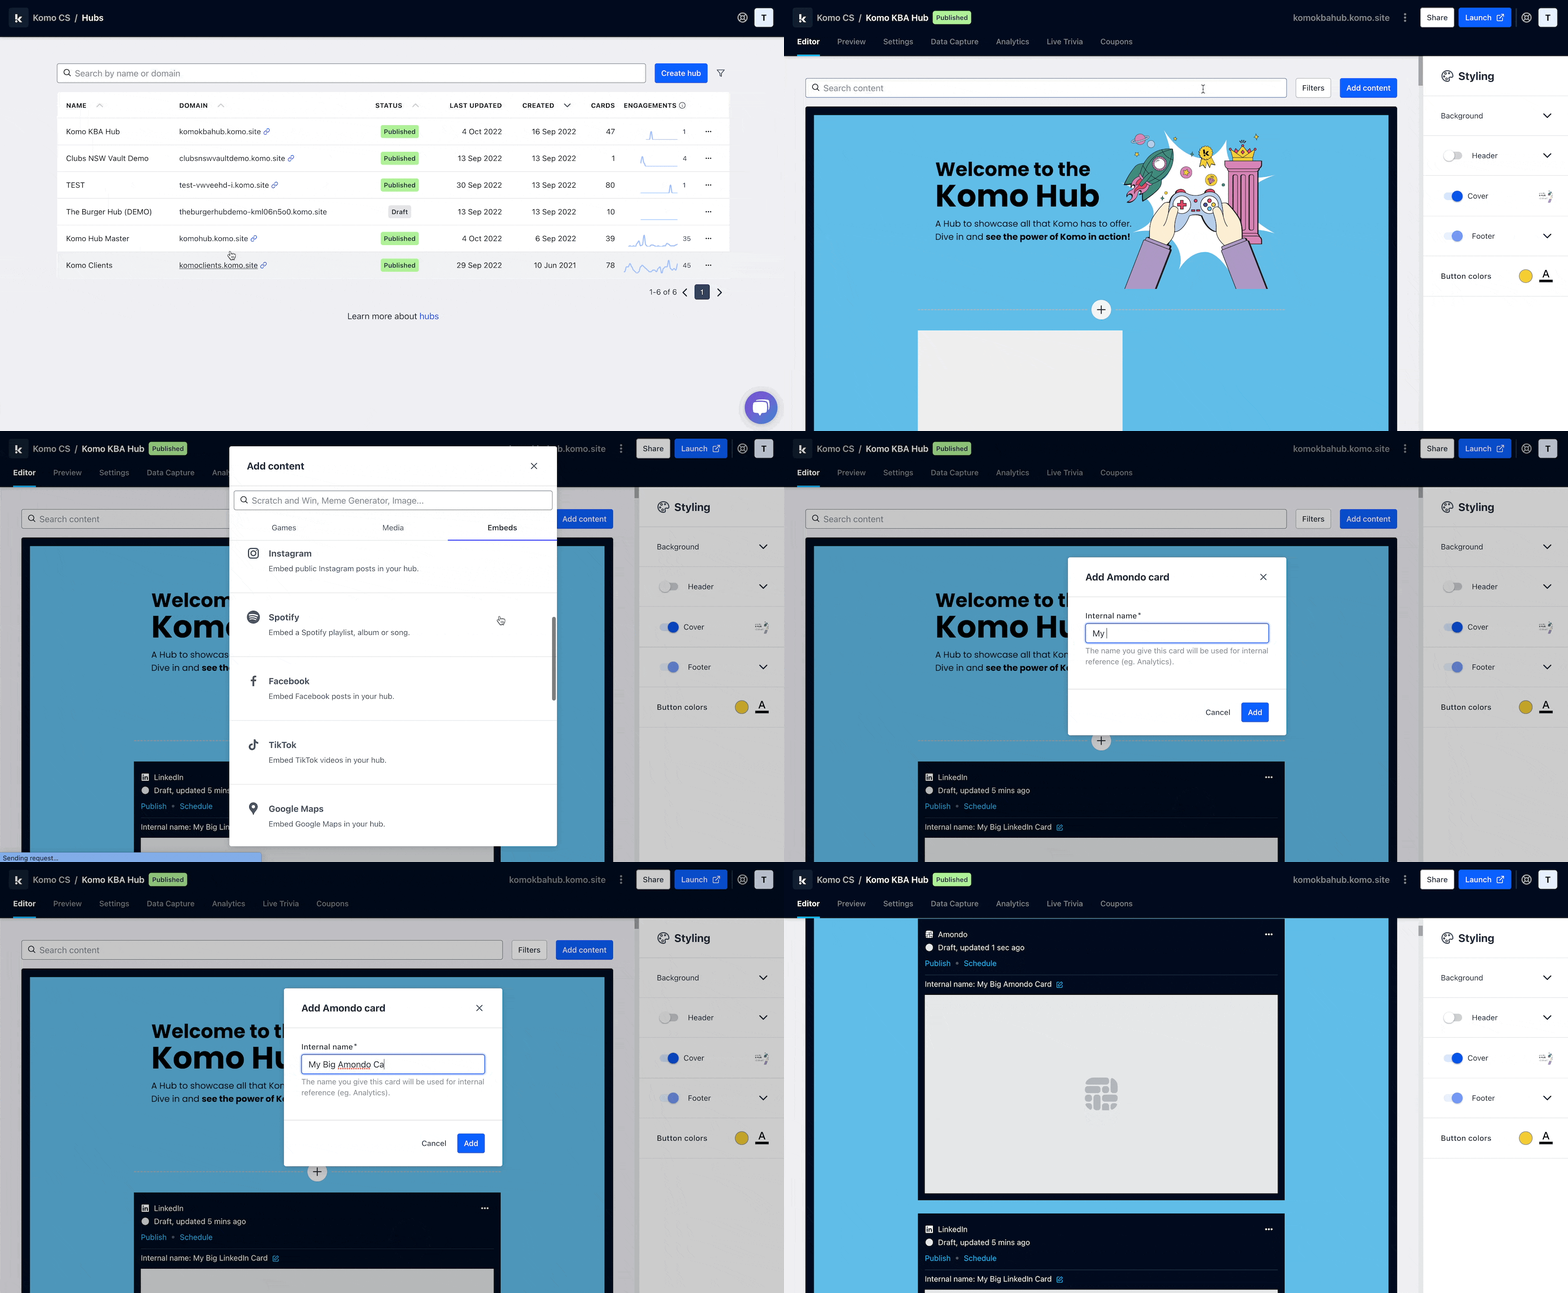 * Navigate to your **Engagement Hub**.
* Once there, click **Add content**, from here select **Embeds** and then **Amondo.**
* You will then see your new card has been added to your Engagement Hub.
### Step 2: Paste in the Imprint ID
* Navigate to your **Engagement Hub**.
* Once there, click **Add content**, from here select **Embeds** and then **Amondo.**
* You will then see your new card has been added to your Engagement Hub.
### Step 2: Paste in the Imprint ID
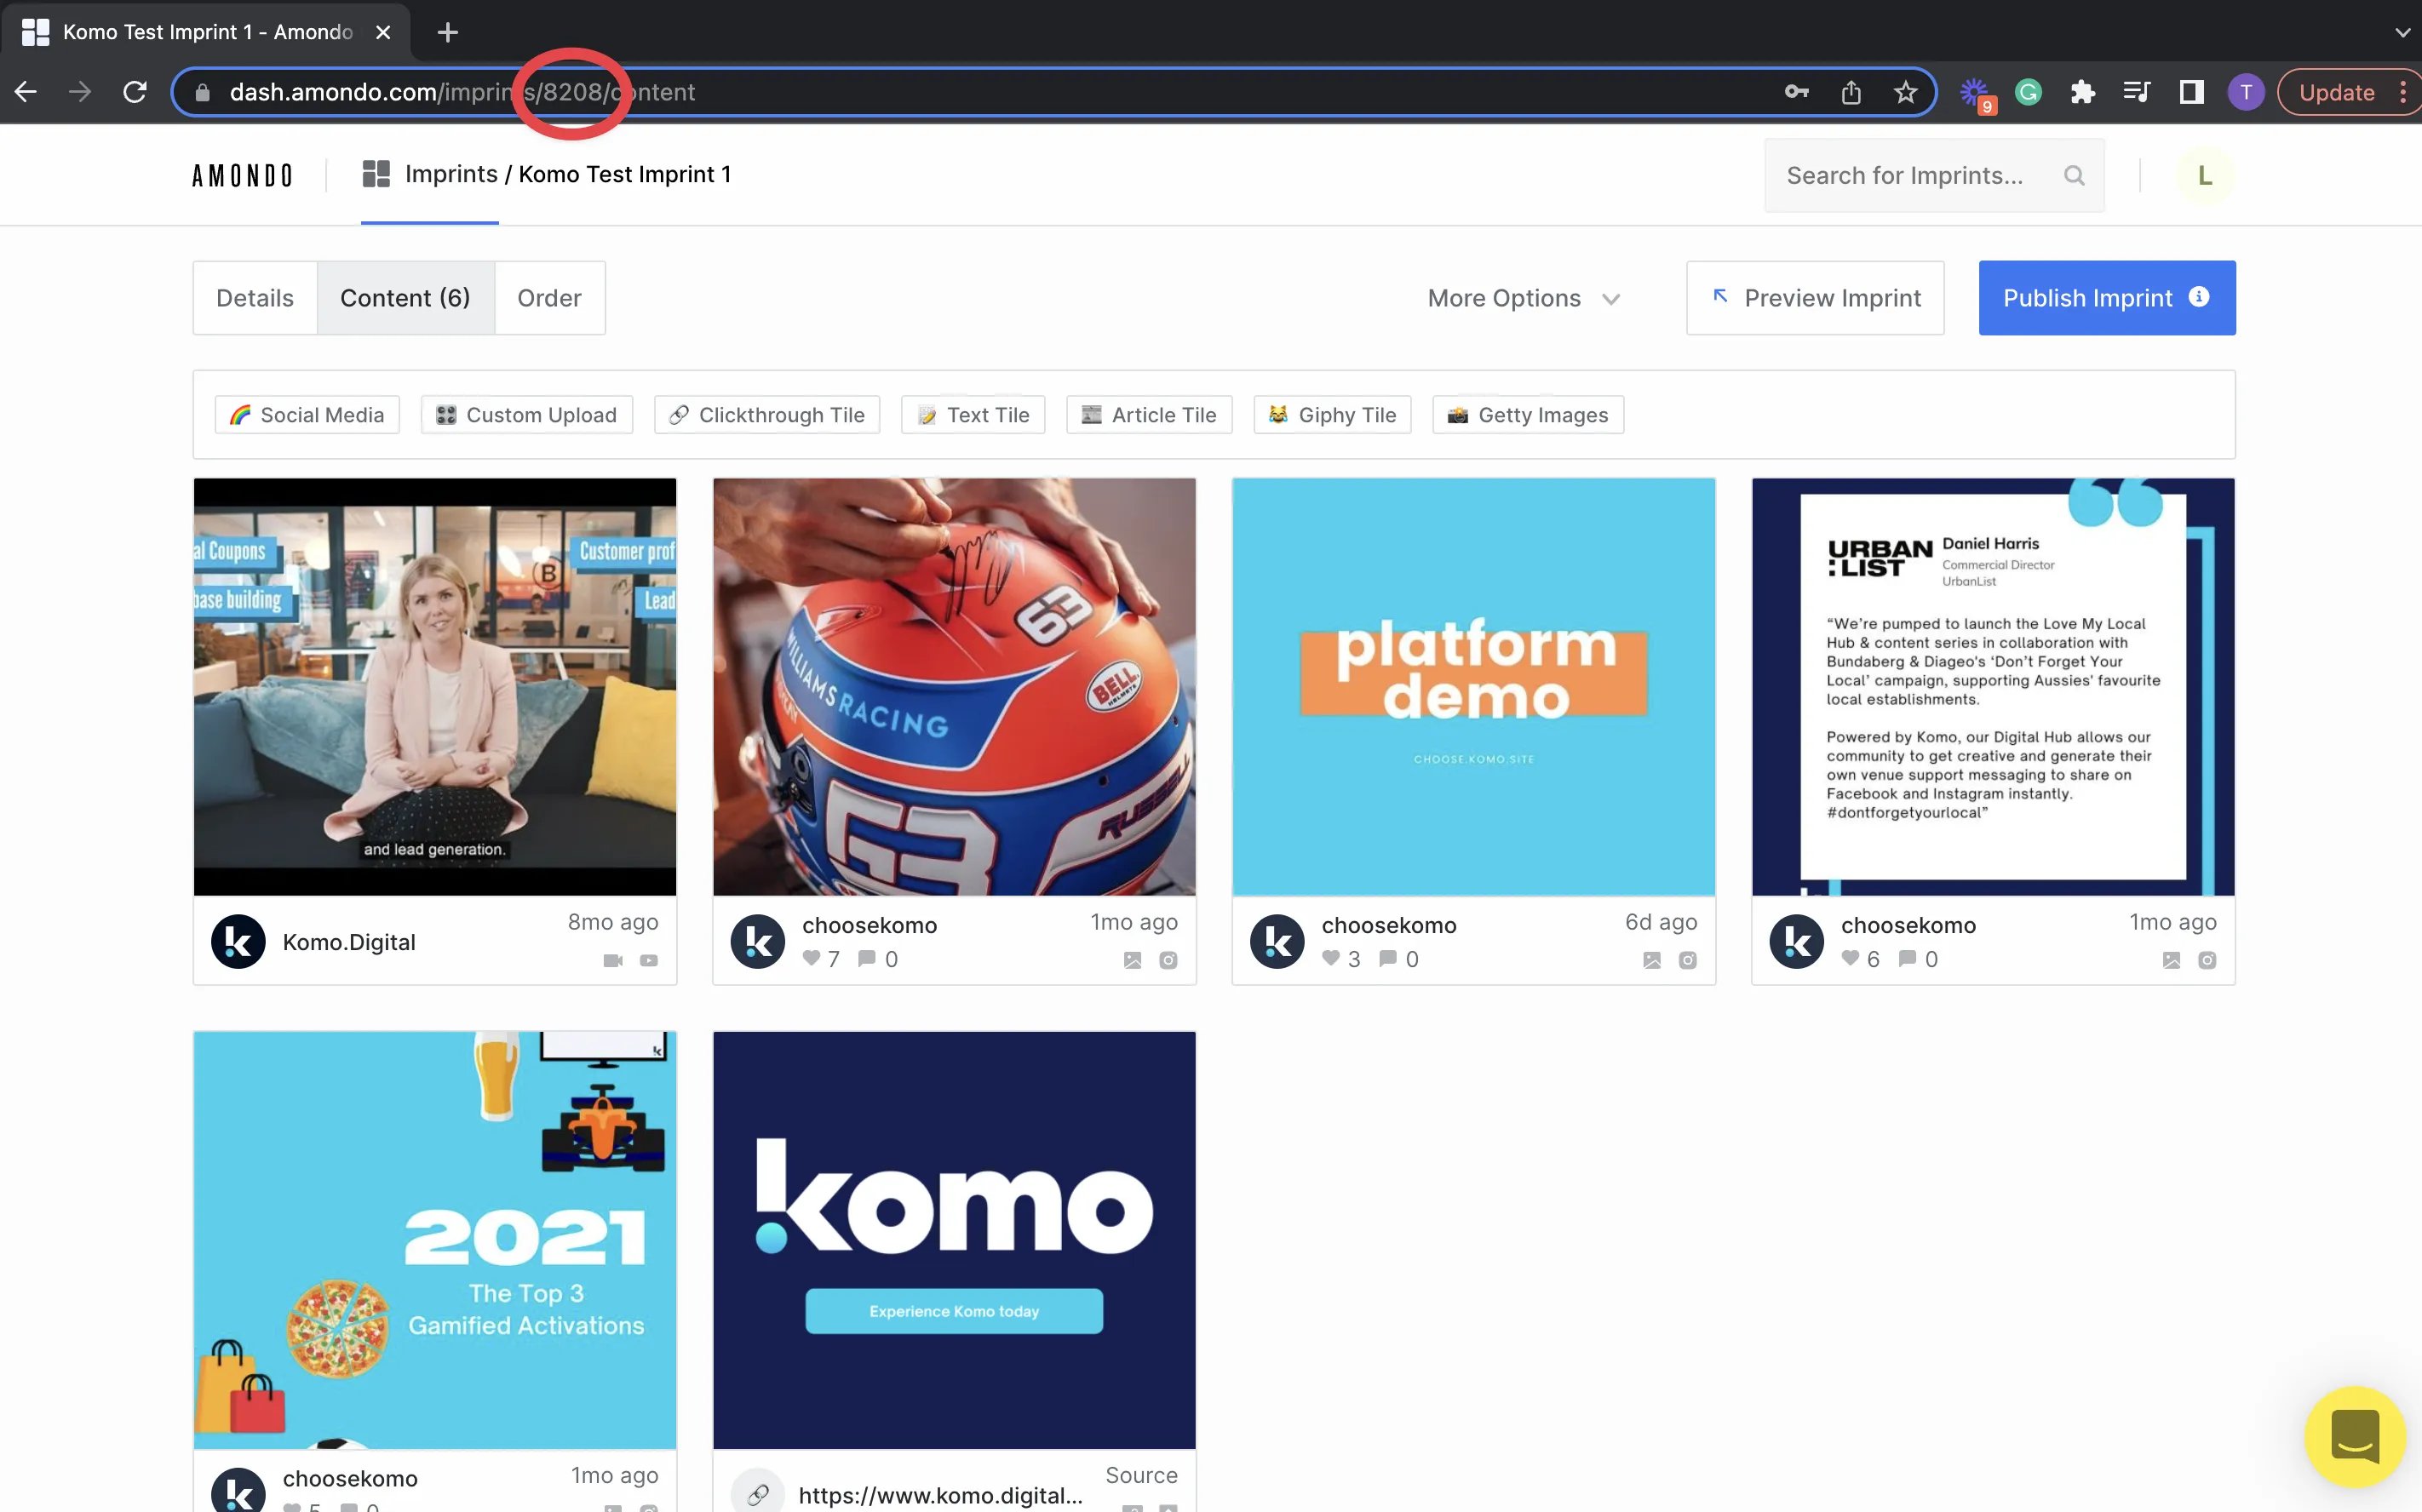
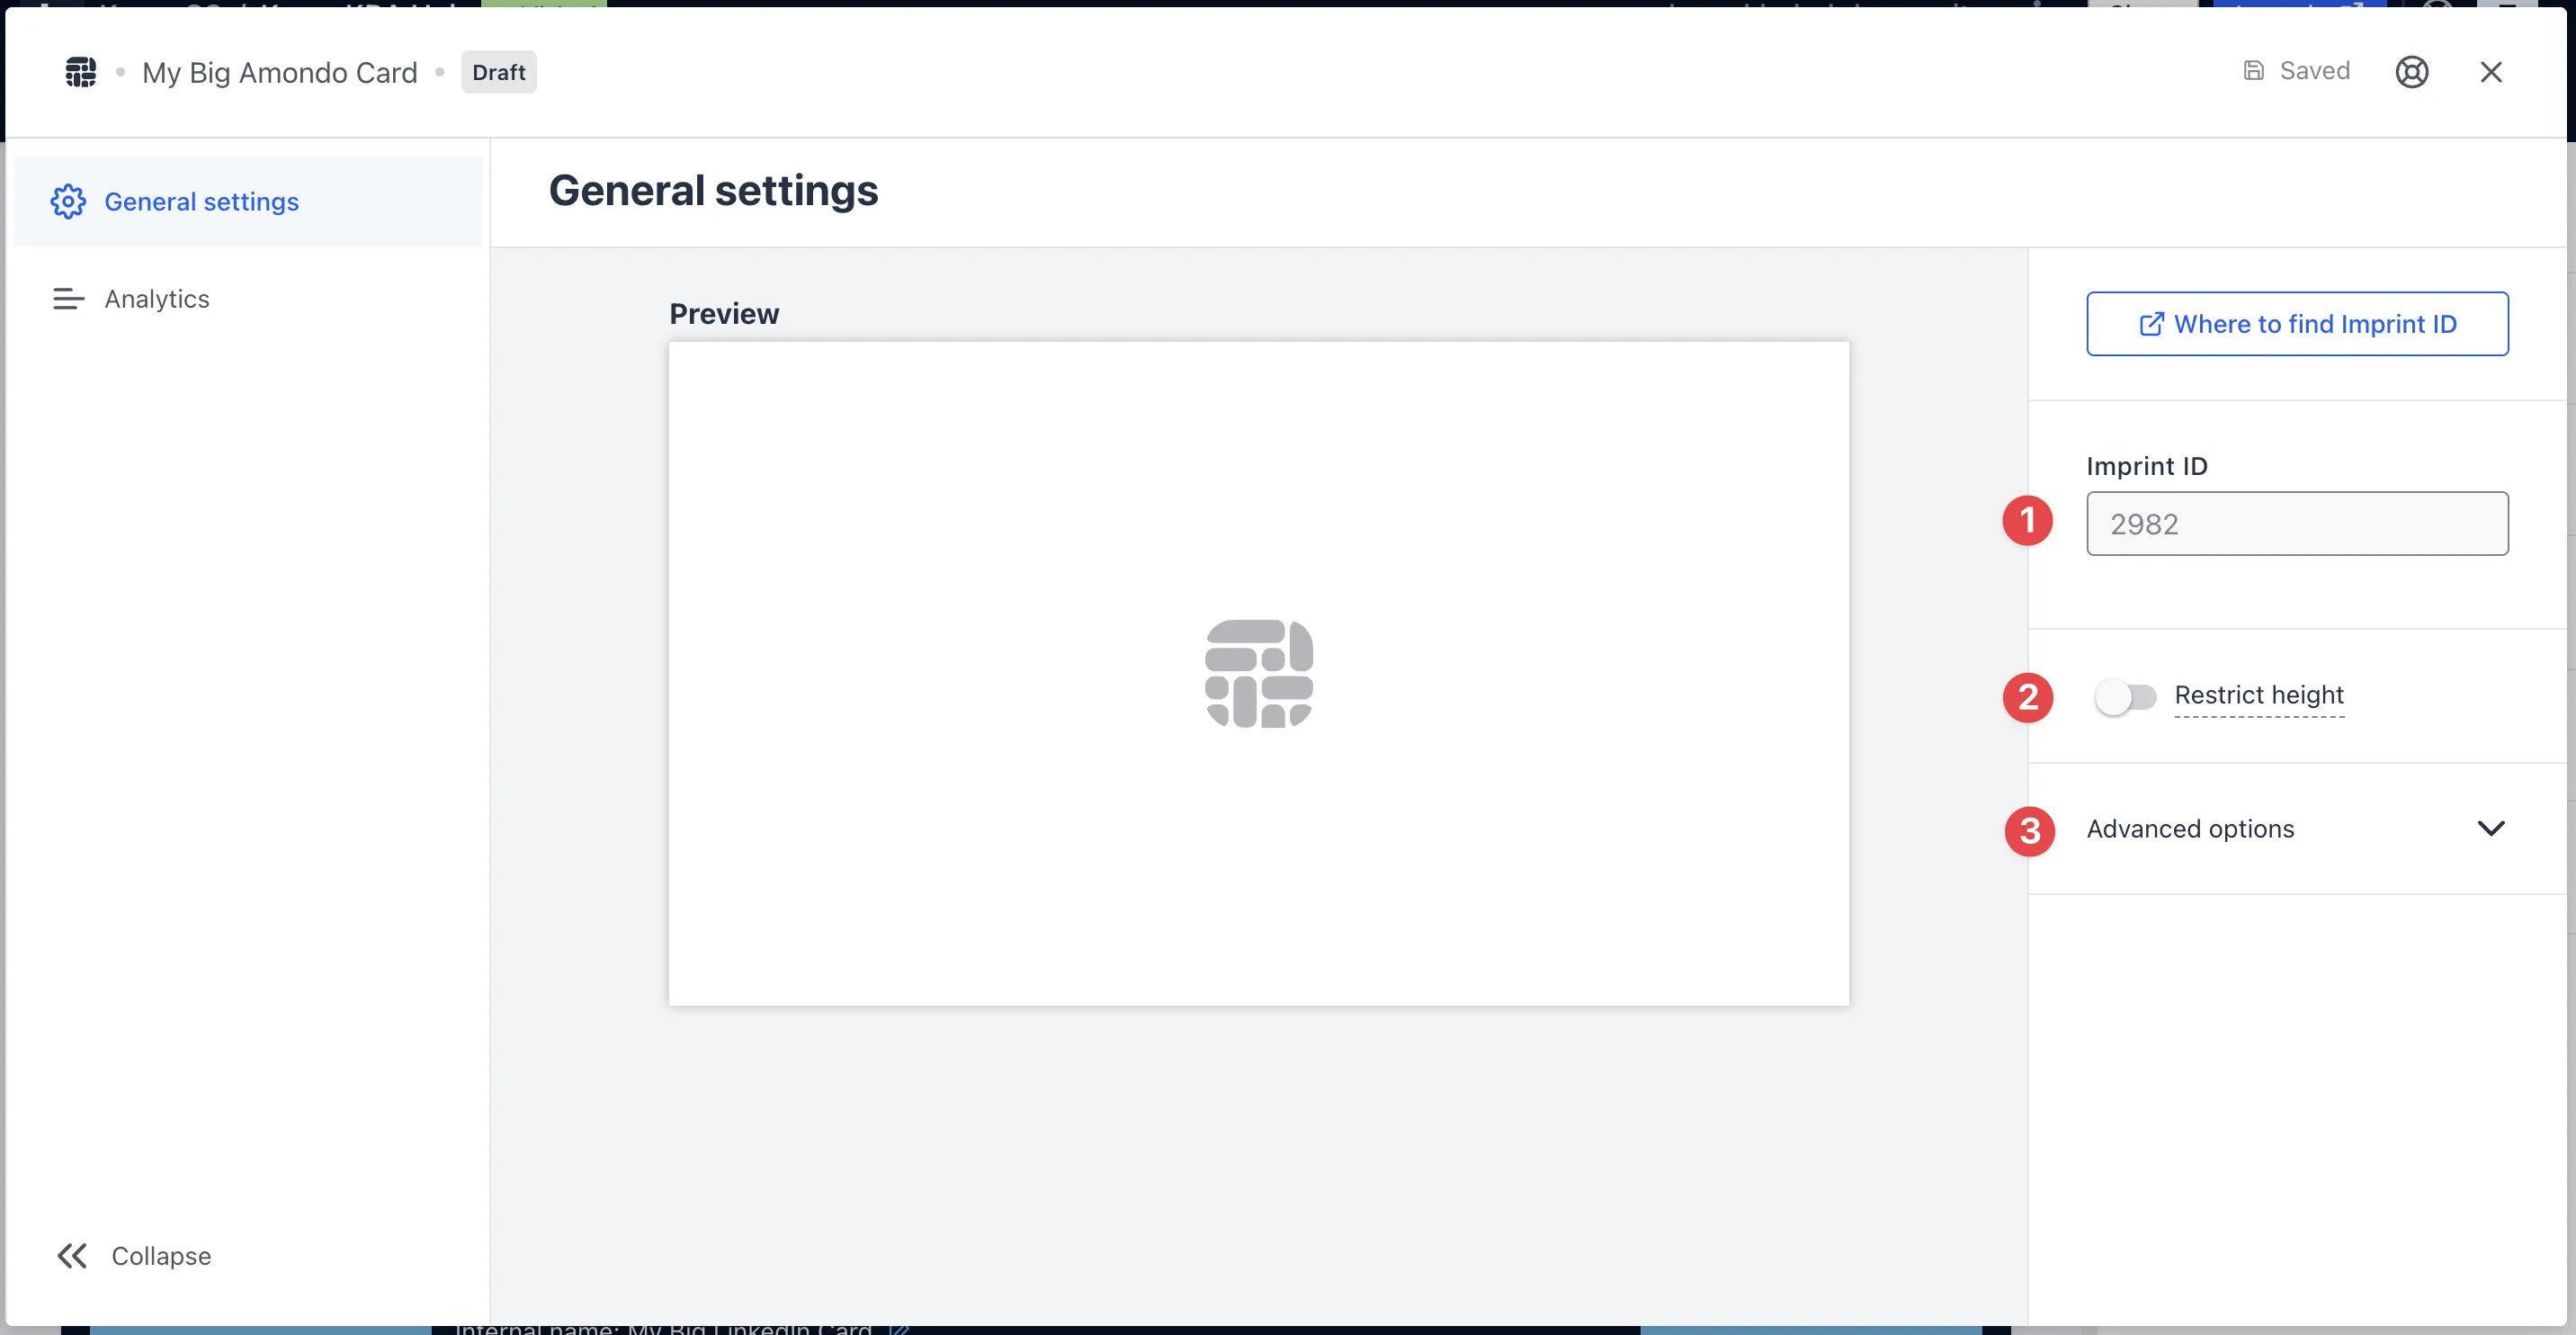 * **(1)** Get the **Imprint ID** and paste it in here and a preview will appear on the left.
To find the Amondo's Imprint ID simply copy the number from the Amondo Imprint URL, otherwise you can find it in the Imprint SDK Generator.
* **(1)** Get the **Imprint ID** and paste it in here and a preview will appear on the left.
To find the Amondo's Imprint ID simply copy the number from the Amondo Imprint URL, otherwise you can find it in the Imprint SDK Generator.
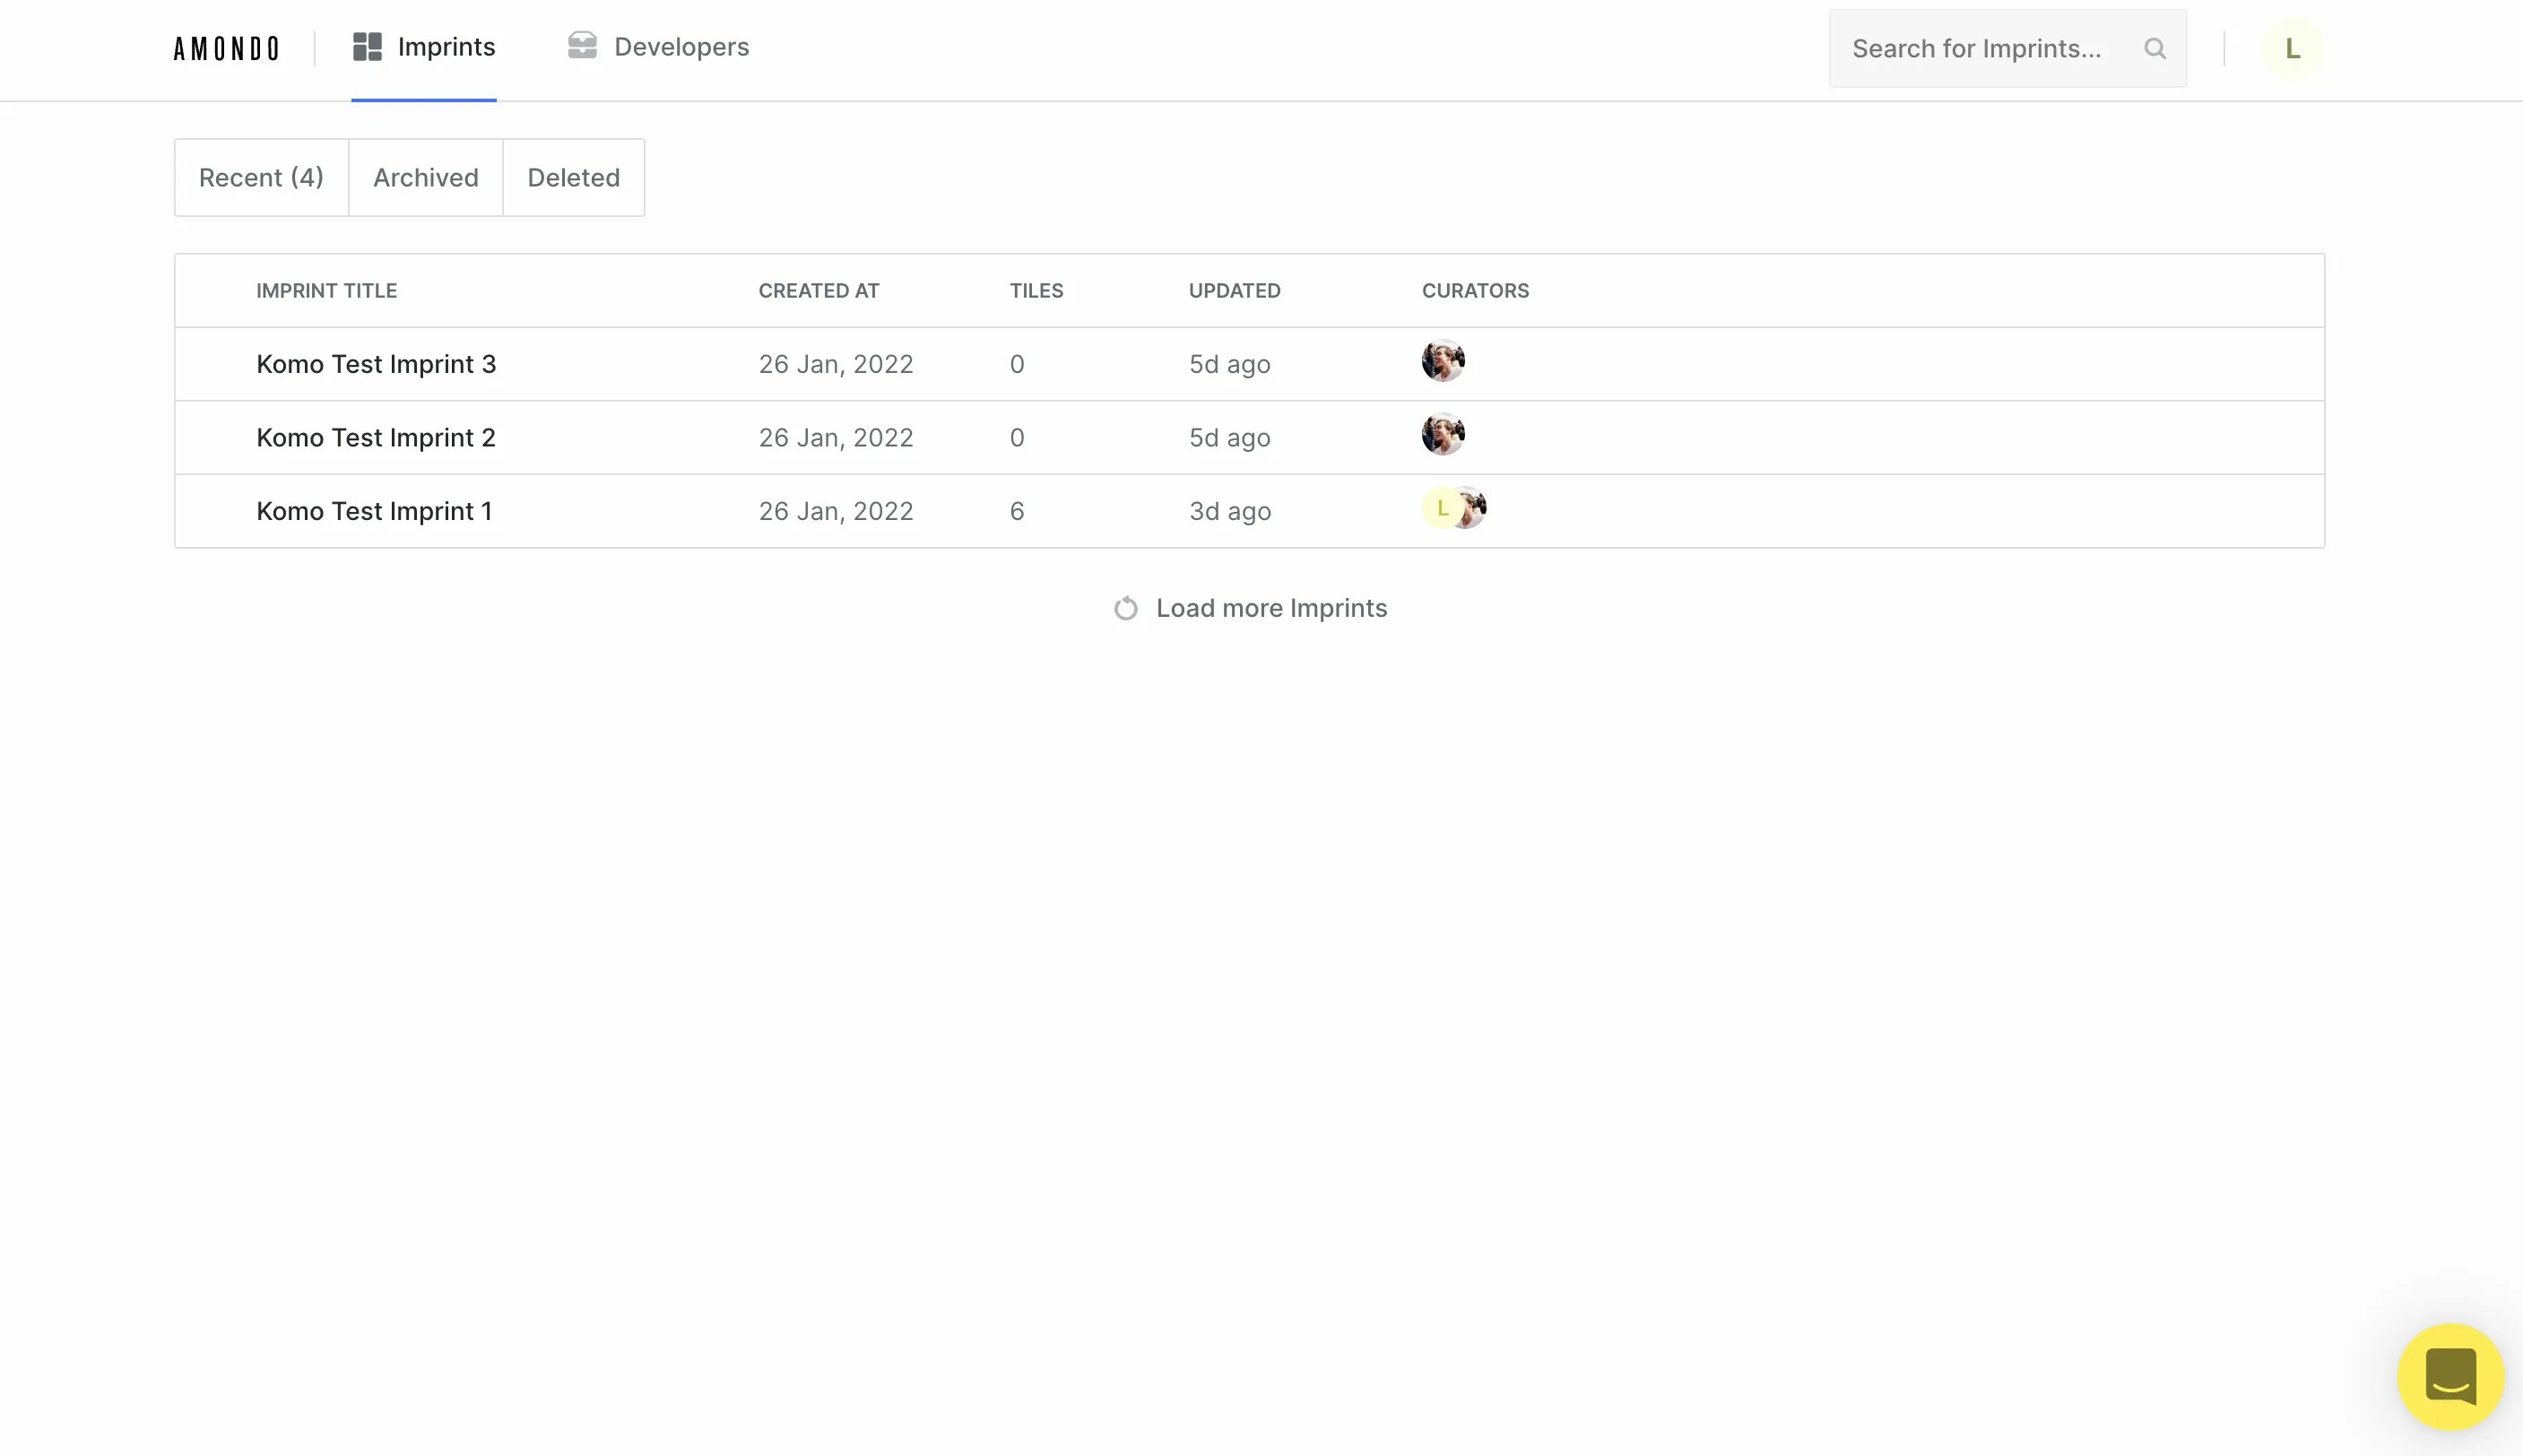
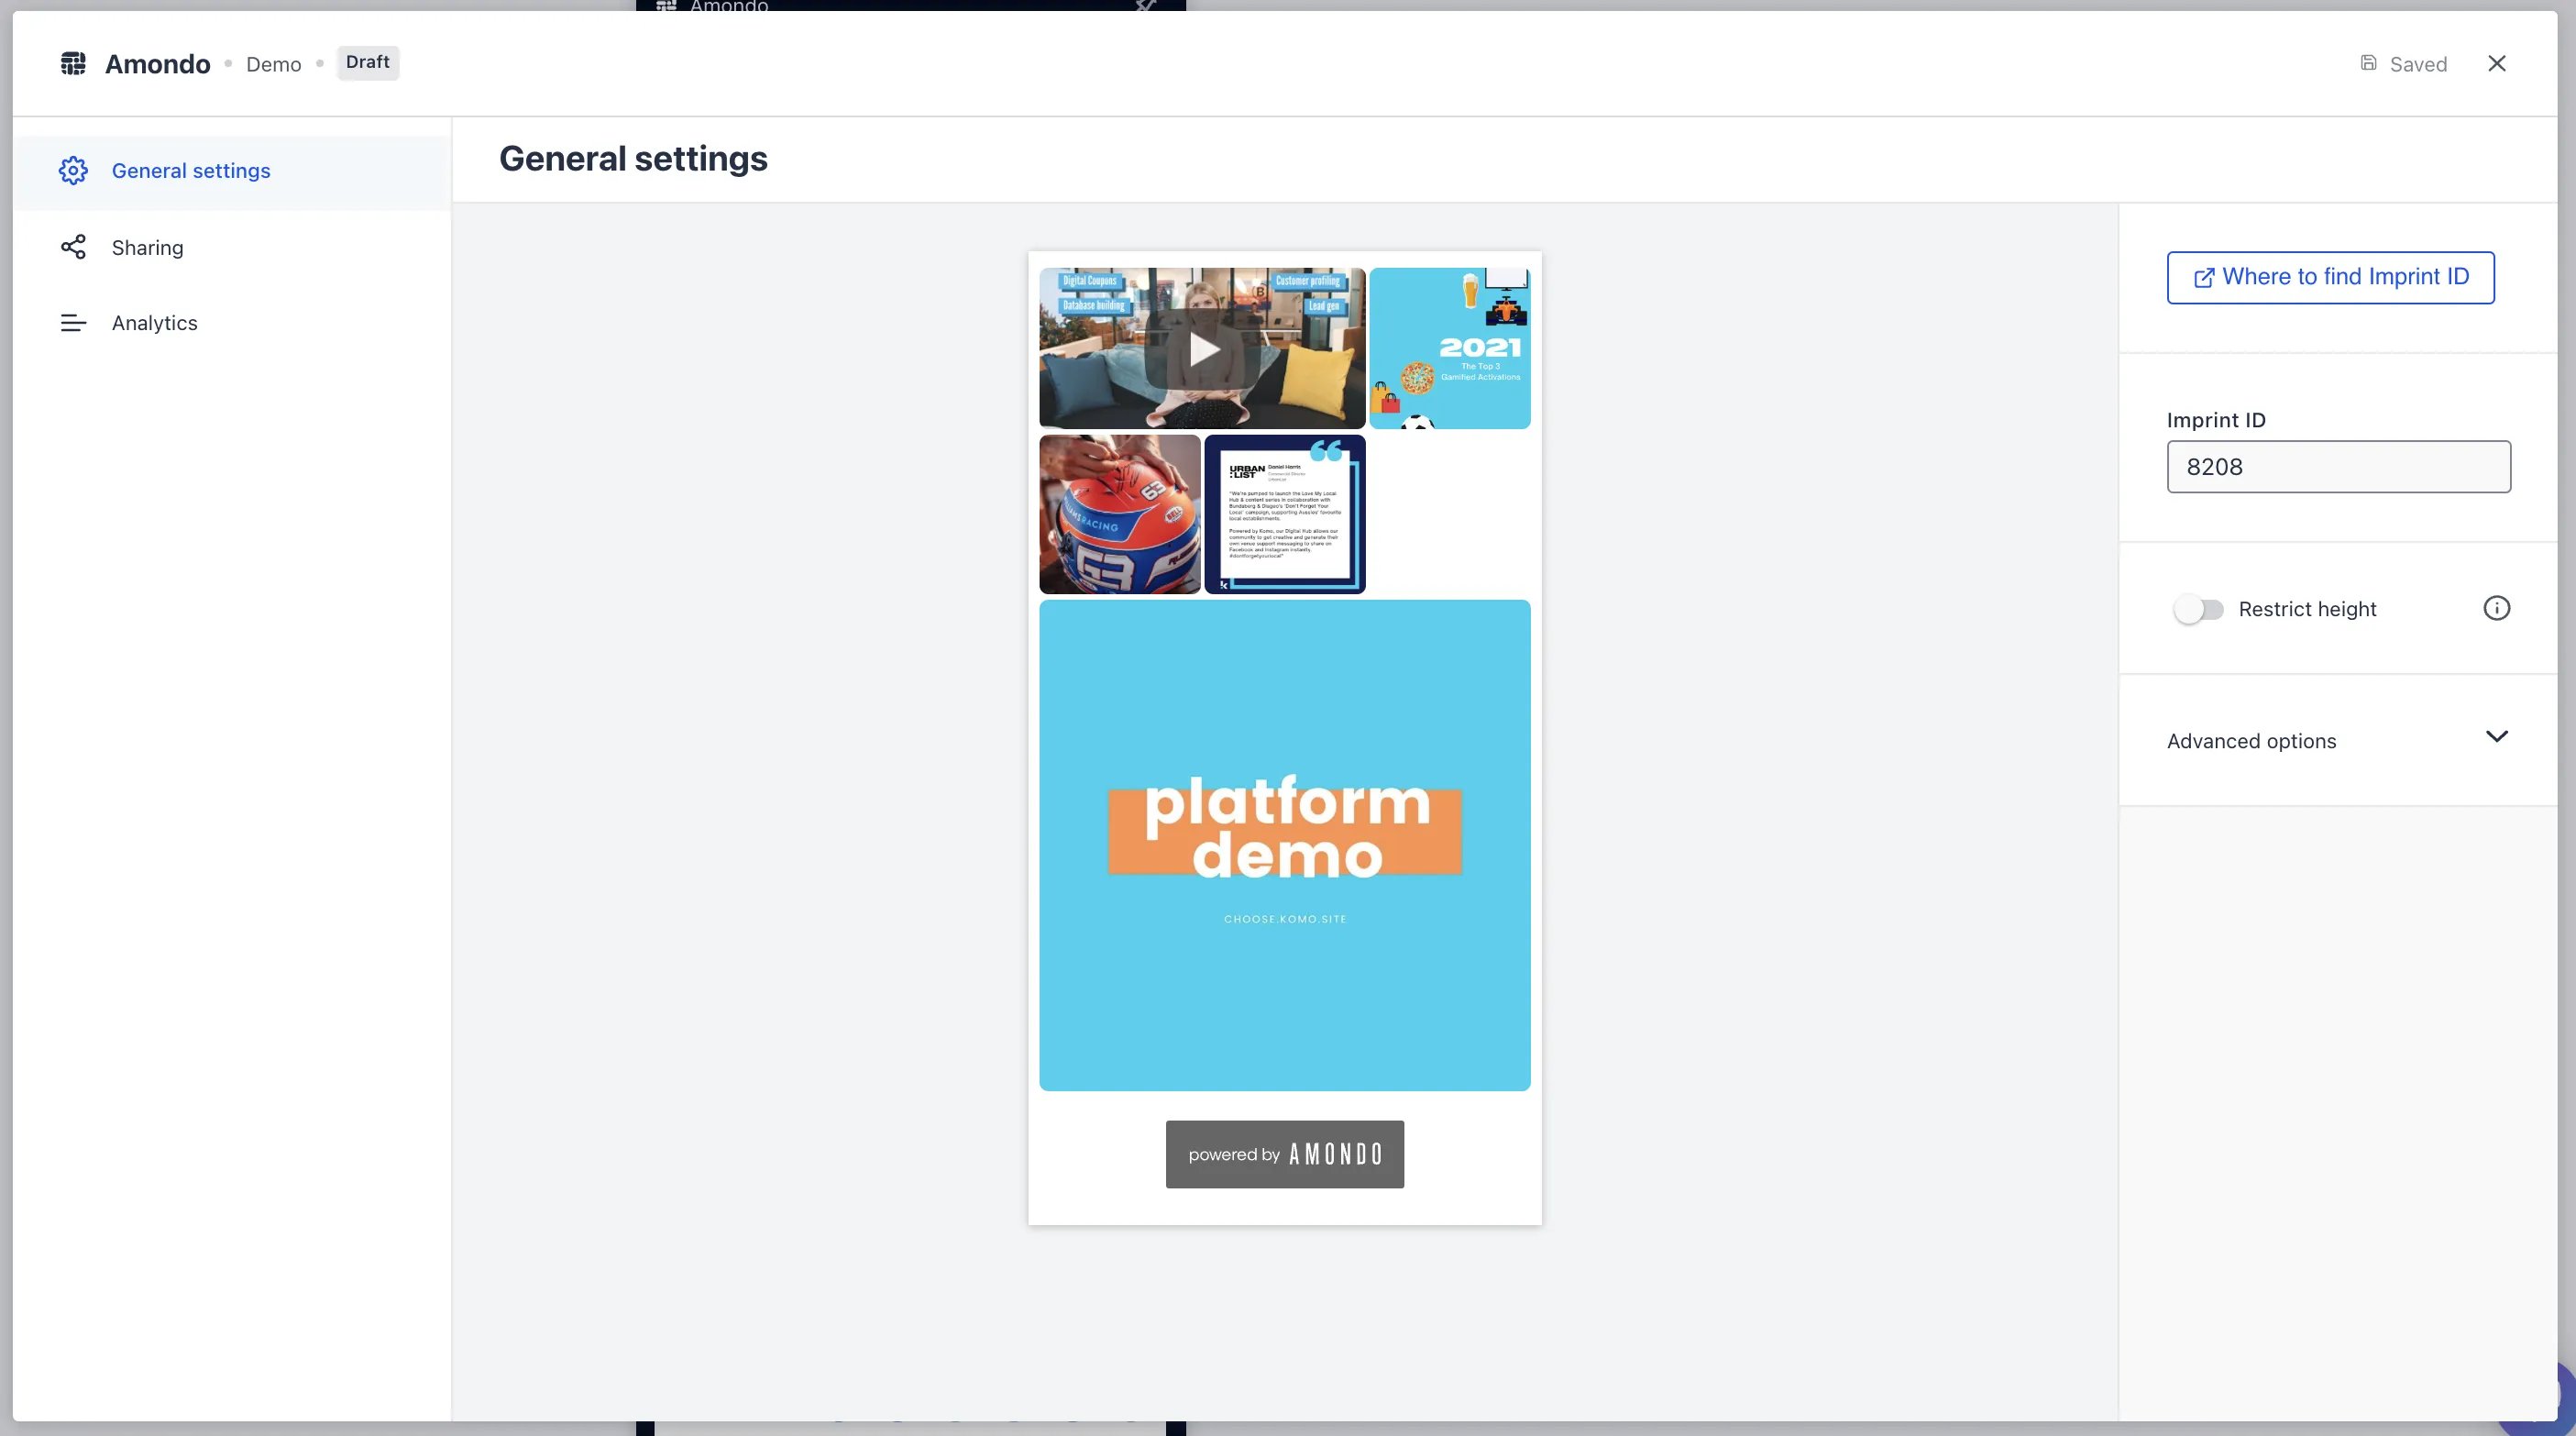 * **(2)** Toggling this option on allows you to restrict the **height** of your Amondo. If you do decide to use this feature a "See More" CTA bar will appear at the bottom of card
* **(3)** Under **advanced options** you can further customize your Amondo. Click [here](https://dash.amondo.com/developers/web-sdk/options) for an in-depth breakdown of these options
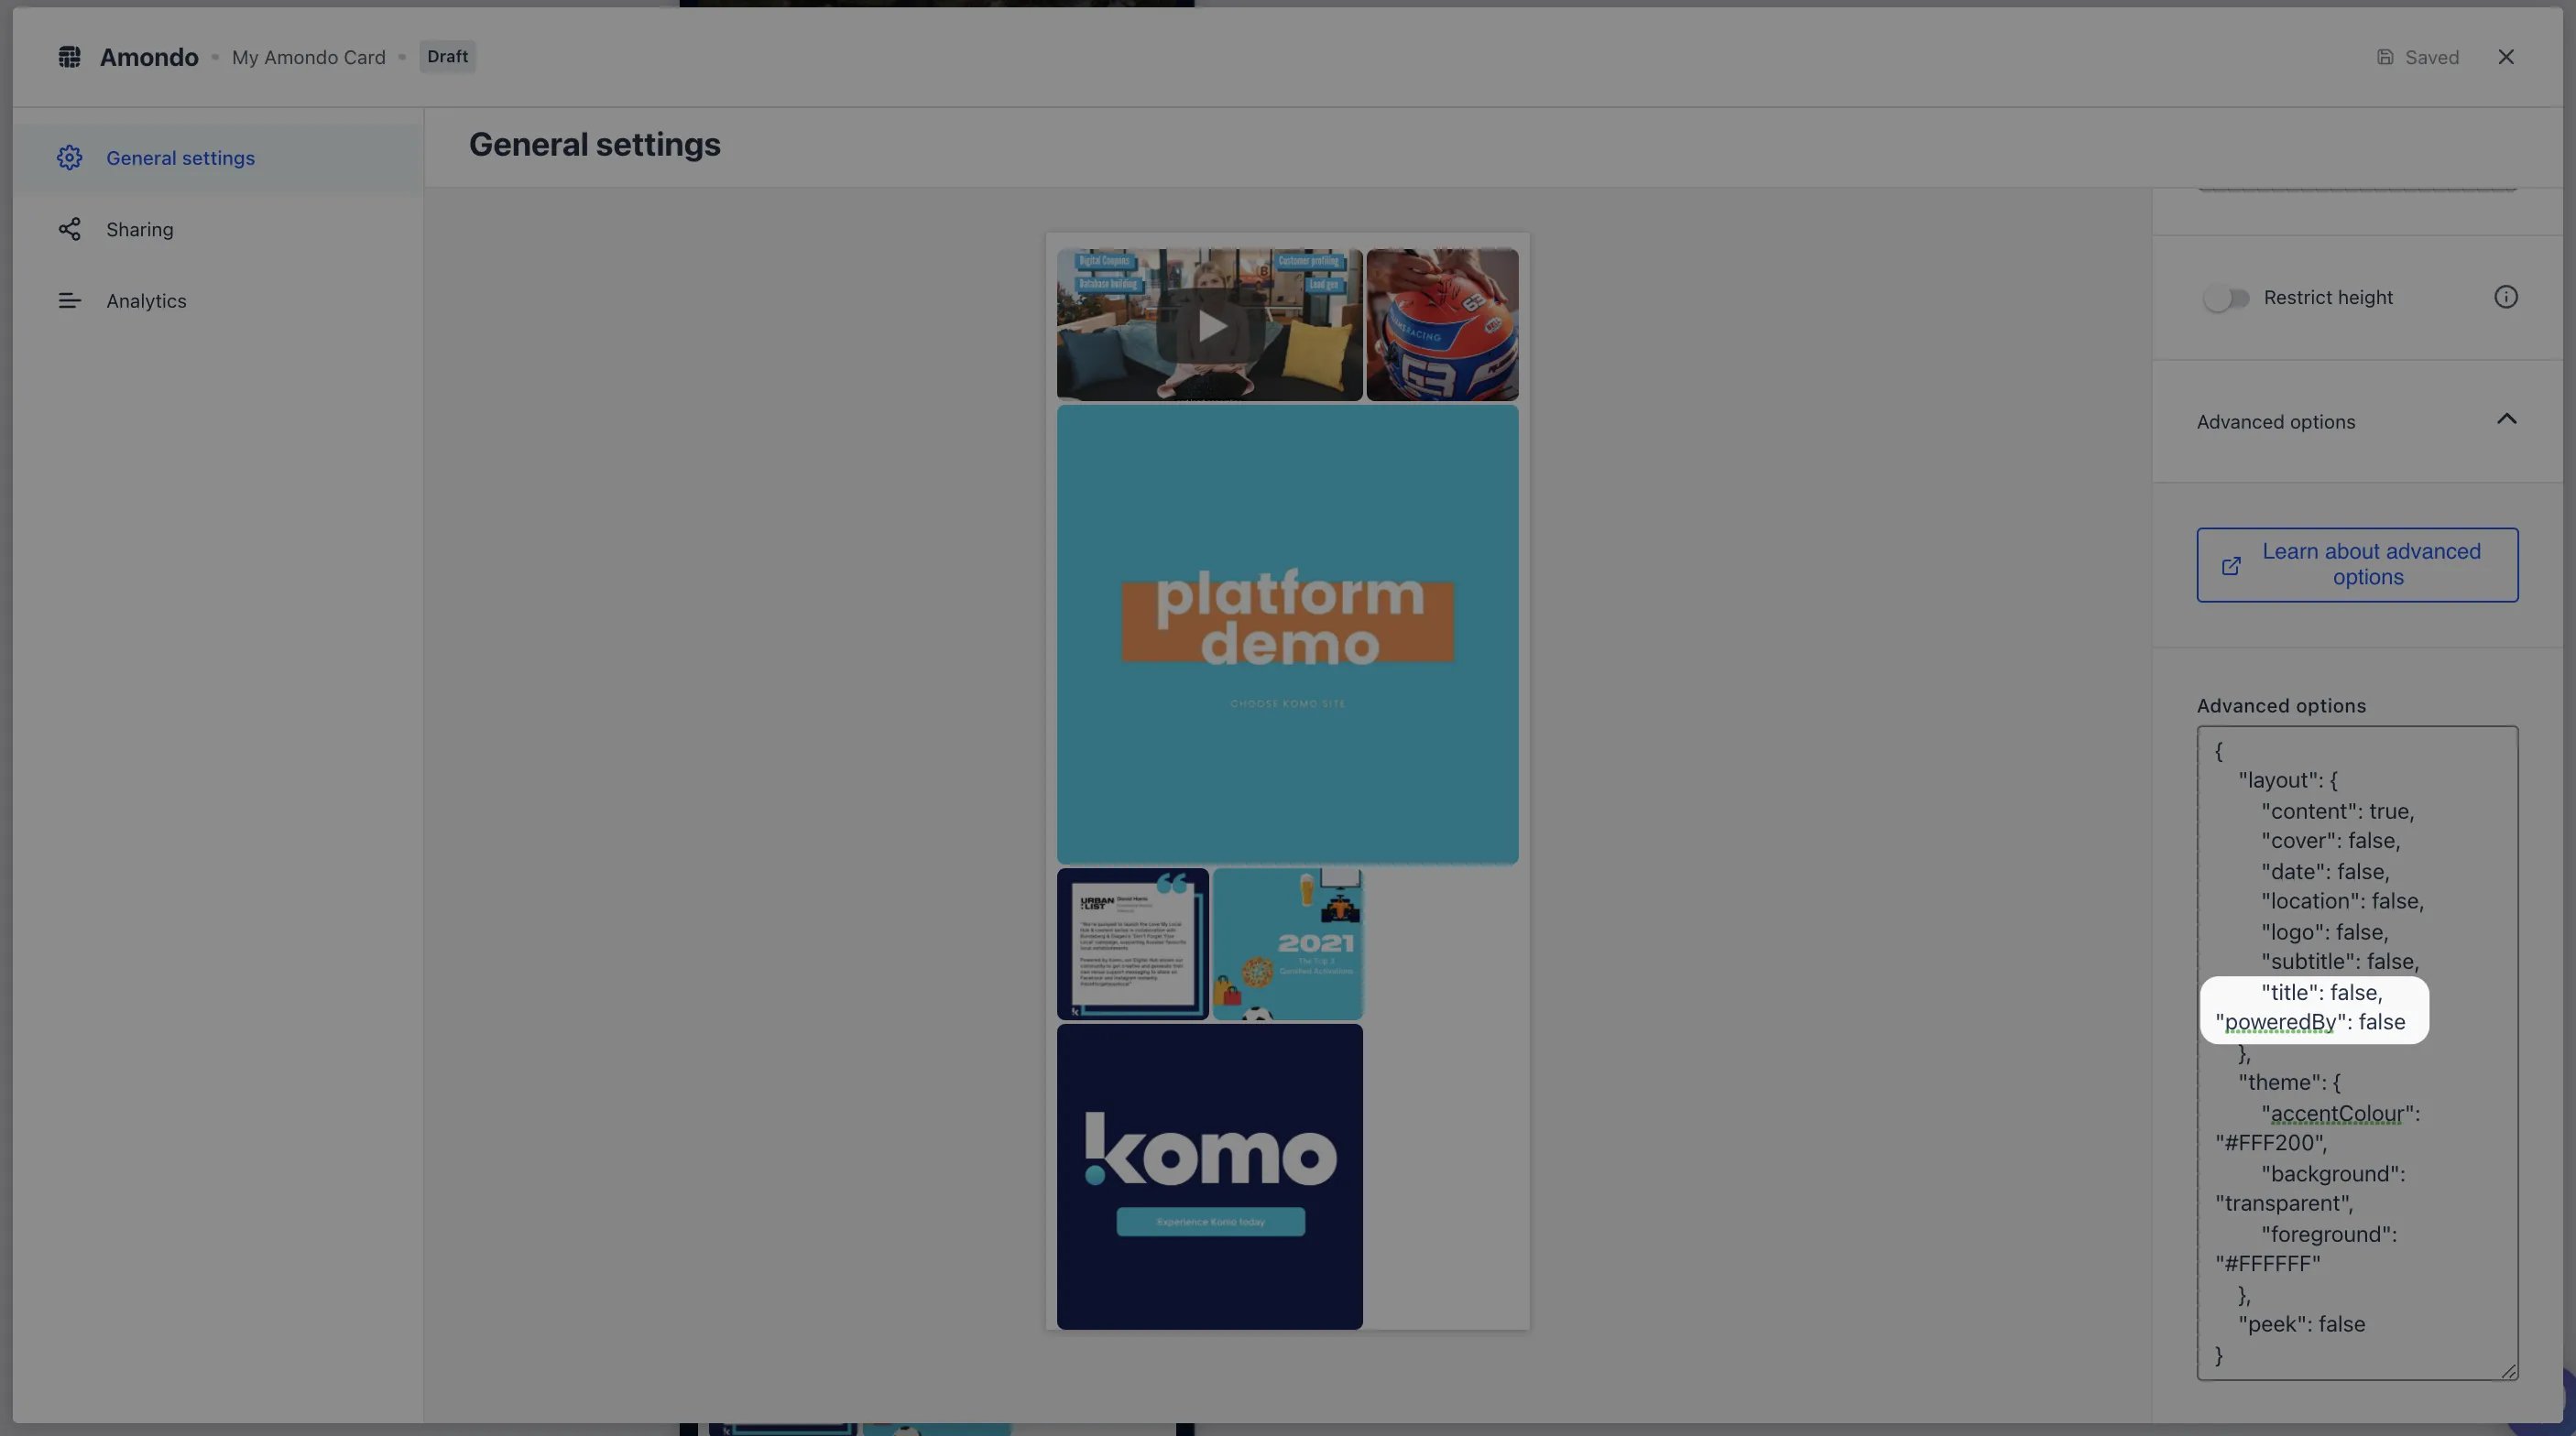
In the Advanced options, placing a comma at the end of the title option and entering "poweredBy": false below it will hide the powered by Amondo at the bottom of the card
* **(2)** Toggling this option on allows you to restrict the **height** of your Amondo. If you do decide to use this feature a "See More" CTA bar will appear at the bottom of card
* **(3)** Under **advanced options** you can further customize your Amondo. Click [here](https://dash.amondo.com/developers/web-sdk/options) for an in-depth breakdown of these options
In the Advanced options, placing a comma at the end of the title option and entering "poweredBy": false below it will hide the powered by Amondo at the bottom of the card
 ### Step 3: Publish your card
 Once you've completed all of these steps and are happy with all the aspects, it's time to get your card live!
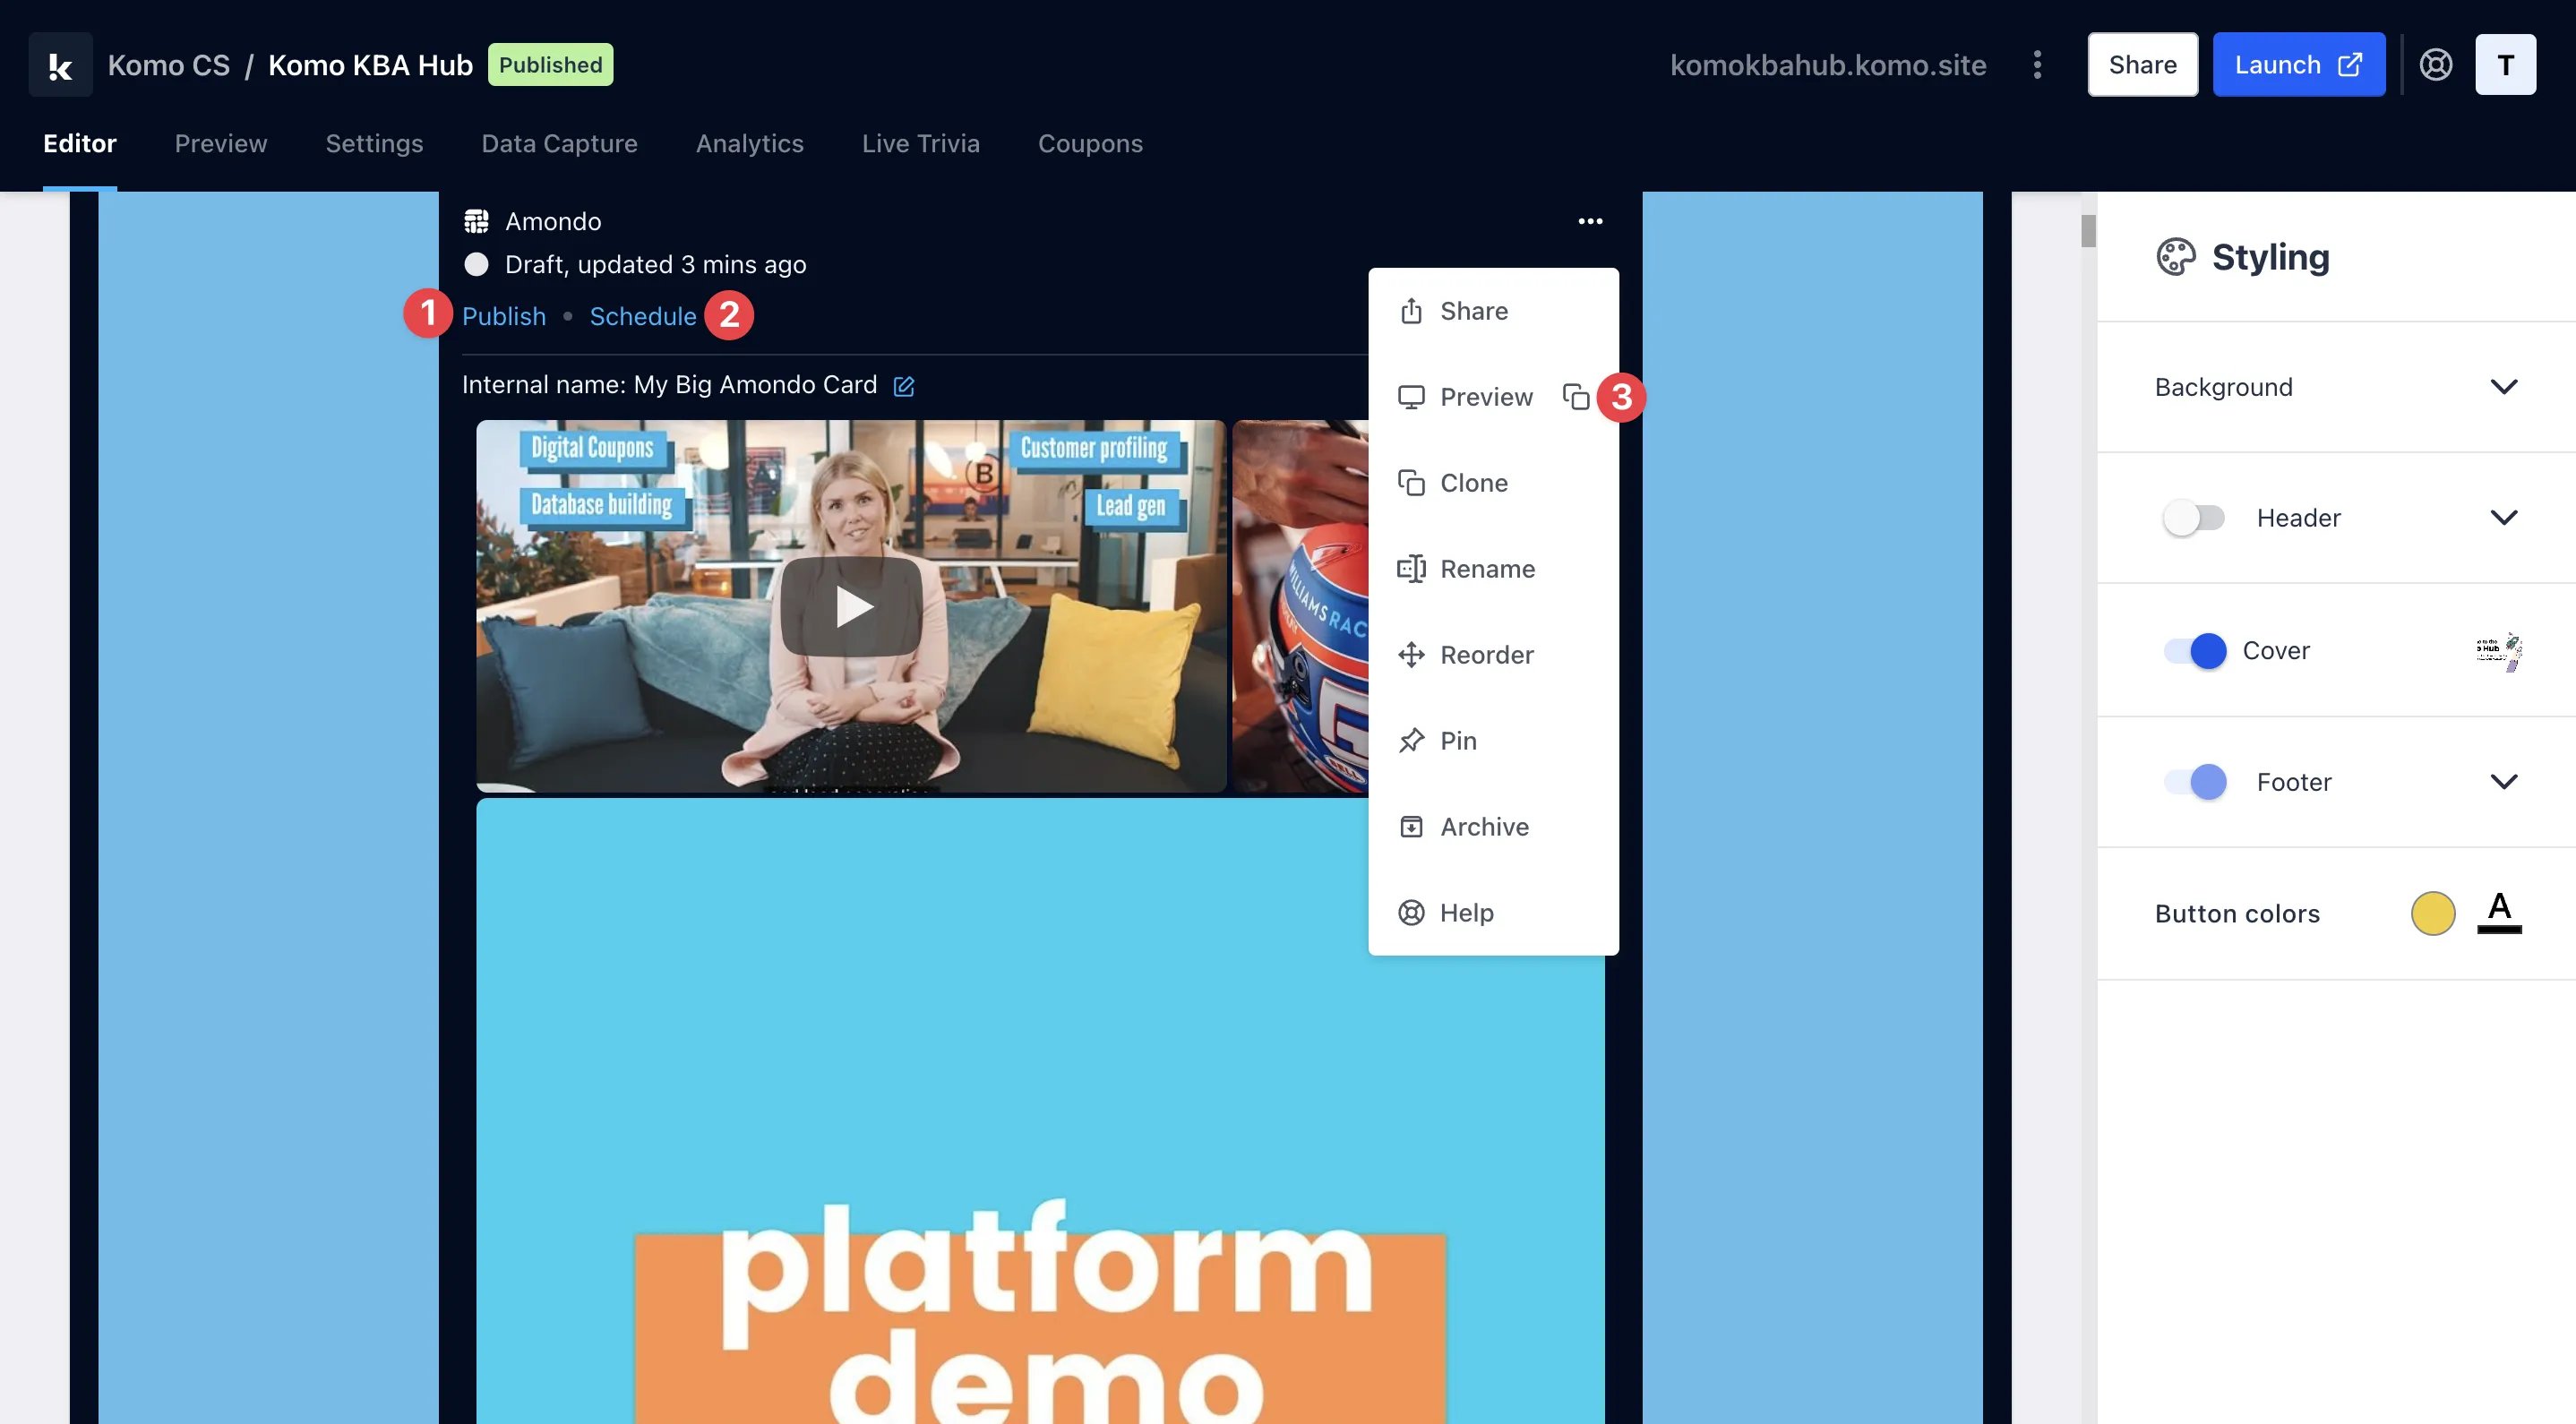
* **(1)Publish** your card manually and instantly for the world to see
* **(2)Schedule** your card to be published and unpublished at set dates and times
* **(3)** Click on **...** to **Preview** and interact with the card on the front end from a user's perspective before publishing it
All competition entries will be recorded and will impact the card analytics.
Once you've completed all of these steps and are happy with all the aspects, it's time to get your card live!
* **(1)Publish** your card manually and instantly for the world to see
* **(2)Schedule** your card to be published and unpublished at set dates and times
* **(3)** Click on **...** to **Preview** and interact with the card on the front end from a user's perspective before publishing it
All competition entries will be recorded and will impact the card analytics.