> ## Documentation Index
> Fetch the complete documentation index at: https://knowledge.komo.tech/llms.txt
> Use this file to discover all available pages before exploring further.
# HTML Card
> Create interactive HTML-based content cards.
## What is it?
An HTML Card is like a mini web page that requires multiple file types to create the ad feature and ad display.
## How do I build one?
* [Step 1: Add an HTML card to your Hub](#step-1-add-an-html-card-to-your-hub)
* [Step 2: Add your HTML code to your card](#step-2-add-your-html-code-to-your-card)
* [Step 3: Publish your card](#step-3-publish-your-card)
### Step 1: Add an HTML card to your Hub
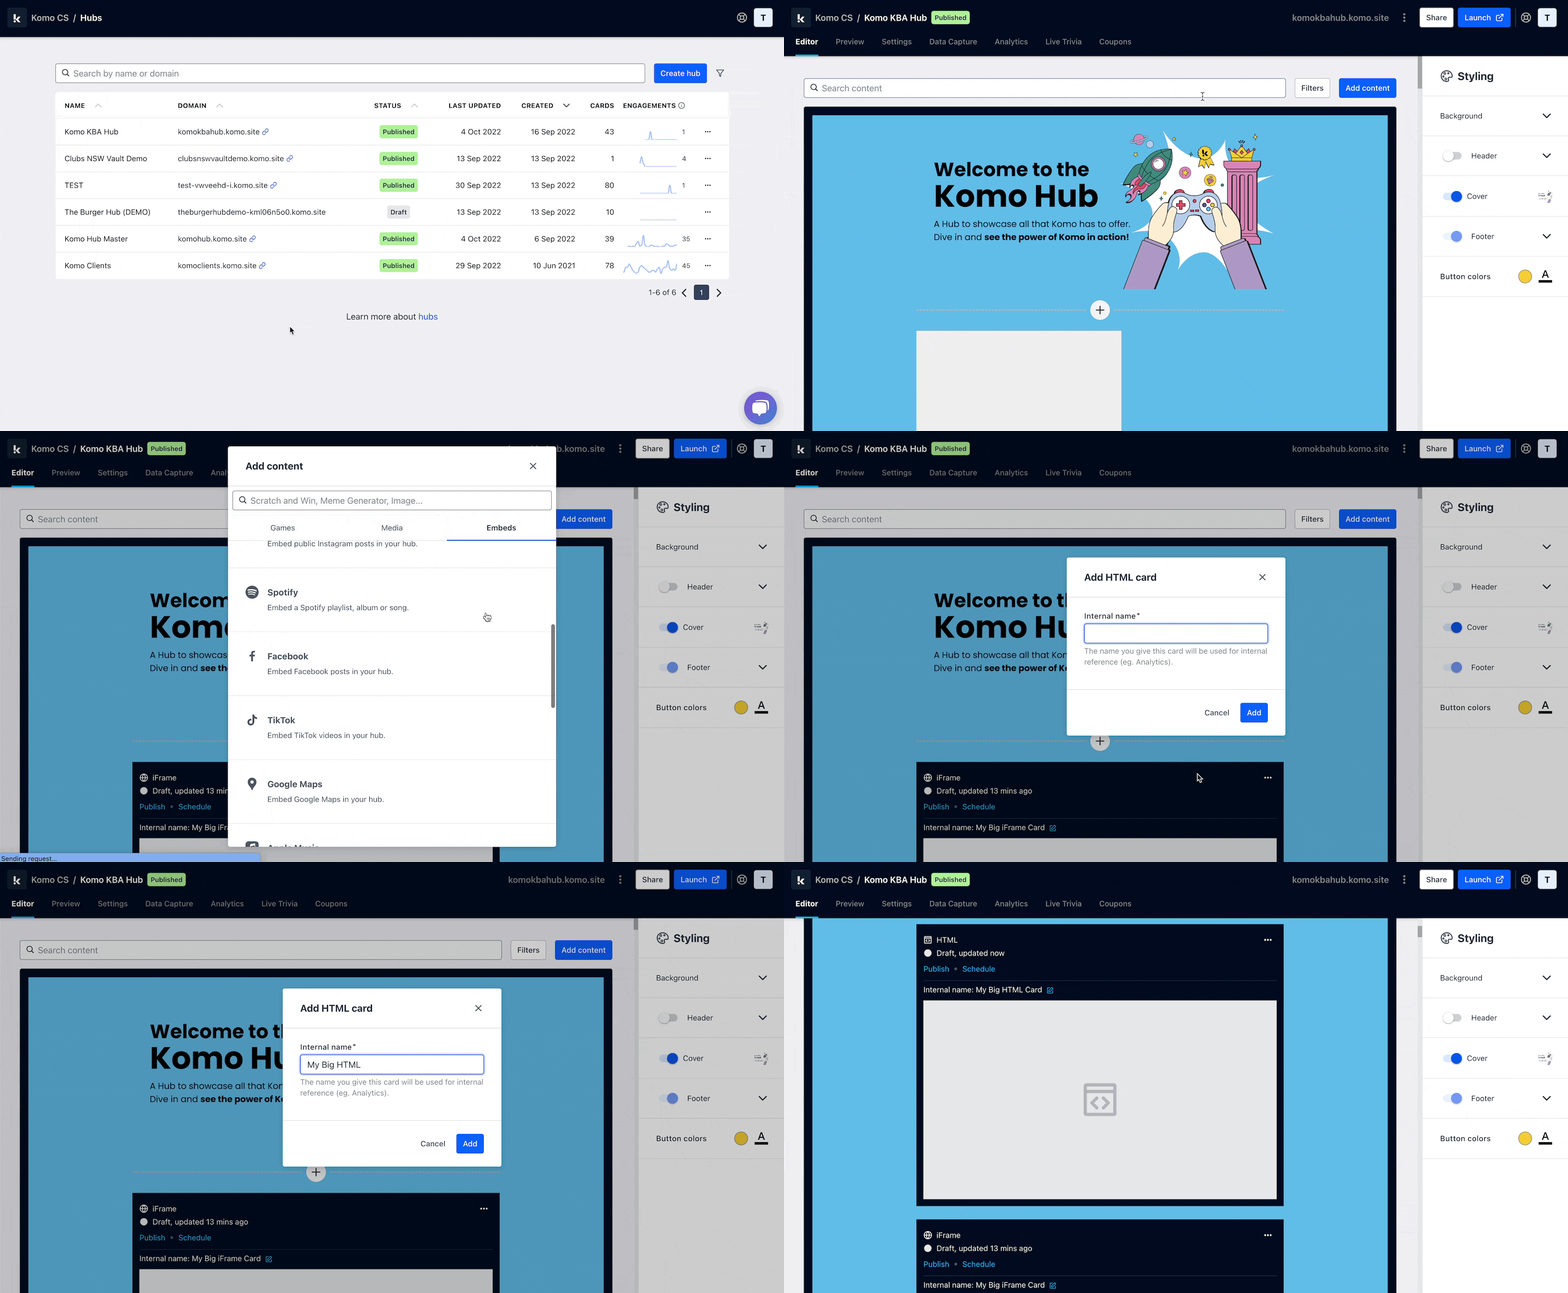 * Navigate to your **Engagement Hub**.
* Once there, click **Add content,** from here select **Embeds** and then **HTML.**
* You will then see your new card has been added to your Hub.
### Step 2: Add your HTML code to your card
* Navigate to your **Engagement Hub**.
* Once there, click **Add content,** from here select **Embeds** and then **HTML.**
* You will then see your new card has been added to your Hub.
### Step 2: Add your HTML code to your card
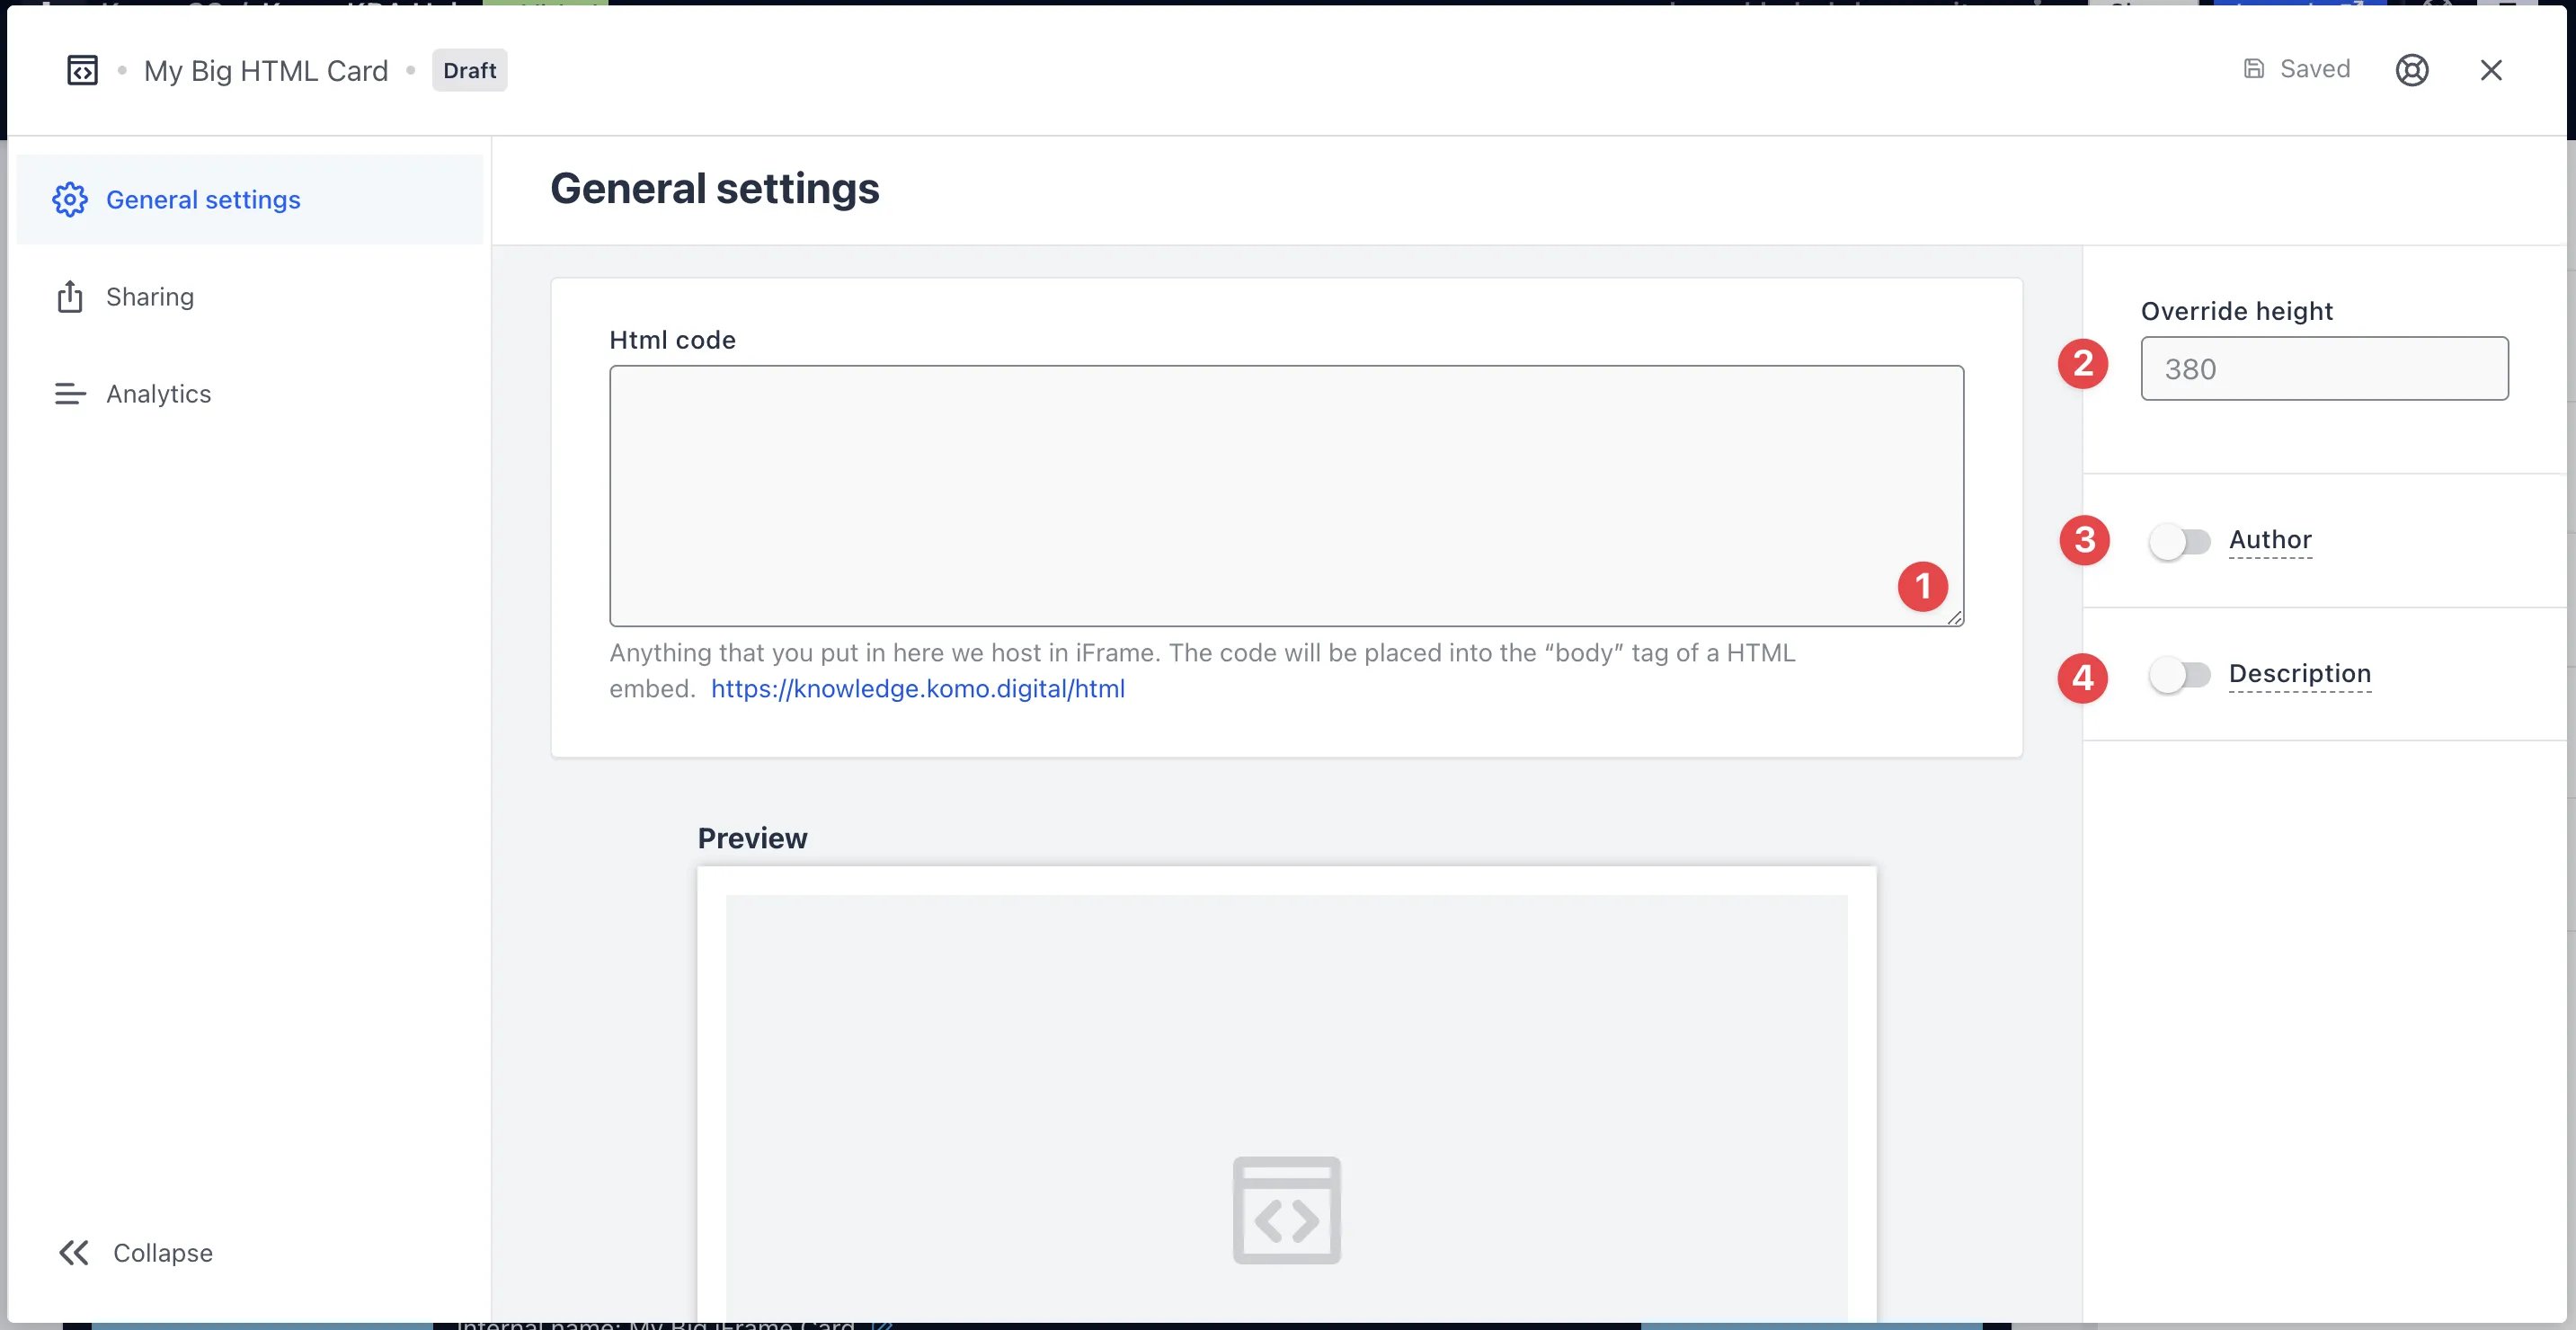 * Clicking on the **HTML** will open the editing module.
* **(1)** Paste your **HTML code** here and a preview will appear below. Anything placed in your HTML code is hosted in your iFrame.
* **(2)** Enter the **HTML height** of how you want to display it on the card.
* **(3)** You can add an **author** tag by displaying the brand or person who's responsible for the card content.
* **(4)** Add a **description** to the card.
### Step 3: Publish your card
* Clicking on the **HTML** will open the editing module.
* **(1)** Paste your **HTML code** here and a preview will appear below. Anything placed in your HTML code is hosted in your iFrame.
* **(2)** Enter the **HTML height** of how you want to display it on the card.
* **(3)** You can add an **author** tag by displaying the brand or person who's responsible for the card content.
* **(4)** Add a **description** to the card.
### Step 3: Publish your card
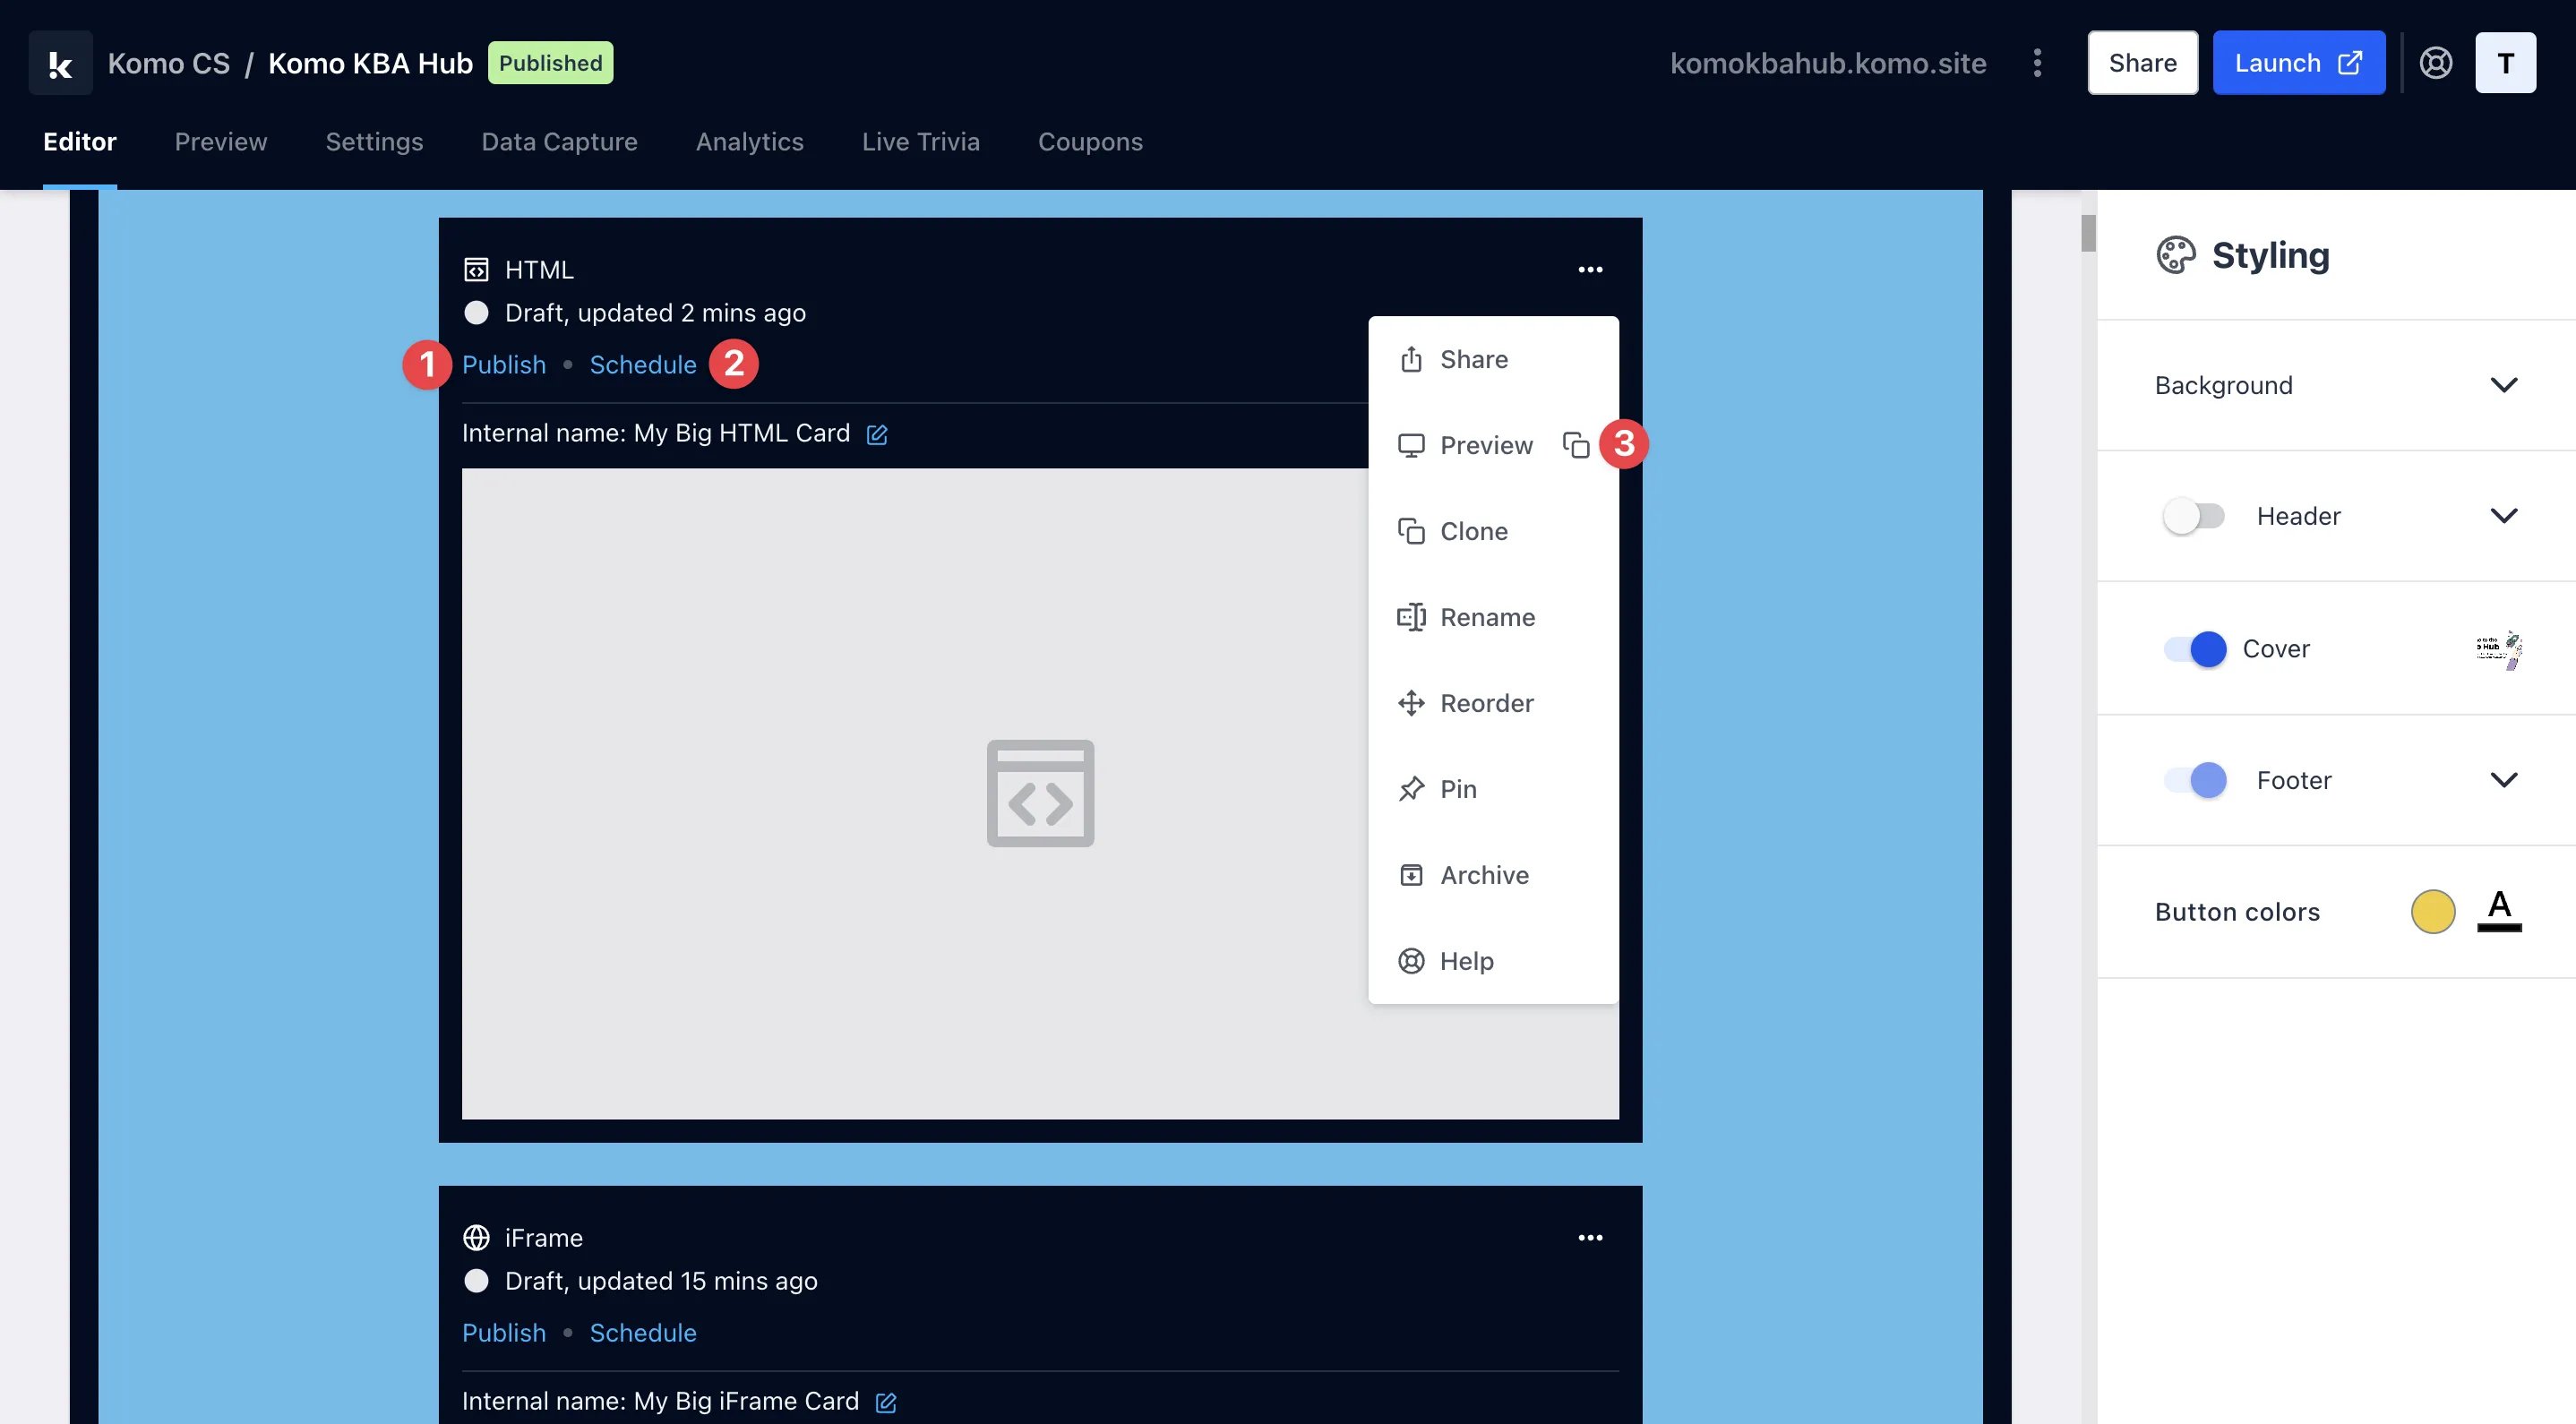 **Once you've completed all of these steps and are happy with all the aspects, it's time to get your card live!**
* **(1)** **Publish** your card manually and instantly for the world to see.
* **(2)** **Schedule** your card to be published and unpublished at set dates and times.
* **(3)** Click on **...** to **Preview** and interact with the card on the front end from a user's perspective before publishing it. See how to test your card [here](/getting-started/hub-setup/card-testing/index).
**Once you've completed all of these steps and are happy with all the aspects, it's time to get your card live!**
* **(1)** **Publish** your card manually and instantly for the world to see.
* **(2)** **Schedule** your card to be published and unpublished at set dates and times.
* **(3)** Click on **...** to **Preview** and interact with the card on the front end from a user's perspective before publishing it. See how to test your card [here](/getting-started/hub-setup/card-testing/index).