> ## Documentation Index
> Fetch the complete documentation index at: https://knowledge.komo.tech/llms.txt
> Use this file to discover all available pages before exploring further.
# Reference Tables
> Import a reference table to validate unique entries.
## What is it?
This feature allows you to upload a file that can consist of client account/membership numbers, first and last name, email and more, and connect this to your competitions to validate unique entries. This feature gives you the ability to gate access to exclusive competitions based on user membership details.
## How do I use it?
* [Step 1: Go to the Reference Tables setting](#step-1-go-to-the-reference-tables-setting)
* [Step 2: Create a Reference Table](#step-2-create-a-reference-table)
* [Step 3: Upload your Reference Table file](#step-3-upload-your-reference-table-file)
* [Step 4: Update the Data capture form](#step-4-update-the-data-capture-form)
* [Step 5: Link the Reference Table to your competition](#step-5-link-the-reference-table-to-your-competition)
* [Step 6: Update mapping fields](#step-6-update-mapping-fields)
### Step 1: Go to the Reference Tables setting
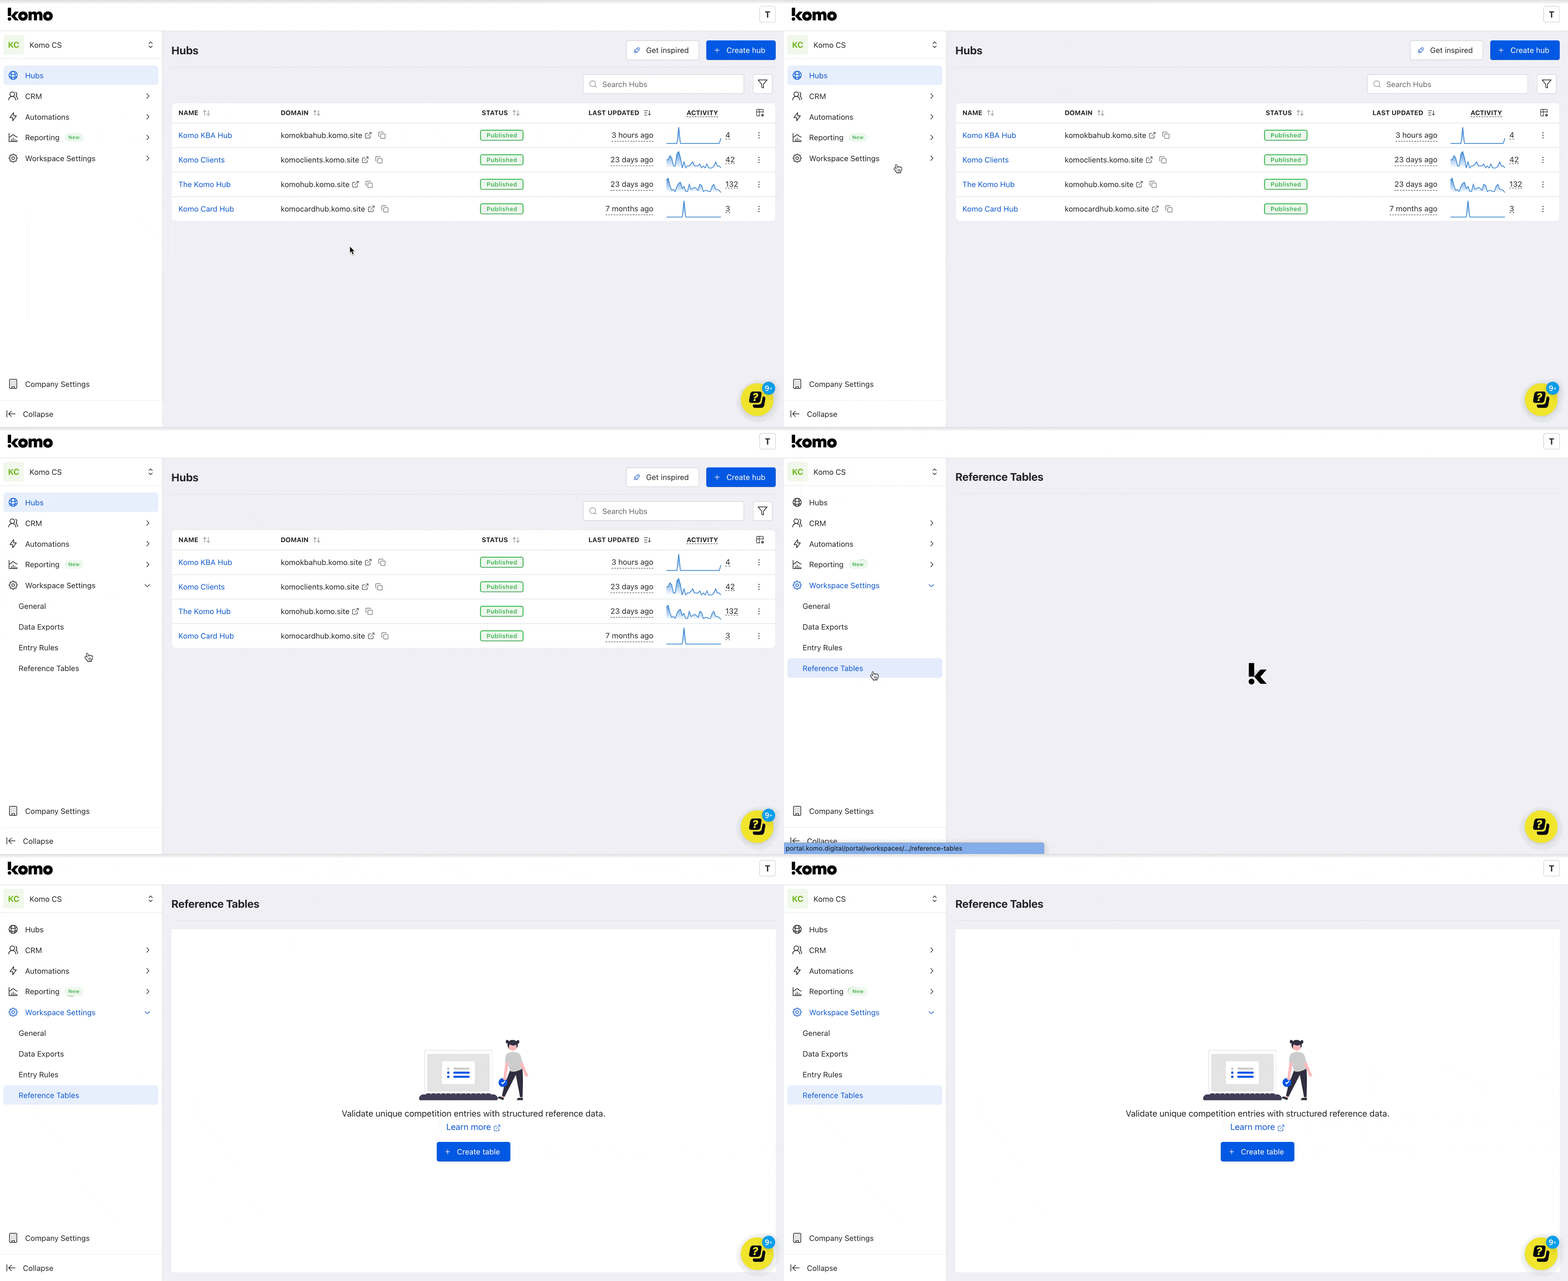 * Head to the **Workspace settings** followed by **Reference Tables.**
### Step 2: Create a Reference Table
* Head to the **Workspace settings** followed by **Reference Tables.**
### Step 2: Create a Reference Table
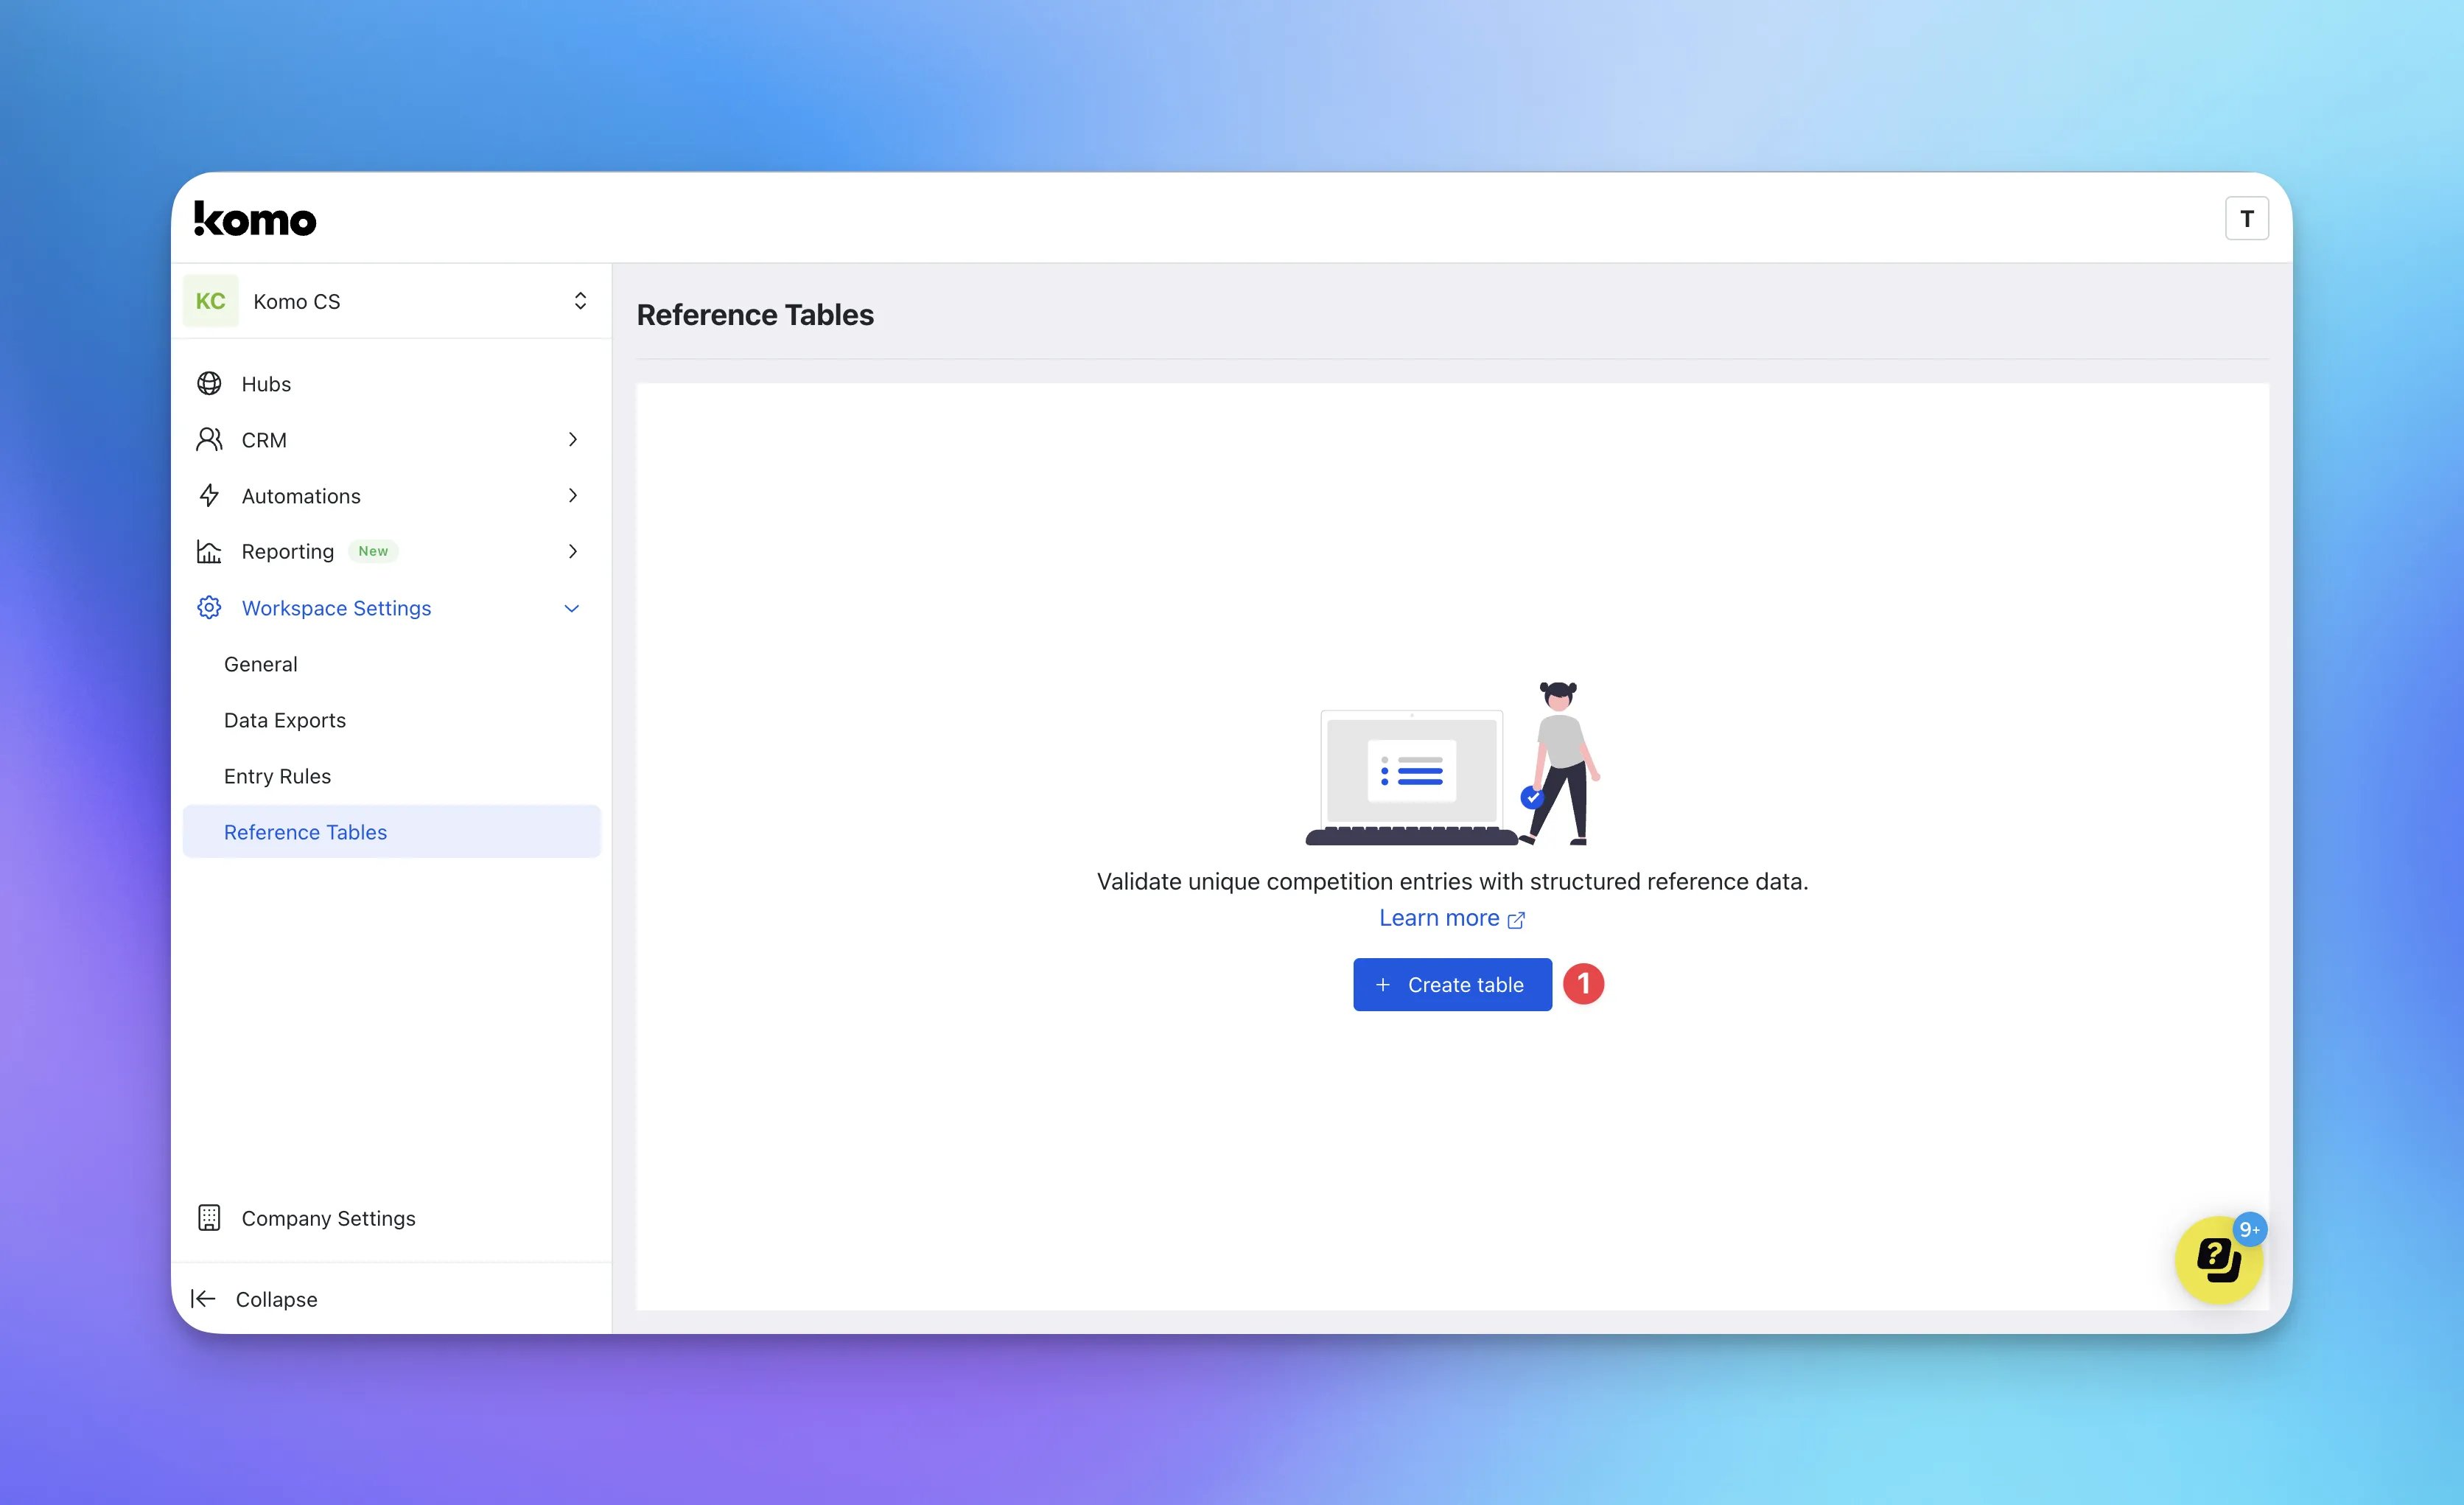 * **(1)** Click on **Create table.**
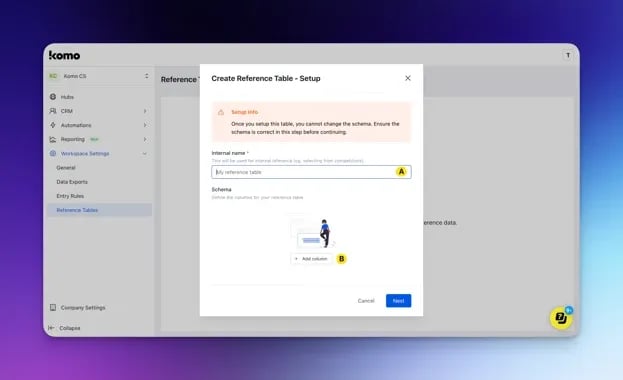 * **(A)** Give your reference table a **name.**
* **(B)** Add a **column** you have included in your file.
* **(A)** Give your reference table a **name.**
* **(B)** Add a **column** you have included in your file.
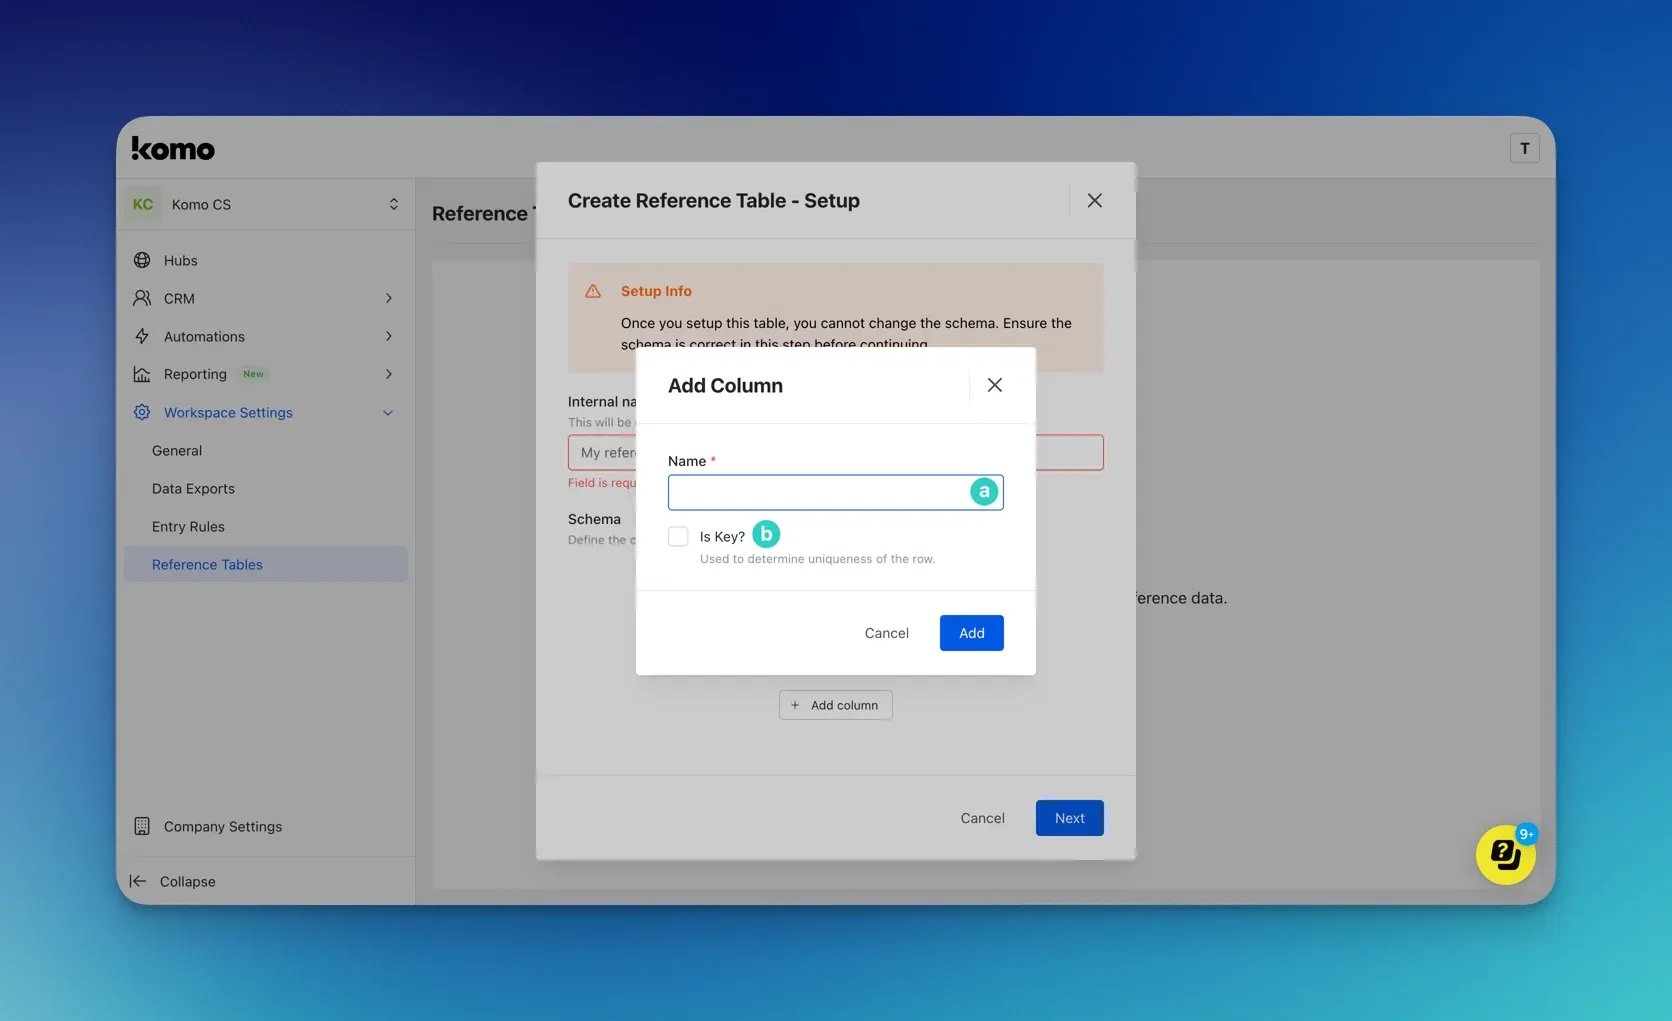 * **(a)** Add your column **name** e.g. Membership Number.
* **(b)** You can mark this column as a **key column**. The key column refers to the column that will be scanned first against the reference table on the data capture.\
**Note:** We recommend marking the unique field as the key column e.g. membership numbers, account numbers etc.
### Step 3: Upload your Reference Table file
* **(a)** Add your column **name** e.g. Membership Number.
* **(b)** You can mark this column as a **key column**. The key column refers to the column that will be scanned first against the reference table on the data capture.\
**Note:** We recommend marking the unique field as the key column e.g. membership numbers, account numbers etc.
### Step 3: Upload your Reference Table file
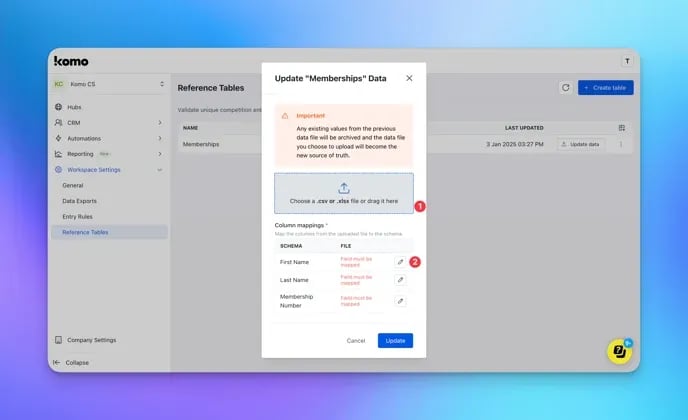 * **(1) Upload** your file here as a .CSV or .XLSX format.
* **(2)** After you have uploaded your file, you will need to **update mapping** for each column created.
* **(1) Upload** your file here as a .CSV or .XLSX format.
* **(2)** After you have uploaded your file, you will need to **update mapping** for each column created.
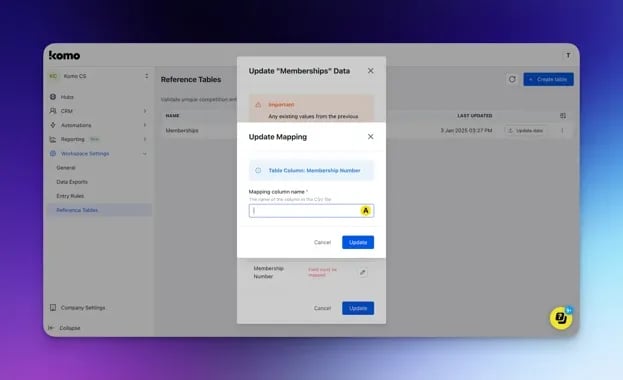 * **(A)** Enter the **CSV column name** of the data you want to be located in each column of the reference table.\
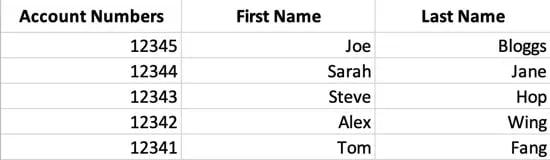
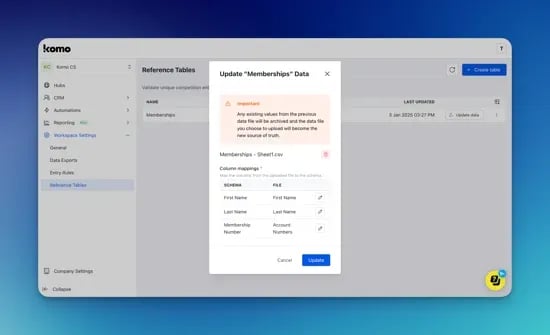
E.g. the Membership Number reference table column is to pull all the data under the Account Numbers column and complete all columns created
* **(A)** Enter the **CSV column name** of the data you want to be located in each column of the reference table.\
E.g. the Membership Number reference table column is to pull all the data under the Account Numbers column and complete all columns created
 ### Step 4: Update the Data capture form
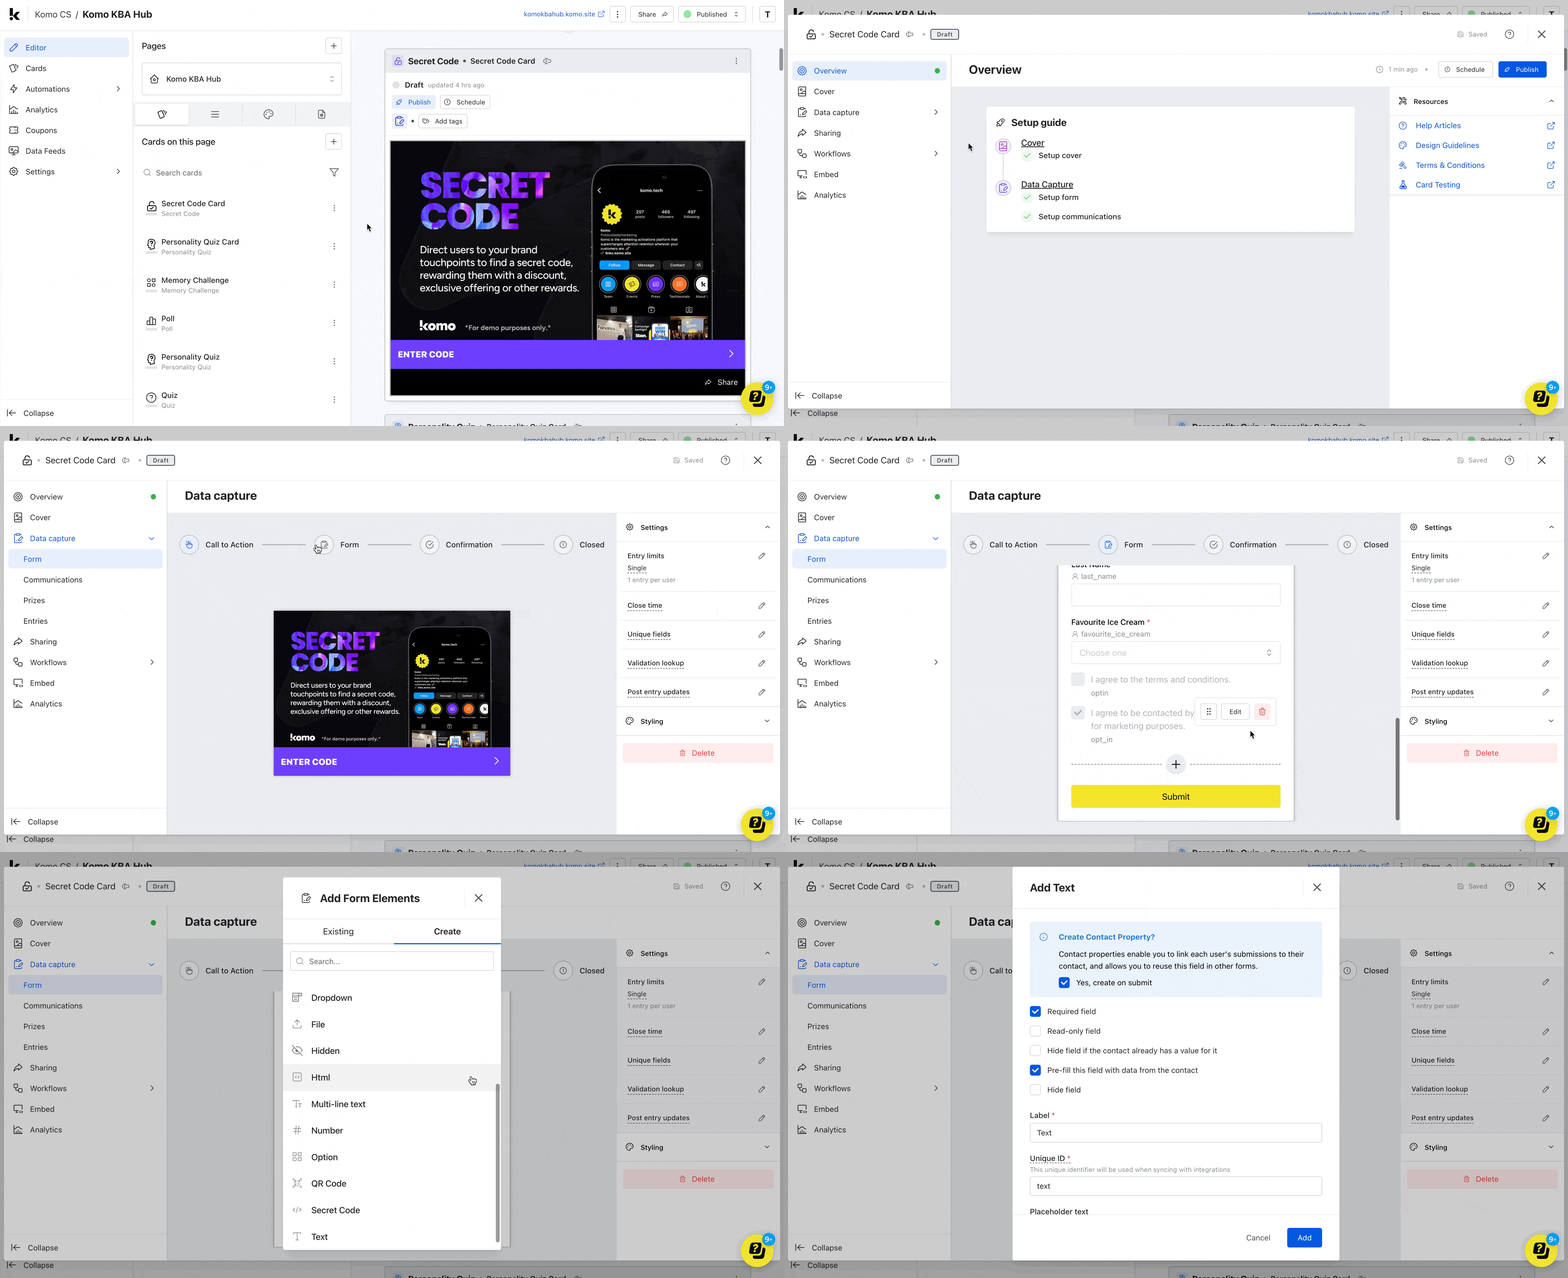 * Go back to your Hub and select the **Settings** cog on the relevant card.
* Select **Data Capture** on the left menu.
* Click on **Form** and then **Entry form**.
* Then click on the **plus icon** and add a **text field.**
The text field is relevant if you are requesting a unique field e.g. membership numbers.
* Go back to your Hub and select the **Settings** cog on the relevant card.
* Select **Data Capture** on the left menu.
* Click on **Form** and then **Entry form**.
* Then click on the **plus icon** and add a **text field.**
The text field is relevant if you are requesting a unique field e.g. membership numbers.
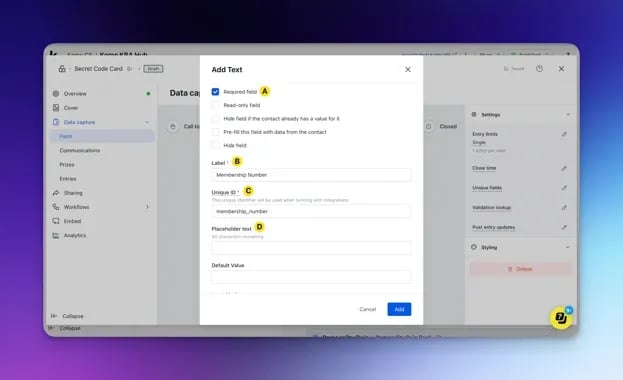 * **(A)** You can make this field **required.**
* **(B)** Give the field a **Label** on the form.
* **(C)** You can give this a **Unique ID** for analytic purposes.
* **(D)** Add a **placeholder text** in the field.
### Step 5: Link the Reference Table to your competition
* **(A)** You can make this field **required.**
* **(B)** Give the field a **Label** on the form.
* **(C)** You can give this a **Unique ID** for analytic purposes.
* **(D)** Add a **placeholder text** in the field.
### Step 5: Link the Reference Table to your competition
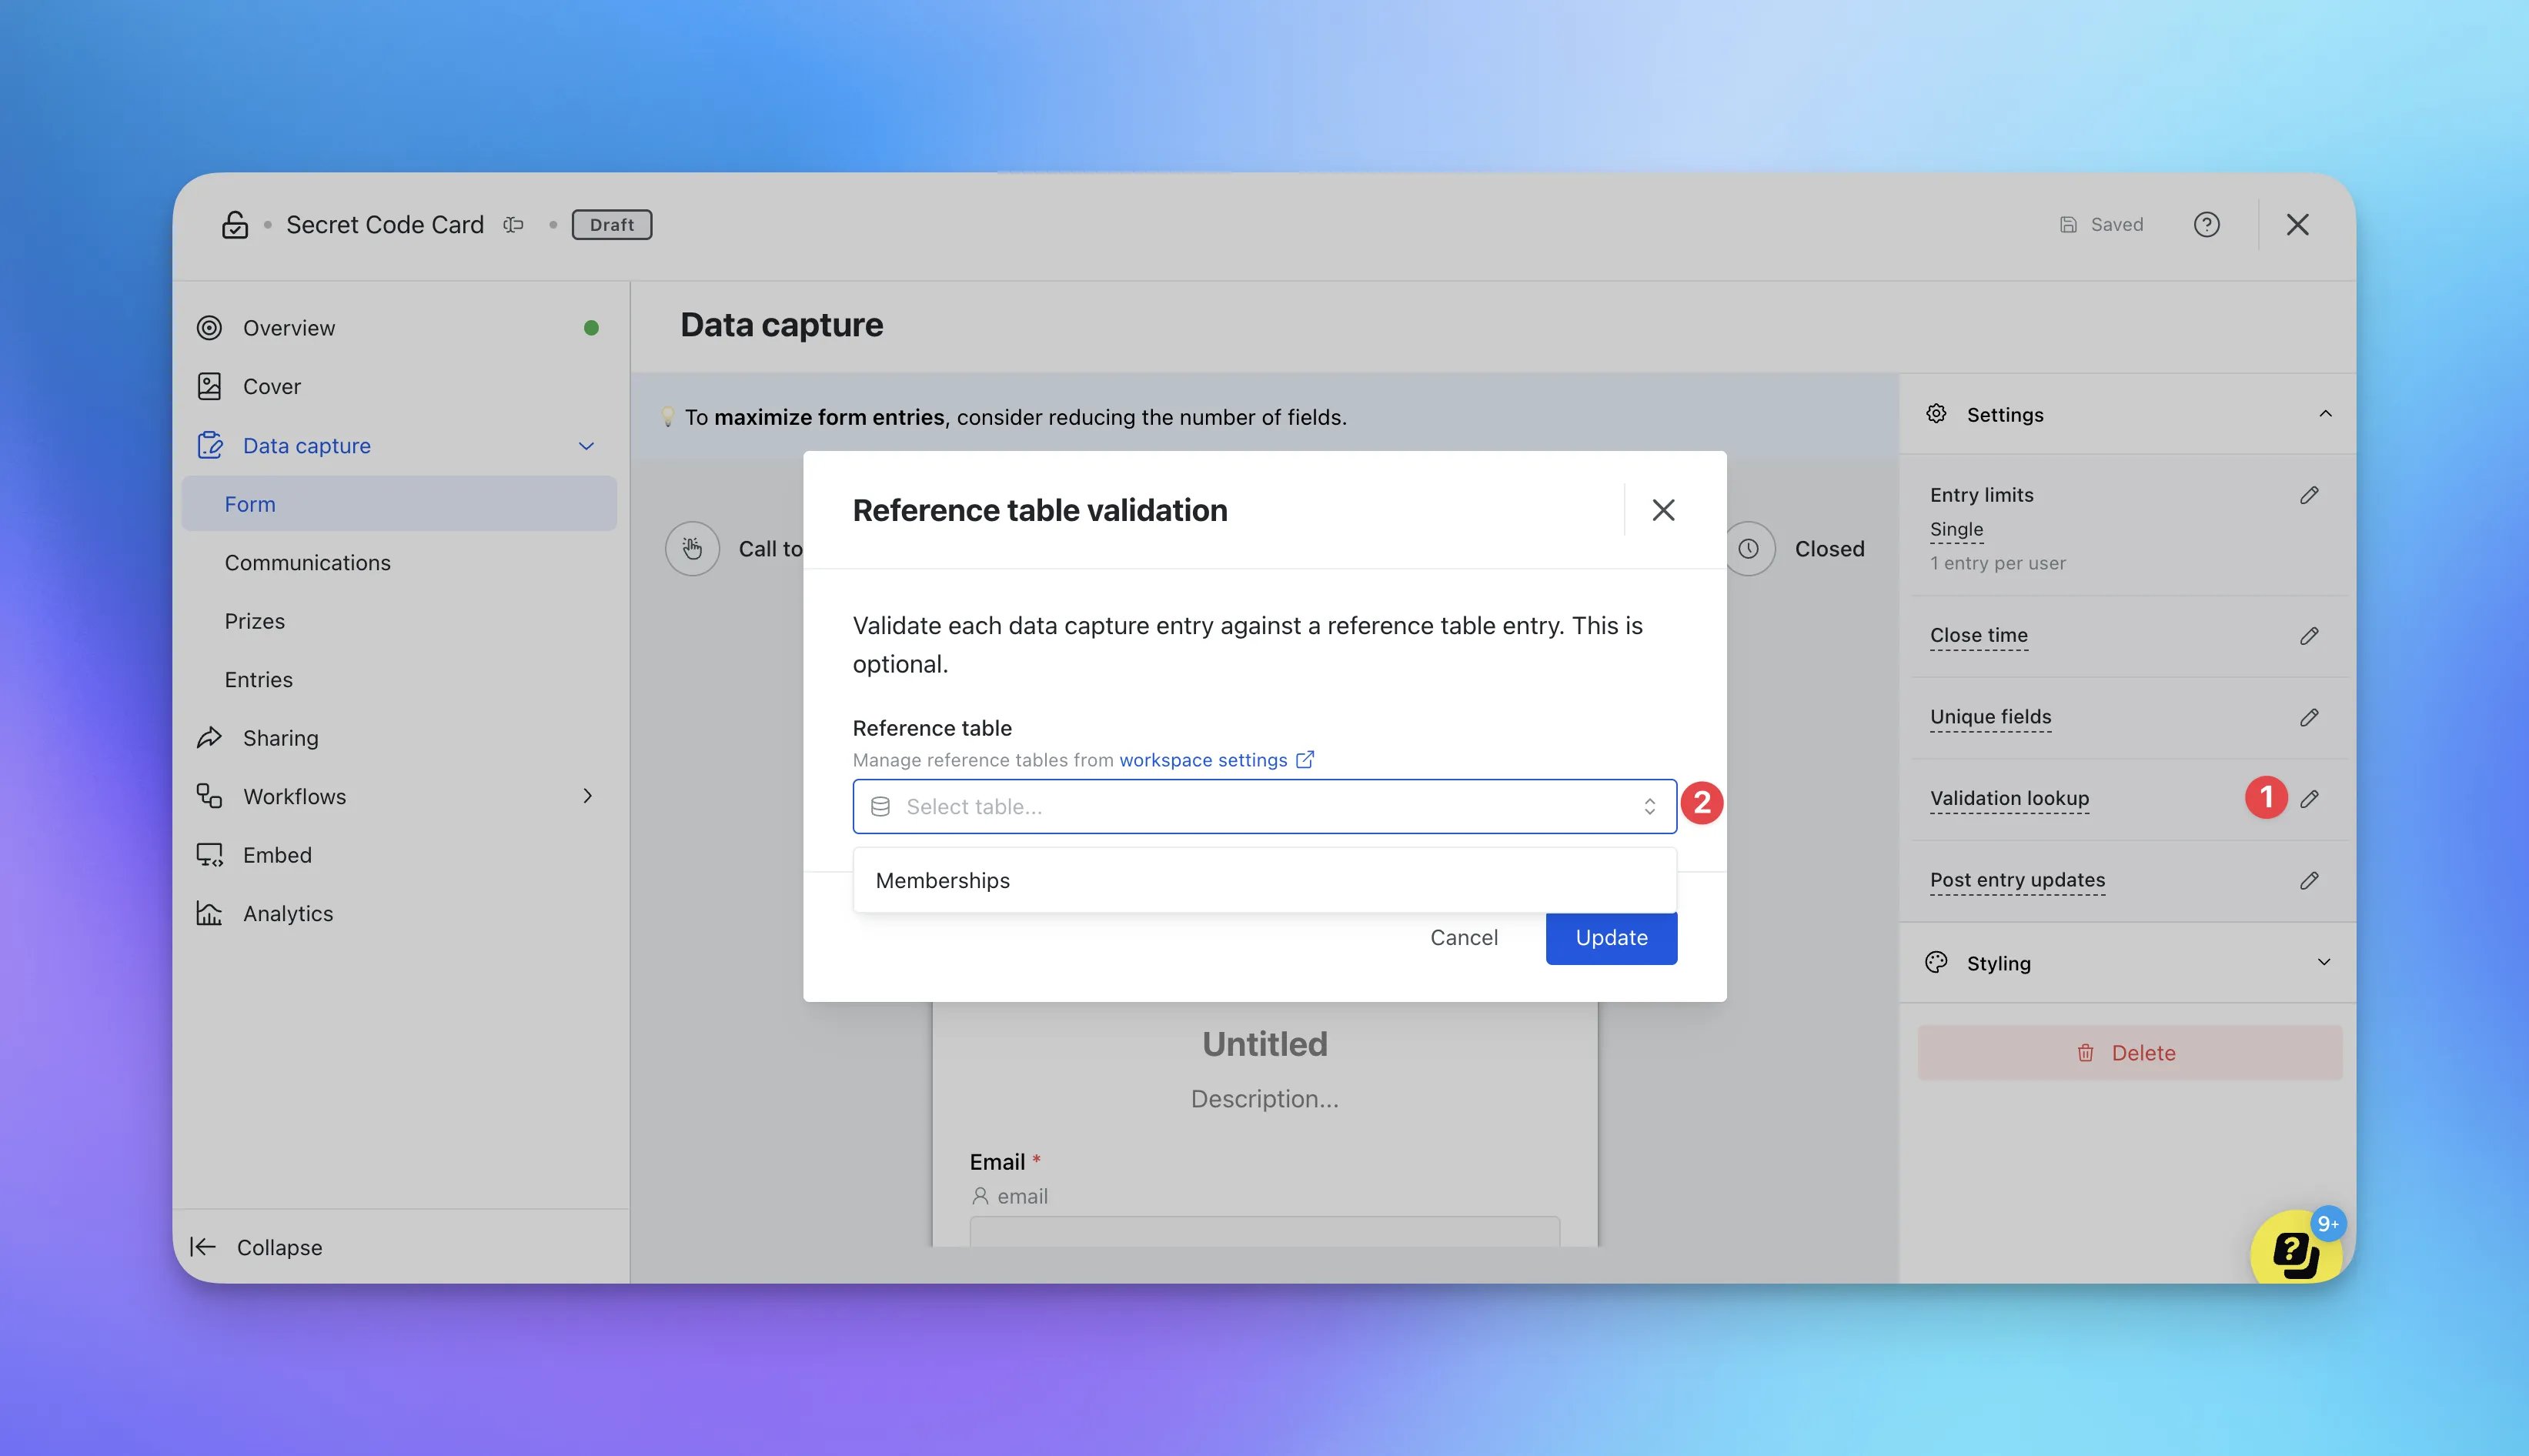 * **(1)** On the right sidebar, click on the **edit** icon next to Validation lookup.
* **(2)** Using the drop down, select the **reference table** to connect to the data capture.
### Step 6: Update mapping fields
* **(1)** On the right sidebar, click on the **edit** icon next to Validation lookup.
* **(2)** Using the drop down, select the **reference table** to connect to the data capture.
### Step 6: Update mapping fields
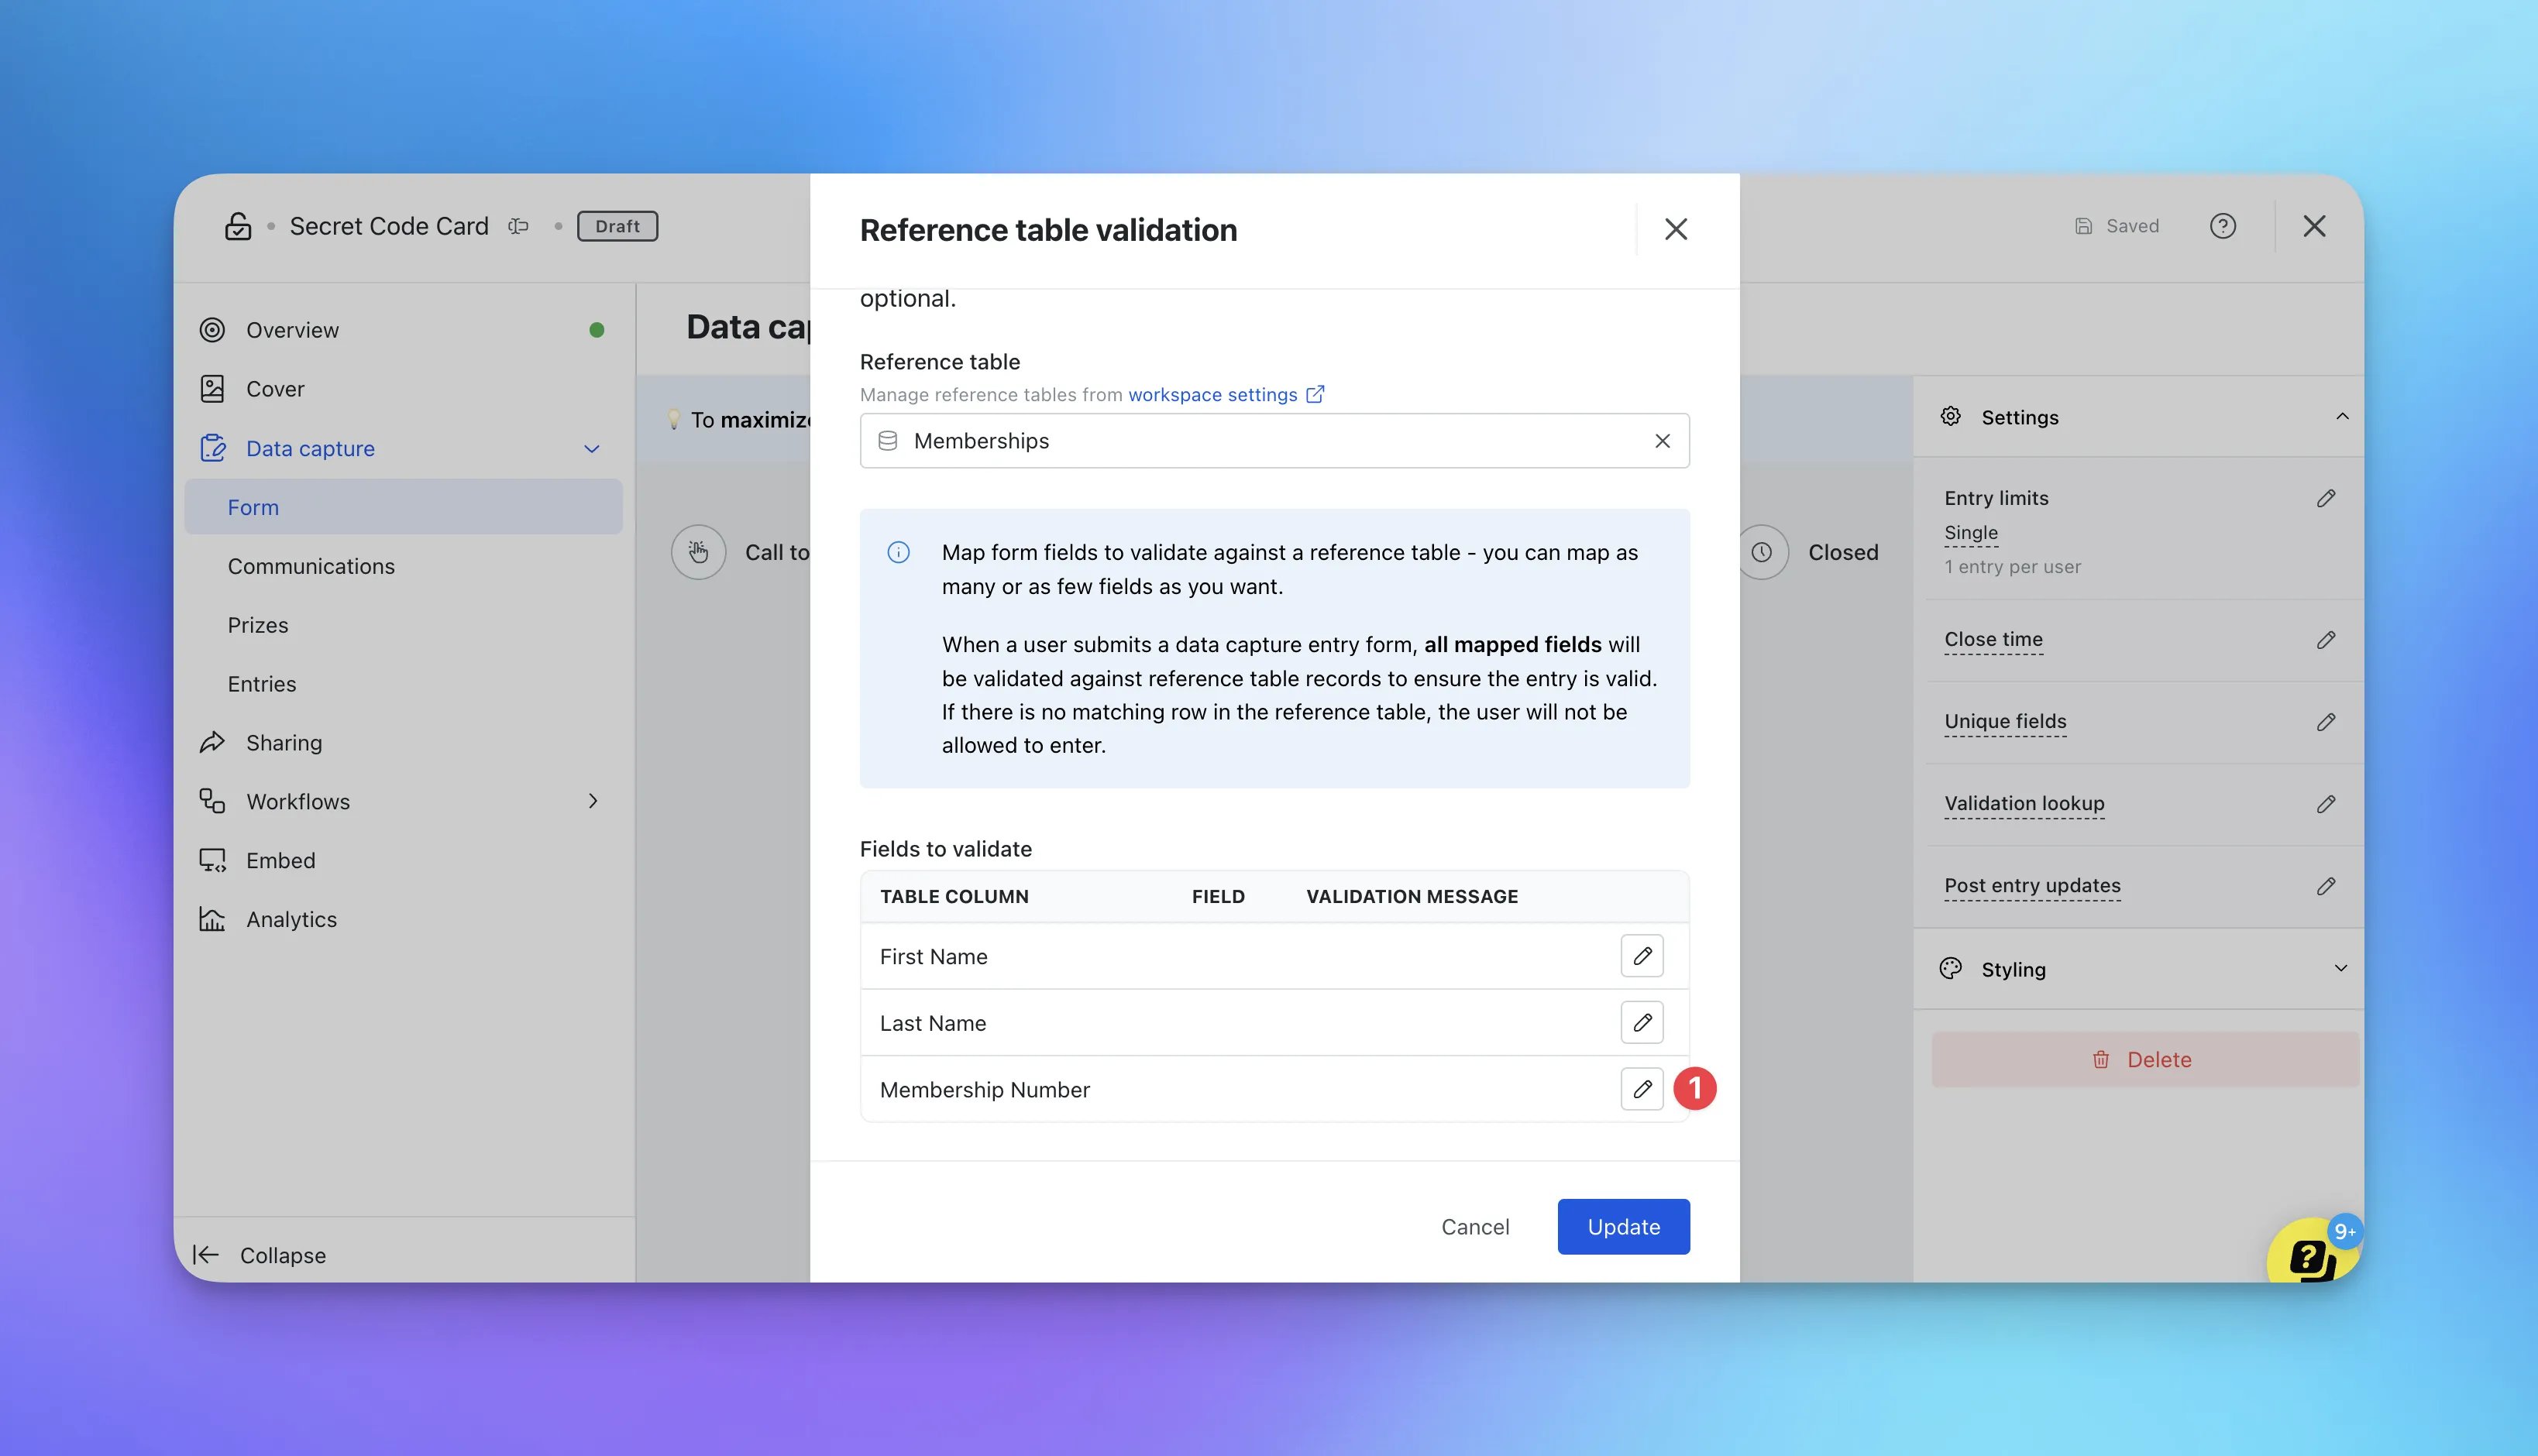 * **(1) Map** the relevant form field against the reference table column.
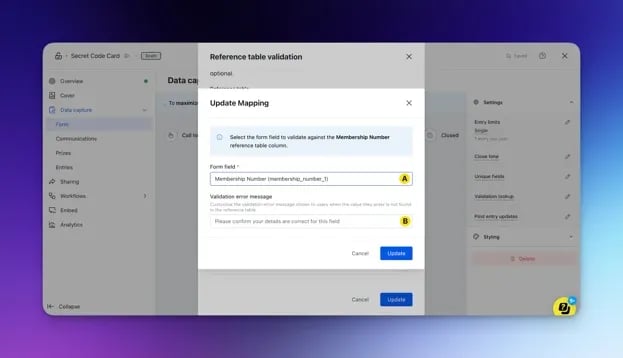 * **(A)** Using the drop-down menu, select the **form field** you want to validate against the reference table column.
* **(B)** Here you can edit the **message** that appears when a value entered is not found in the reference table file.
* **(2)** Once you have mapped the columns you wish to validate, click on **Update rules** to save the validation settings.
## FAQ
**What files can I import my Reference table from?**
You can only import your Reference table from a **CSV** or **XLSX** file.
**What can I use a Reference Table for?**
You can use a reference table to qualify your users in order to enter a competition. If you want to run a competition for your members only, you can validate entries based on membership numbers, emails, first name and/or last name. This is to ensure only account owners can enter a competition, not another user using the account number to enter.
* **(A)** Using the drop-down menu, select the **form field** you want to validate against the reference table column.
* **(B)** Here you can edit the **message** that appears when a value entered is not found in the reference table file.
* **(2)** Once you have mapped the columns you wish to validate, click on **Update rules** to save the validation settings.
## FAQ
**What files can I import my Reference table from?**
You can only import your Reference table from a **CSV** or **XLSX** file.
**What can I use a Reference Table for?**
You can use a reference table to qualify your users in order to enter a competition. If you want to run a competition for your members only, you can validate entries based on membership numbers, emails, first name and/or last name. This is to ensure only account owners can enter a competition, not another user using the account number to enter.