> ## Documentation Index
> Fetch the complete documentation index at: https://knowledge.komo.tech/llms.txt
> Use this file to discover all available pages before exploring further.
# Custom Email Sender Names
> Set up a custom sender name for your emails.
## What is it?
Create a new sender email with your personalised domain to fully brand your emails. Here you can connect your marketing emails to your Komo communications and include a reply-to email to allow users to reach out to.
## How do I set it up?
### Step 1: Navigate to your Account Settings
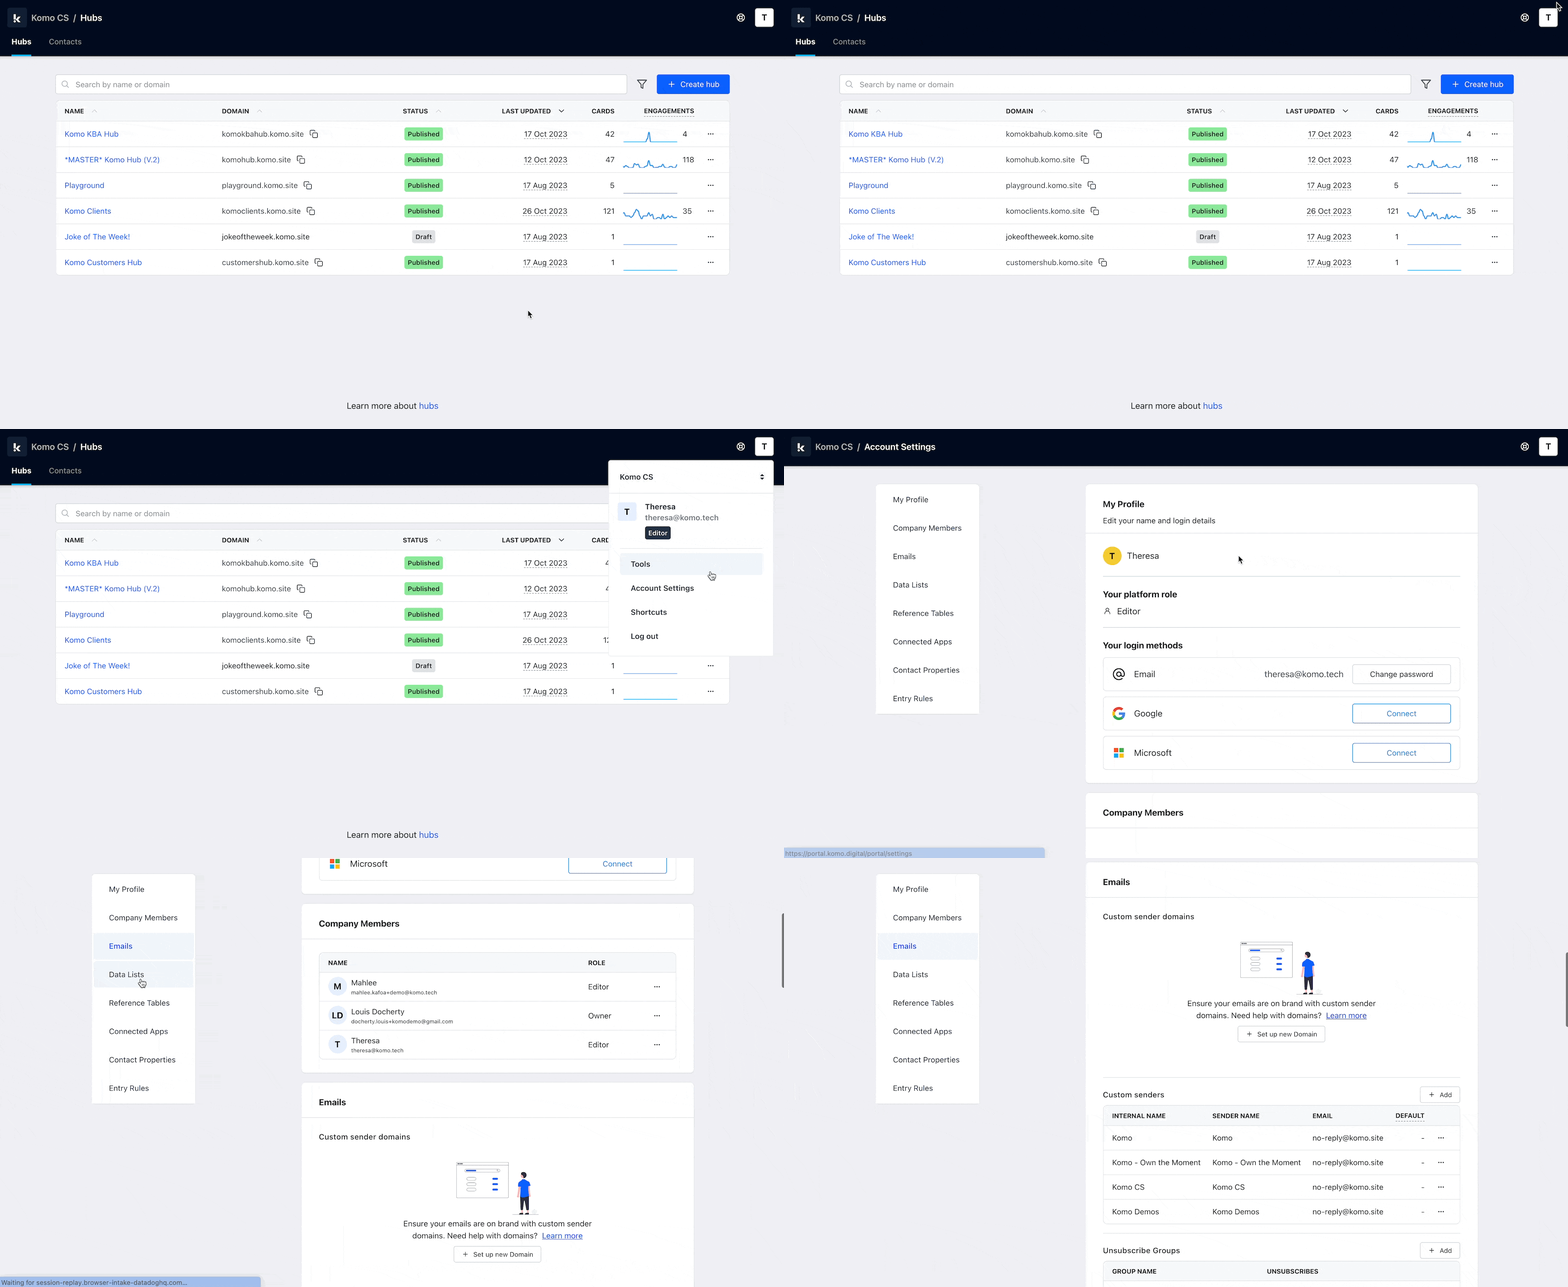 * Head to your **Hub** then select your **icon** on the top right of the Komo portal.
* Click on **Account Settings** followed by **Custom sender domains**.
### **Step 2: Set up a new Domain**
* Head to your **Hub** then select your **icon** on the top right of the Komo portal.
* Click on **Account Settings** followed by **Custom sender domains**.
### **Step 2: Set up a new Domain**
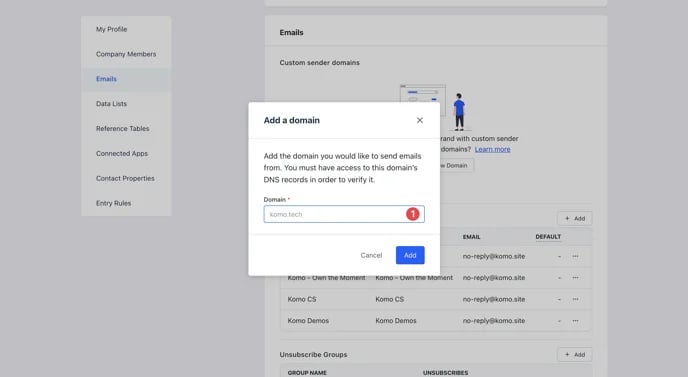 * Click on **Set up a new Domain.**
* **(1)** Add the **domain** you would like to send emails from.
You must have access to this domain’s DNS records in order to verify it.
### Step 3: Verify your Domain
* Head over to your DNS provider and add DKIM and Return-Path DNS records to verify your domain and ensure effective delivery.
* Click on the **...** and then select **Verify**.
Once verified, the DKIM Verified and Return-Path Verified columns will change to a tick.
### Step 4: Add your sender name
* Click on **Set up a new Domain.**
* **(1)** Add the **domain** you would like to send emails from.
You must have access to this domain’s DNS records in order to verify it.
### Step 3: Verify your Domain
* Head over to your DNS provider and add DKIM and Return-Path DNS records to verify your domain and ensure effective delivery.
* Click on the **...** and then select **Verify**.
Once verified, the DKIM Verified and Return-Path Verified columns will change to a tick.
### Step 4: Add your sender name
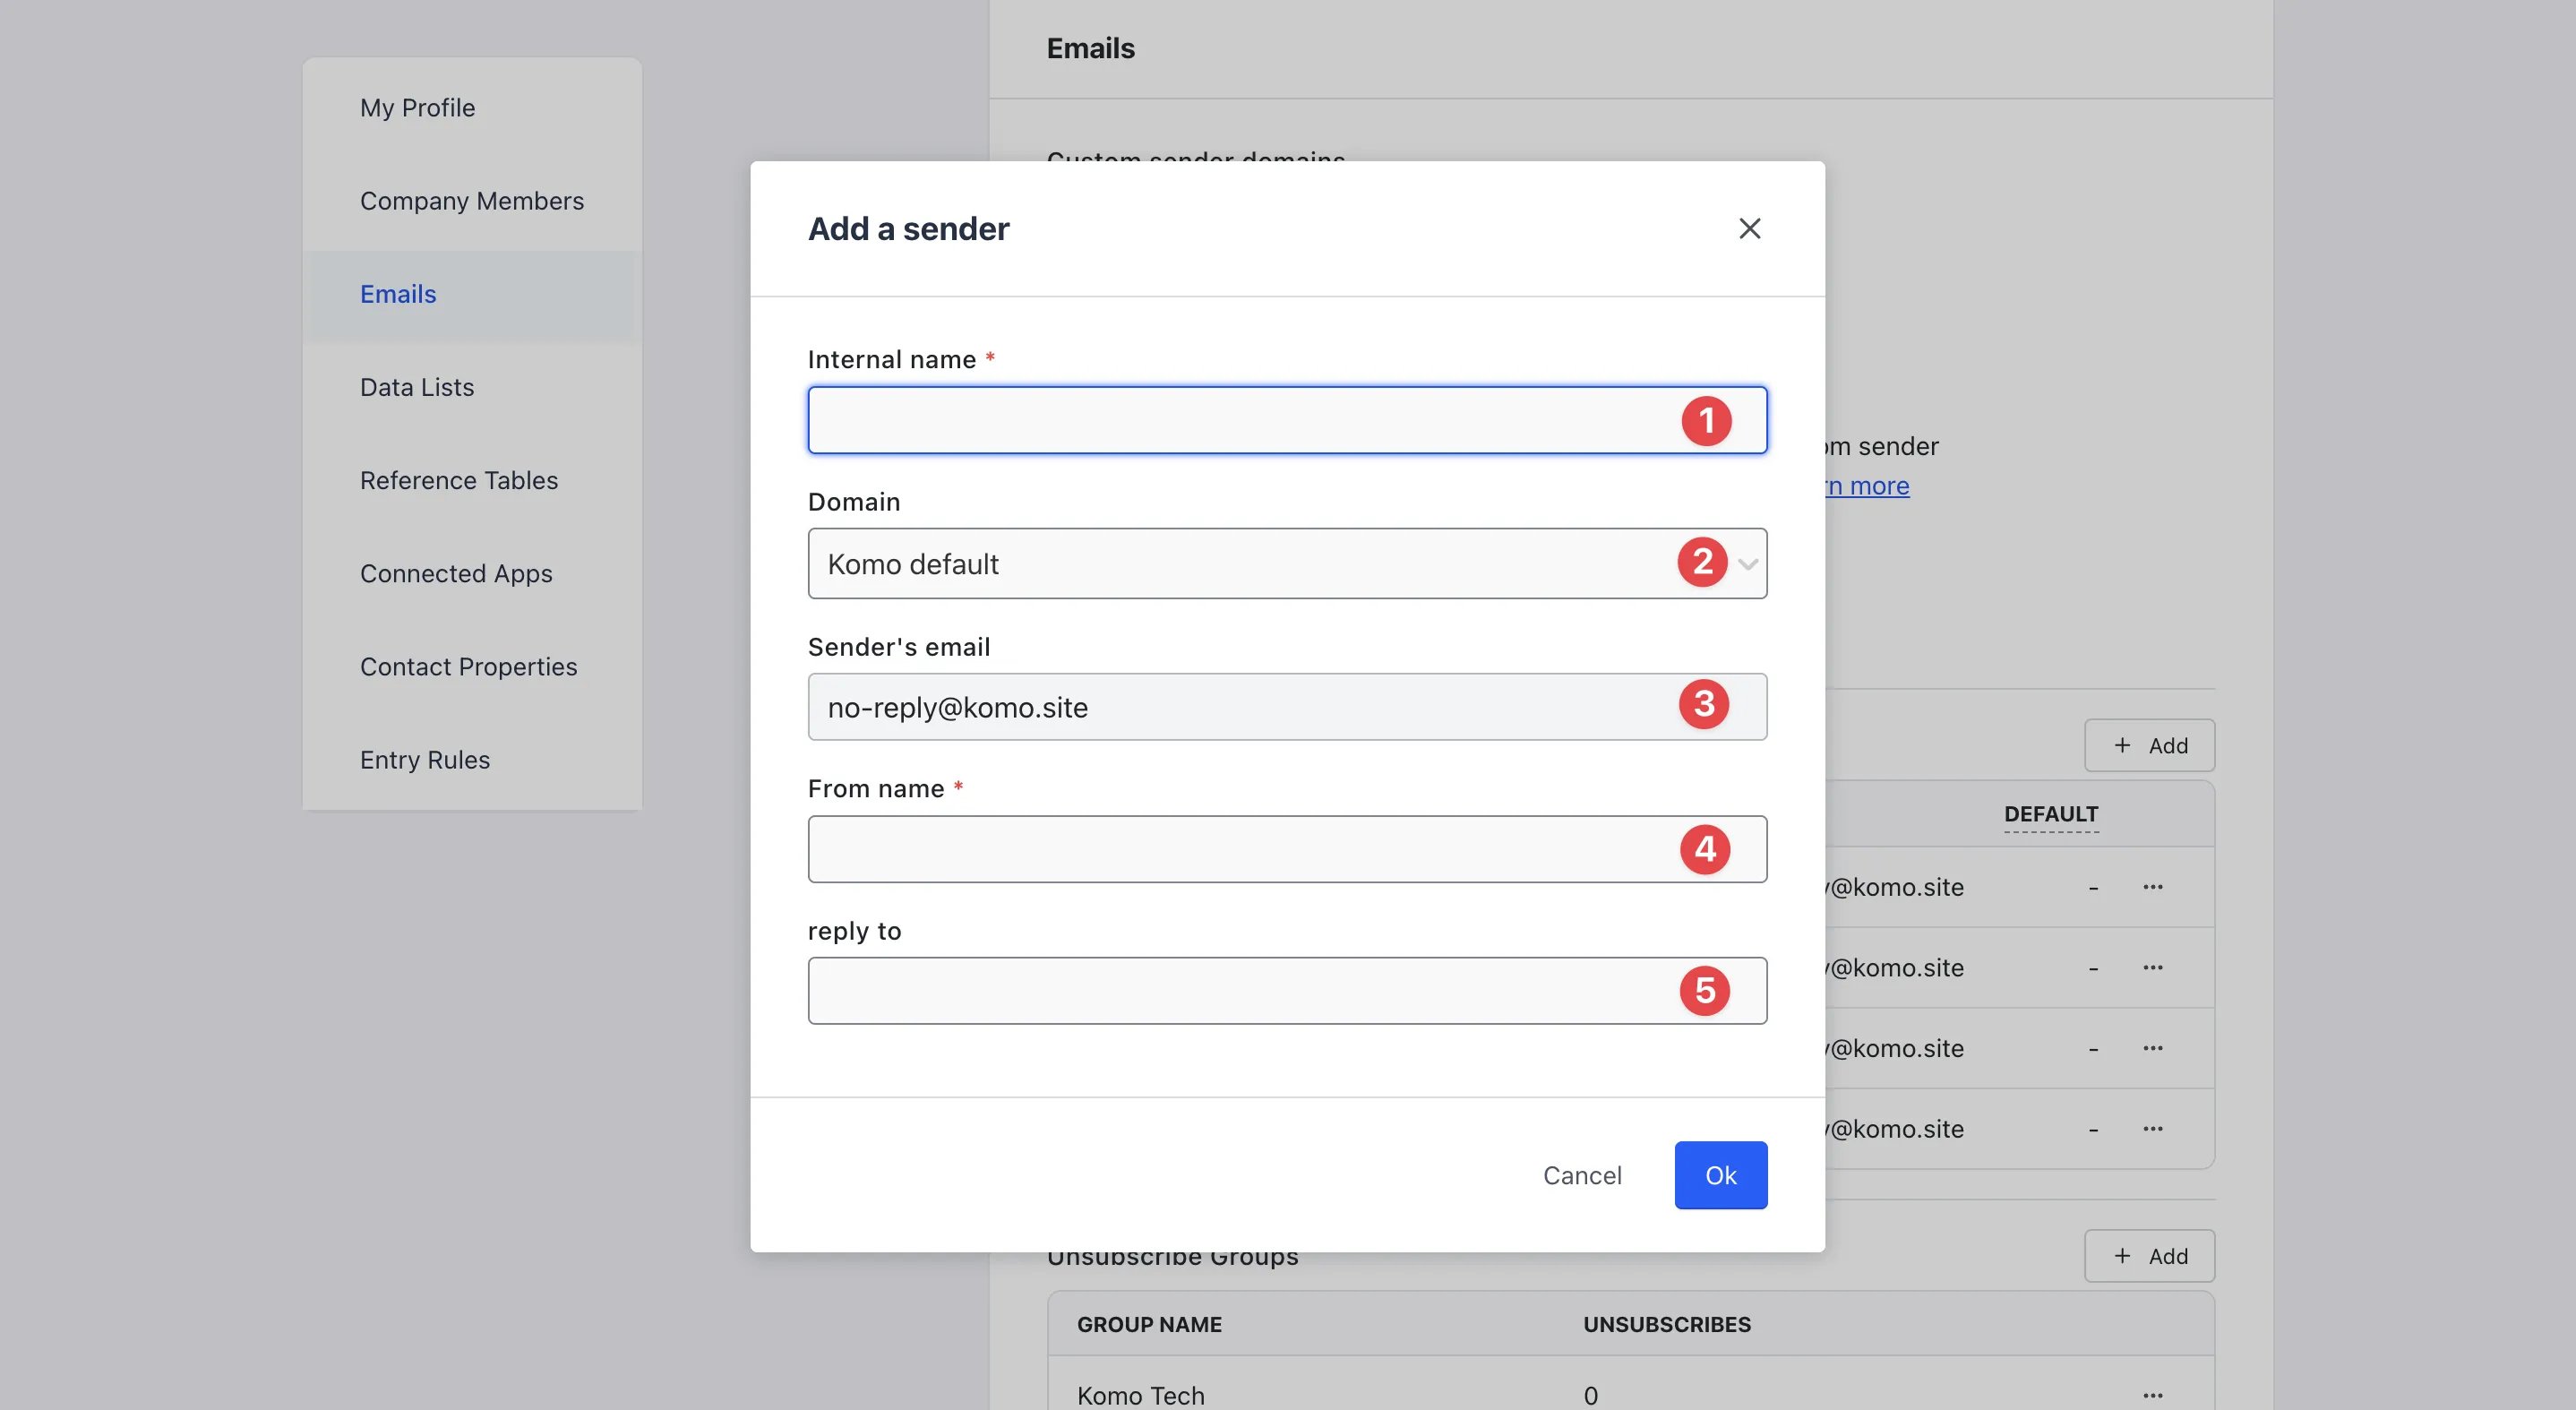 * Click on **Add** to set up your sender email.
* **(1)** Here is where you'll enter an **internal name.**
* **(2)** Using the drop-down, select the **domain** you wish to use.
* **(3)** Enter the **email** you wish to use before the domain.
* **(4)** Include a **from name** that will appear with the email.
* **(5)** Add a **reply to** email here for users to email when they receive your communications and have any follow-up questions.
### Step 5: Mark the sender email as Default
* Click on **Add** to set up your sender email.
* **(1)** Here is where you'll enter an **internal name.**
* **(2)** Using the drop-down, select the **domain** you wish to use.
* **(3)** Enter the **email** you wish to use before the domain.
* **(4)** Include a **from name** that will appear with the email.
* **(5)** Add a **reply to** email here for users to email when they receive your communications and have any follow-up questions.
### Step 5: Mark the sender email as Default
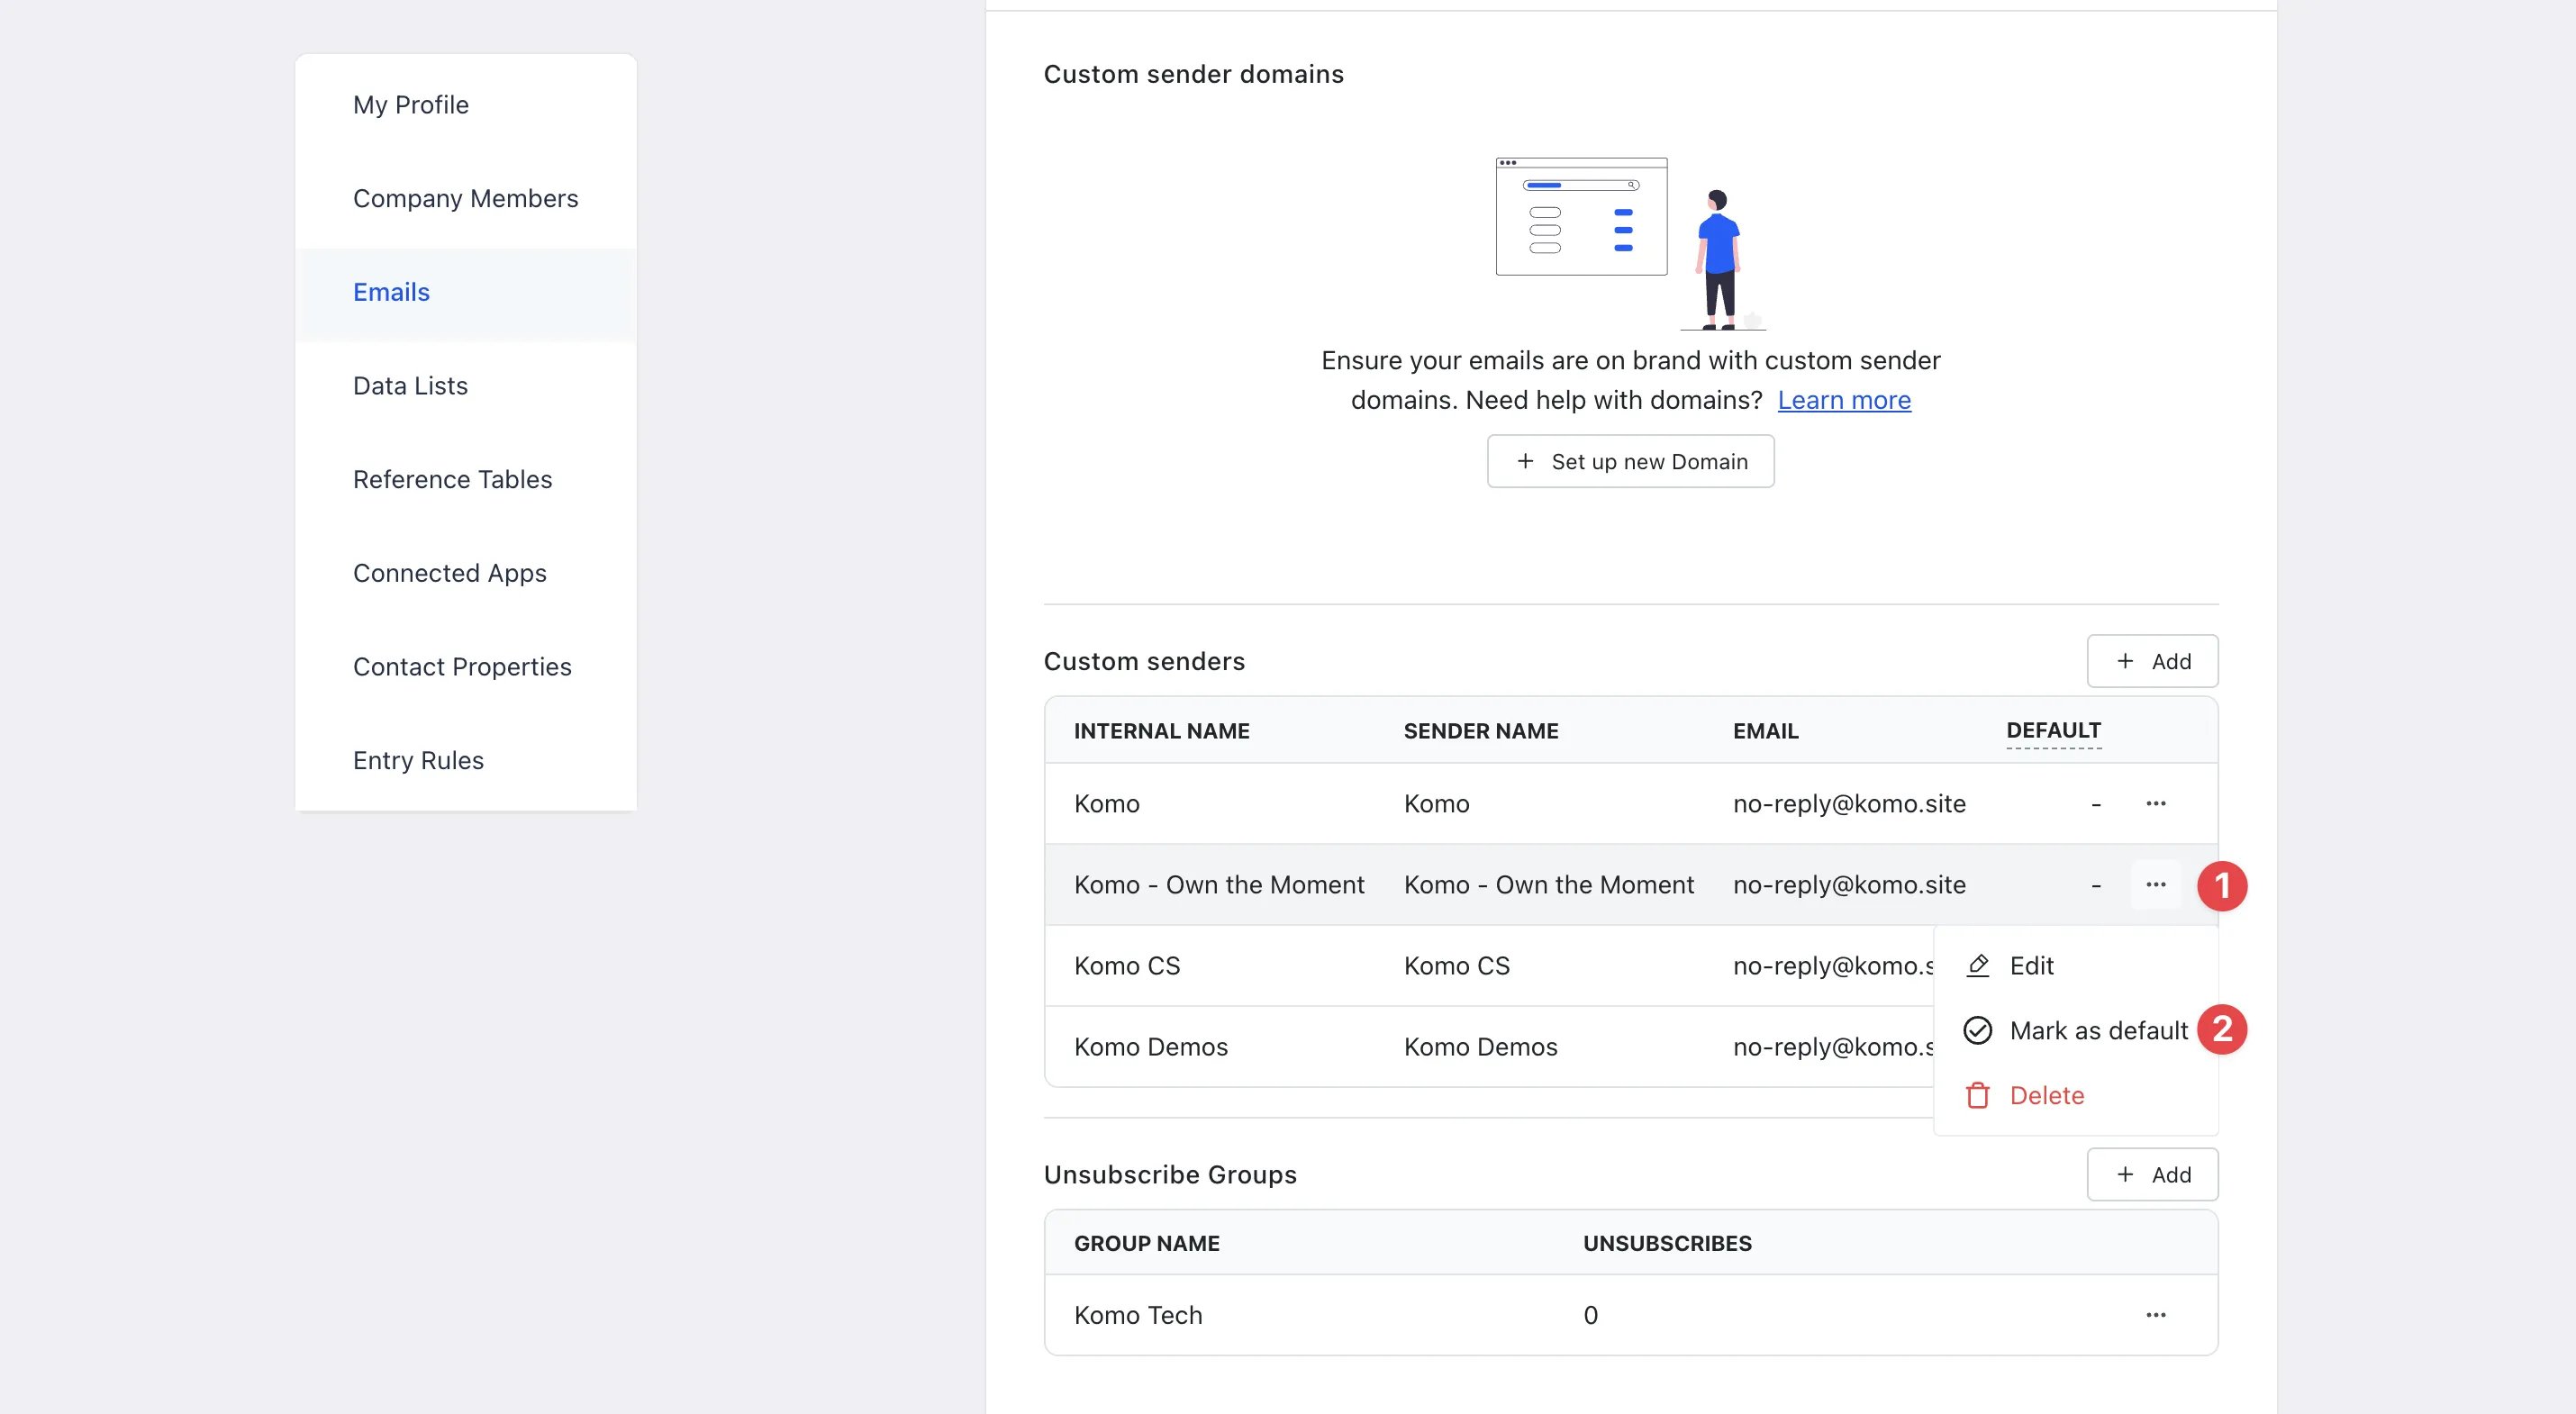 * **(1)** Click on the **...** next to the sender email.
* **(2)** Select **Mark as default**.
Marking the sender email as default to automatically use this email for all communications created.
## FAQ
**Can I have multiple sender emails?**\
Yes, you can have different sender emails set up. To select a different sender email when creating a communication, use the **Sender info** drop-down and select the email you wish to use.
**Do I need to mark an email as default?**
We do highly recommend marking one as default so this sender email will always be used when you set up a communication. This is to avoid using the incorrect email if you have multiple setups.
**Can I edit already created sender emails?**\
Yes, if you click on the **...** next to the email, you have the option to edit, mark/remove as default or delete.
**What if we require an SPF record to enable a 3rd party to send emails on behalf of our domain?**
SPF records are not required, provided you have DKIM and Return Path set up, which Komo requires to set up a custom email domain. If you still wish to add the SPF record, [you can see how to do this here.](https://postmarkapp.com/support/article/1092-how-do-i-set-up-spf-for-postmark)
* **(1)** Click on the **...** next to the sender email.
* **(2)** Select **Mark as default**.
Marking the sender email as default to automatically use this email for all communications created.
## FAQ
**Can I have multiple sender emails?**\
Yes, you can have different sender emails set up. To select a different sender email when creating a communication, use the **Sender info** drop-down and select the email you wish to use.
**Do I need to mark an email as default?**
We do highly recommend marking one as default so this sender email will always be used when you set up a communication. This is to avoid using the incorrect email if you have multiple setups.
**Can I edit already created sender emails?**\
Yes, if you click on the **...** next to the email, you have the option to edit, mark/remove as default or delete.
**What if we require an SPF record to enable a 3rd party to send emails on behalf of our domain?**
SPF records are not required, provided you have DKIM and Return Path set up, which Komo requires to set up a custom email domain. If you still wish to add the SPF record, [you can see how to do this here.](https://postmarkapp.com/support/article/1092-how-do-i-set-up-spf-for-postmark)