> ## Documentation Index
> Fetch the complete documentation index at: https://knowledge.komo.tech/llms.txt
> Use this file to discover all available pages before exploring further.
# Default Data Capture Form
> Create a quick and easy default form to use for all competitions.
If you plan to Add Data Capture to your Content Cards, we recommend taking a few minutes to set up your Default Form in the Hub settings before getting started. This default form automatically attaches to competitions, so setting it up in advance will save you time - especially if you plan to run multiple competitions.
This feature will only add the data capture form when it is first created; you are still able to alter the Data Capture on a case-by-case basis to suit whatever competition you are running.
## How to build one:
### Step 1: Go to the Hub settings
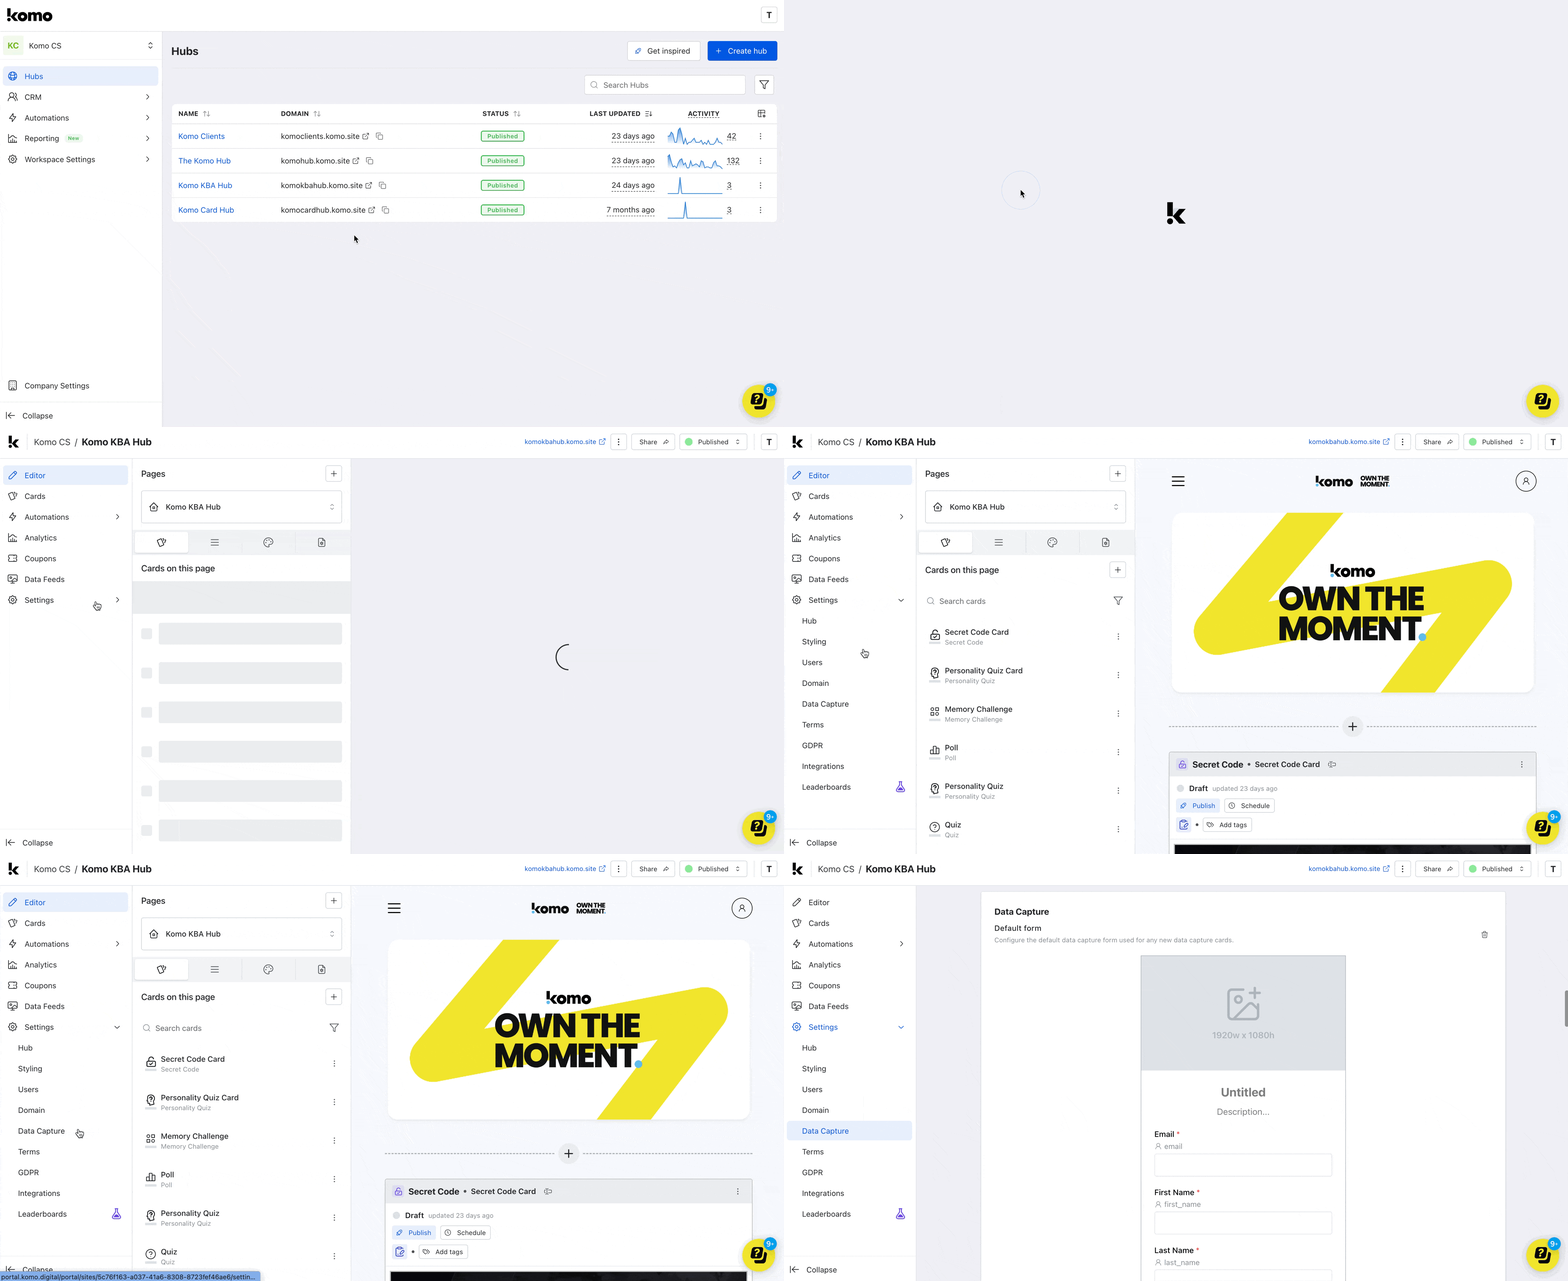 * Navigate to your **Engagement Hub.**
* Click on the **Settings** tab and then head to the **Data Capture** tab.
### Step 2: Edit your Default Form
* Navigate to your **Engagement Hub.**
* Click on the **Settings** tab and then head to the **Data Capture** tab.
### Step 2: Edit your Default Form
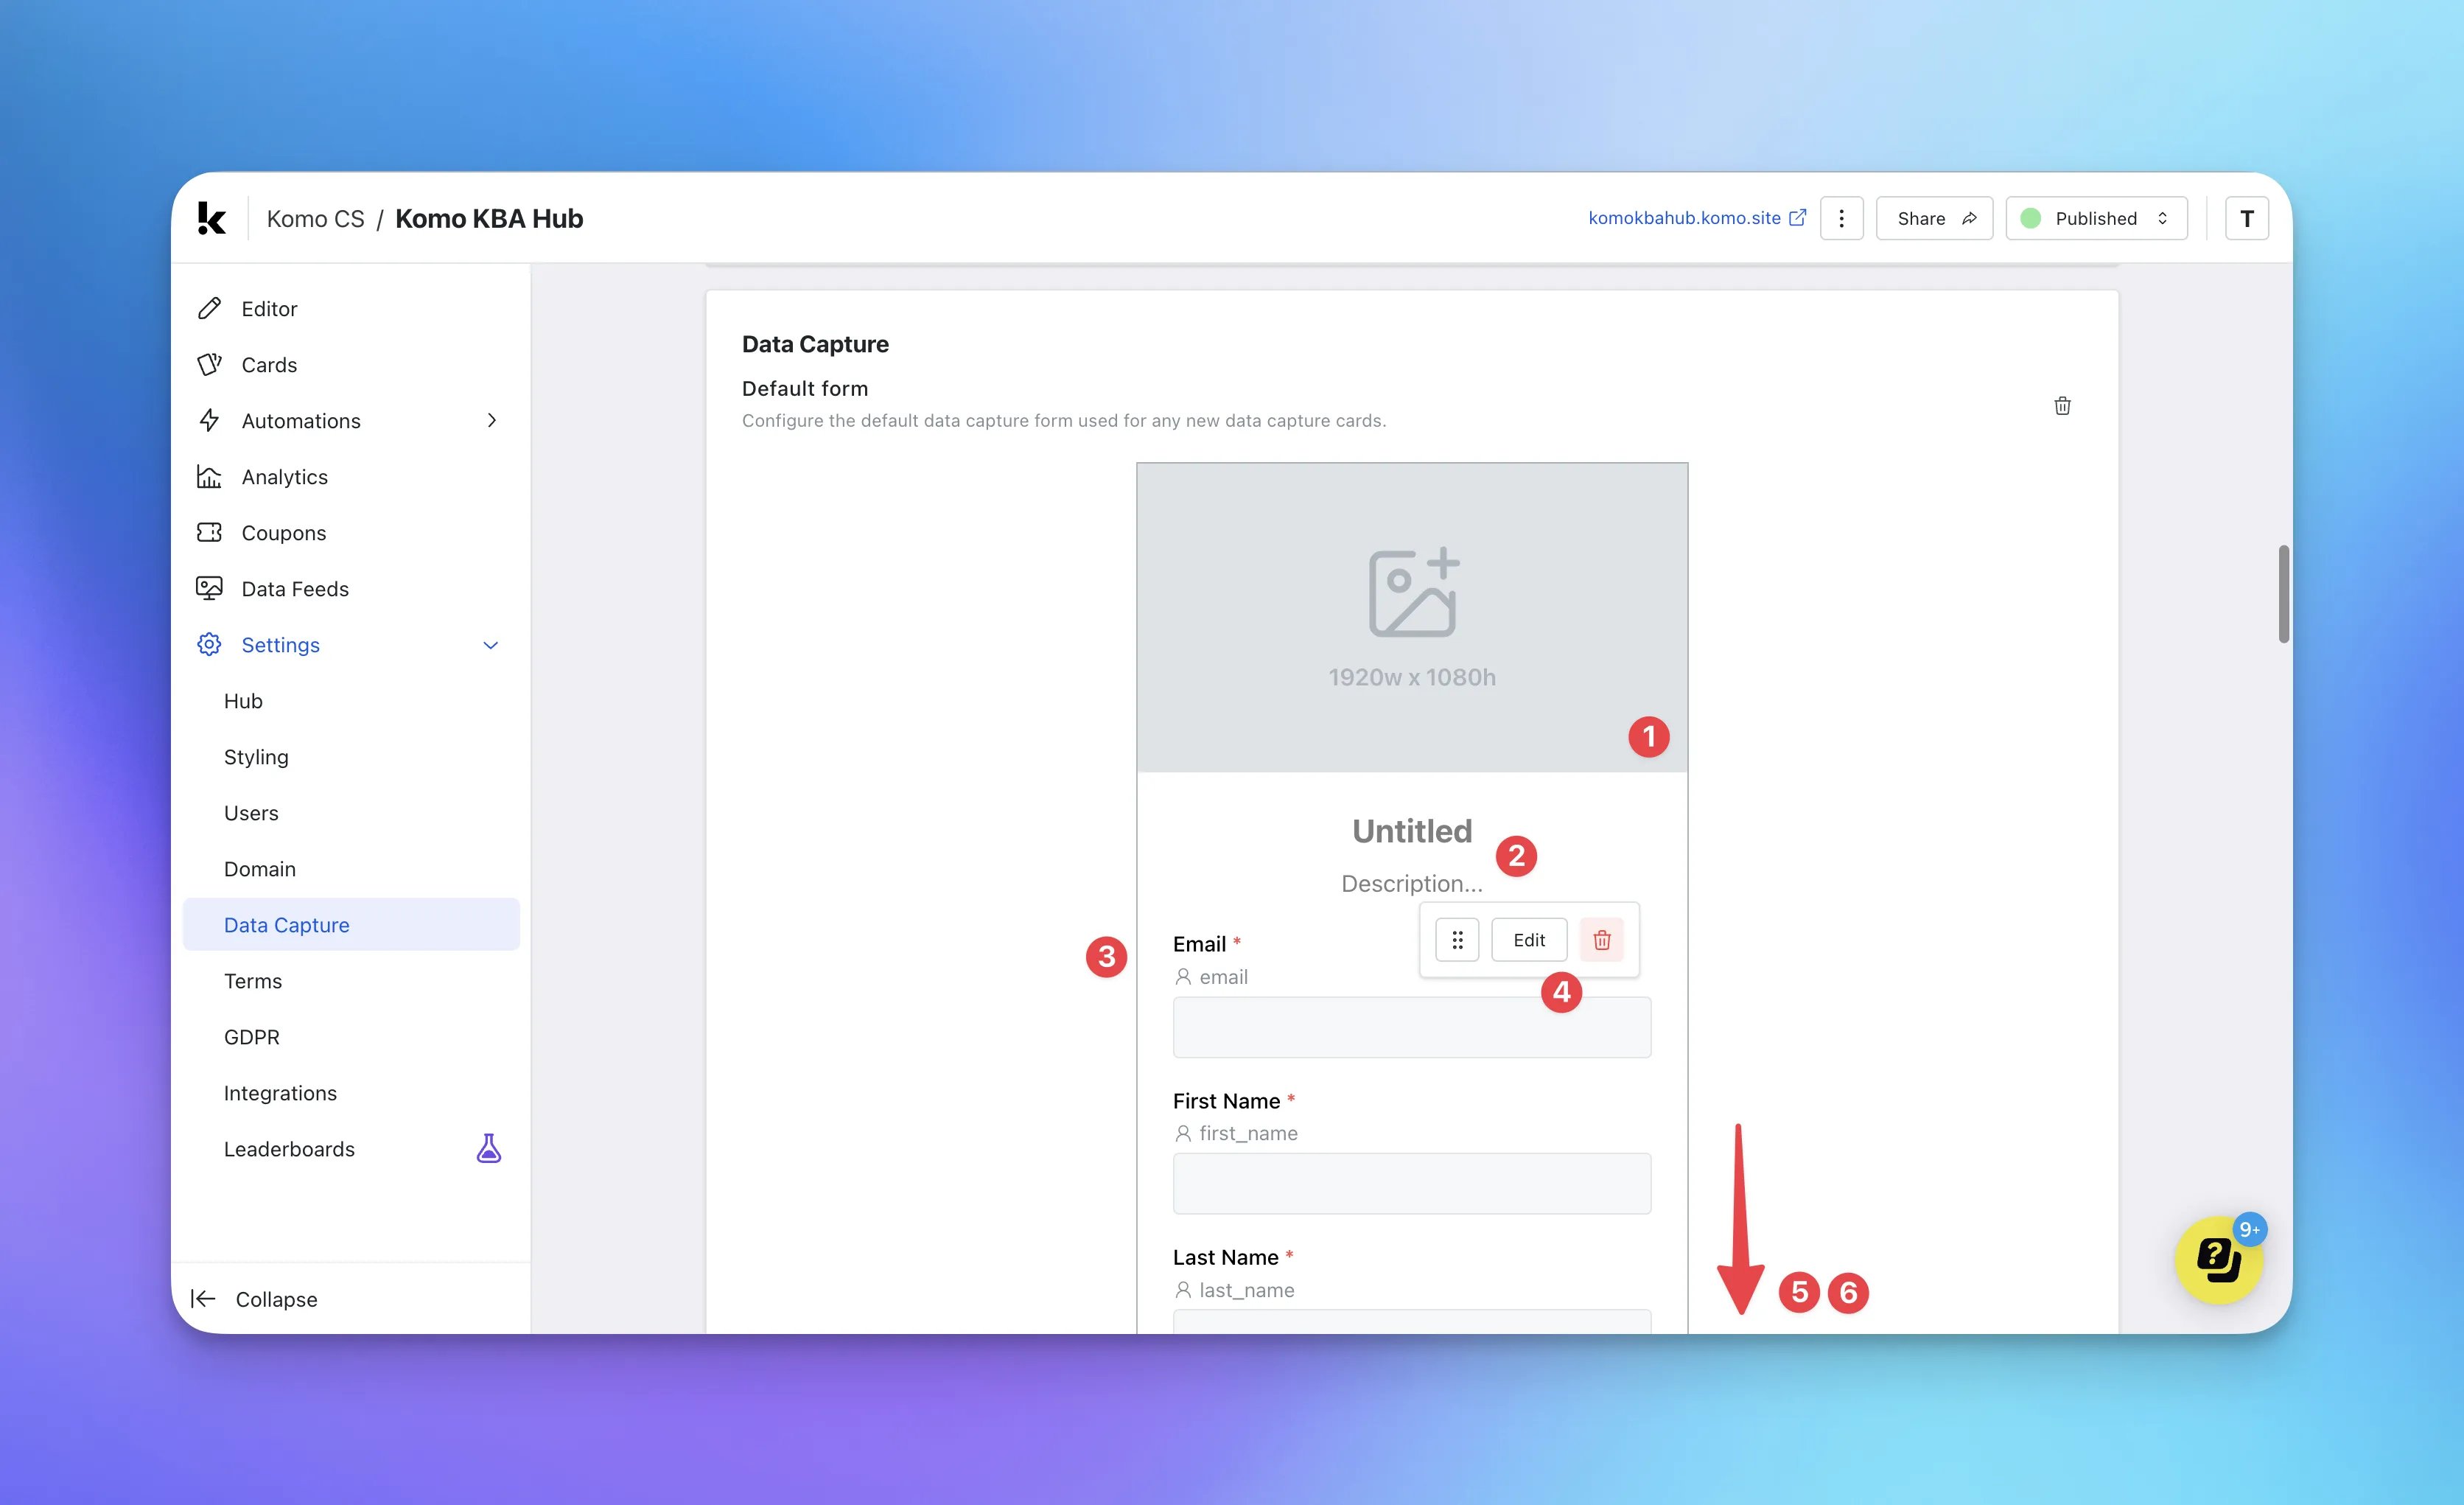 * **(1)** Here we can add the form **cover image**. You may choose to alter this depending on the competition you are planning to run. However, setting a simple image here (e.g. a logo) will add it to your form.
* **(2)** Here you can alter the **title** and **description** that will sit above your data capture fields.
* **(3)** Here we are looking at the specific **data capture fields**.
* **(4)** Hovering over each field, you can edit the **additional settings** such as making it a required field.
* **(5)** Scrolling down, clicking on the plus icon, you can add as many **additional fields** as you would like, such as a marketing opt-in.
* **(1)** Here we can add the form **cover image**. You may choose to alter this depending on the competition you are planning to run. However, setting a simple image here (e.g. a logo) will add it to your form.
* **(2)** Here you can alter the **title** and **description** that will sit above your data capture fields.
* **(3)** Here we are looking at the specific **data capture fields**.
* **(4)** Hovering over each field, you can edit the **additional settings** such as making it a required field.
* **(5)** Scrolling down, clicking on the plus icon, you can add as many **additional fields** as you would like, such as a marketing opt-in.
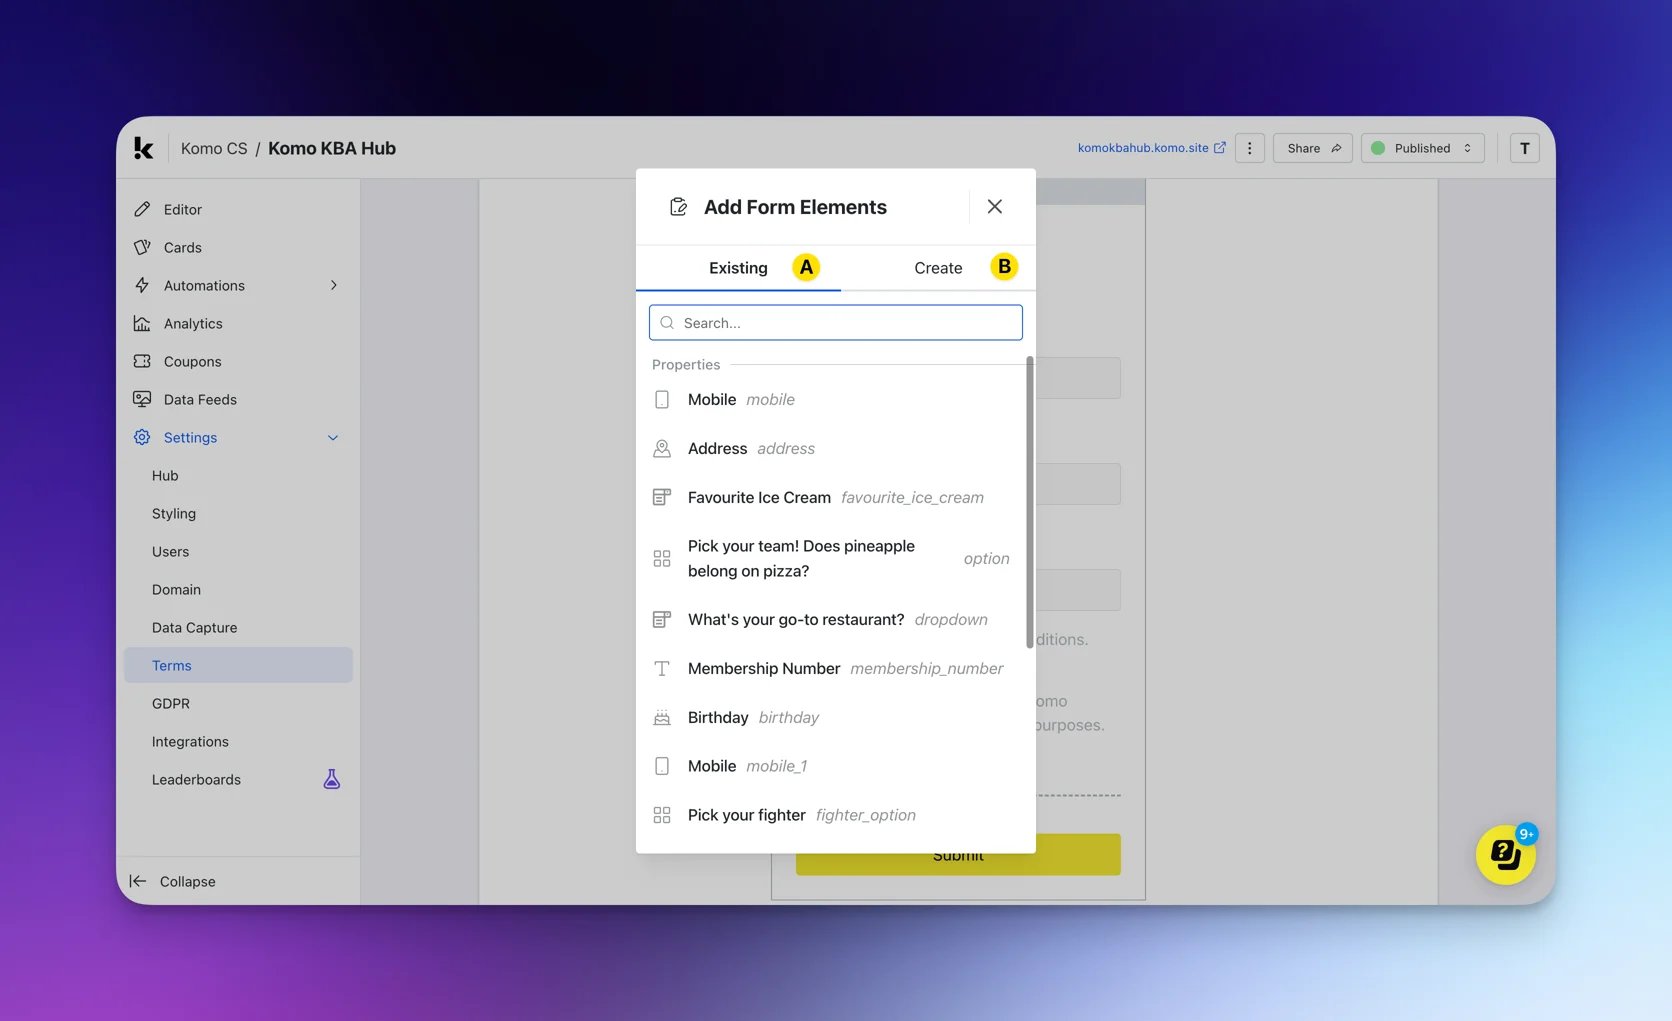 * **(A)** Add existing contact properties to the default form. If you don't have any created, [follow these steps](/crm/contacts/contact-properties) to create properties that you will consistently use overtime.
* **(B)** Create new fields to add to the default form.
You can create a contact property here.
* **(6)** Here you can alter the **copy and colors** of the submit button.
### Step 3: Add Content
* **(A)** Add existing contact properties to the default form. If you don't have any created, [follow these steps](/crm/contacts/contact-properties) to create properties that you will consistently use overtime.
* **(B)** Create new fields to add to the default form.
You can create a contact property here.
* **(6)** Here you can alter the **copy and colors** of the submit button.
### Step 3: Add Content
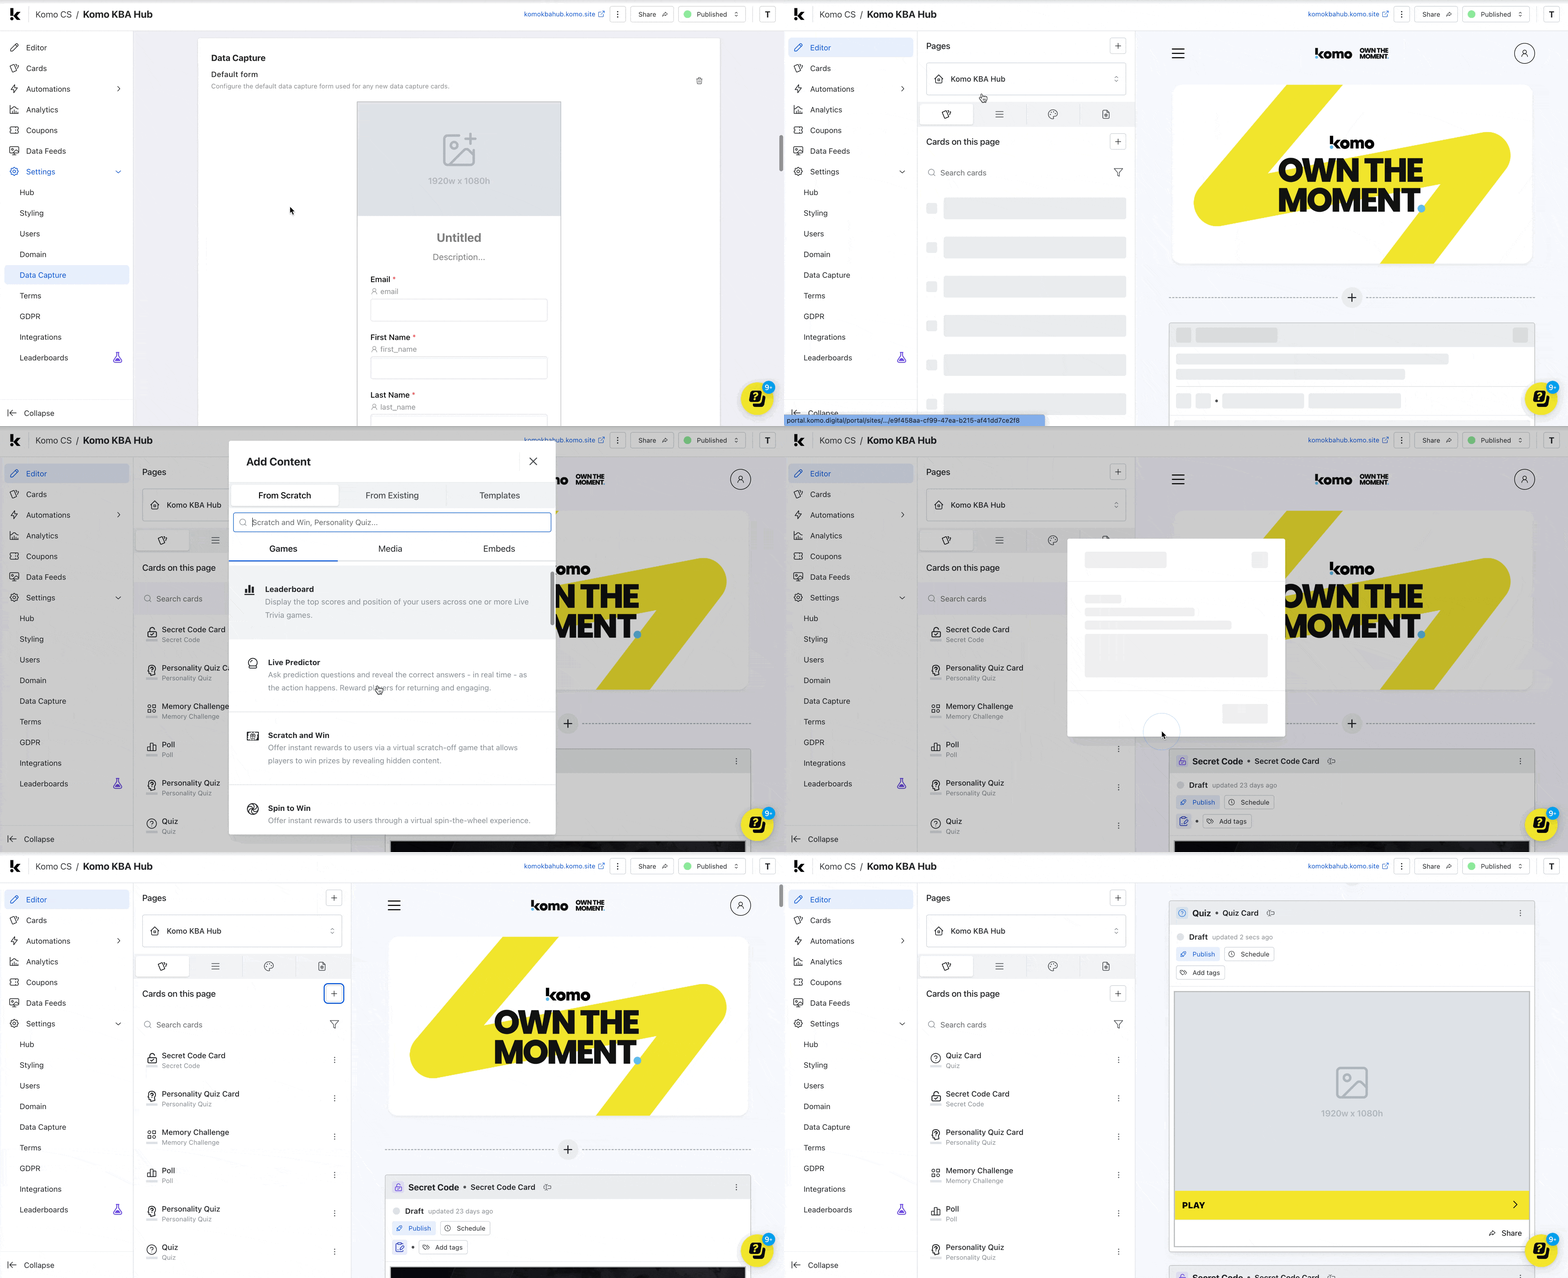 * Navigate back to the **Editor page** and add a content card to your Hub.
### Step 4: Add a Data Capture
* Navigate back to the **Editor page** and add a content card to your Hub.
### Step 4: Add a Data Capture
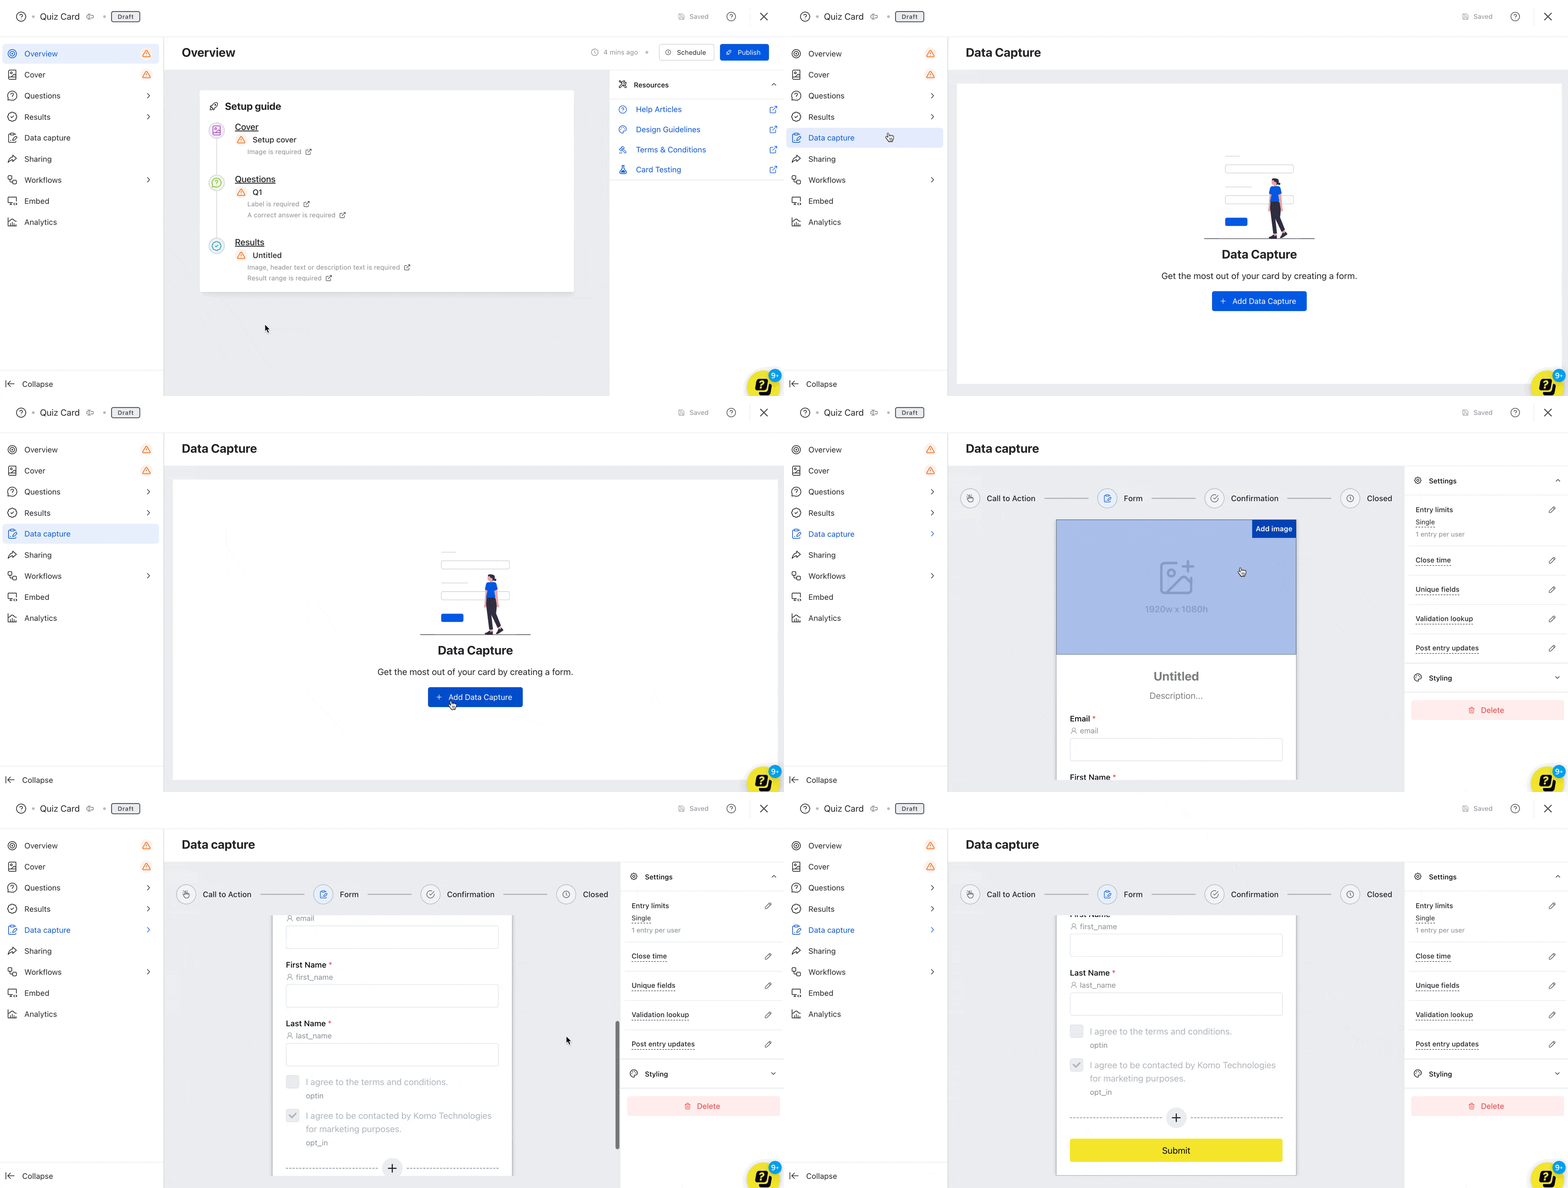 * Clicking on the **card** will open the editing module.
* Head to the **Data Capture** tab and then click **Add Data Capture**.
* Clicking on **Form**, you will see the Default Form has been added.
* Clicking on the **card** will open the editing module.
* Head to the **Data Capture** tab and then click **Add Data Capture**.
* Clicking on **Form**, you will see the Default Form has been added.