
How do I do this?
Step 1: Schedule the card
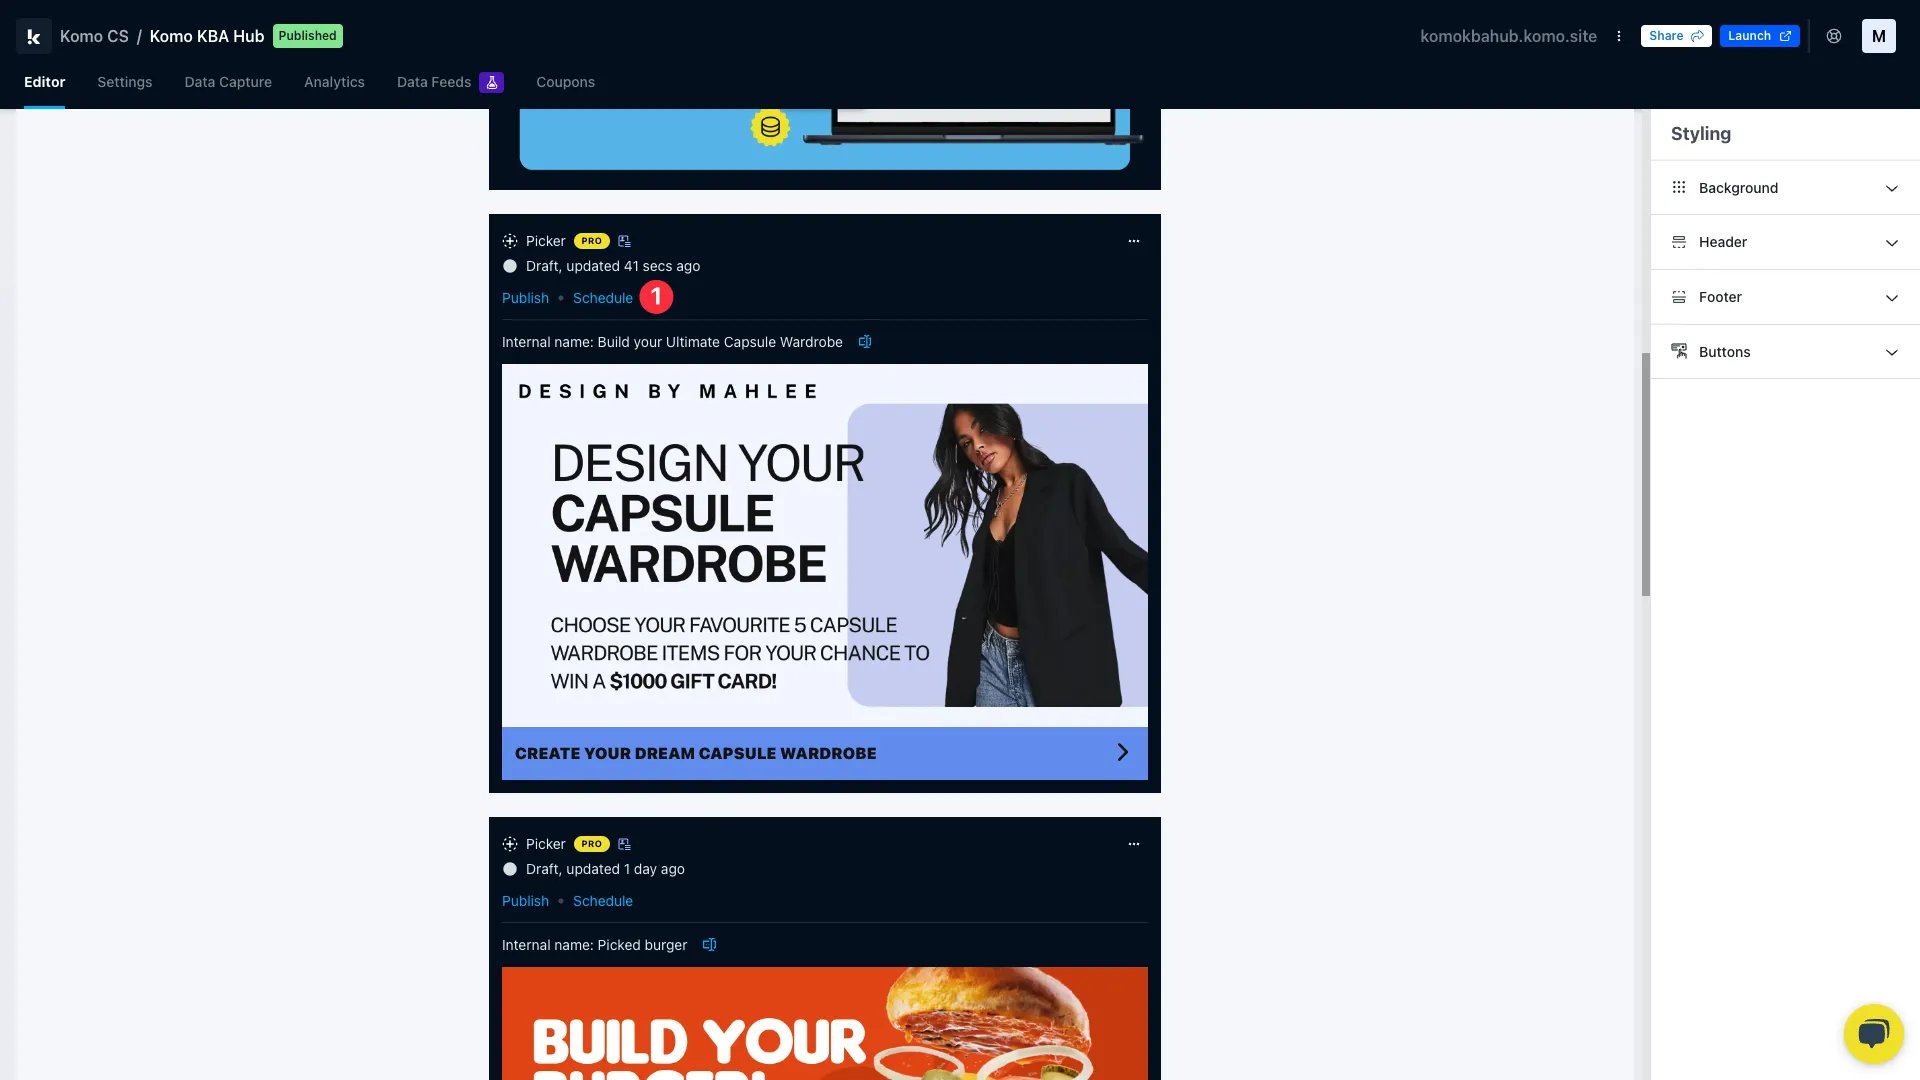
- (1) Click Schedule once you’ve completely built out your card and are ready to schedule it.
Step 2: Set the dates and times

- (1) Here you can set the timezone to reflect when you wish to schedule your Card.
-
(2) Click Schedule Publish to set a date and time you want the card to publish on the Hub.
Schedule Publish

- (A) Click here to select the date the card will publish on.
- (B) Here you can set the time the card will publish at.
-
(3) Click Schedule Expiry to set a date and time you want the card to unpublish on the Hub.
Schedule Expiry

- (A) Click here to select the date the card will unpublish.
- (B) Here you can set the time the card will unpublish.
- (4) Click Save once you’re happy with the selected date and time.
Step 3: Overview of the scheduled times
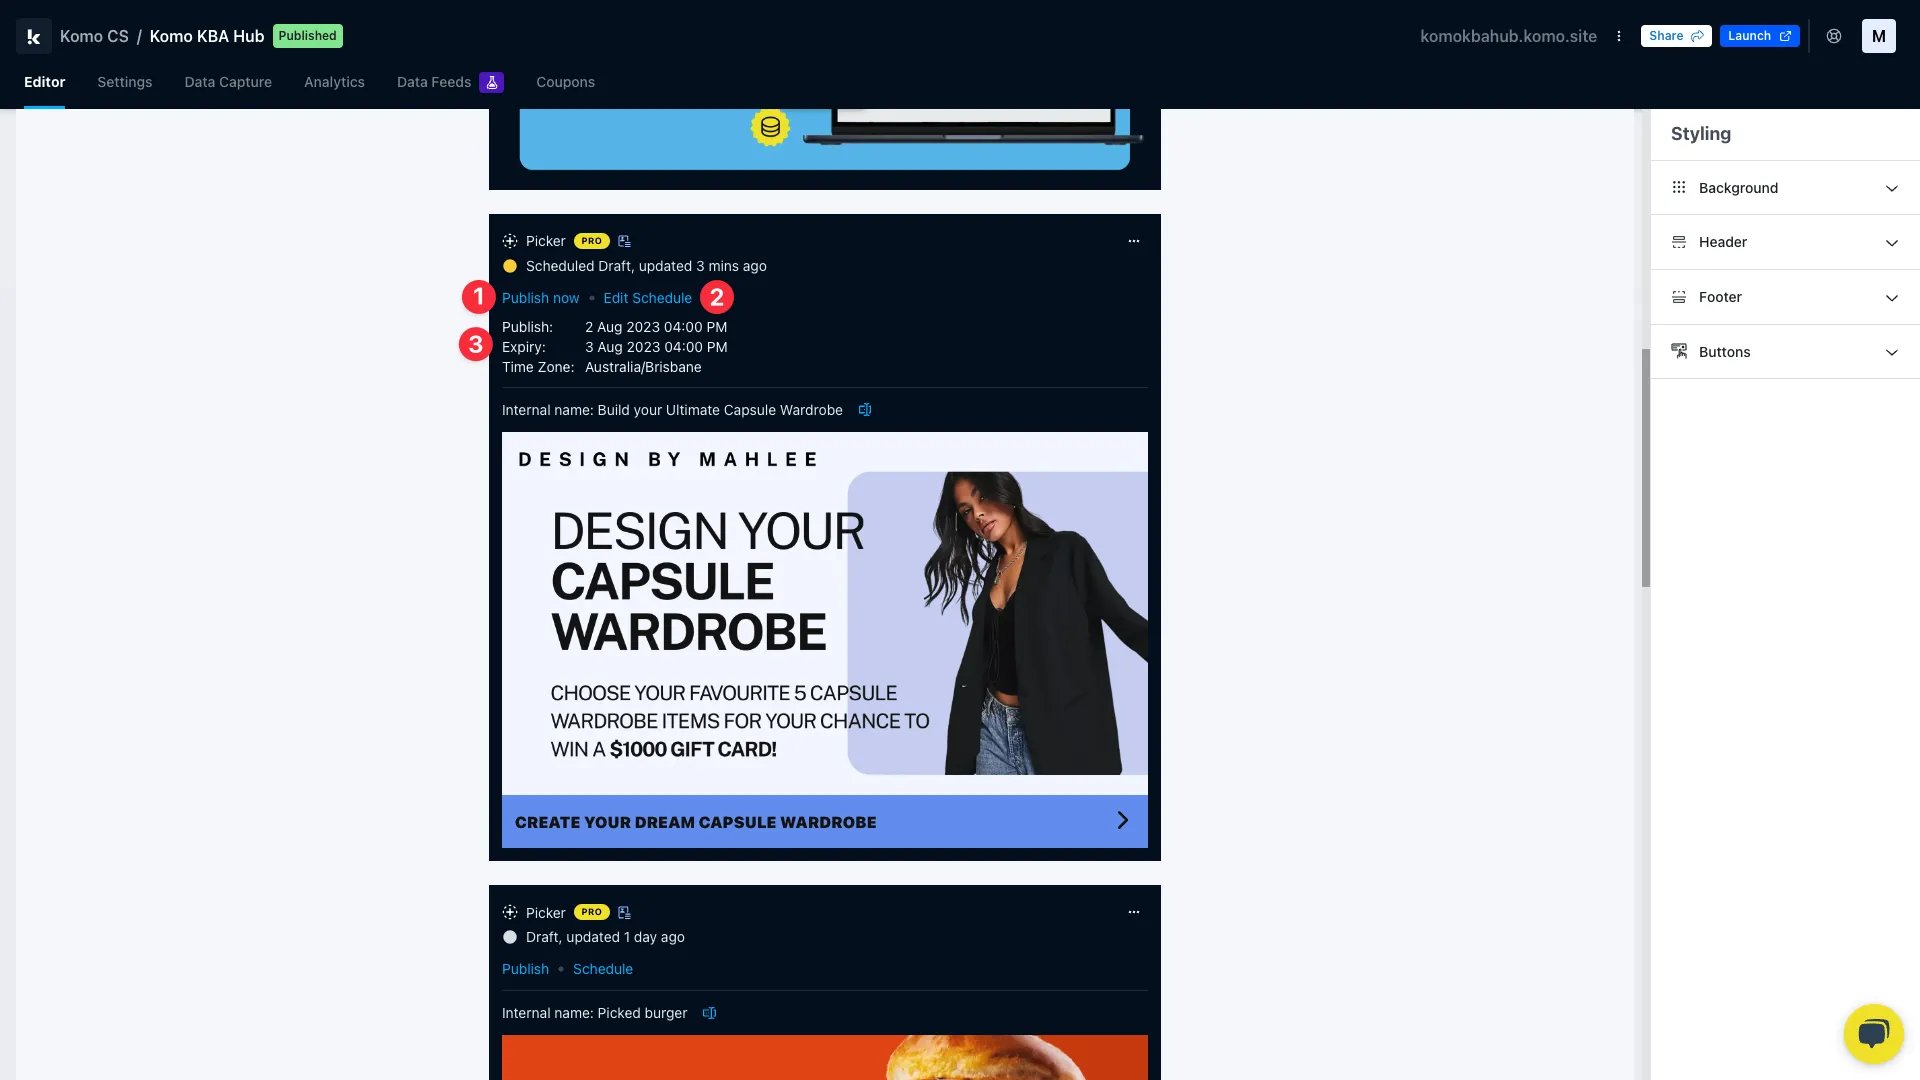
- (1) If you change your mind and want to immediately publish the card, you can click Publish now.
- (2) You can edit the dates and time of the schedule here.
- (3) Here is an overview of the scheduled times.