> ## Documentation Index
> Fetch the complete documentation index at: https://knowledge.komo.tech/llms.txt
> Use this file to discover all available pages before exploring further.
# Click Banner Card
> Direct users to an external site or another card on your Hub
## What is it?
The Click Banner works by uploading a smaller image (1920 x 480) to the card that can then link users to external sites or to other cards within your Engagement Hub.
### Watch it come to life
## How do I build one?
* **Step 1:** Add a Click Banner to your Hub.
* **Step 2:** Edit your card settings
* **Step 3:** Publish your card
### Step 1: Add a Click Banner card to your Hub
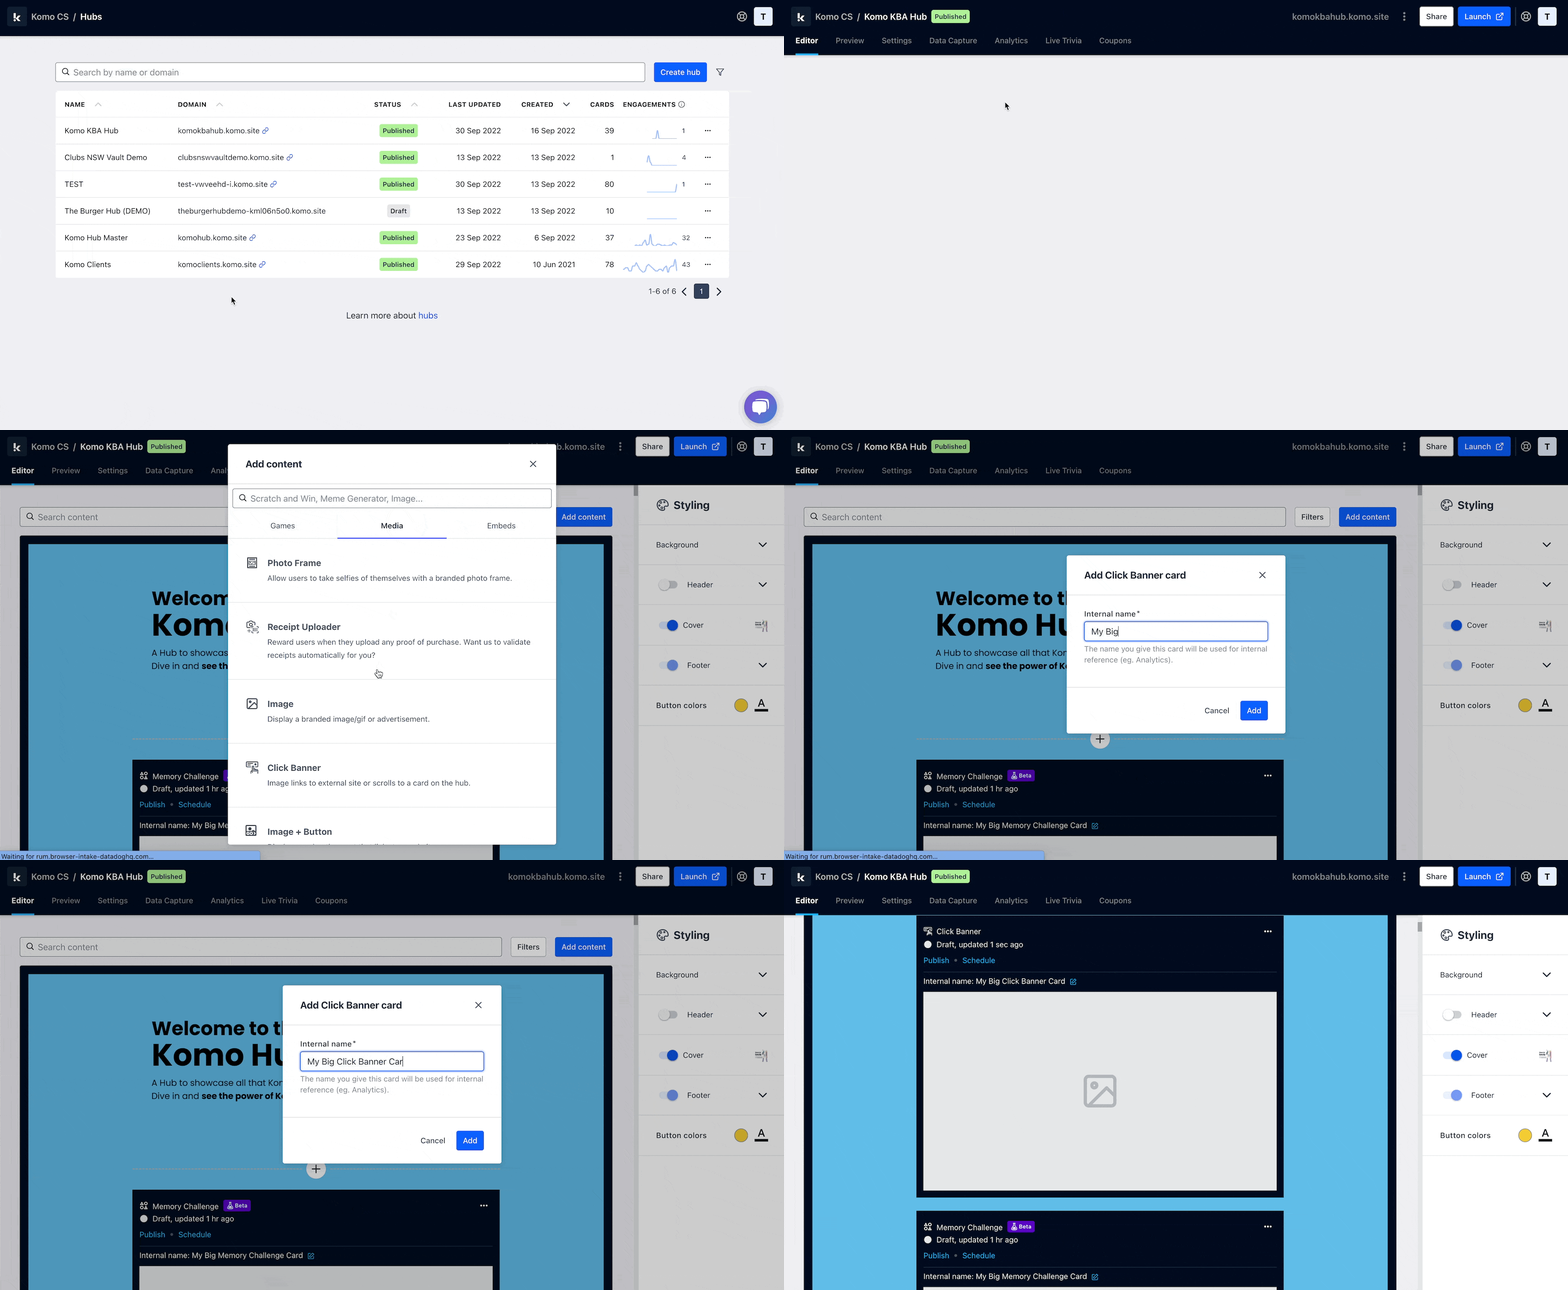 * Navigate to your **Engagement Hub**.
* Once there click **Add Content**, from here select **Media** and then **Click Banner**.
* You will then see your new card has been added to your Hub.
### Step 2: Edit your card settings
* Navigate to your **Engagement Hub**.
* Once there click **Add Content**, from here select **Media** and then **Click Banner**.
* You will then see your new card has been added to your Hub.
### Step 2: Edit your card settings
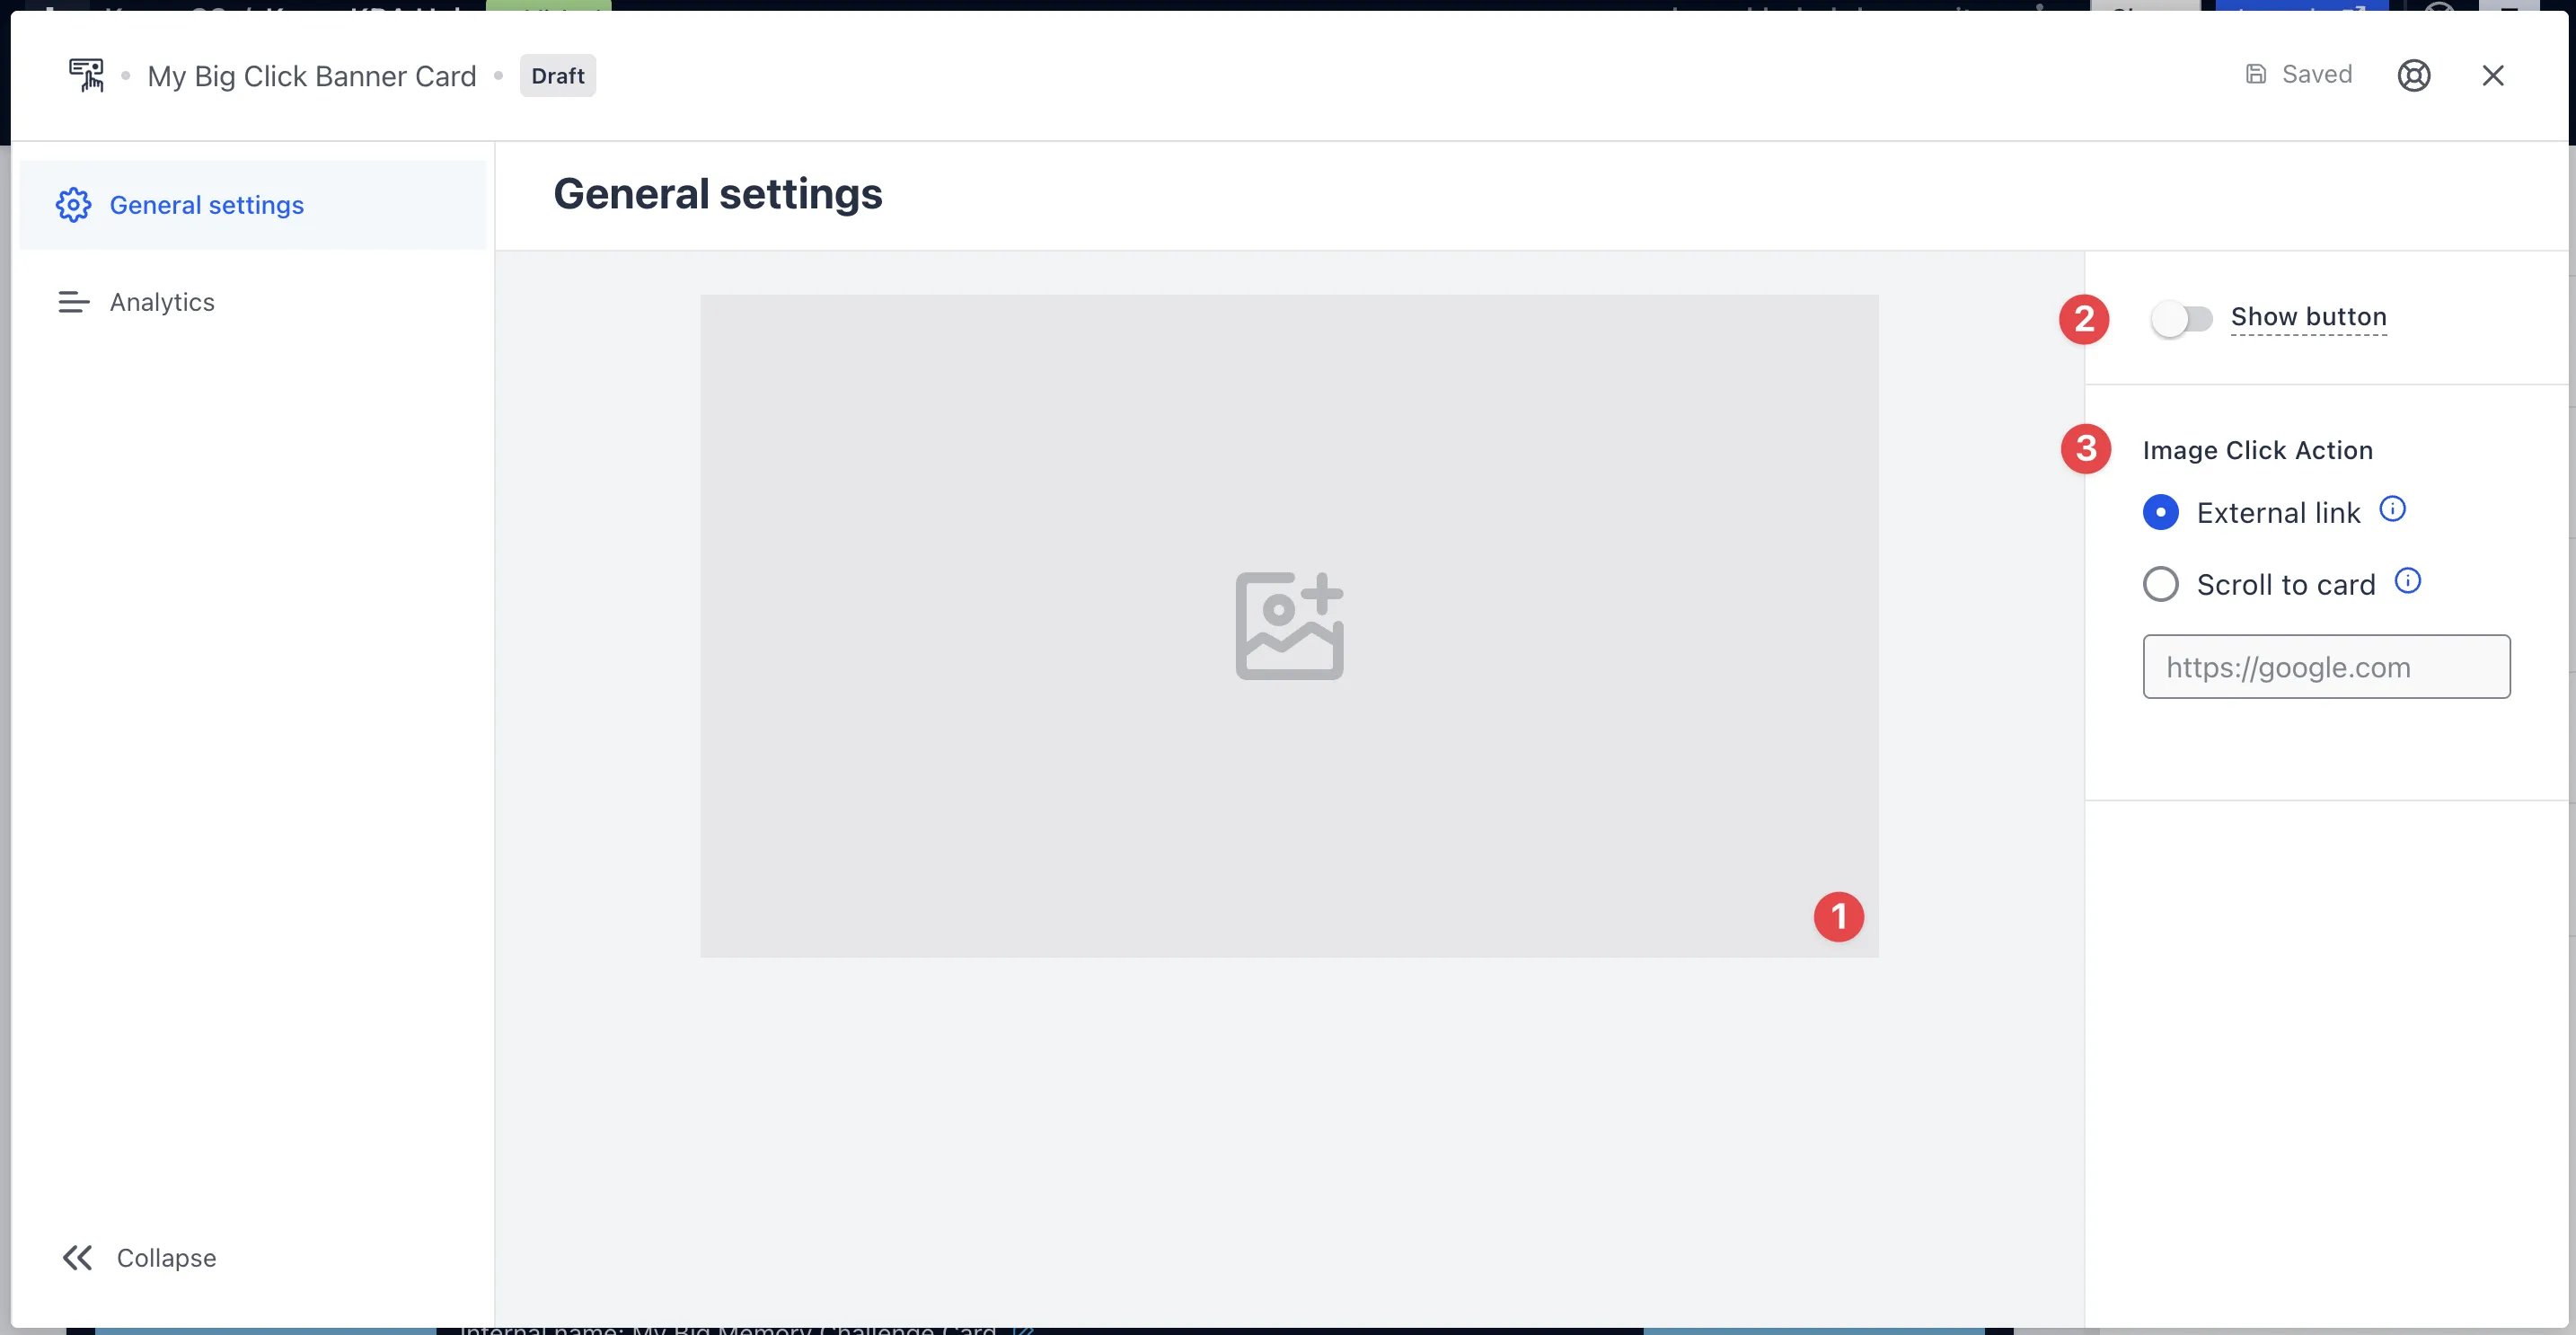 * Clicking on the **Click Banner** will open the editing module.
* **(1)** Here is where you'll upload your **image**.
* **(2)** You have the option to enable a **call-to-action** bar.
This will only be visible if an external link has been attached.
* Here you can have the image link to an **external site** or **scroll** to another card.
You can upload a transparent image to use as a spacer or divider to sort the content on your Hub.
### Step 3: Publish your card
* Clicking on the **Click Banner** will open the editing module.
* **(1)** Here is where you'll upload your **image**.
* **(2)** You have the option to enable a **call-to-action** bar.
This will only be visible if an external link has been attached.
* Here you can have the image link to an **external site** or **scroll** to another card.
You can upload a transparent image to use as a spacer or divider to sort the content on your Hub.
### Step 3: Publish your card
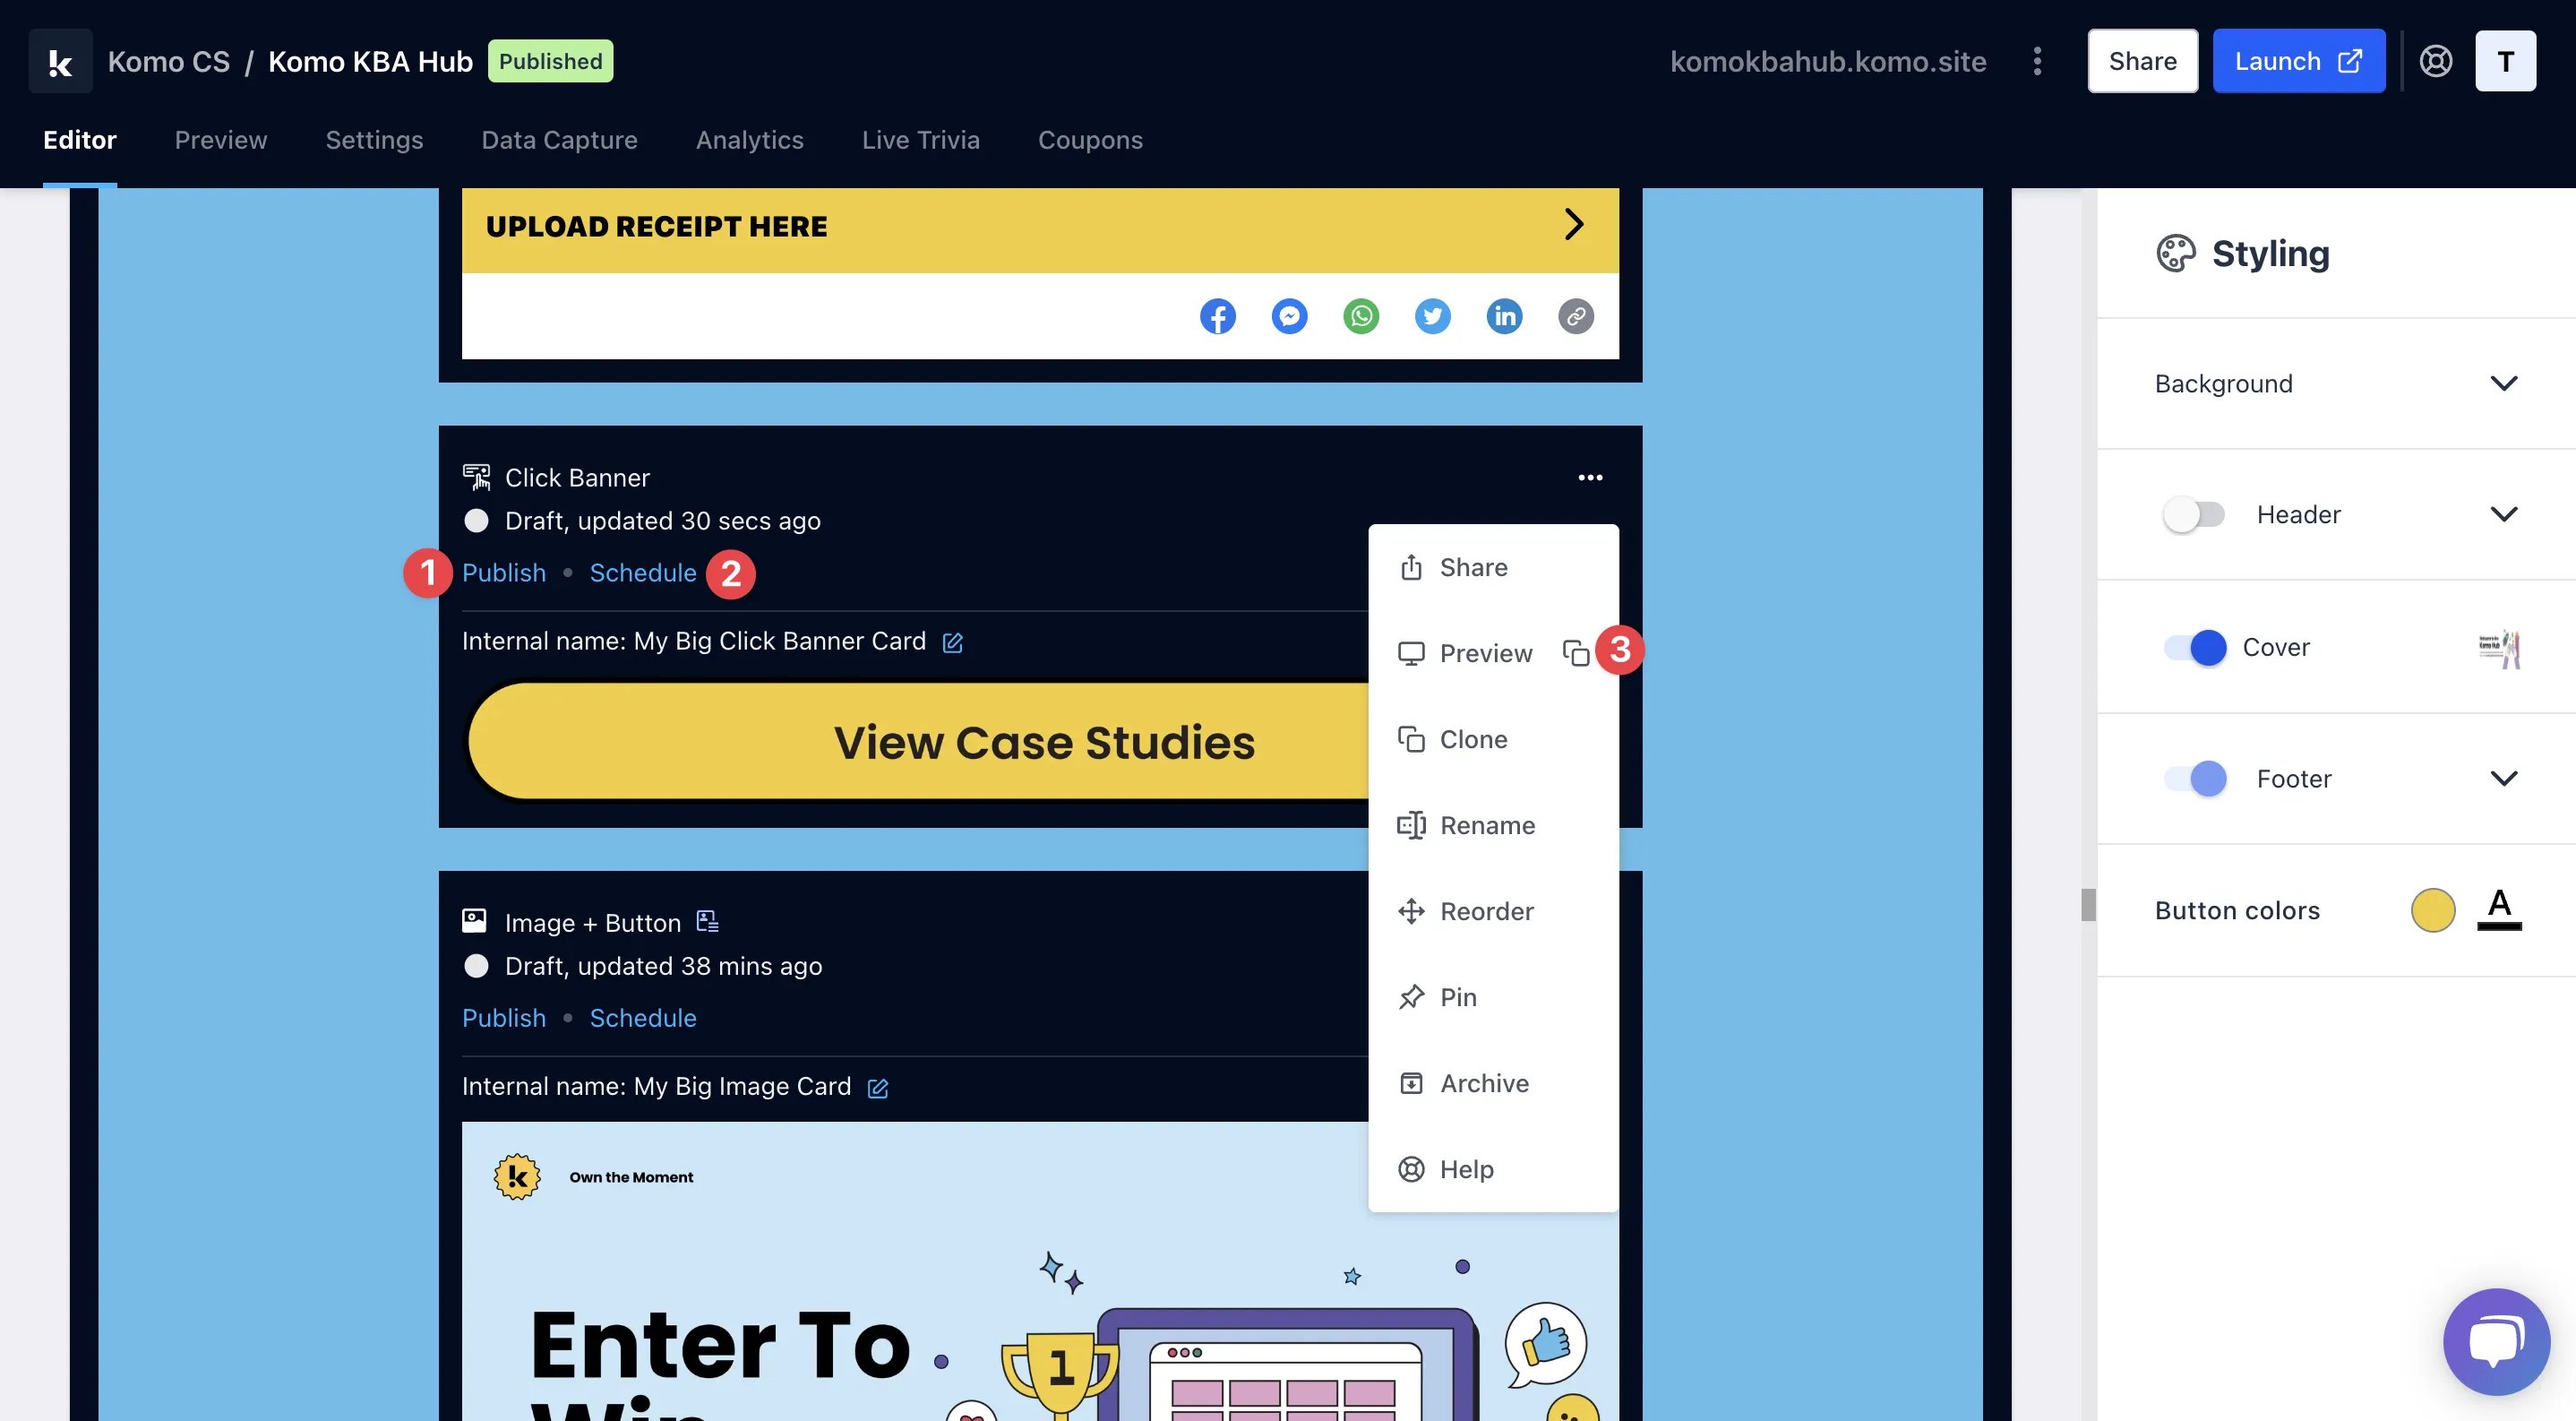 **Once you've completed all of these steps, played around with your card and are happy with all the aspects of your card, it's time to get your card live!**
* **(1) Publish** your card manually and instantly for the world to see.
* **(2) Schedule** your card to be published and unpublished at set dates and times.
* **(3)** Click on **...** to **Preview** and interact with the card on the front end from a user's perspective before publishing it. See how to test your card [here](/getting-started/hub-setup/card-testing).
All competition entries will be recorded and will impact the card analytics.
## FAQ
**Can I add an author tag and description to my Click Banner?**
Yes, you can do this by clicking on the **Options** button at the bottom of the card. However, we recommend not turning these options on and instead incorporating all the relevant information in the Click Banner design.
**Can I use them to link to an external site?**
Yes, click [here](#step-2-edit-your-card-settings) to find out how.
**What file formats can I upload?**
You can upload PNG, JPEG, GIFs for the Click Banner.
**Once you've completed all of these steps, played around with your card and are happy with all the aspects of your card, it's time to get your card live!**
* **(1) Publish** your card manually and instantly for the world to see.
* **(2) Schedule** your card to be published and unpublished at set dates and times.
* **(3)** Click on **...** to **Preview** and interact with the card on the front end from a user's perspective before publishing it. See how to test your card [here](/getting-started/hub-setup/card-testing).
All competition entries will be recorded and will impact the card analytics.
## FAQ
**Can I add an author tag and description to my Click Banner?**
Yes, you can do this by clicking on the **Options** button at the bottom of the card. However, we recommend not turning these options on and instead incorporating all the relevant information in the Click Banner design.
**Can I use them to link to an external site?**
Yes, click [here](#step-2-edit-your-card-settings) to find out how.
**What file formats can I upload?**
You can upload PNG, JPEG, GIFs for the Click Banner.