> ## Documentation Index
> Fetch the complete documentation index at: https://knowledge.komo.tech/llms.txt
> Use this file to discover all available pages before exploring further.
# Entry Condition Screen
> Create a barrier to entry for your Hub.
## What is it?
The Entry condition screen allows you to add an additional screen to your hub where users will be required to input data before viewing your Hub's content.
This feature is best for industries and Hub's that require users to be 18 years or older.
## How do I set it up?
* [Step 1: Navigate to your Hub Settings](#)
* [Step 2: Configure your Entry Condition Screen settings](#)
* [Step 3: Test the feature](#)
### Step 1: Navigate to your Hub Settings
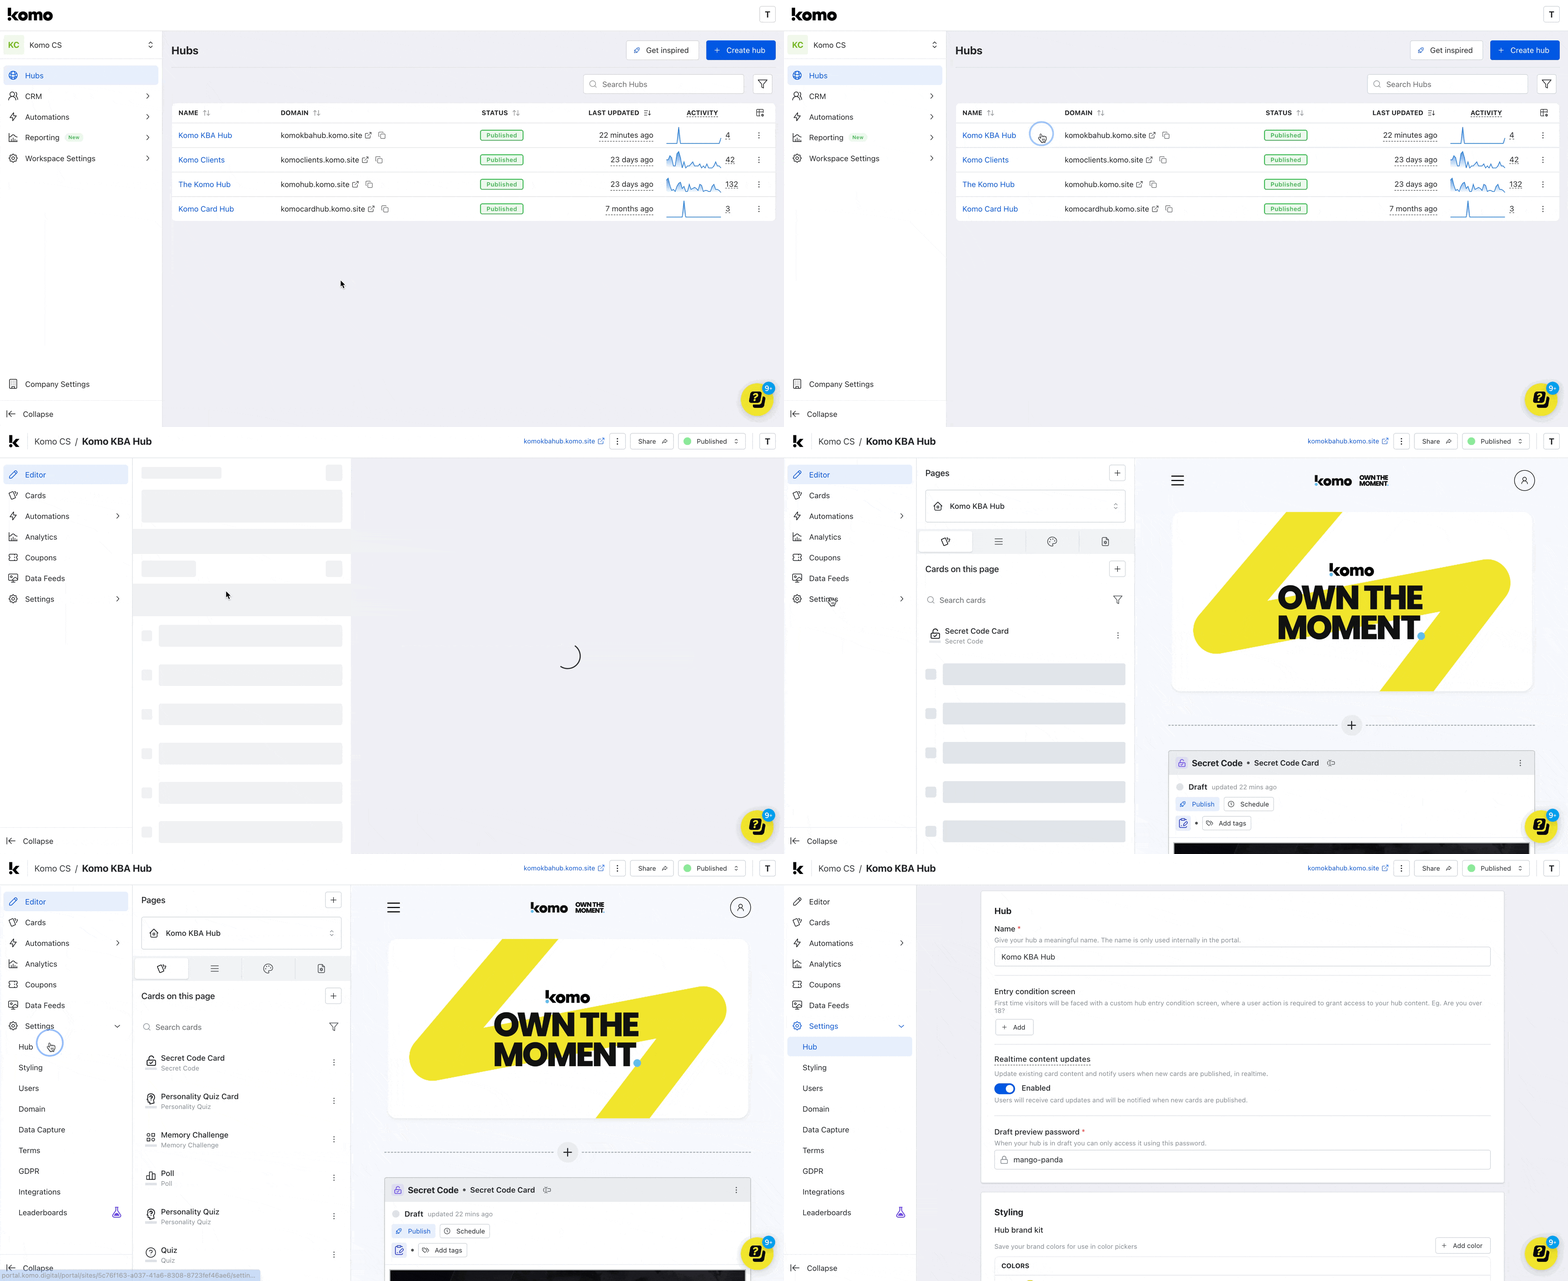 * Go to your **Engagement Hub,** click on **Settings** and then **Hub.**
### Step 2: Configure your Entry Condition Screen settings
* Go to your **Engagement Hub,** click on **Settings** and then **Hub.**
### Step 2: Configure your Entry Condition Screen settings
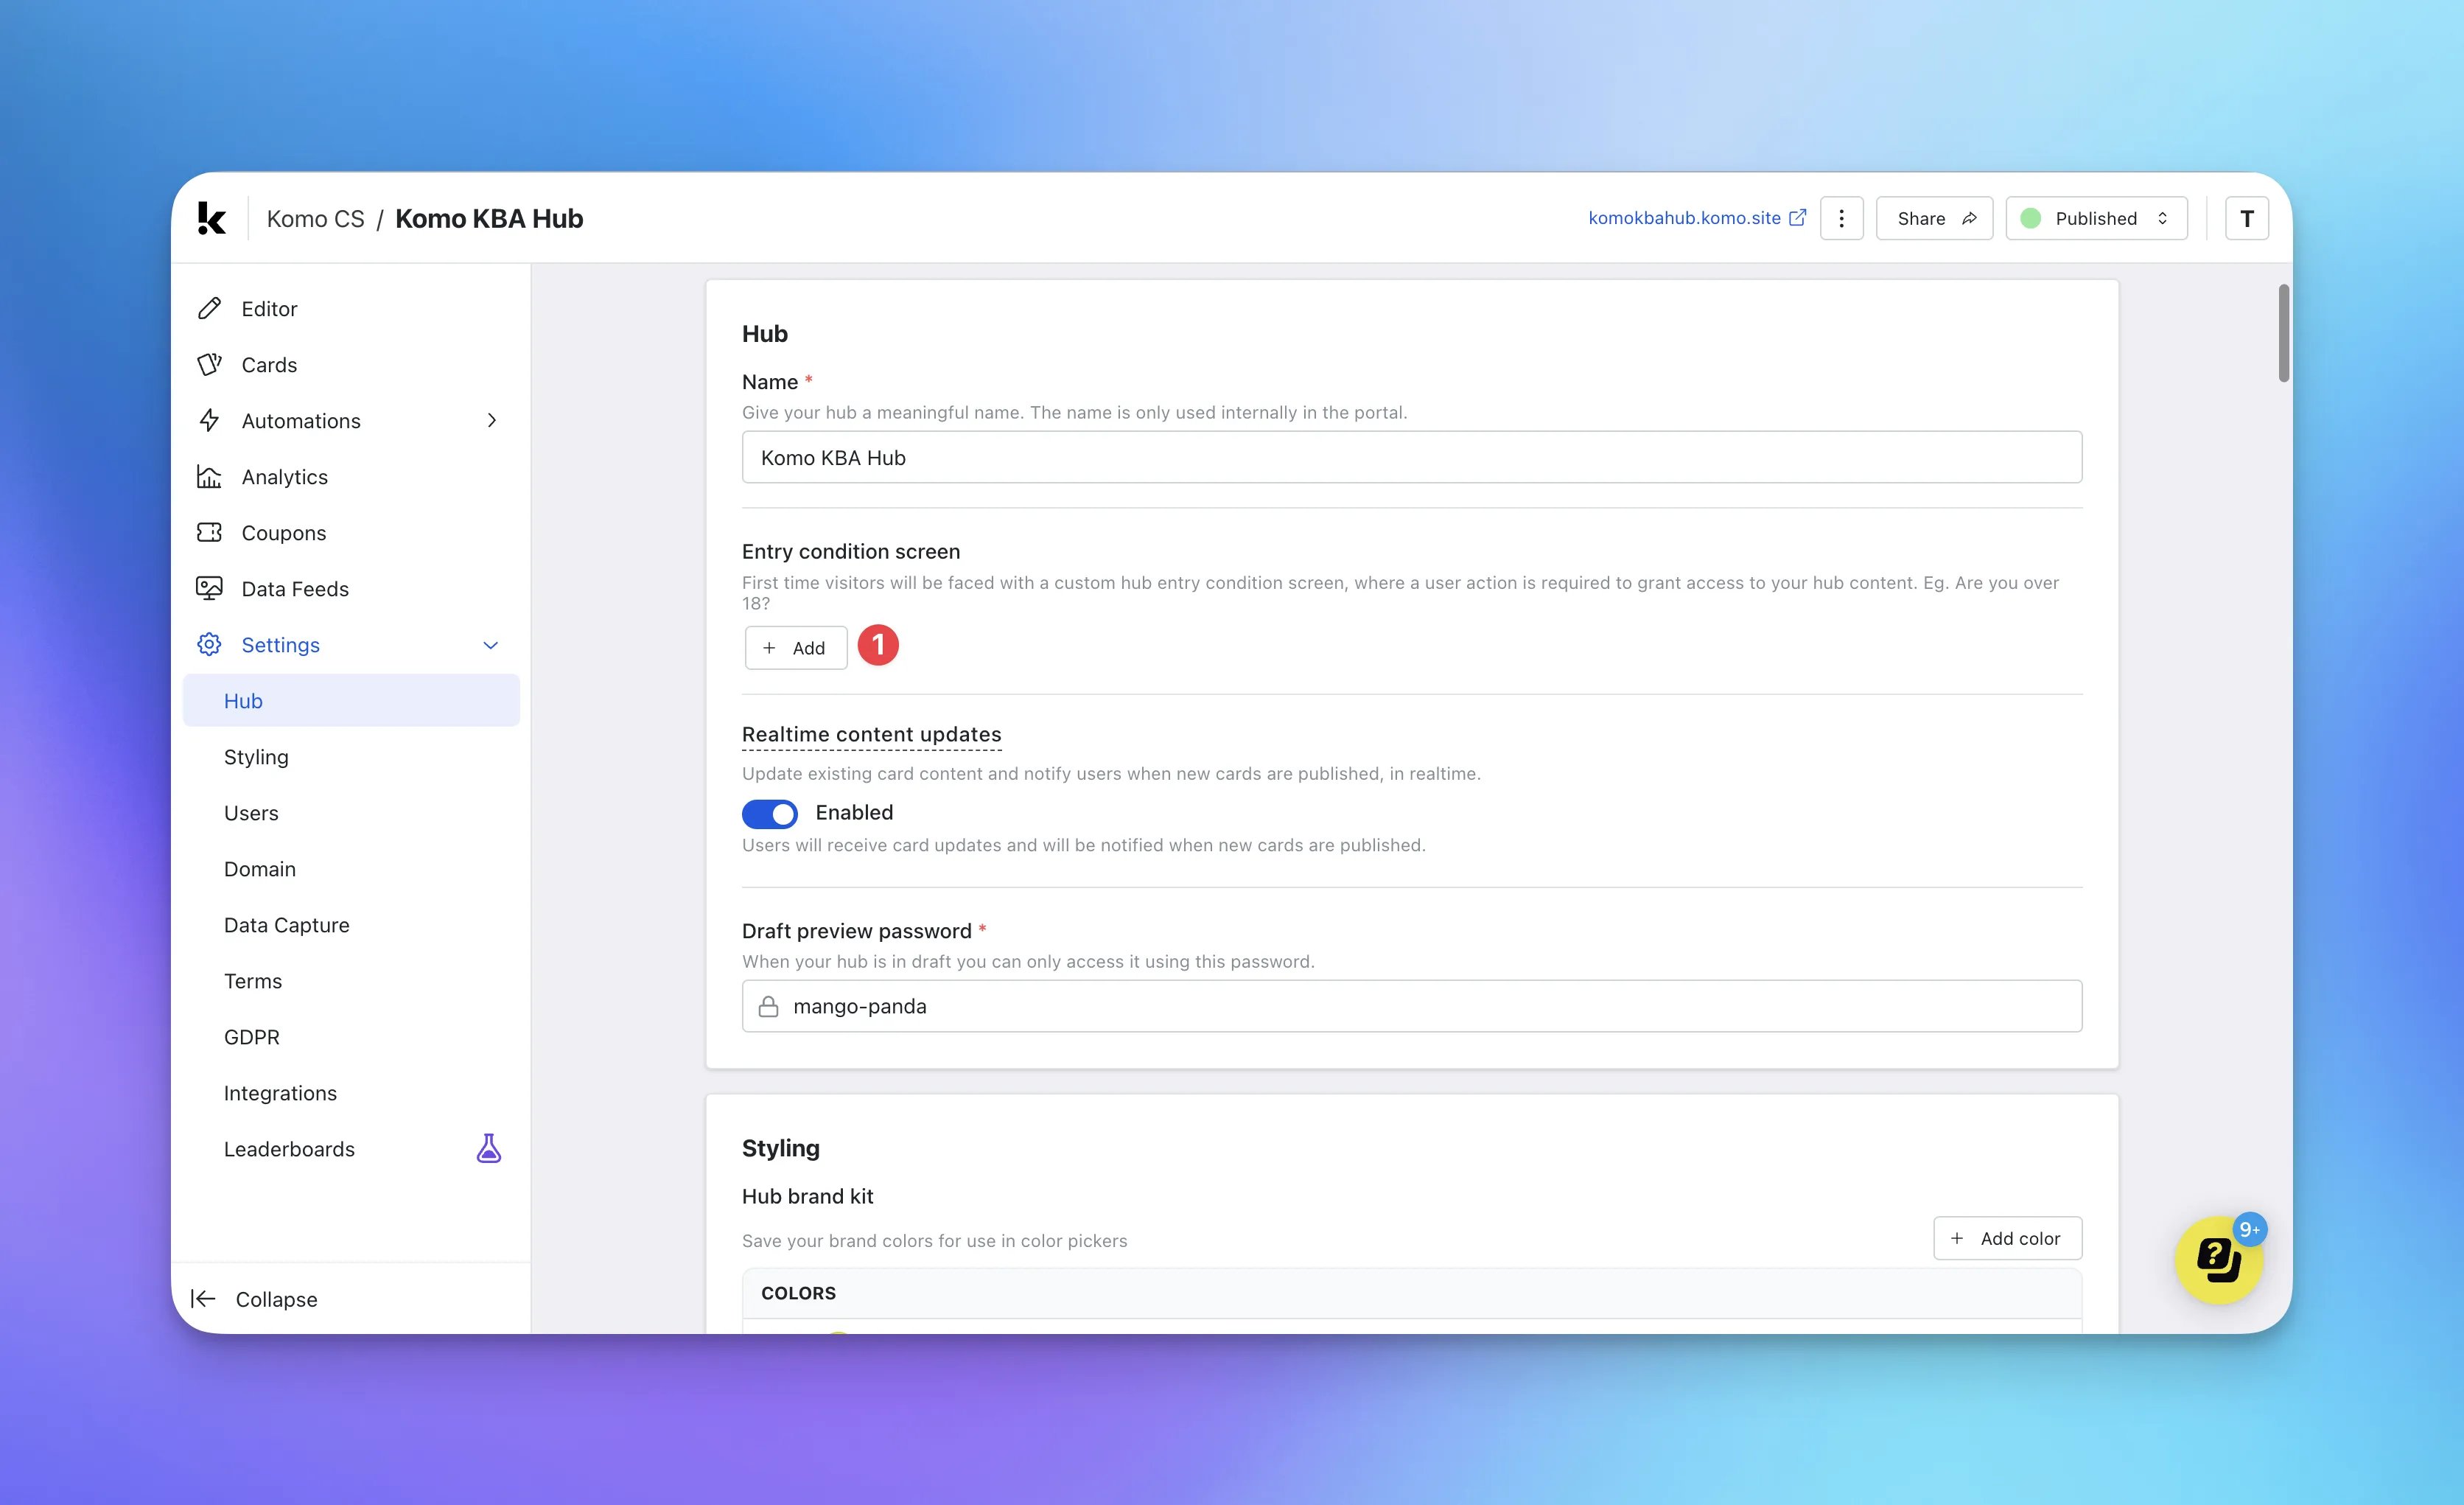 * **(1)** Click on **Add** below the Entry condition screen section to enable this feature.
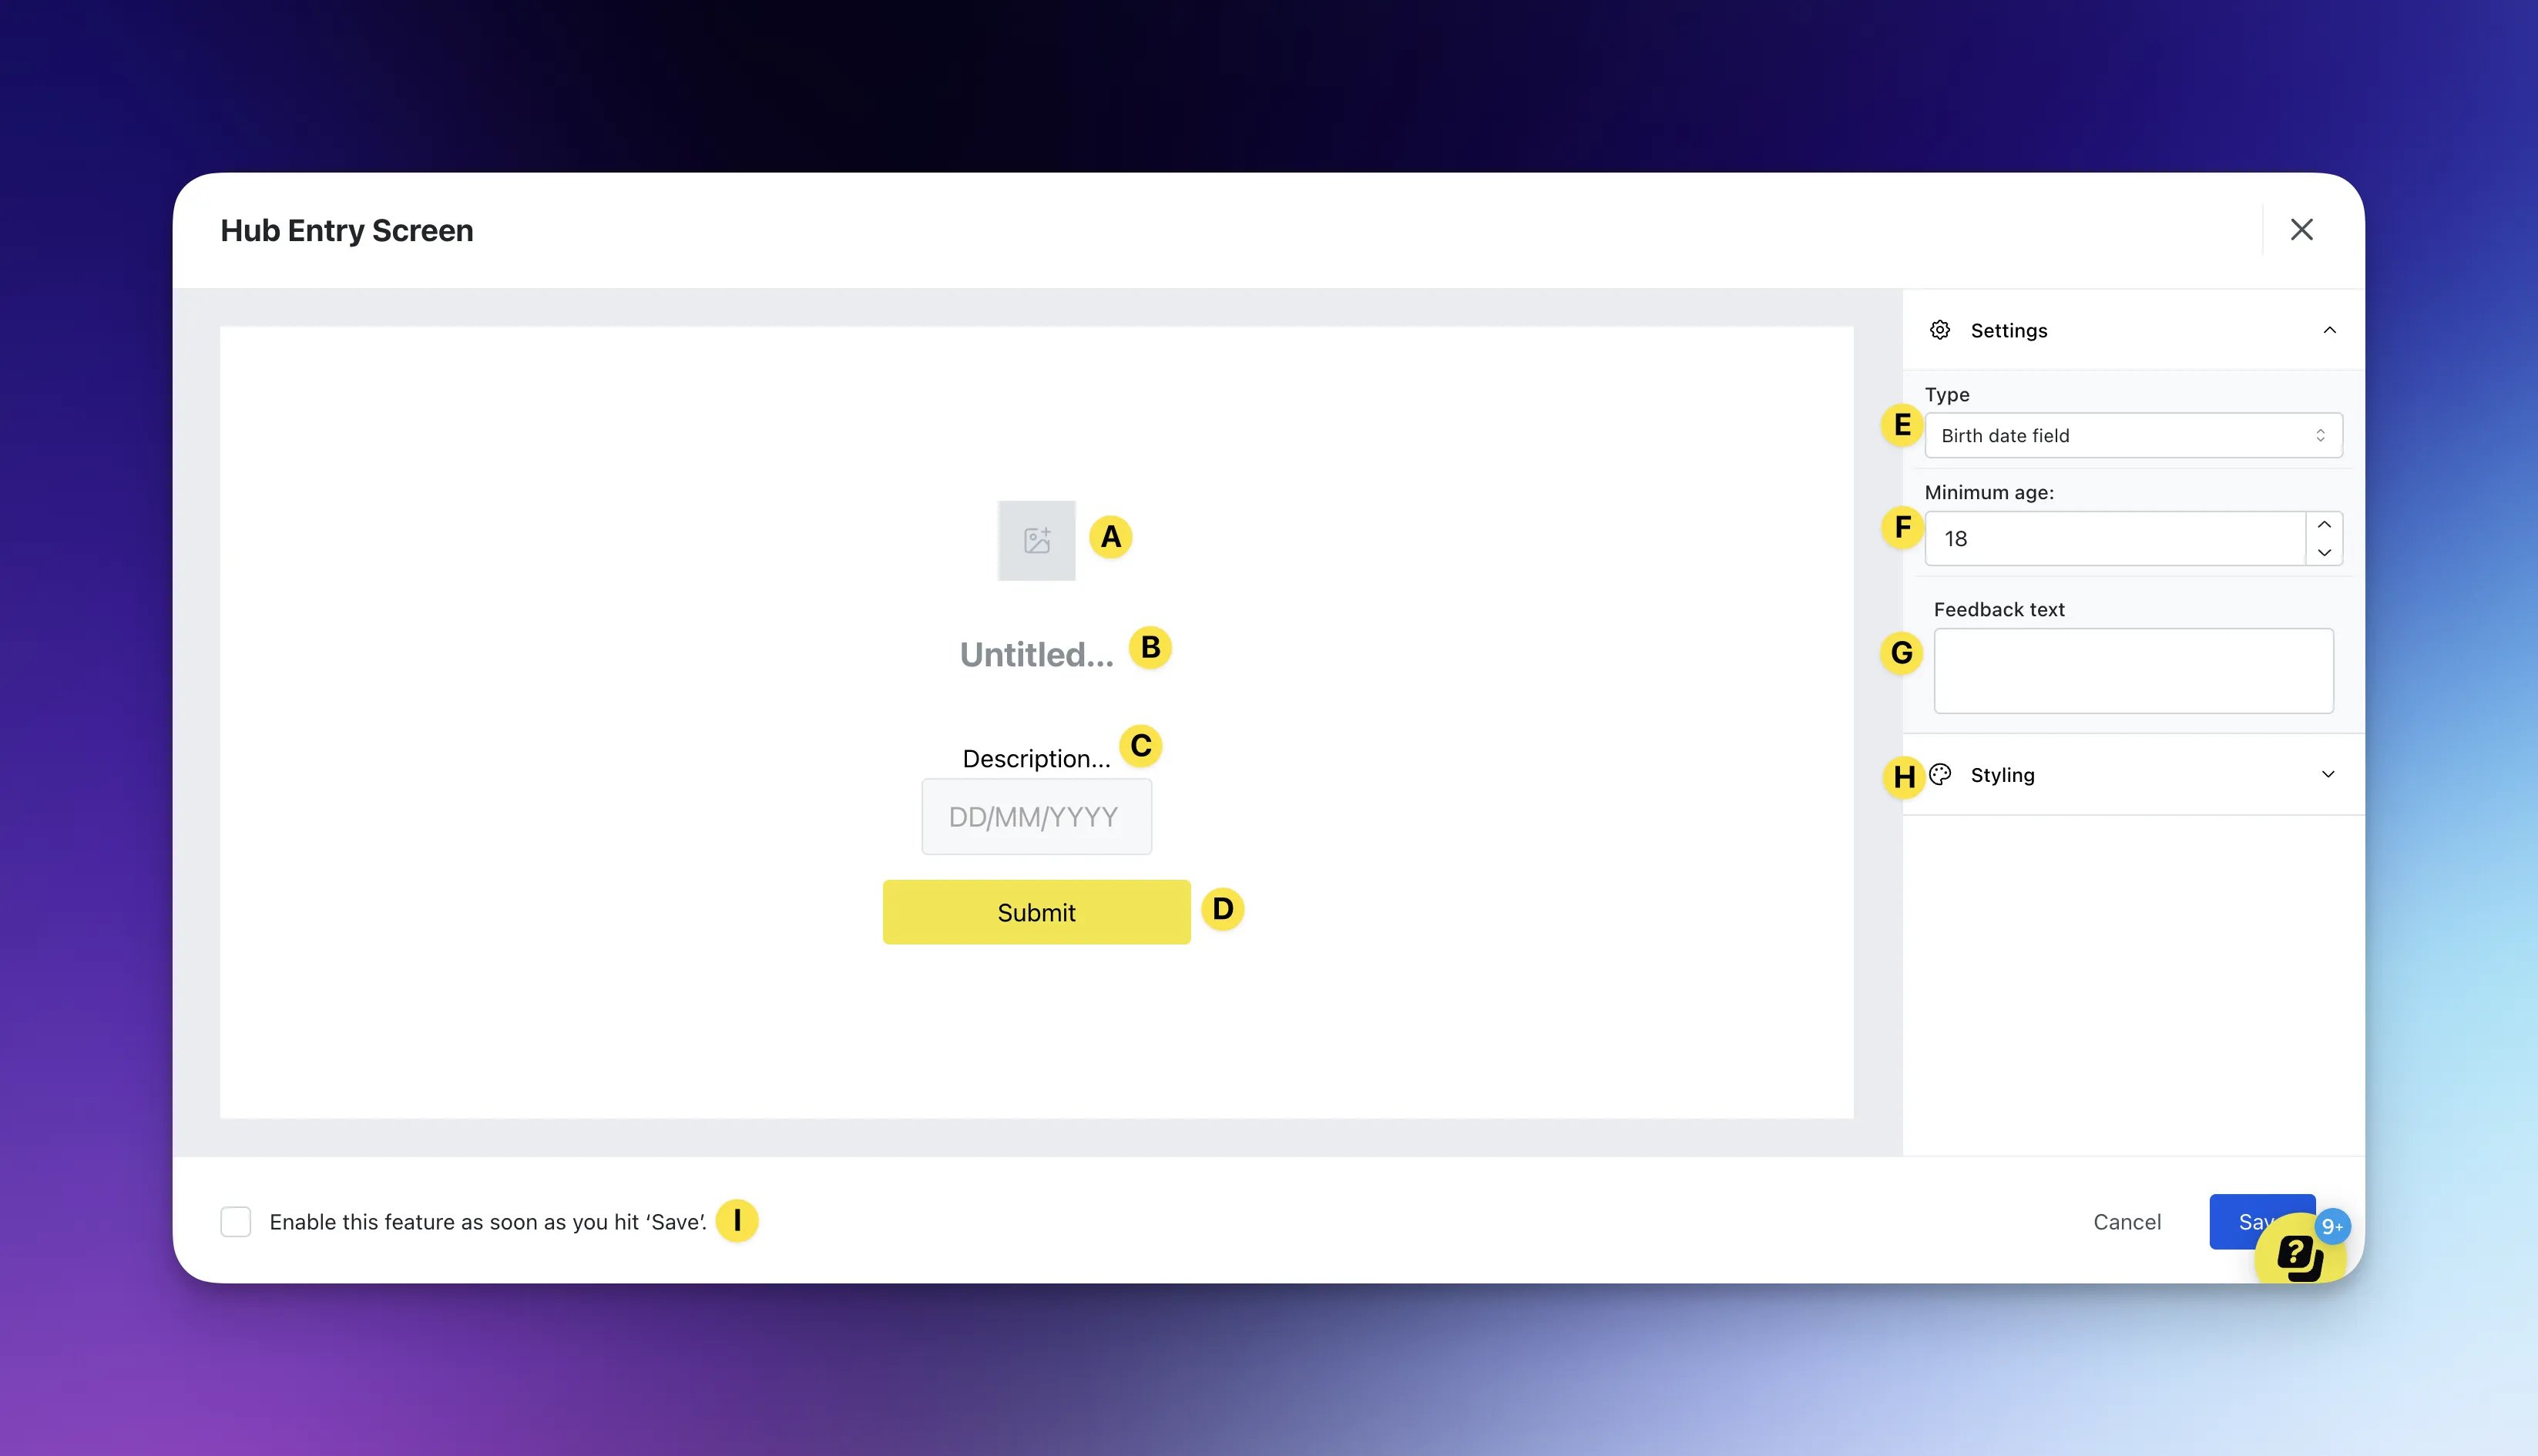 * **(A)** Upload your **logo** here.\
**Note:** We recommend uploading this with a transparent background.
* **(B)** Include a **title** on your screen. E.g. Are you 18+?
* **(C)** Add a **description** on the screen. E.g. Please enter your birth date below to enter.
* **(D)** Alter the **call-to-action** bar.
* **(E)** Select the **screen** you want to appear.
* **(F)** Add the **minimum age** required to enter the hub.
* **(G)** Here you can include some **feedback text** when a user is below the minimum age. E.g. You must be 18 years or older to view this content.
* **(H)** Here you can edit more **styling settings.**
* **(A)** Upload your **logo** here.\
**Note:** We recommend uploading this with a transparent background.
* **(B)** Include a **title** on your screen. E.g. Are you 18+?
* **(C)** Add a **description** on the screen. E.g. Please enter your birth date below to enter.
* **(D)** Alter the **call-to-action** bar.
* **(E)** Select the **screen** you want to appear.
* **(F)** Add the **minimum age** required to enter the hub.
* **(G)** Here you can include some **feedback text** when a user is below the minimum age. E.g. You must be 18 years or older to view this content.
* **(H)** Here you can edit more **styling settings.**
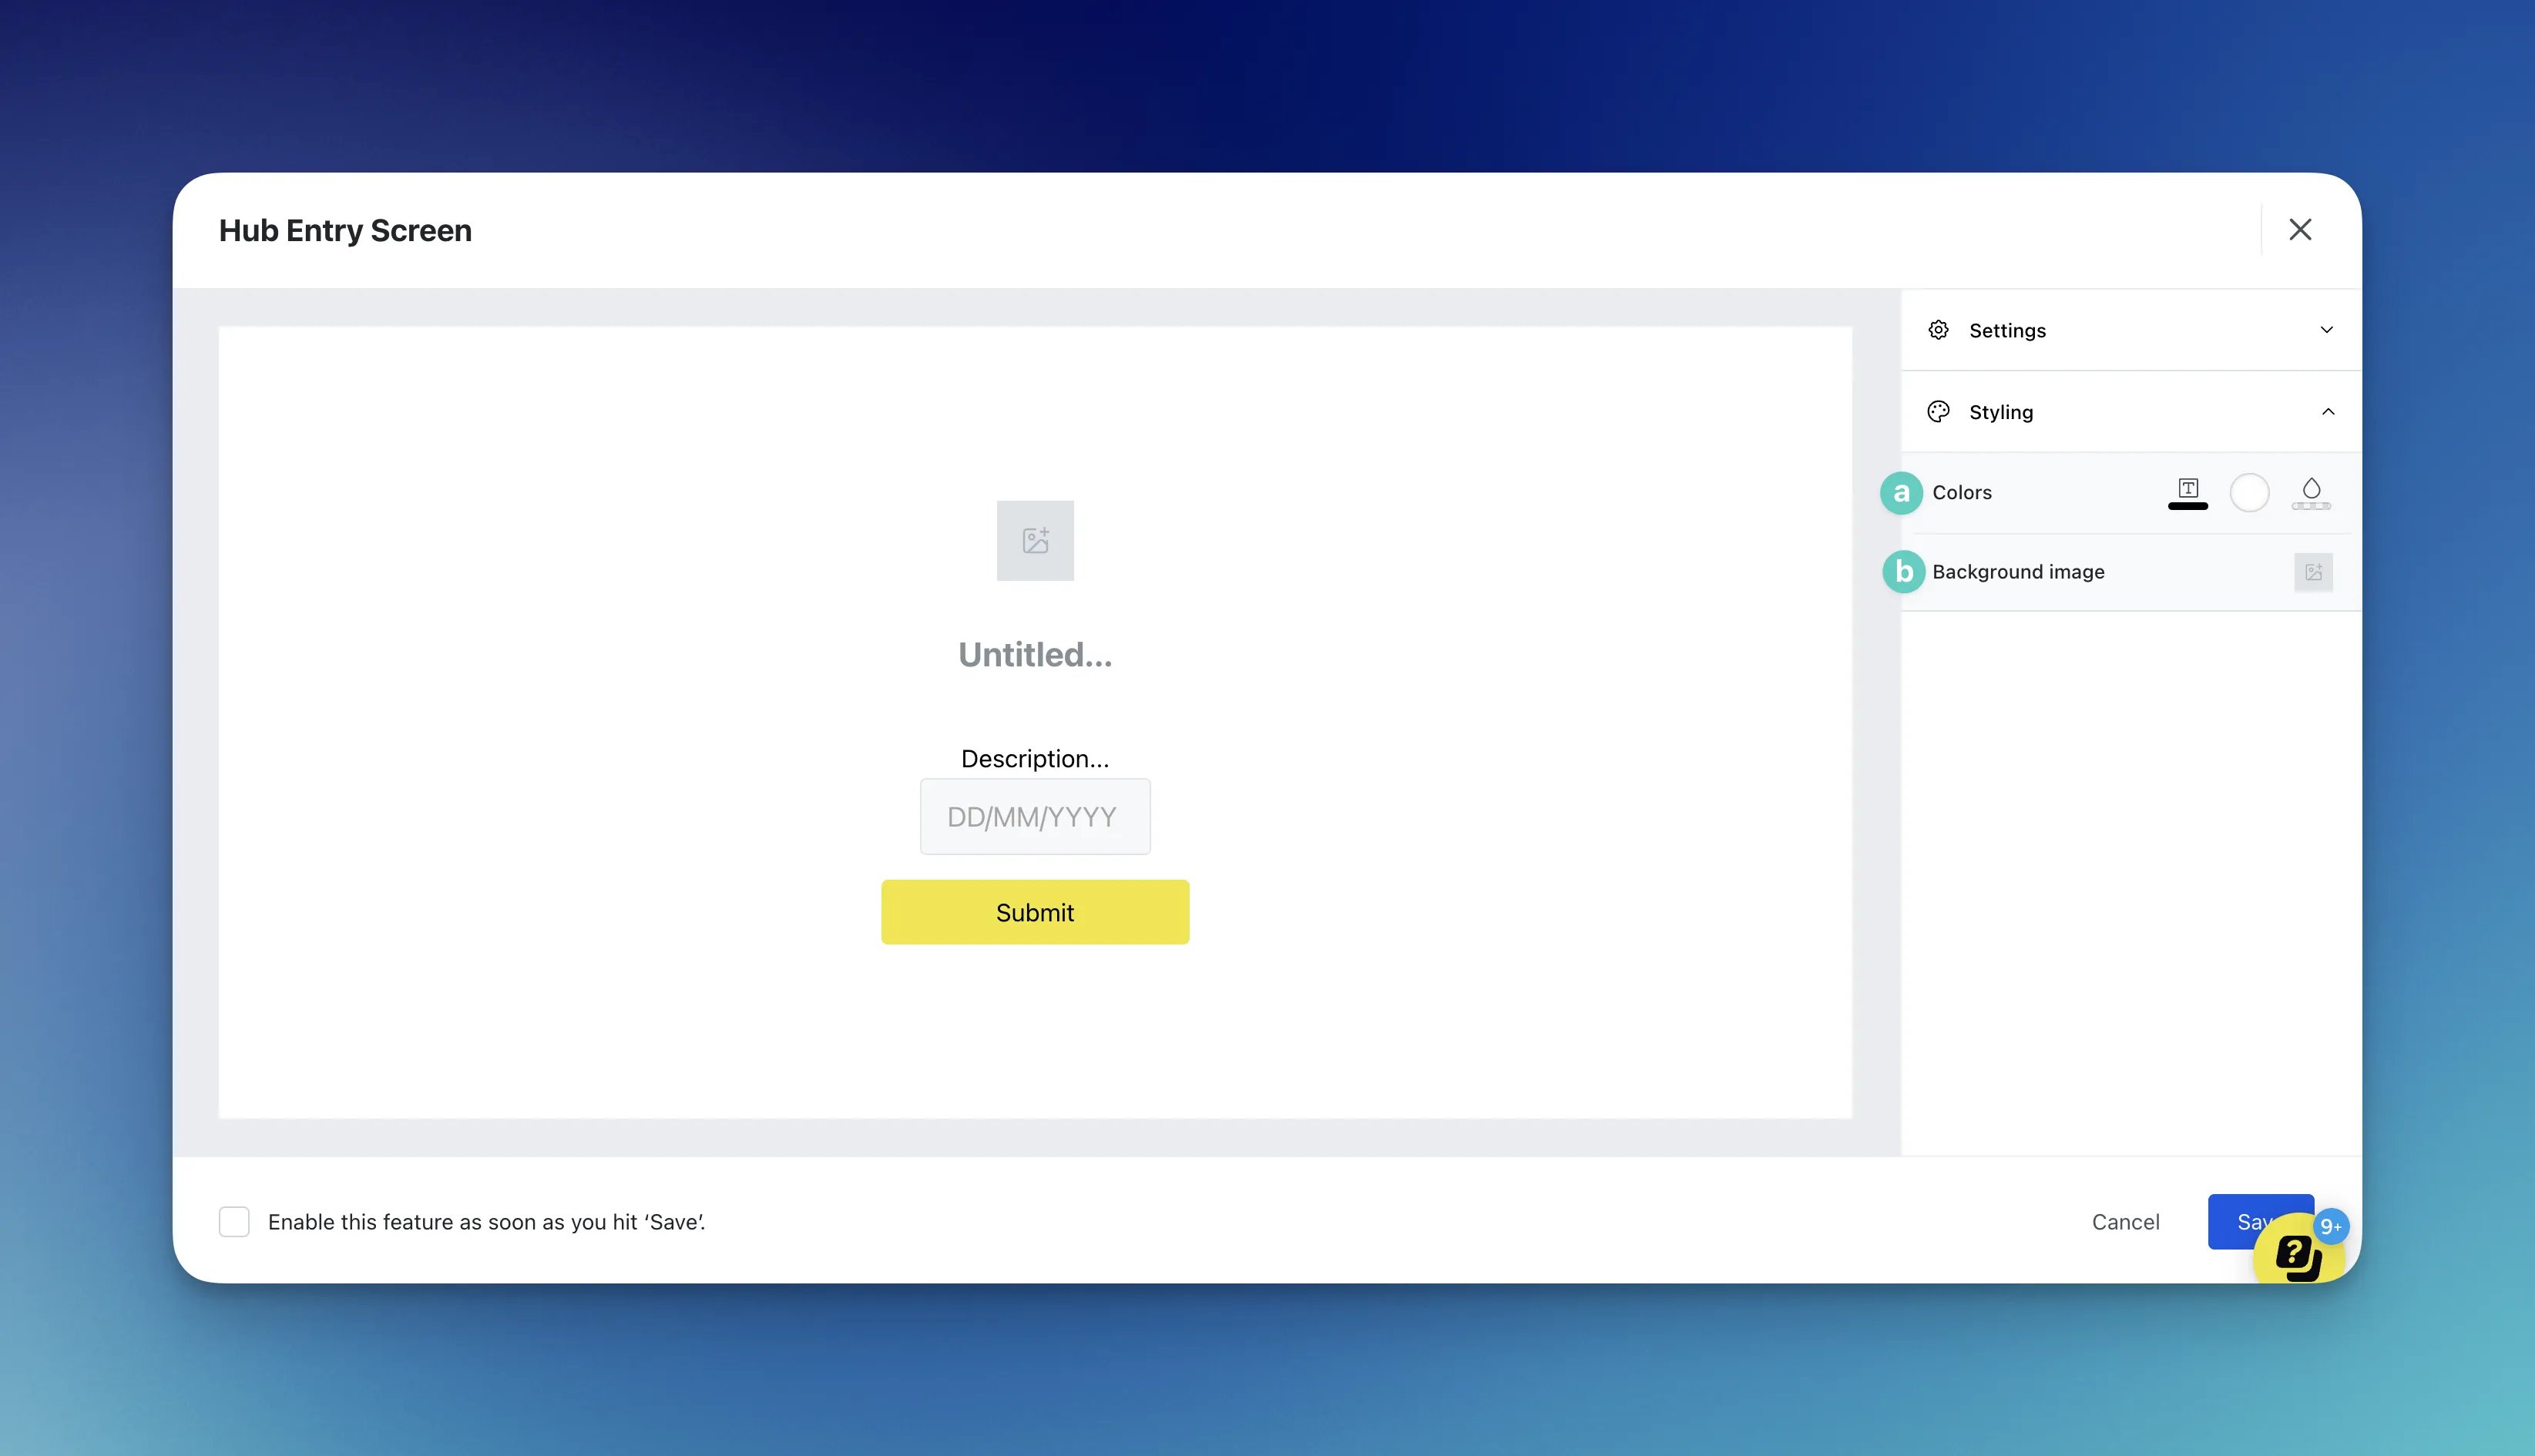 * **(a)** Change the **text color**, **background color** and **background overlay color.**
* **(b)** You can upload an **image** for the background here.
### Step 3: Test the feature
* **(a)** Change the **text color**, **background color** and **background overlay color.**
* **(b)** You can upload an **image** for the background here.
### Step 3: Test the feature
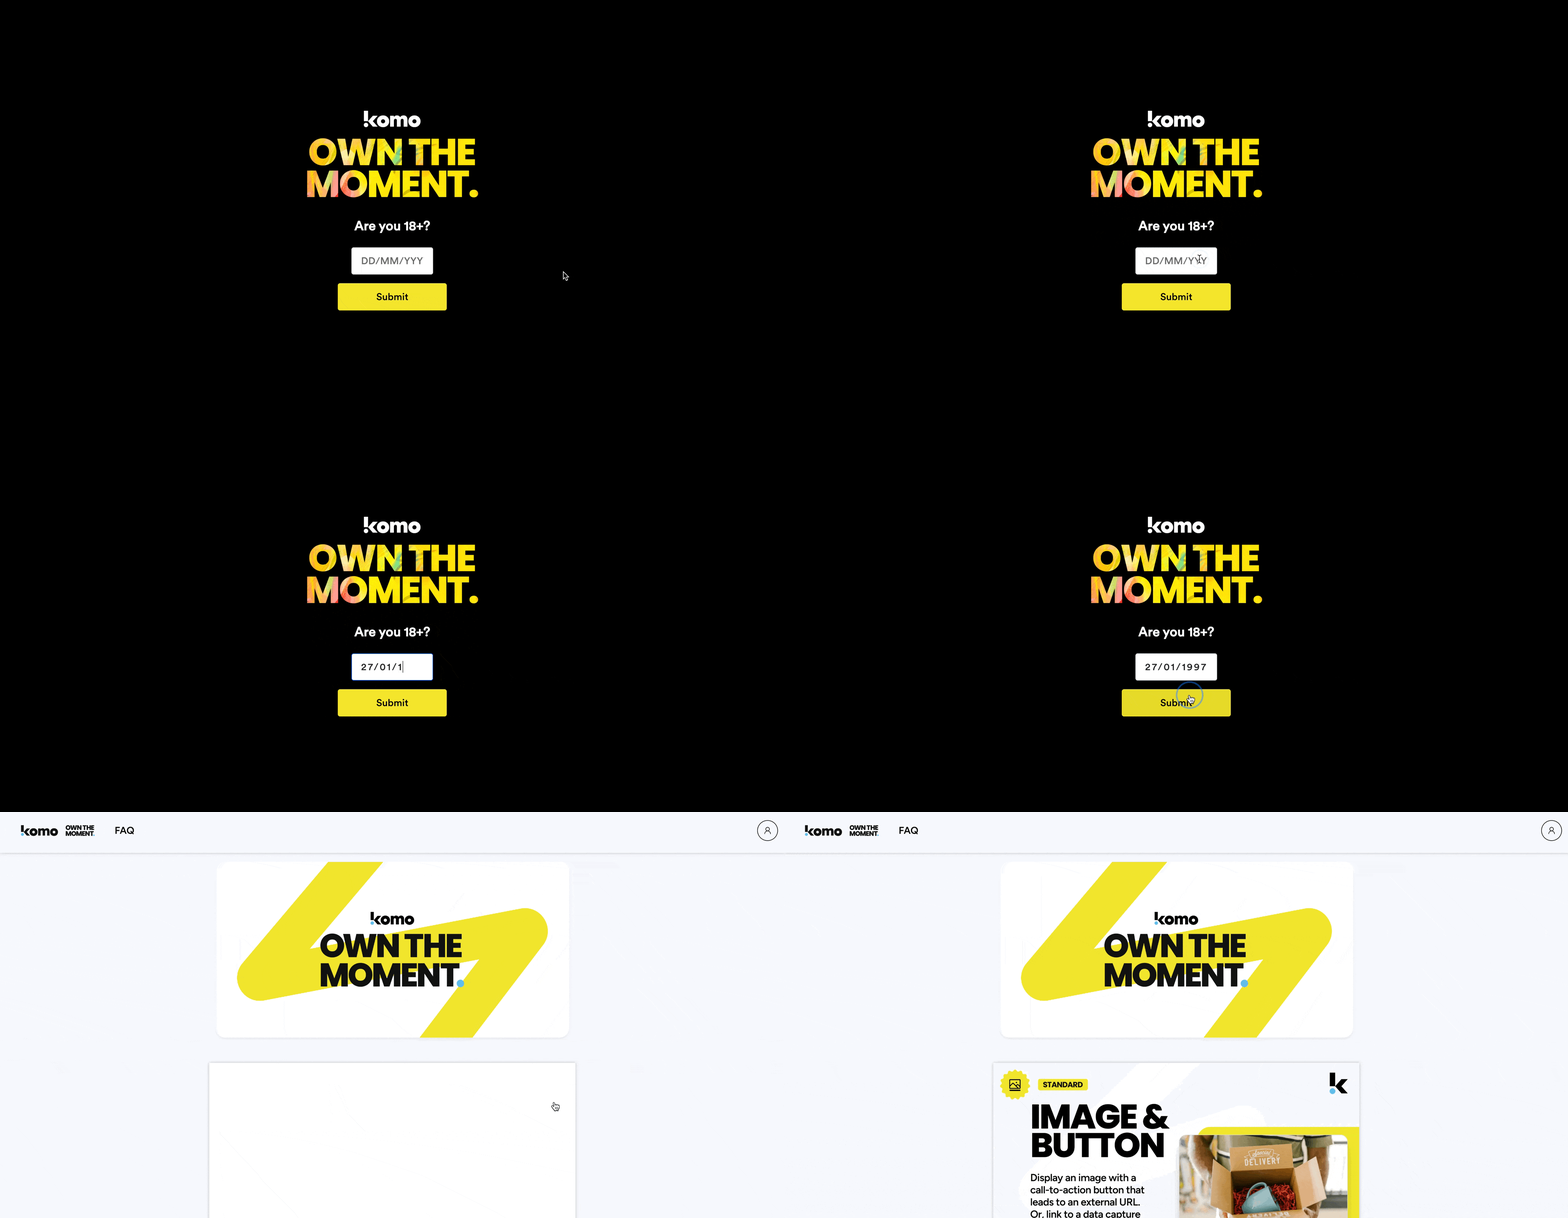 * Head to the live site and test the screen as if you were an end user to ensure you're happy with how it all works!