> ## Documentation Index
> Fetch the complete documentation index at: https://knowledge.komo.tech/llms.txt
> Use this file to discover all available pages before exploring further.
# Image Card
> Display a branded image, gif, or advertisement.
## What is it?
An Image card allows you to share an image or GIF on your Hub. This image can be linked to an external site or another card in your Hub, or simply exist as an image. The Image card is a great option for sponsored posts or advertisement!
## Watch it come to life
## How do I build one?
* [Step 1: Add an Image card to your Hub](#step-1-add-an-image-card-to-your-hub)
* [Step 2: Add your Cover image](#step-2-add-your-cover-image)
* [Step 3: Add a Data capture (Optional)](#step-3-add-a-data-capture-optional)
* [Step 4: Publish your card](#step-4-publish-your-card)
### Step 1: Add an Image card to your Hub
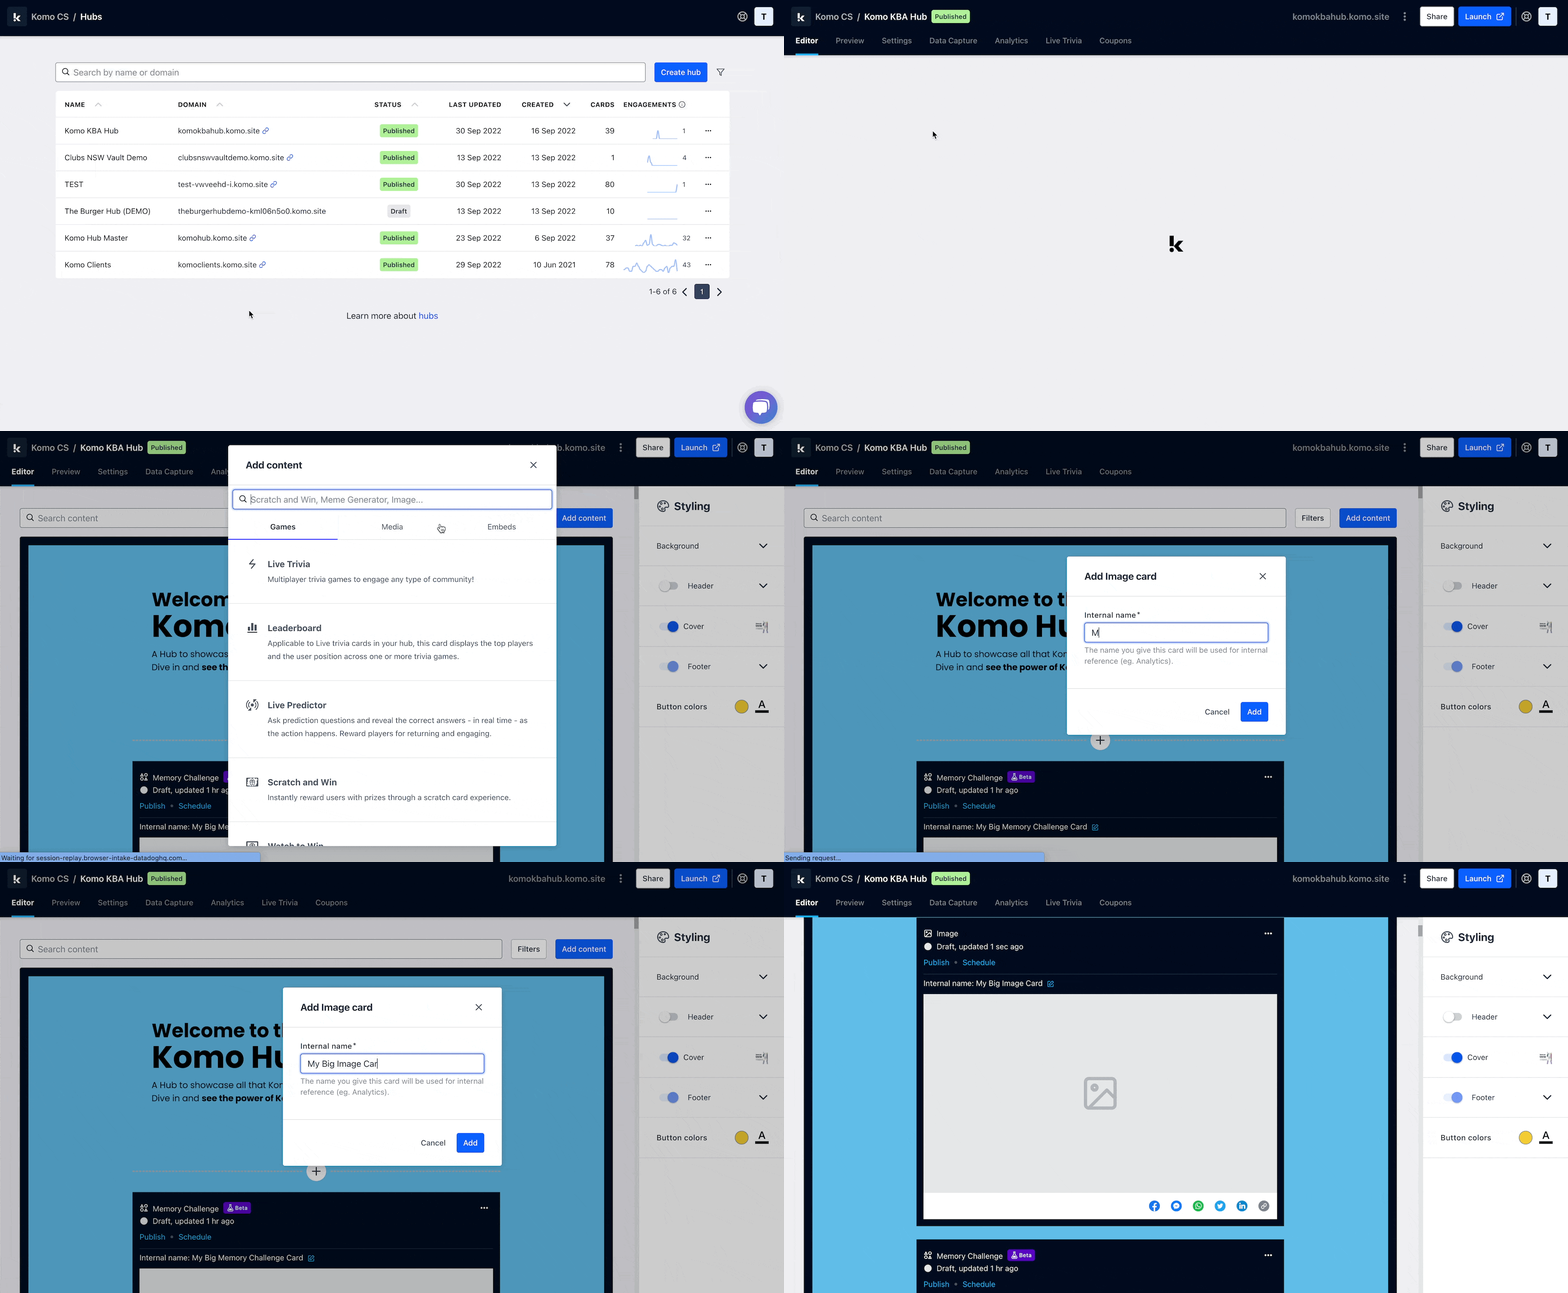 * Navigate to your **Engagement Hub**.
* Once there click **Add Content,** from here select **Media** and then **Image.**
* You will then see your new card has been added to your Hub.
### Step 2: Add your Cover image
* Navigate to your **Engagement Hub**.
* Once there click **Add Content,** from here select **Media** and then **Image.**
* You will then see your new card has been added to your Hub.
### Step 2: Add your Cover image
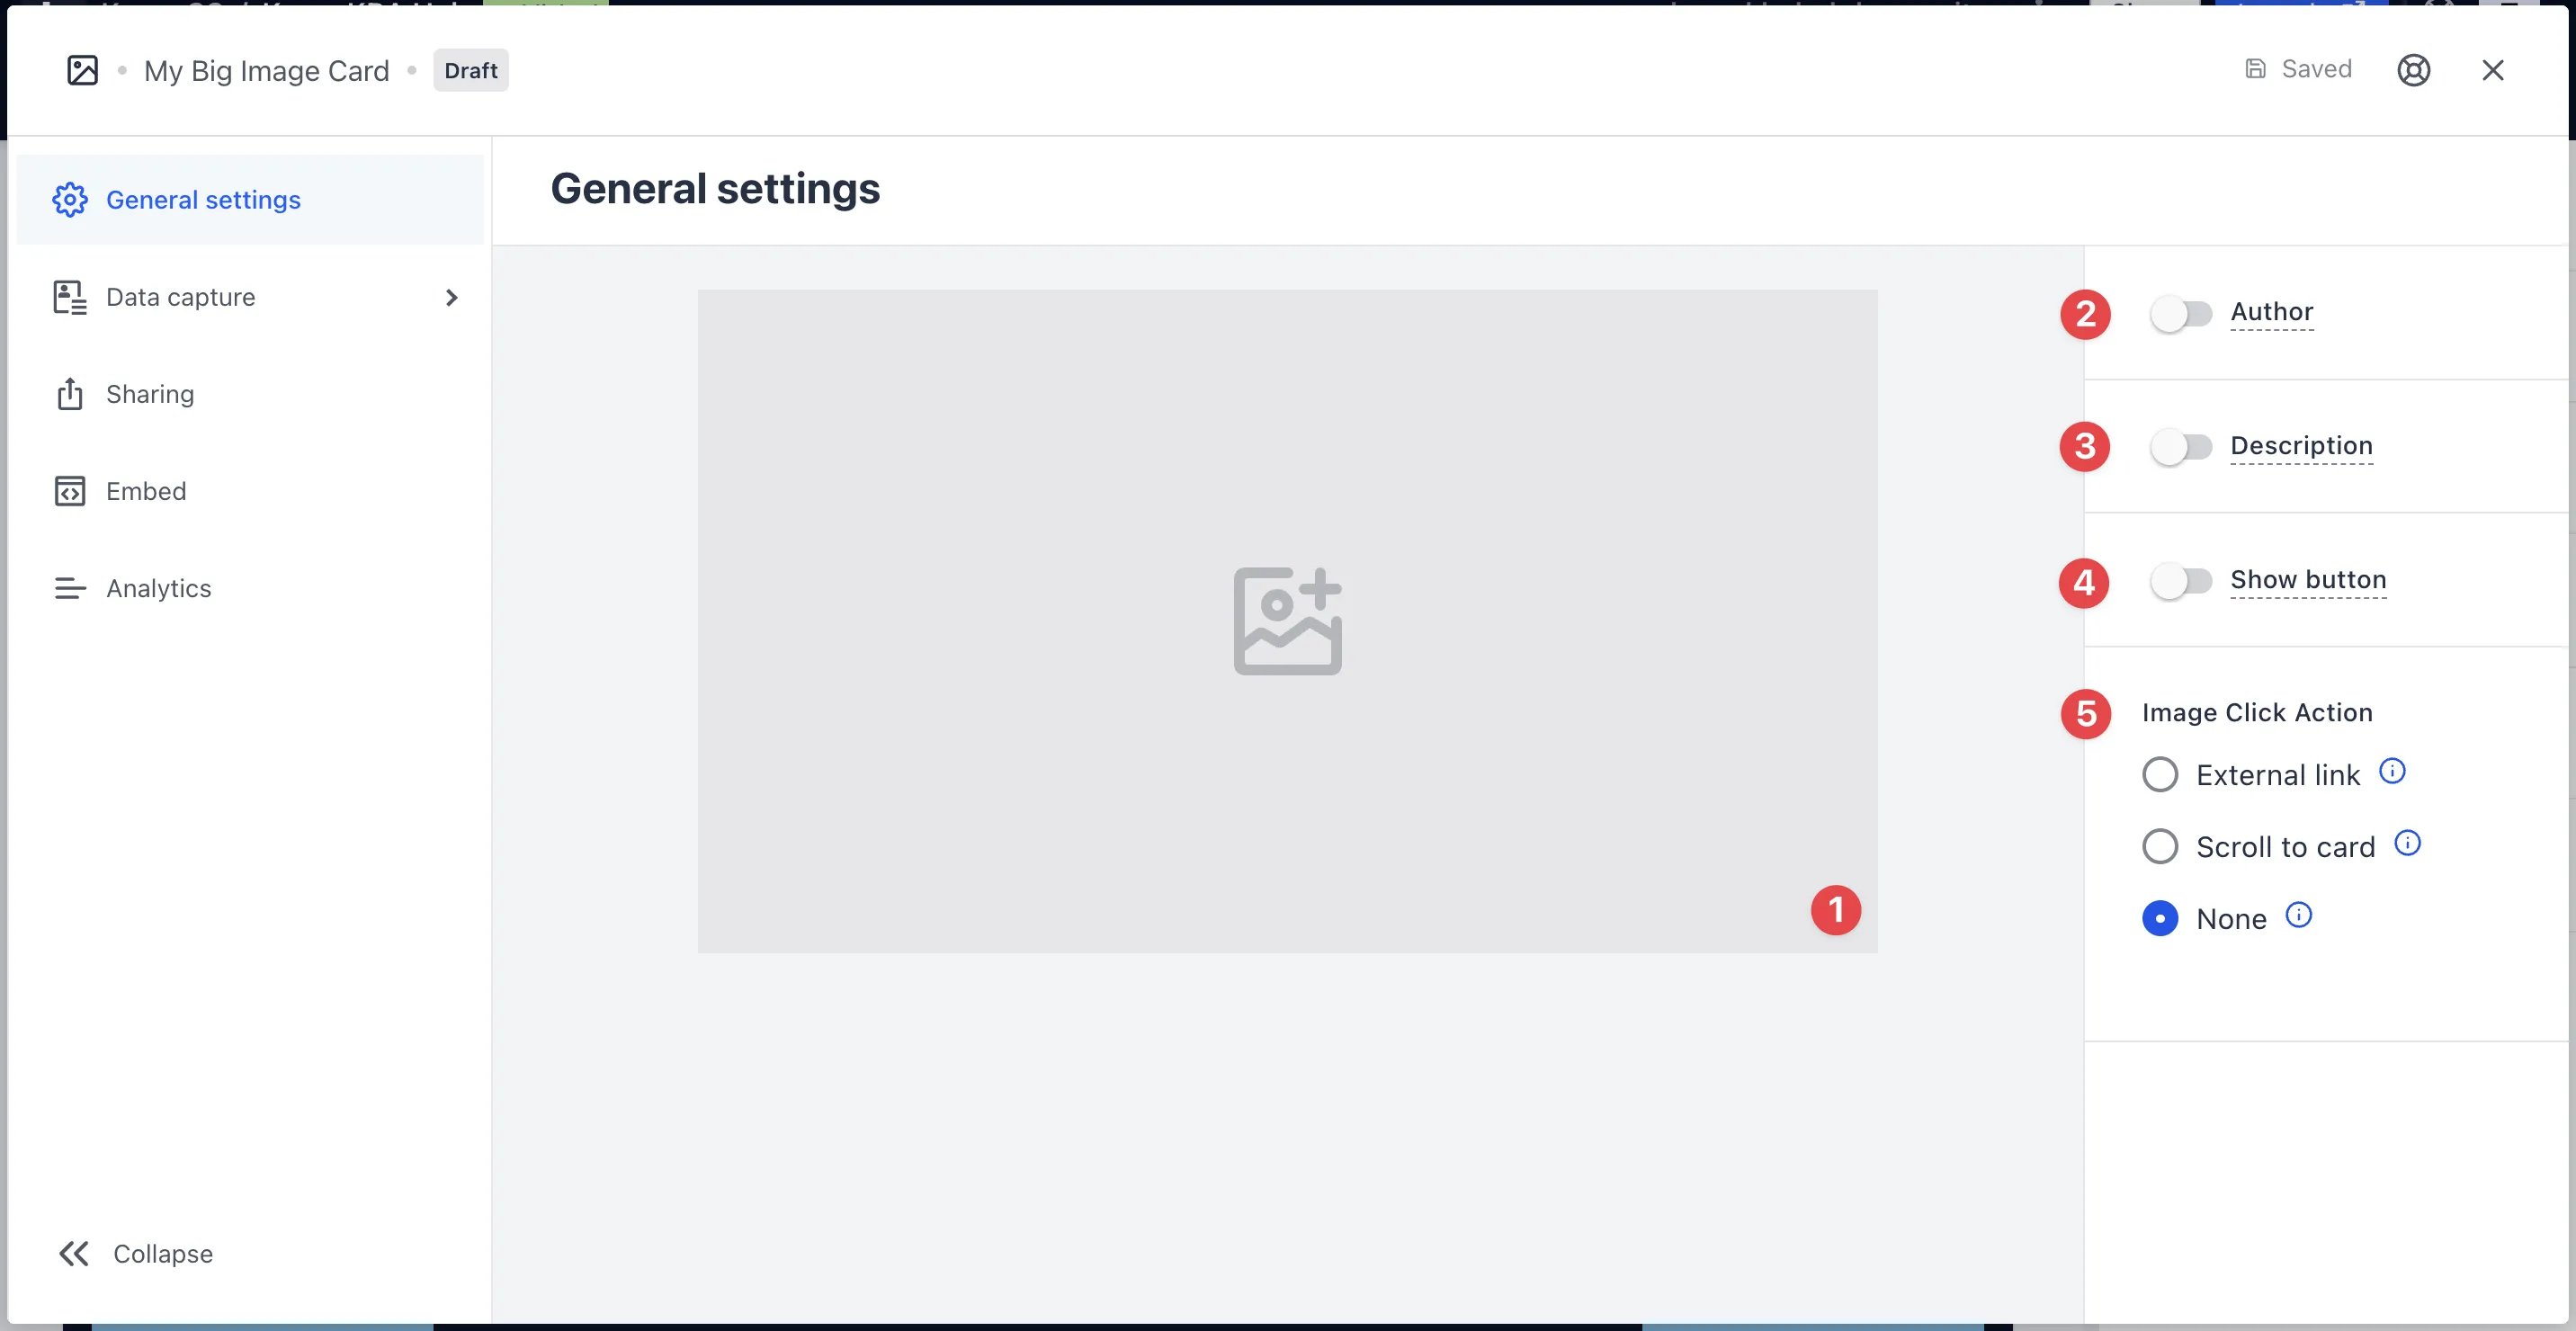 * Clicking on the **Image** will open the editing module.
* **(1)** Here is where you'll add your **Cover** image.
* **(2)** You can add an **author** tag by displaying the brand or person who's responsible for the card content.
* **(3)** Add a **description** to the card.
* **(4)** Here you can add a **call-to-action** button below the card.
This is only visible if you have a data capture attached. If you have this disabled, make sure you add a CTA in the cover image.
* Clicking on the **Image** will open the editing module.
* **(1)** Here is where you'll add your **Cover** image.
* **(2)** You can add an **author** tag by displaying the brand or person who's responsible for the card content.
* **(3)** Add a **description** to the card.
* **(4)** Here you can add a **call-to-action** button below the card.
This is only visible if you have a data capture attached. If you have this disabled, make sure you add a CTA in the cover image. 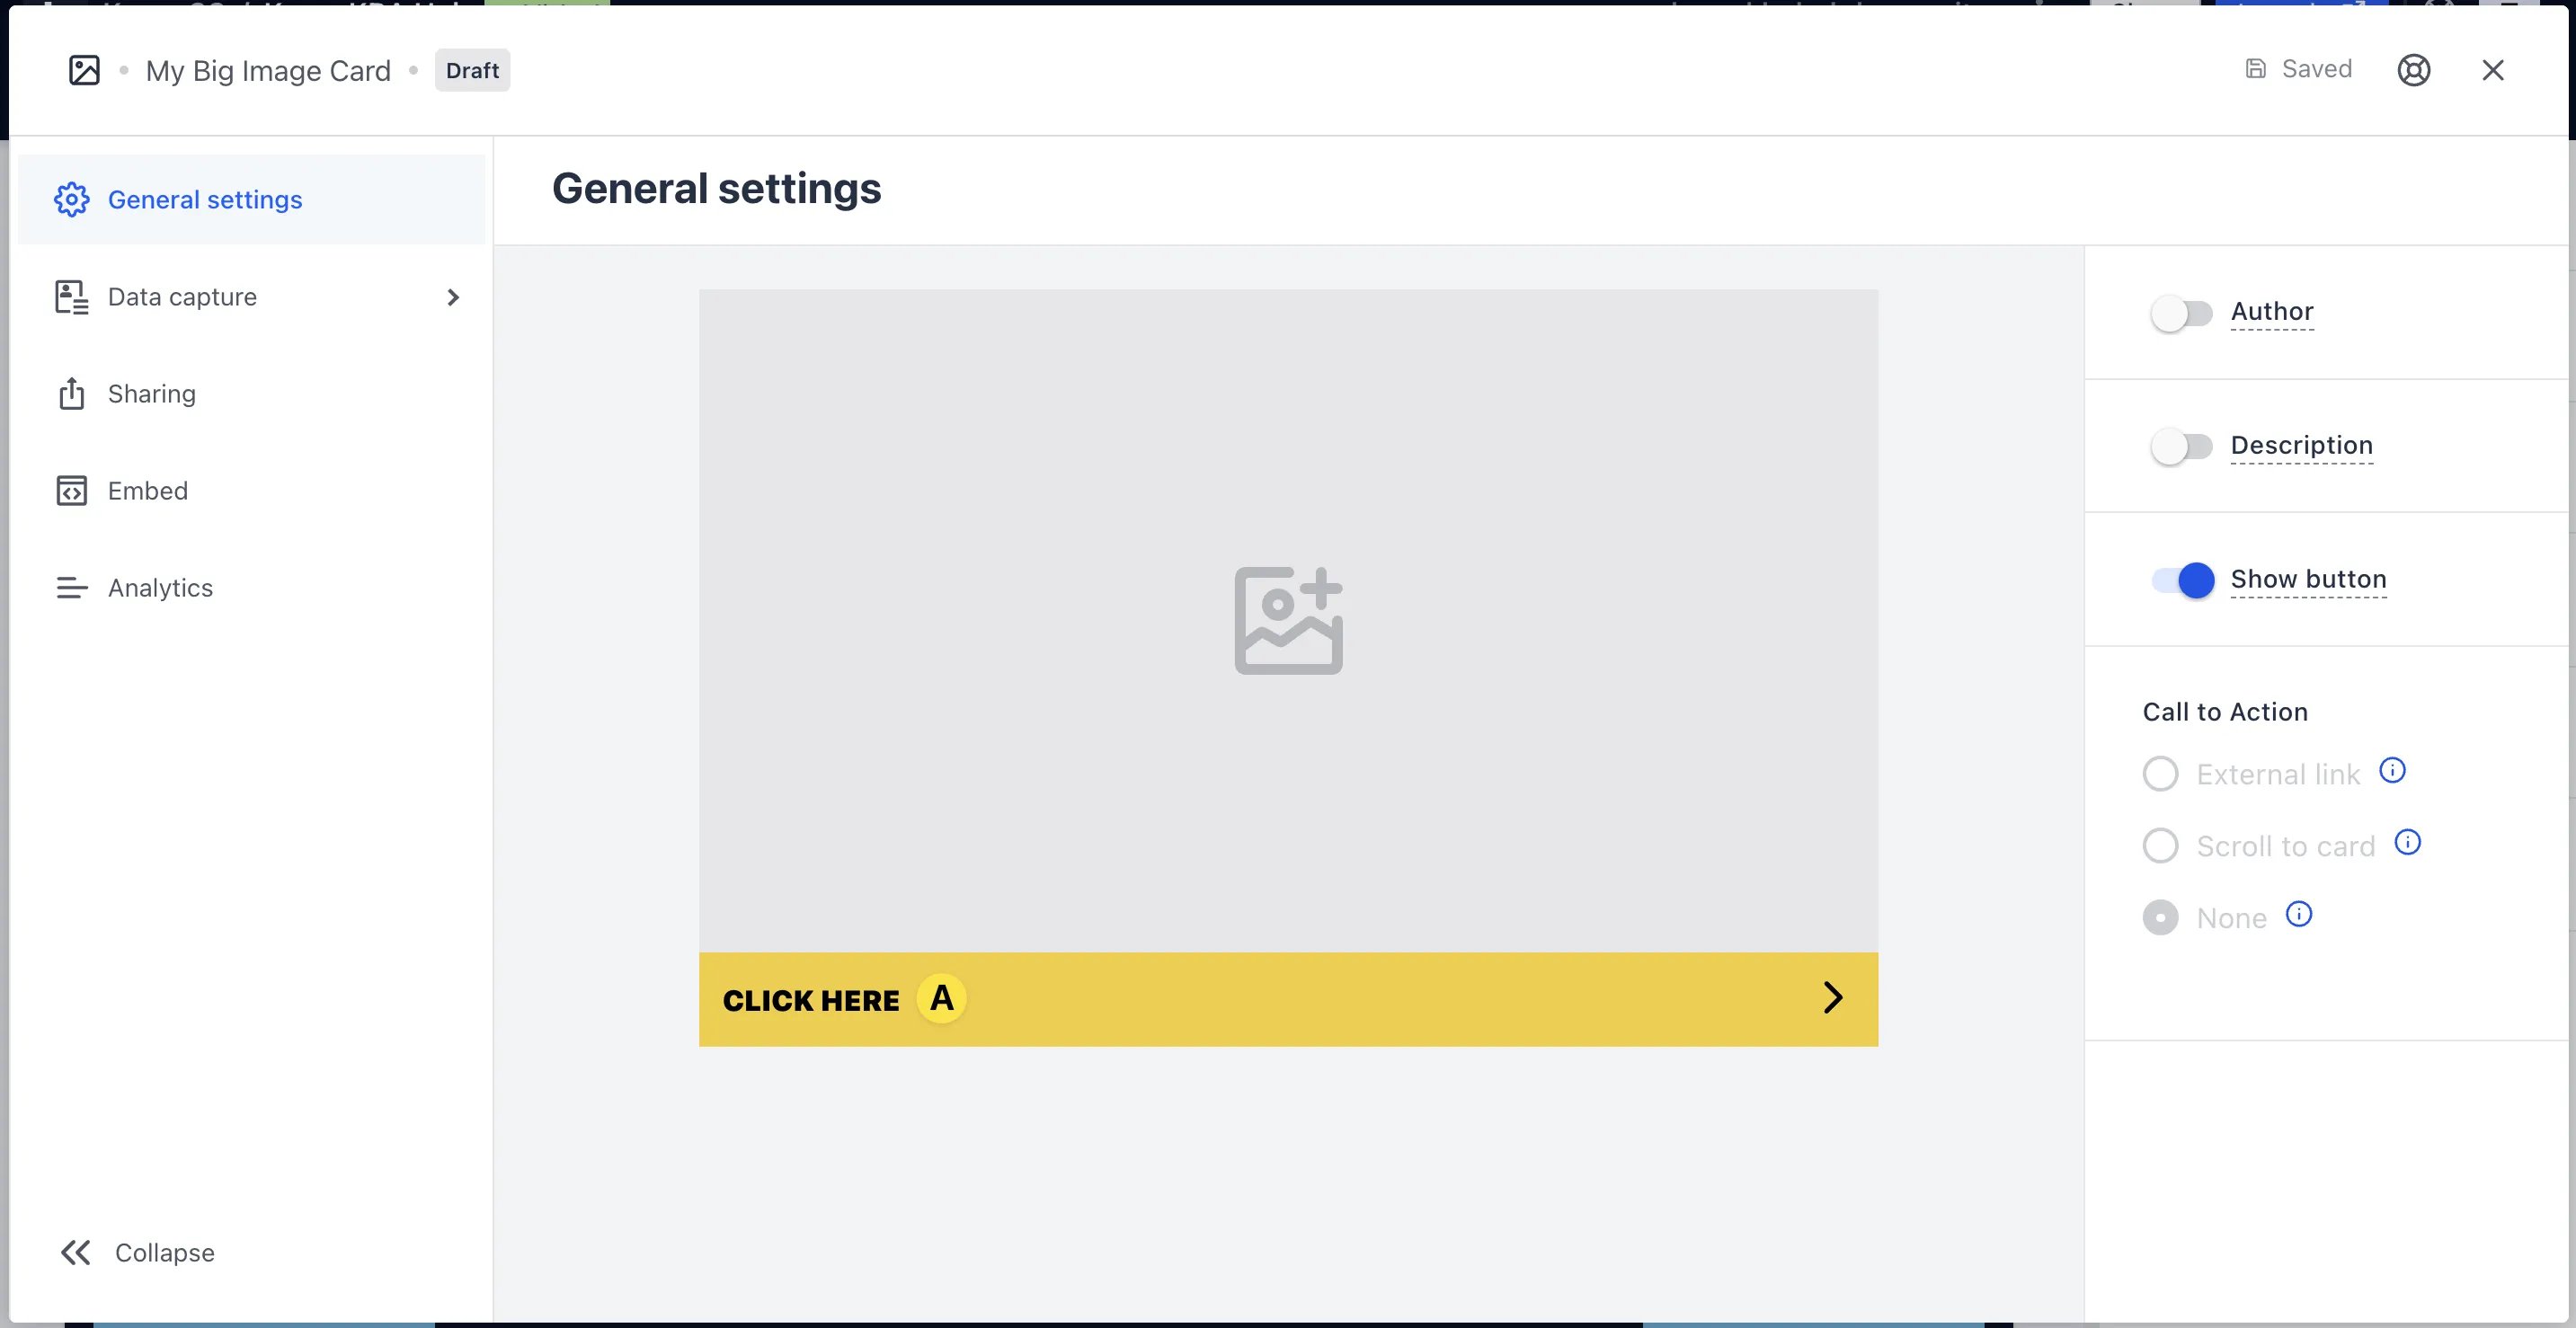 * **(A)** Once you have enabled the button, click on the bar to alter the **colour and copy** of the call-to-action.
* **(5)** Here you have the option to direct users to an **external site or card** when they click on the image.
### Step 3: Add a Data capture *(Optional)*
Add a Data Capture to your Vote card if you want to collect user data.
### Step 4: Publish your card
* **(A)** Once you have enabled the button, click on the bar to alter the **colour and copy** of the call-to-action.
* **(5)** Here you have the option to direct users to an **external site or card** when they click on the image.
### Step 3: Add a Data capture *(Optional)*
Add a Data Capture to your Vote card if you want to collect user data.
### Step 4: Publish your card
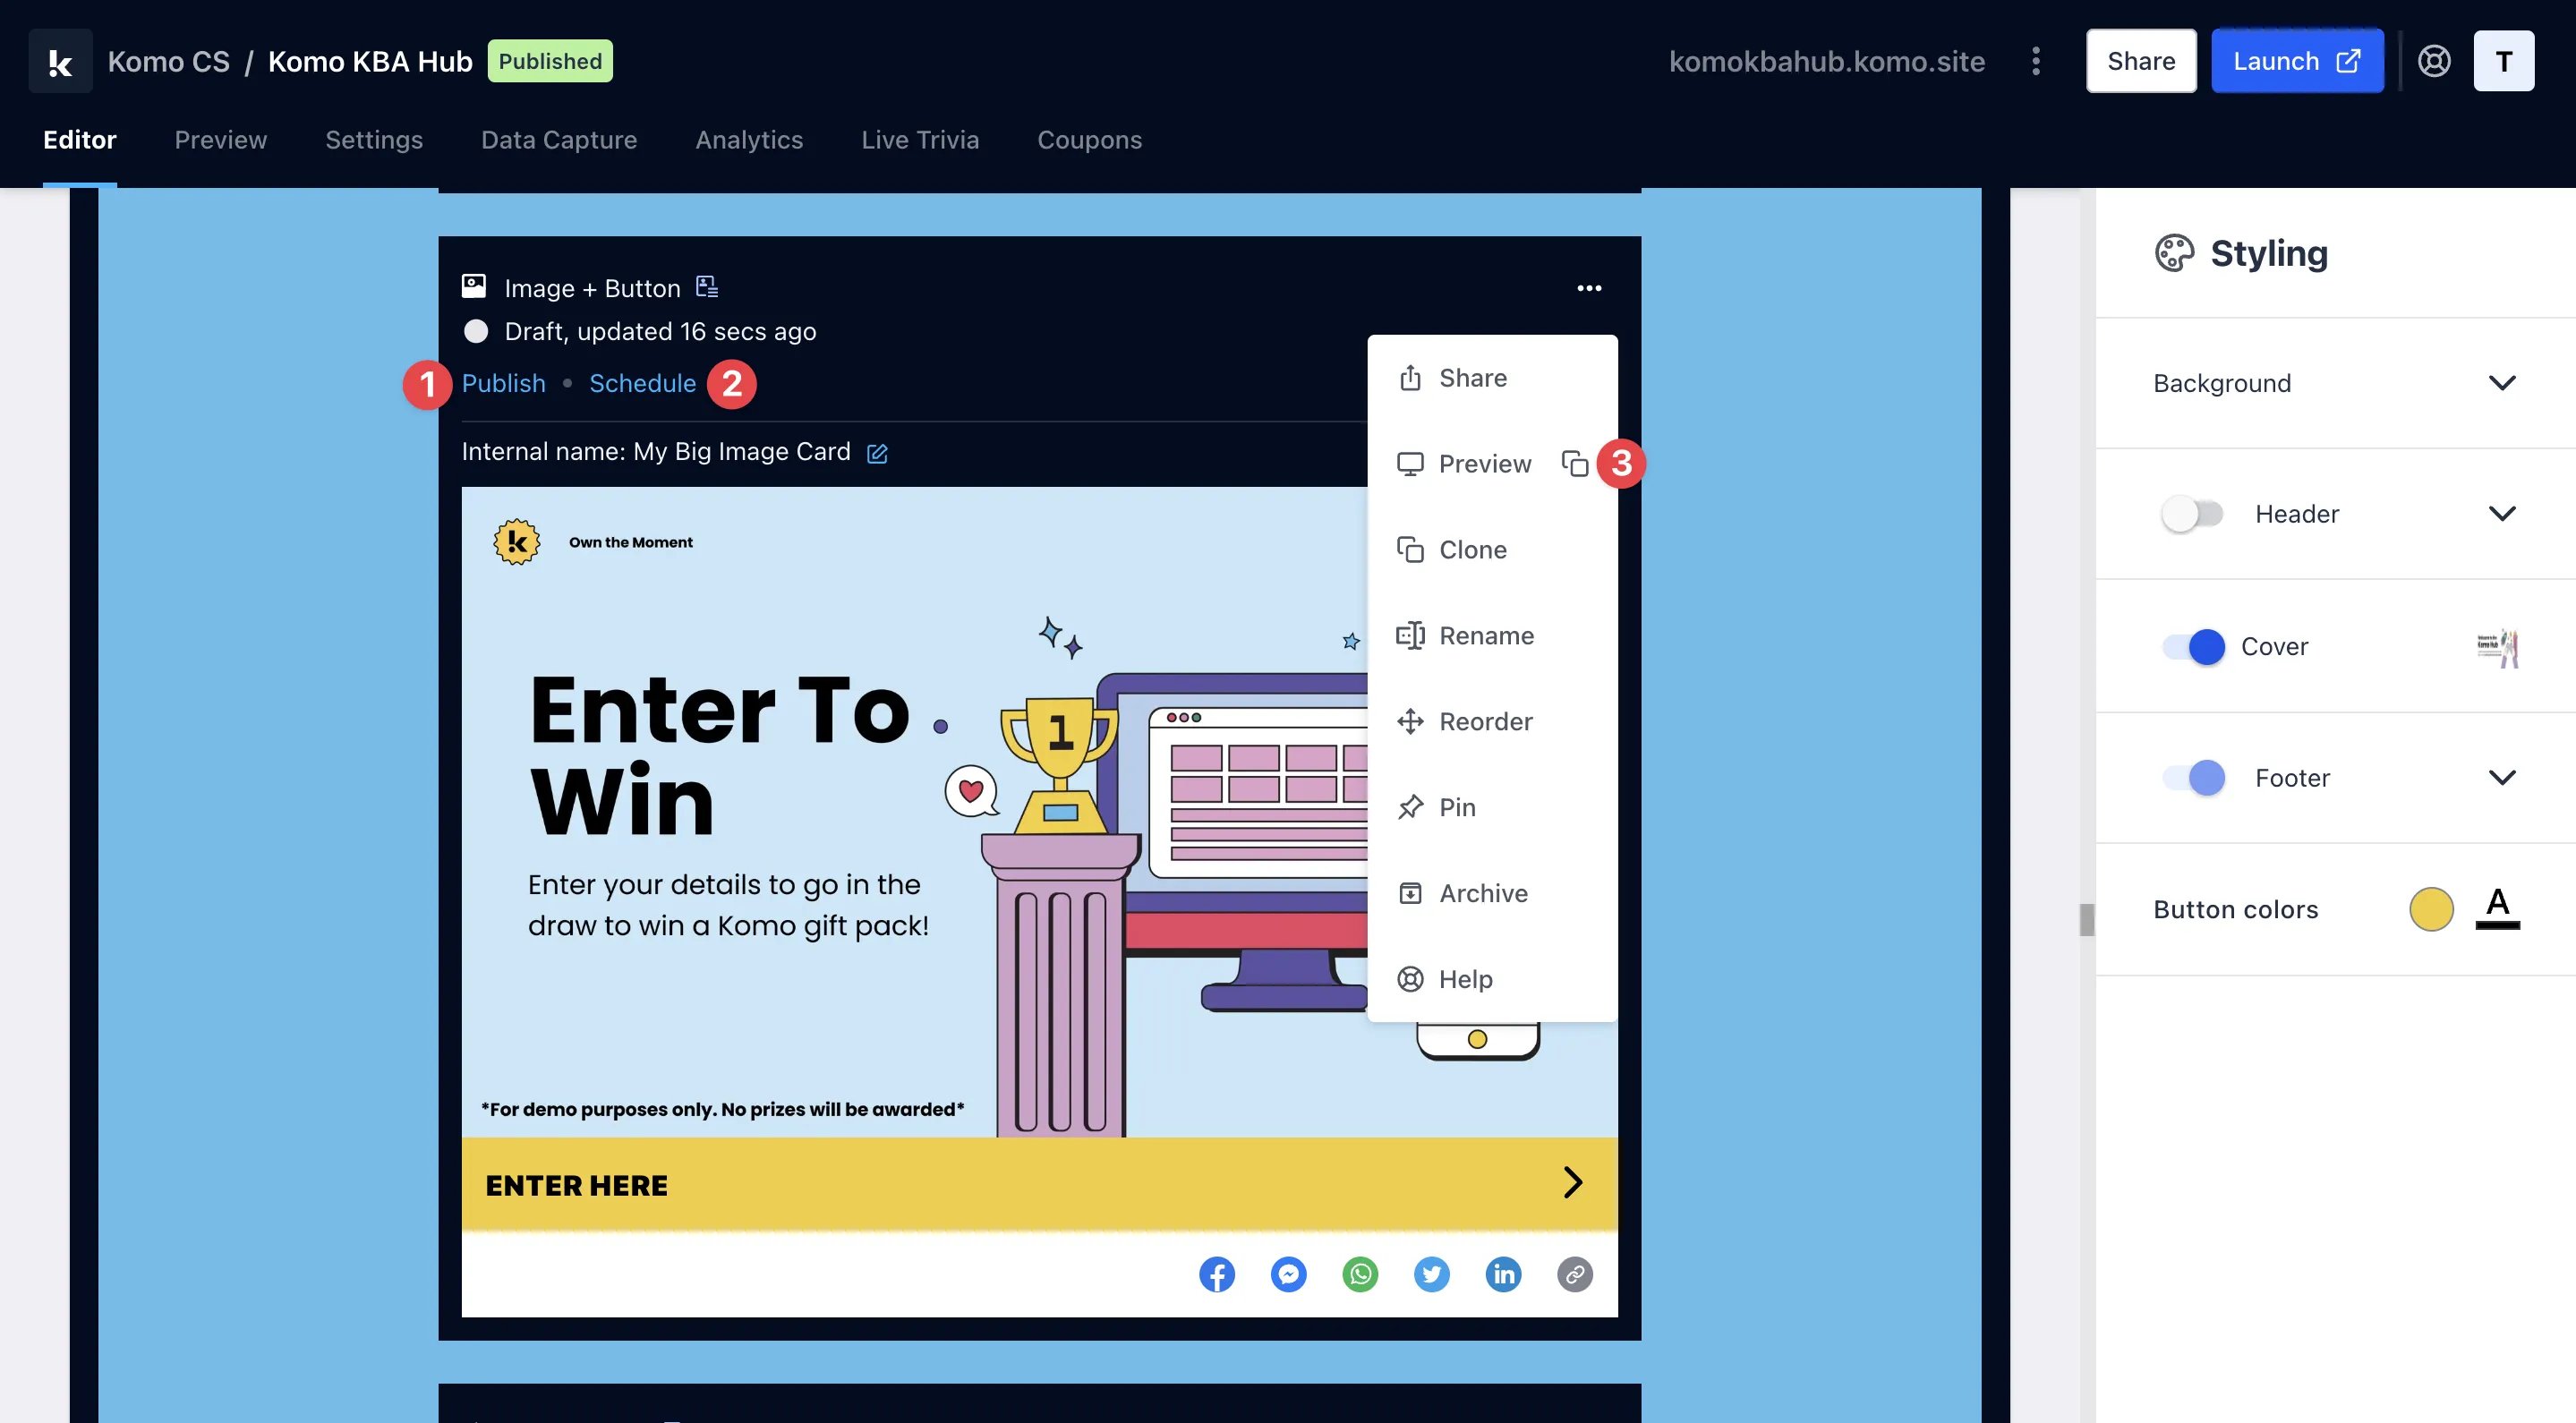 **Once you've completed all of these steps, played around with your card and are happy with all the aspects of your card, it's time to get your card live!**
* **(1) Publish** your card manually and instantly for the world to see.
* **(2) Schedule** your card to be published and unpublished at set dates and times.
* **(3)** Click on **...** to **Preview** and interact with the card on the front end from a user's perspective before publishing it. See how to test your card [here](/getting-started/hub-setup/card-testing).
All competition entries will be recorded and will impact the card analytics.
## Promotion
## FAQ
**What type file formats can I upload in the Image card?**
You can upload PNG, JPEG and GIF formatted images.
**Once you've completed all of these steps, played around with your card and are happy with all the aspects of your card, it's time to get your card live!**
* **(1) Publish** your card manually and instantly for the world to see.
* **(2) Schedule** your card to be published and unpublished at set dates and times.
* **(3)** Click on **...** to **Preview** and interact with the card on the front end from a user's perspective before publishing it. See how to test your card [here](/getting-started/hub-setup/card-testing).
All competition entries will be recorded and will impact the card analytics.
## Promotion
## FAQ
**What type file formats can I upload in the Image card?**
You can upload PNG, JPEG and GIF formatted images.