
Make it quick and easy for users to enter multiple competitions.
Contents:
What is it?
User accounts allow customers to save their login information on your Hub. This means they do not need to re-enter the same information every time they enter a competition or Live Trivia.
Through user accounts, customers will have a greater chance of engaging in current and future gamification content and can lead to increased engagement and competition entries.
Note: User Accounts is only available on our Growth pricing plan and above.
How do I set it up?
- Step 1: Navigate to your Hub Settings
- Step 2: Configure your User Accounts settings
- Step 3: Test the feature
Step 1: Navigate to your Hub Settings
- Go to your Engagement Hub then click on Settings.
- Find the Users tab on the left sidebar and enable Accounts.
Step 2: Configure your User Accounts settings
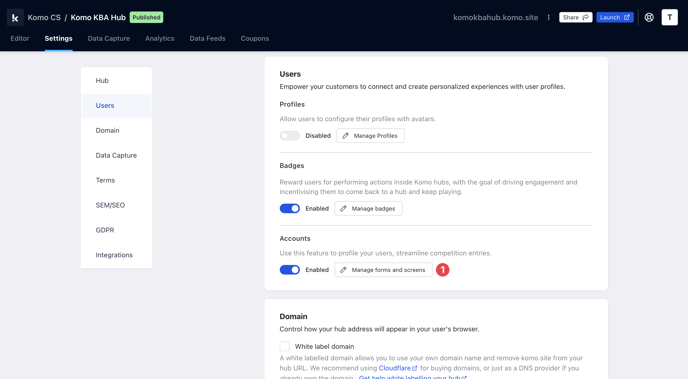
- (1) Here you can edit the forms and screens for creating user accounts.

Tip: Here you can also enable the Magic Links feature, which will allow your users to log in more securely using a code your Hub will send to their email address. Below is what this looks like on the front end.

Important: If you intend to embed your content in other websites, your hub domain must be a sub-domain of the site you are embedding in. For example, if the site you are embedding in is "demo.com", then your hub domain must be a sub-domain of this domain, such as "hub.demo.com". Without this, sign-in won't work.
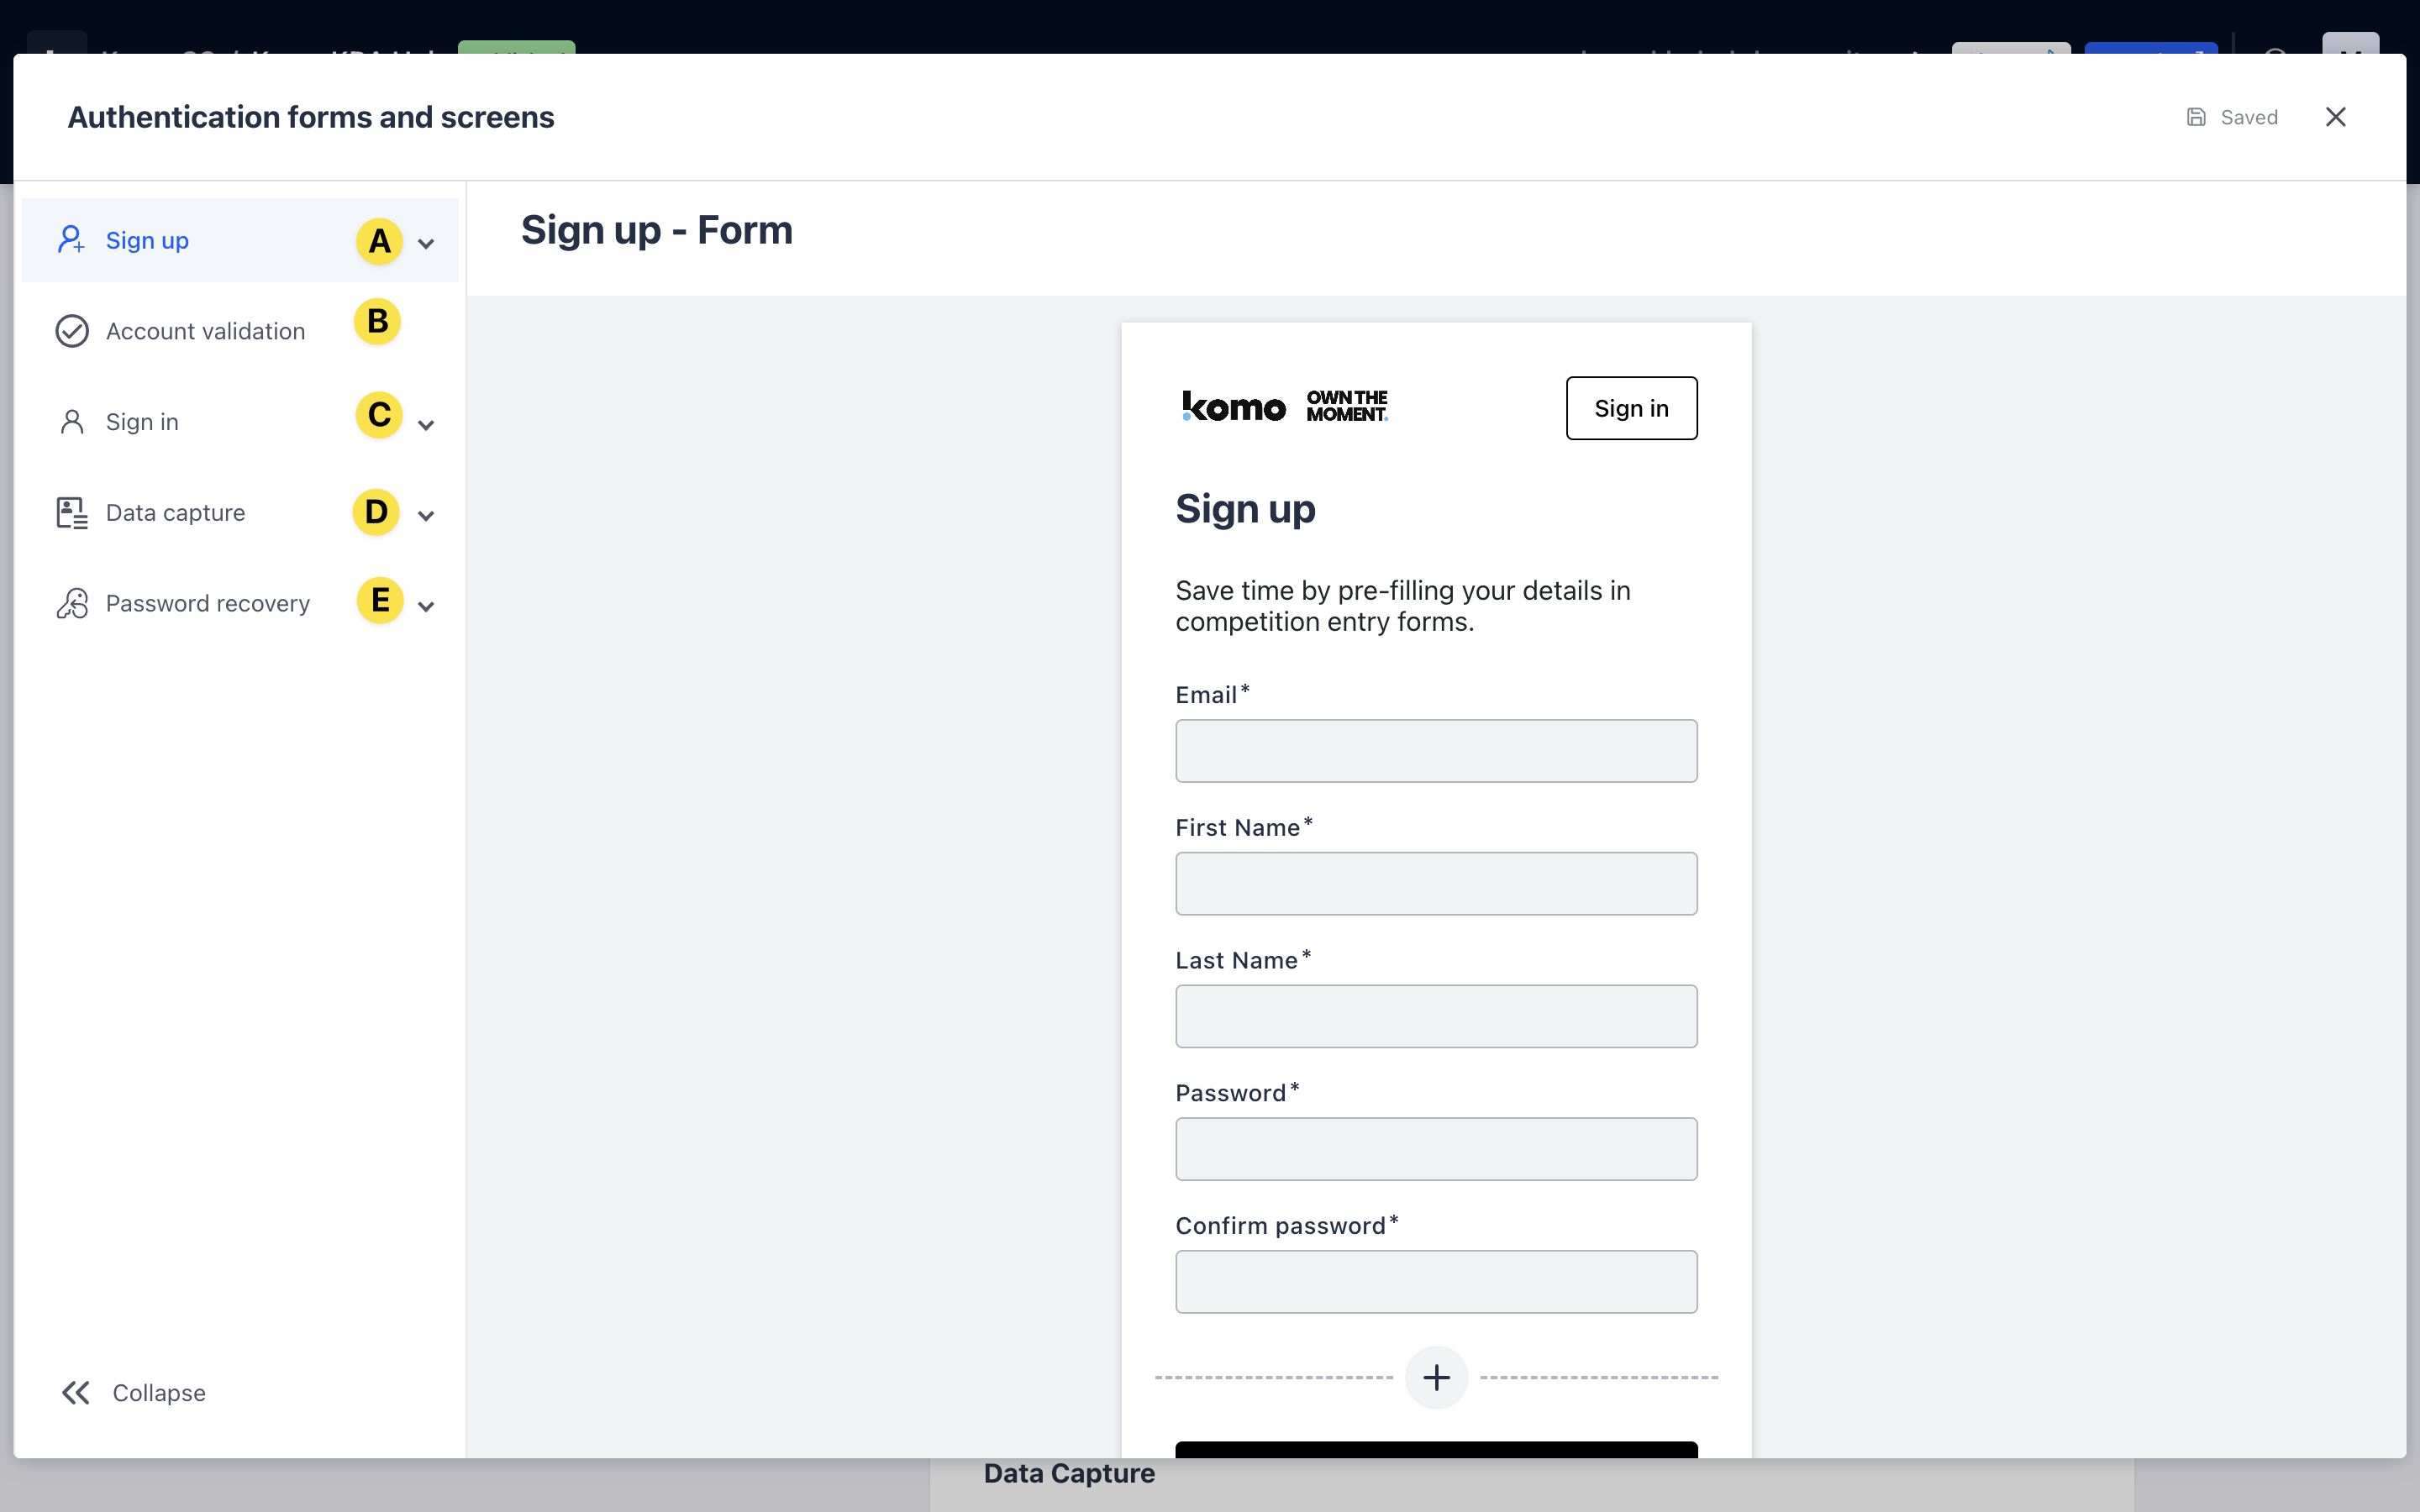
- (A) Set up the initial sign-up screens.

-
- Here you will set up the sign-up form.
- (a) Upload your logo here.
- (b) Alter the color of the sign-in button. Changing this will also change (h) the cancel button.
- (c) + (d) Here you have the option to change the copy of the sign-up form.
- (e) These are the initial fields required when signing up. You can add other fields by (f) clicking on the plus icon.
- (g) + (h) Scrolling down, you can alter the color of the call-to-action bars.
-
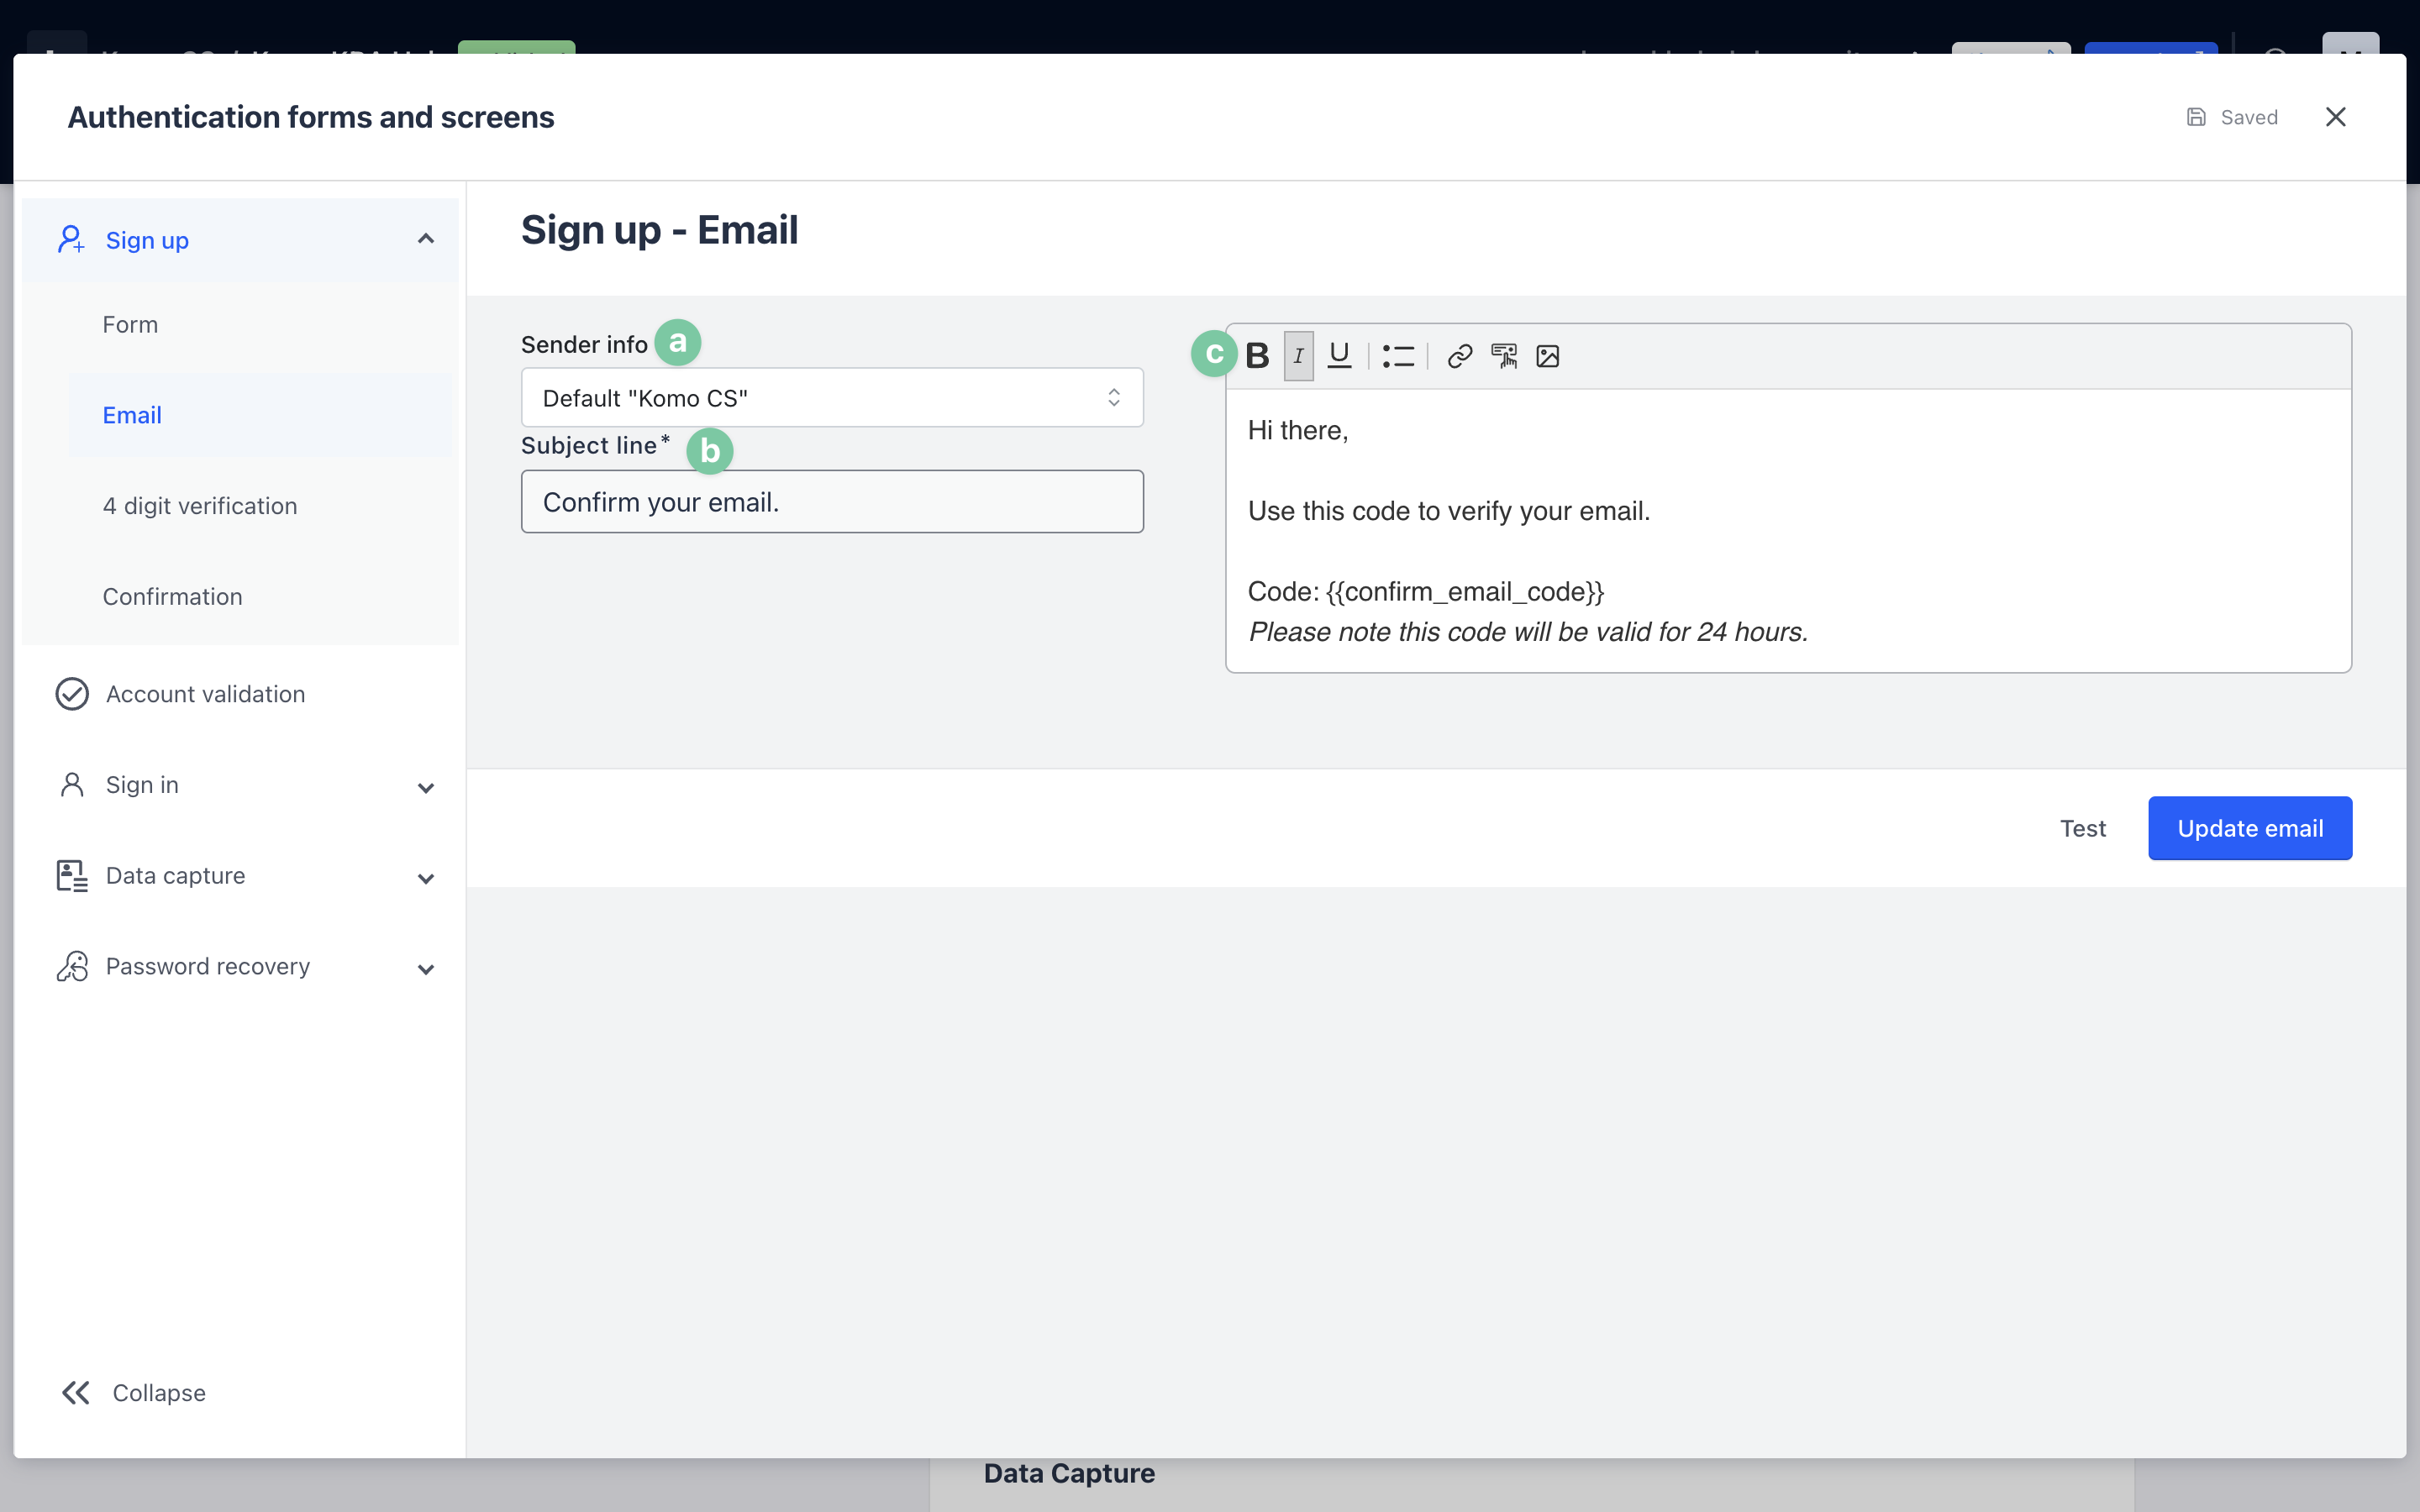
- Next, you can edit the sign-up email.
- (a) Choose your sender info.
-
- (b) Edit the subject line.
- (c) You can alter the email that is sent once a user signs up. Note that you can add banners to these emails to brand the experience! Try clicking the image button in the toolbar.
Note: Do not remove the Code: as this is what users need to receive to activate their account on the portal.
-
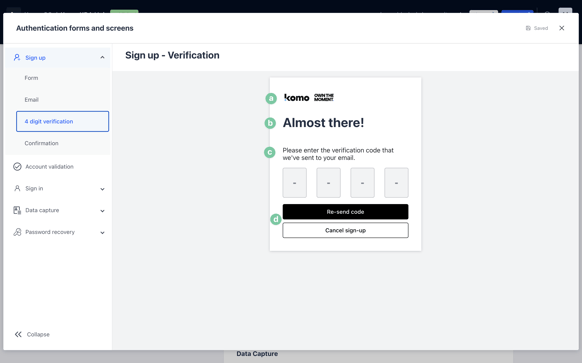
- Here you can edit the 4-digit verification screen.
- (a) Upload your logo here.
- (b) + (c) Here you have the option to change the copy of the 4-digit verification screen.
- (d) Here you can alter the color of the call-to-action bars.

-
- Here you can edit the confirmation screen.
- (a) Upload your logo here.
- (b) + (c) Here you have the option to change the copy of the confirmation screen.
- (d) Here you can alter the color of the call-to-action bar.
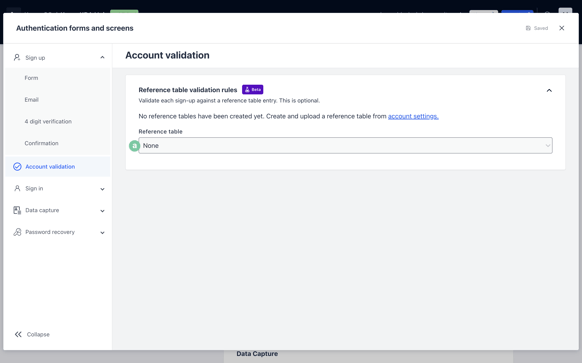
- (B) Add a validation rule to the sign-up form (please note this is an optional step).
-
- (a) If you have reference table files uploaded, you can attach these to the sign-up form.
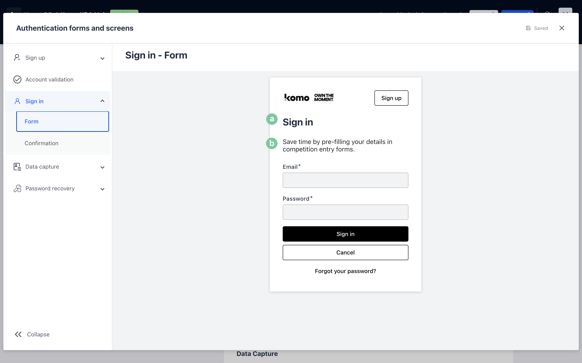
- (C) Here you can edit the sign-in screens.
-
- (a) + (b) You can edit the copy of the sign-in form.
-
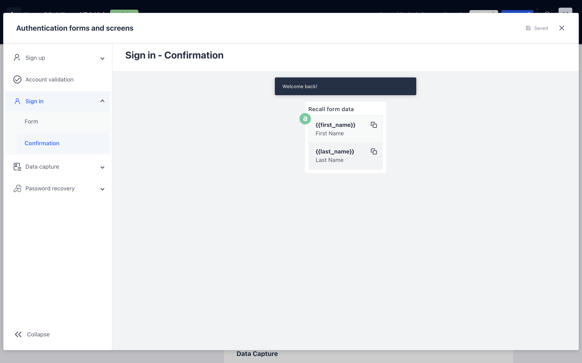
- (a) On the sign-in confirmation message, you can really personalize the experience by adding the recall form fields to the message.
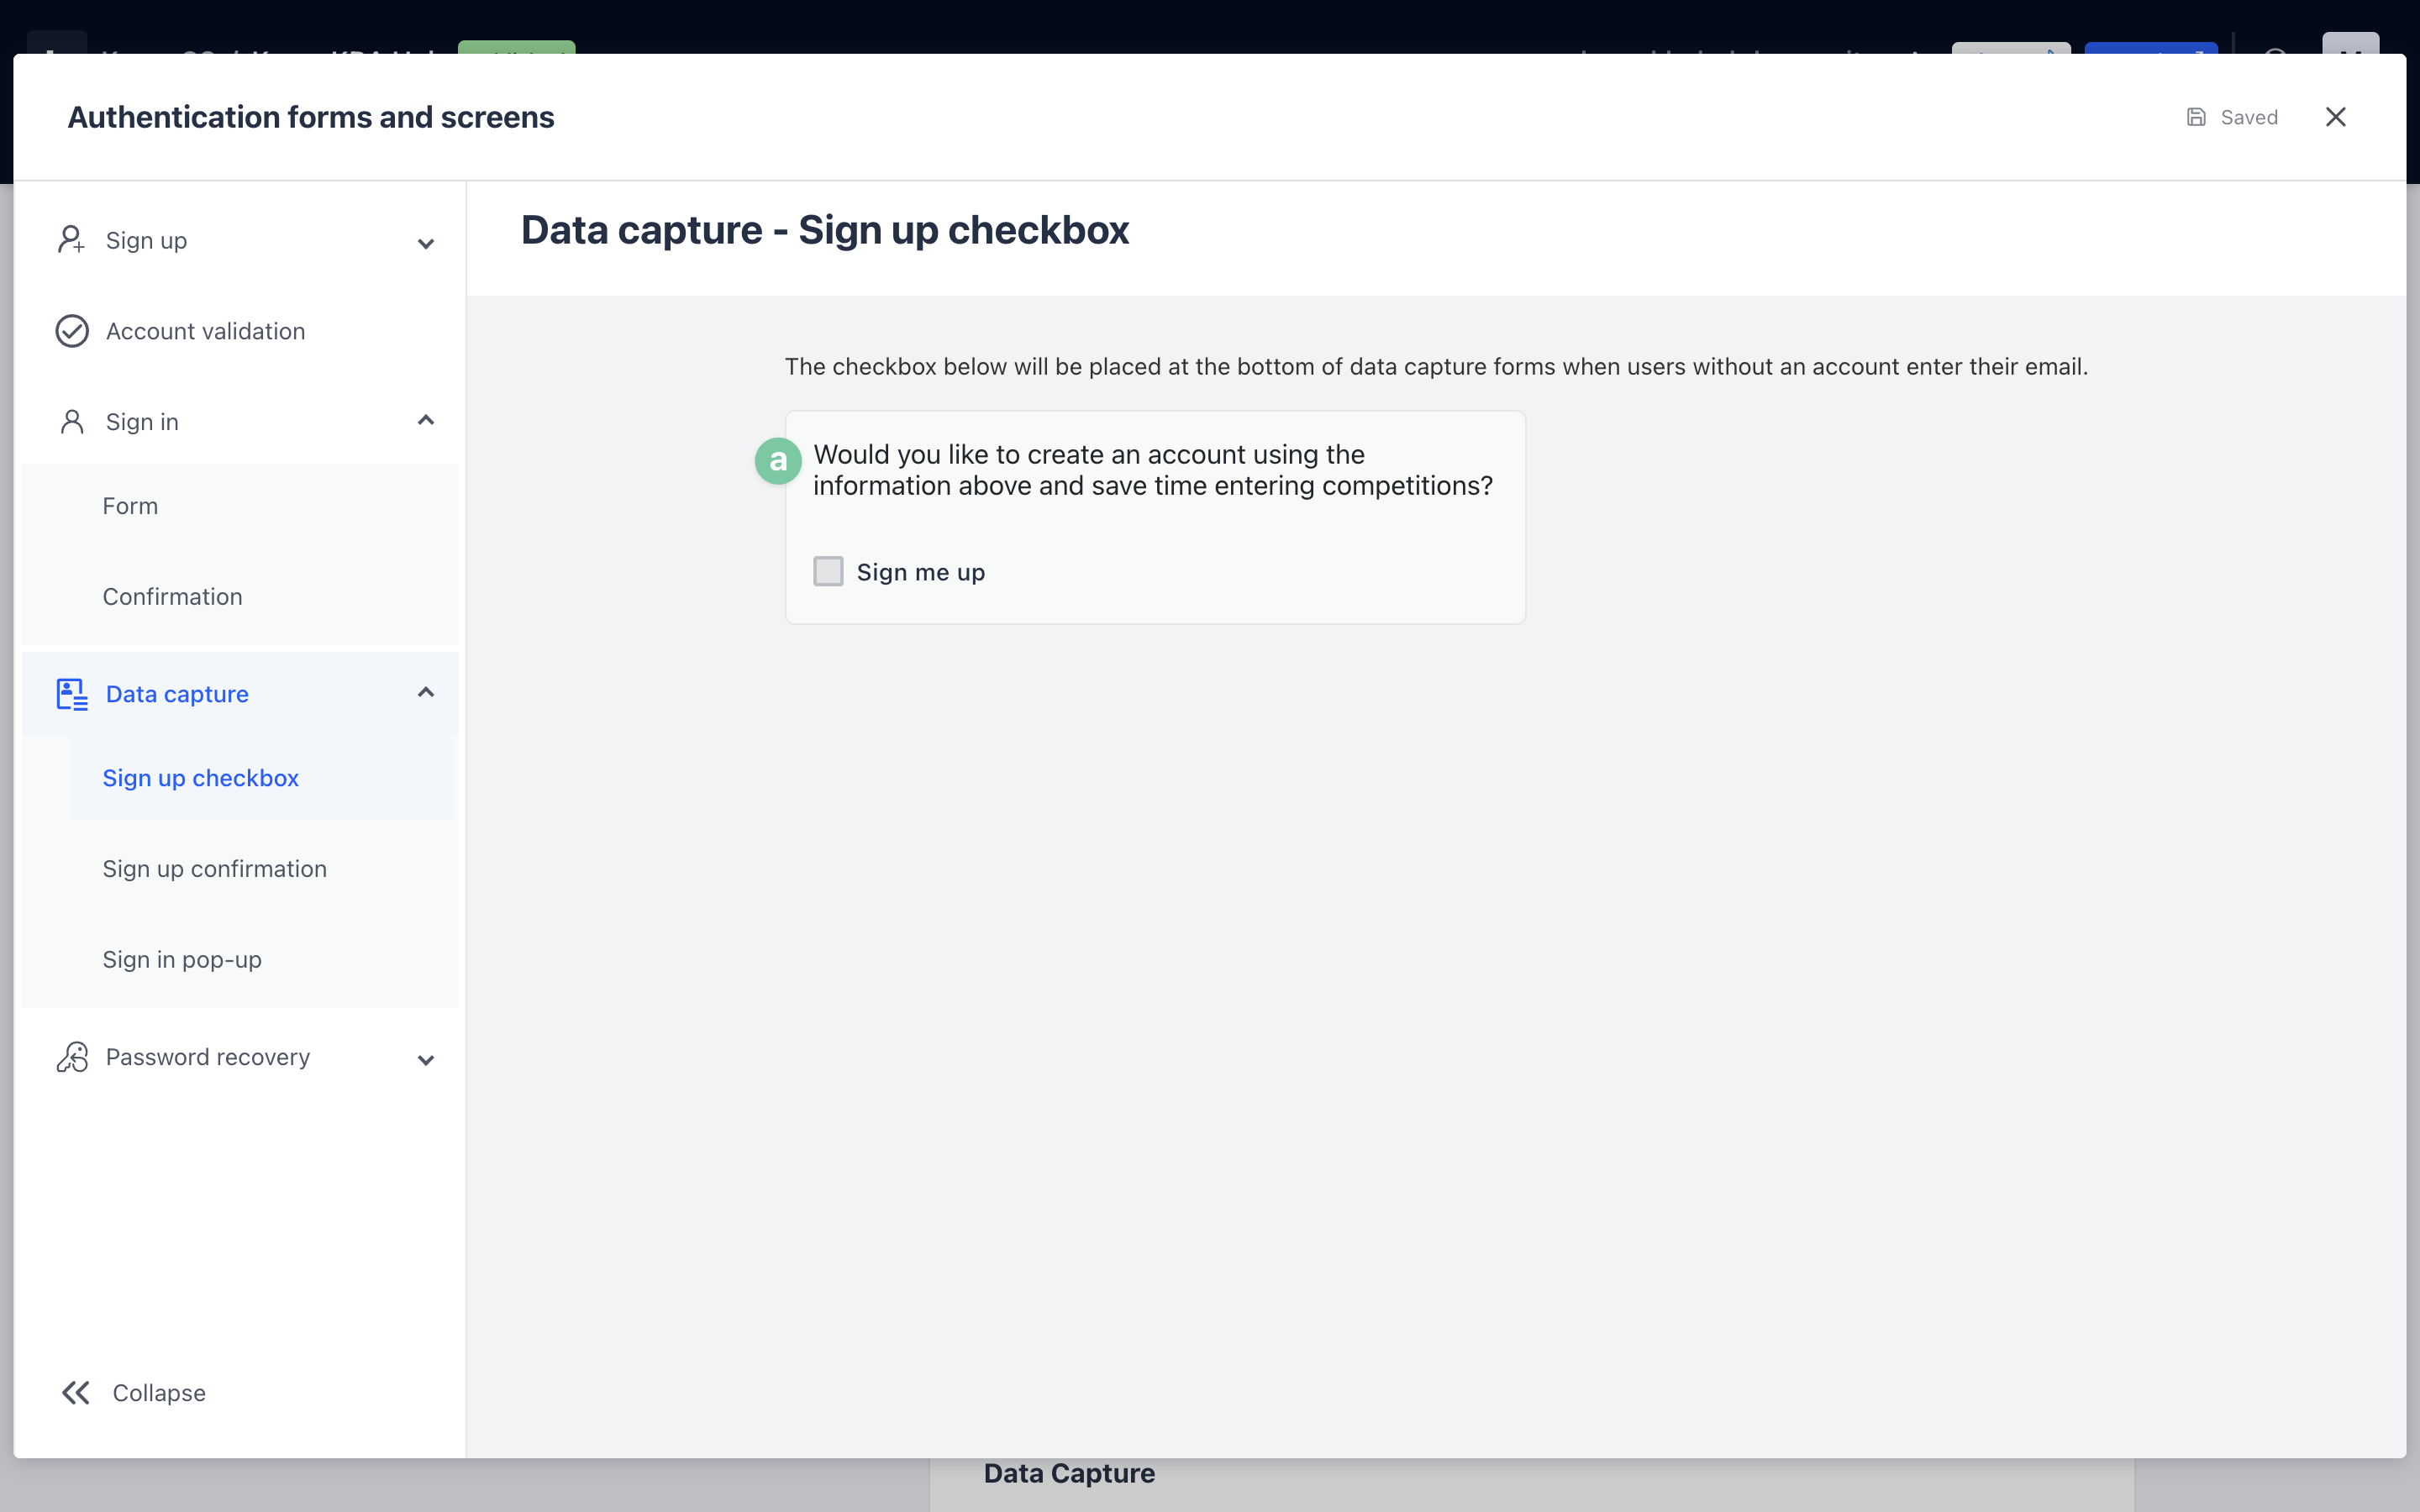
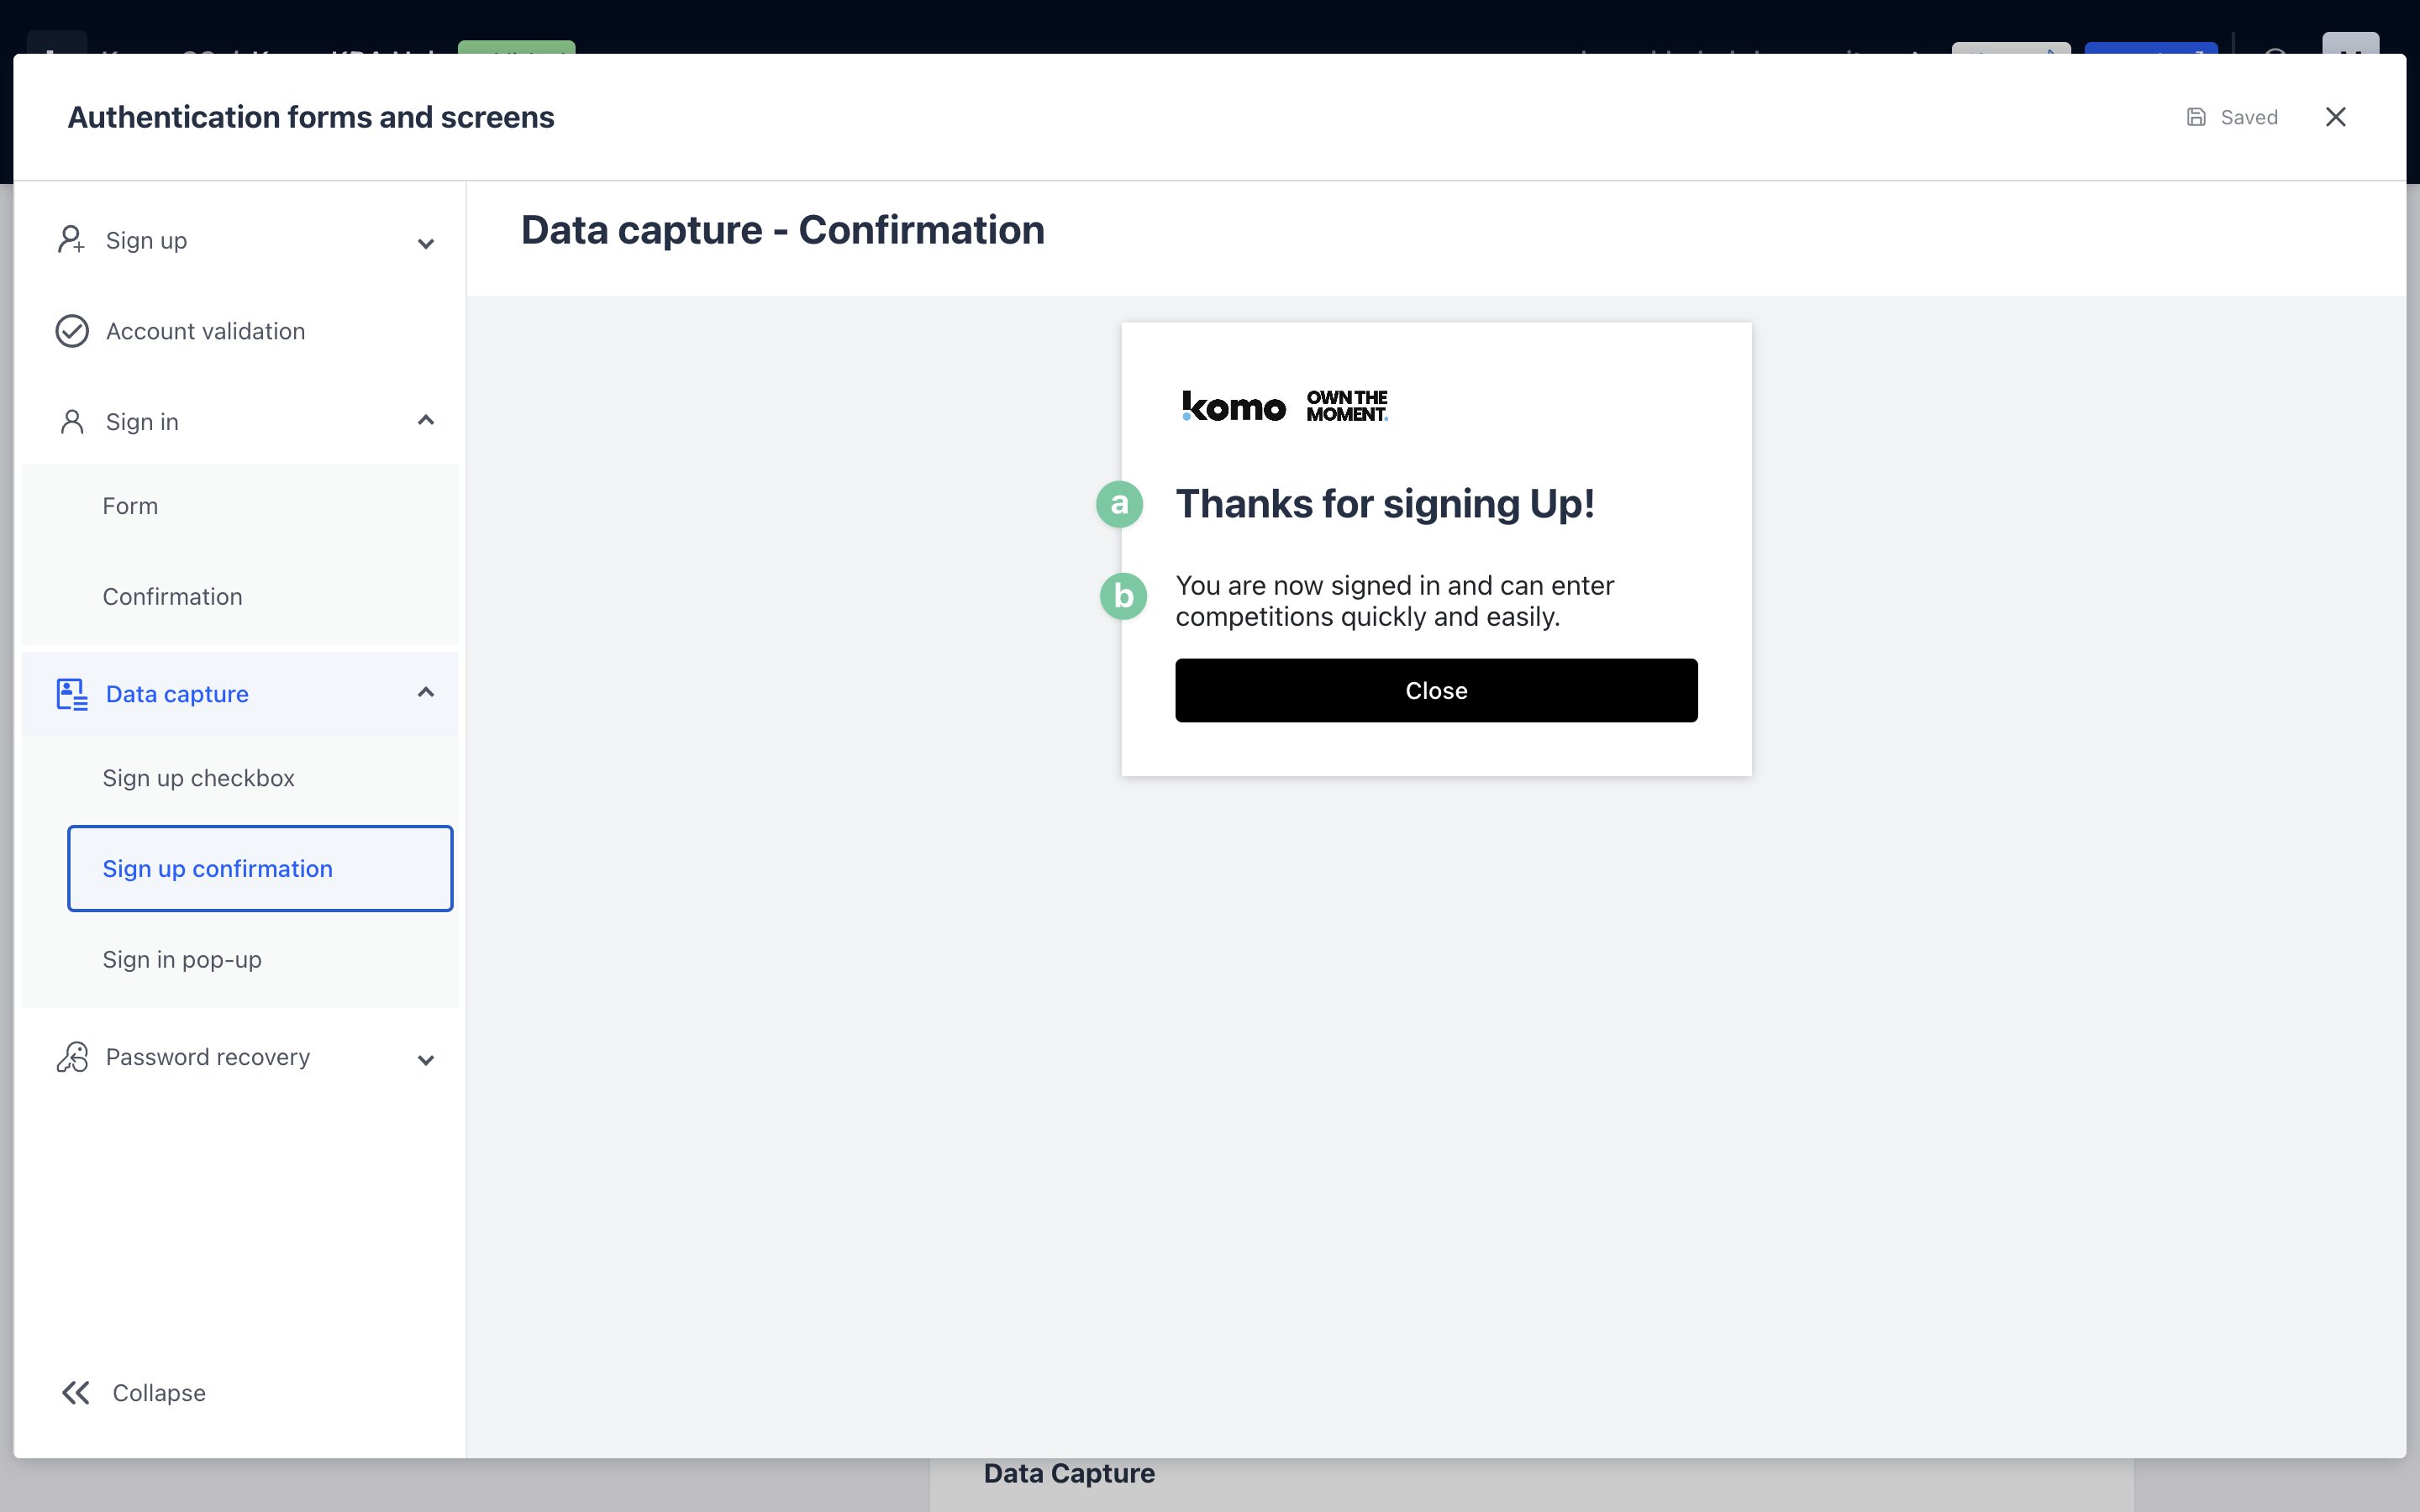
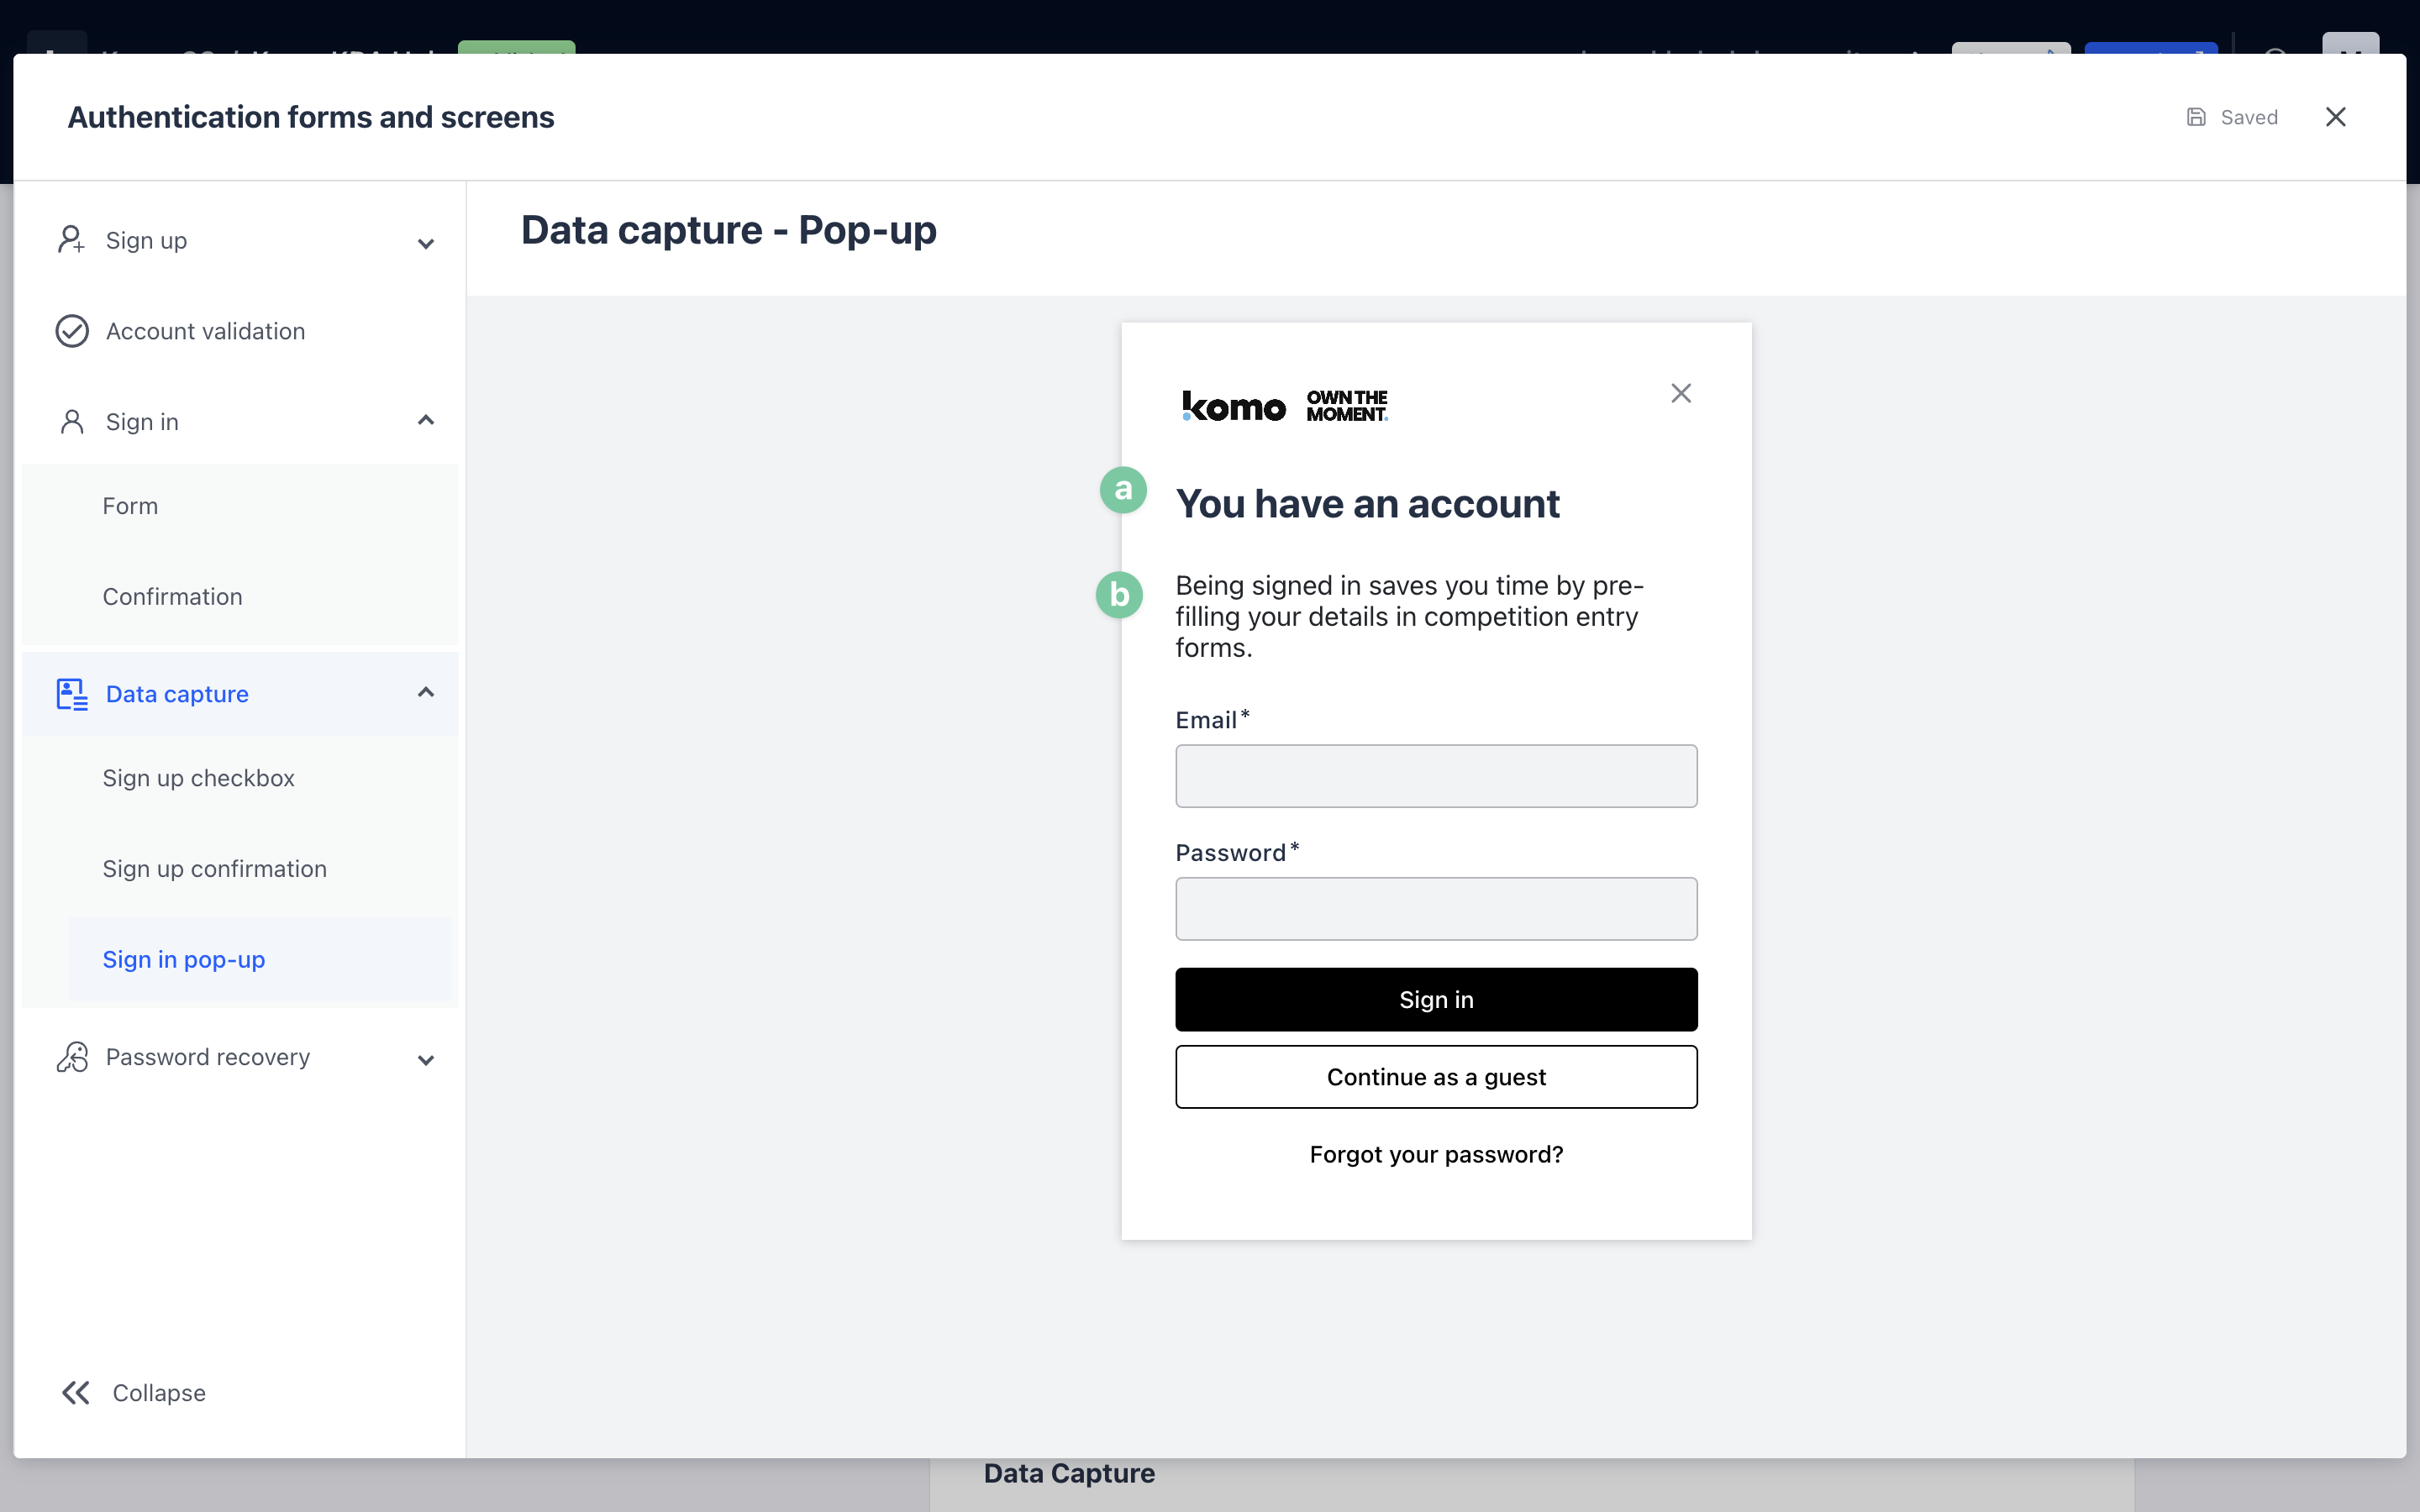
- (D) You can alter the messages seen in each Data capture setting screen.
-
- (a) Here you can edit the copy within your sign-up checkbox.
-
- (a) + (b) Here you can edit the copy within the sign-up confirmation screen.
-
- (a) + (b) Here you can edit the copy within the sign-in pop-up screen.
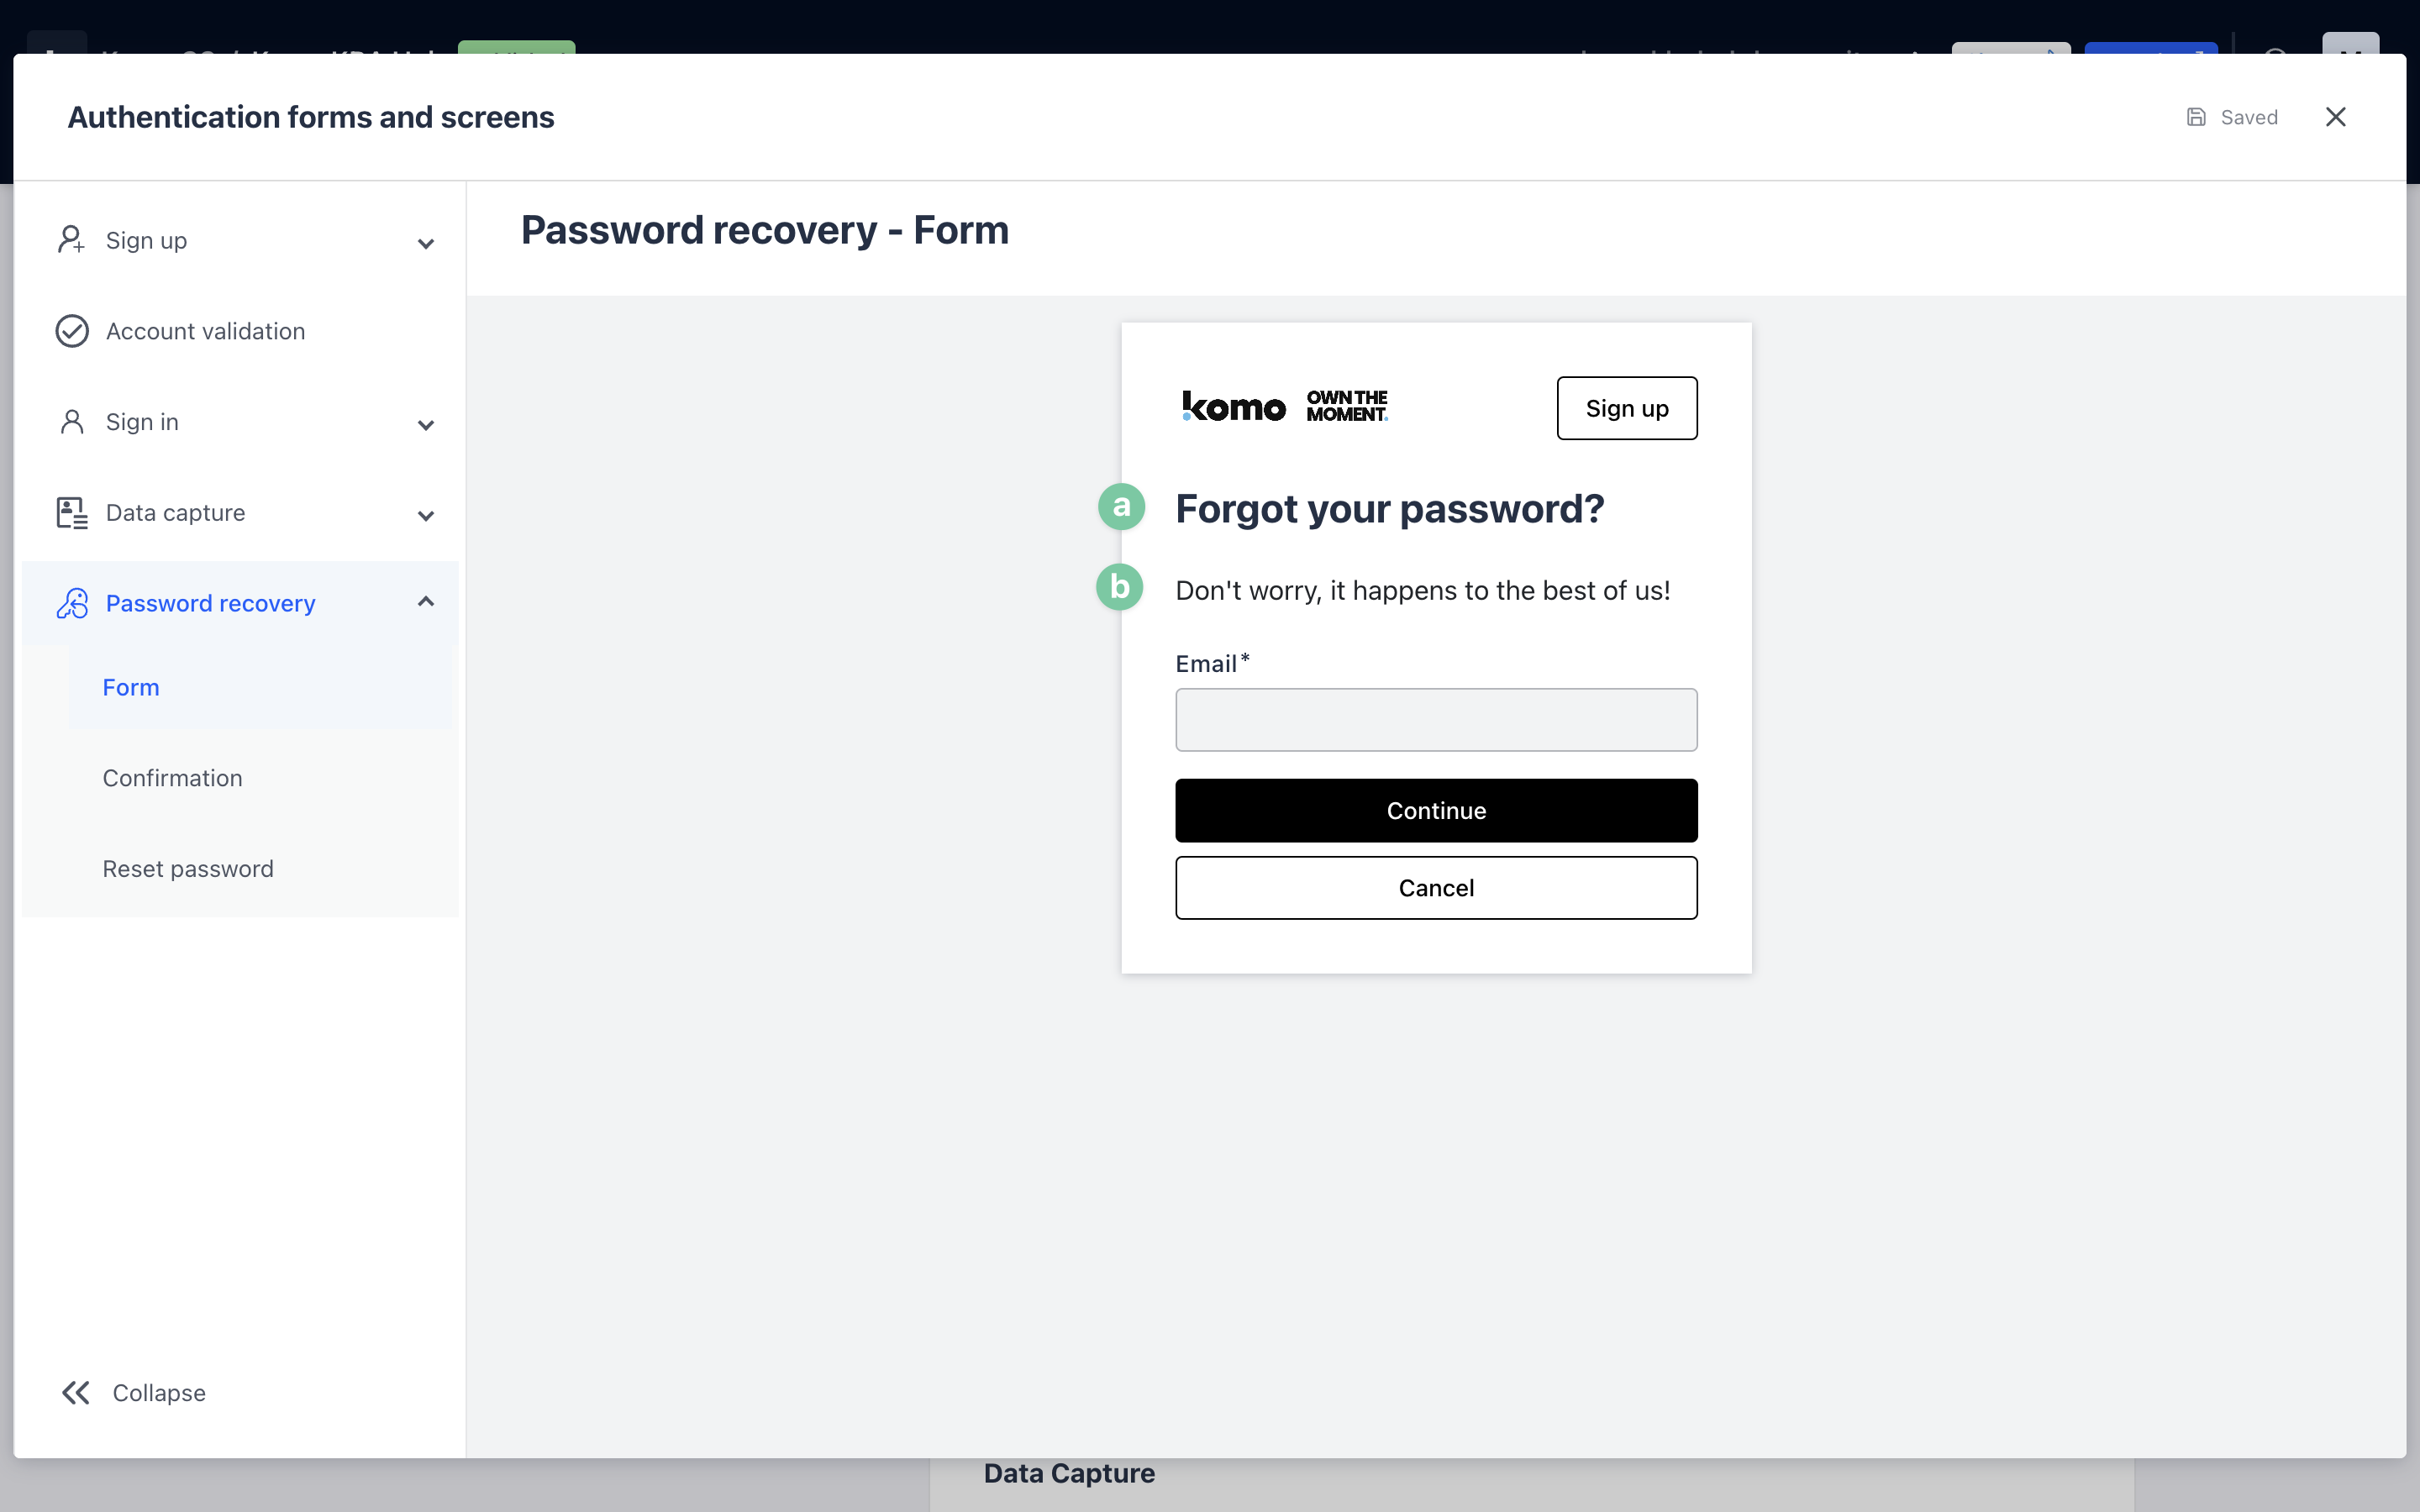
- (E) Alter the screens for password recoveries.
-
- (a) + (b) Edit the messages that appear on the password recovery form.

-
- (a) + (b) Edit the messages that appear on the password recovery confirmation screen.

-
- Here you can edit the password recovery email.
-
- (a) Choose your sender info.
-
- (b) Edit the subject line.
- (c) You can alter the email and color of the reset password button. Note that you can add banners to these emails to brand the experience! Try clicking the image button in the toolbar.
Note: Do not remove the button's URL as this is what users need to receive to reset their password.
Step 3: Test the feature
- Head to the live site and test through your screens as if you were an end user to ensure every screen is set up correctly.
FAQ
Can I use this feature with embedded cards?
Unfortunately, the Accounts feature is only available on the Komo Hub/portal and will not apply to any embedded cards on external sites.
Can I add additional fields to the sign-up form?
Yes you can! You can request any additional information if you wish on the sign-up form. Follow Step 2(1)Ae for more details.
Is this feature required for all users?
No, this feature is optional. Users have the option to create an account and save their details on your Hub or to dismiss this feature.
One last note:
At Komo, we pride ourselves on not only the results our clients achieve with us but the service they receive whilst bringing their hubs to life.
If you ever have any questions about an upcoming activation, how you can best utilize Komo to get the best possible outcome or just a general query, please don't hesitate to reach out to your Customer Success Specialist or email us at support@komo.tech
We also love your feedback, so please let us know if this article helped you by selecting from the options below.
Louis Docherty
Head of Customer Success