Contents:
- Integrations vs. Webhooks
- How do I set up an in-built integration?
- How do I set up a Webhook Integration?
Integrations vs. Webhooks
Integrations are what we define as another piece of software that you can connect to the Komo Platform in order to perform a specific action - these are built into our Platform. For example, here is a selection of the available built-in integrations on the Portal and their functions:
- Adobe Launch Tag Manager - Connect Adobe Analytics and other technologies to your hub using the Adobe Launch tag manager.
- Google Tag Manager - Connect Google Analytics and other technologies to your hub using Google Tag Manager (GTM).
- OneTrust Cookie Consent - Connect OneTrust Cookie Consent to your hub to configure branded banners using unique consent approaches.
- Slack - Notify a channel or individual in Slack with real-time user data
- OAuth Single Sign On (SSO) - Enable SSO integration with an OAuth2-compatible provider like Google or Auth0.
- Braze - Connect Braze to send communications to users based on actions such as form submissions.
- Zapier - Zapier lets you connect Webhooks with thousands of the most popular apps.
- HubSpot - Sync your data with HubSpot to quickly follow up on new leads or update existing details.
+ many more to explore!
A Webhook is what is defined as sending information from a source system (in this case Komo) to a target system, also known as a Webhook (e.g. Zapier, Pipedream, your custom HTTP webhook). This is how we send data to an external source without an in-built integration.
The format is usually JSON. The request is done as an HTTP POST request. You can read more about Webhooks here.
When setting up the webhook, Komo allows you to control which events are published to a specific Webhook. This means you can configure which data it is you would like to send via the Webhook, for example, from the Komo Portal to your CRM. To see all events that can be published, see here.
How do I set up an in-built integration?
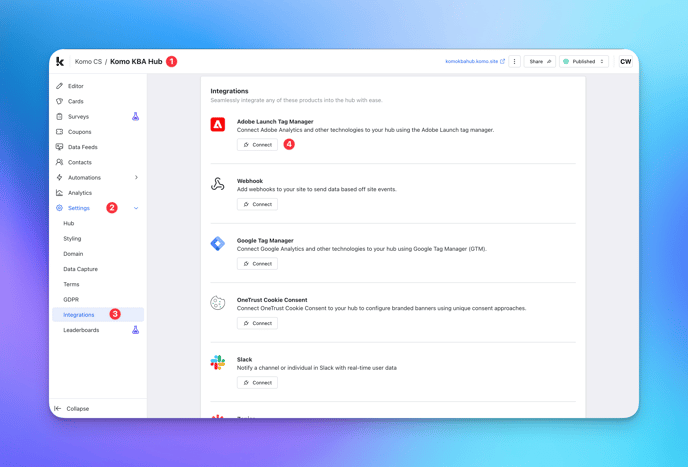
- (1) Navigate to your Engagement Hub.
- (2) Find the Settings tab on the left hand side of your screen.
- (3) Click on the Integrations tab within Settings.
- (4) Find the Integration you wish to set up and click the Connect button.

- (A) Follow the instructions on-screen to configure your integration. For this step, you will often need some kind of Client ID, Domain or URL from the software you are integrating with.
- (B) Click Add to implement your integration.
How do I set up a Webhook integration?
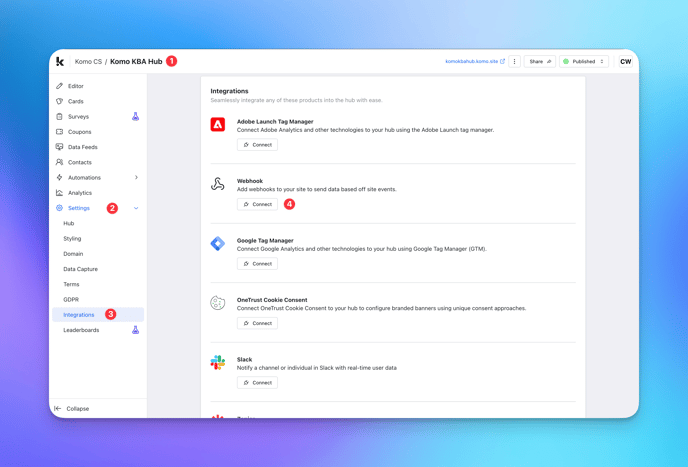
- (1) Navigate to your Engagement Hub.
- (2) Find the Settings tab on the left hand side of your screen.
- (3) Click on the Integrations tab within Settings.
- (4) Find the Webhook integration under the Integrations settings group.

- (A) Follow the instructions on-screen to configure your Webhook. For this step, you will need to give your Webhook an internal name.
- (B) Add a condition.

- (a) Select the event upon which you would like the Webhook to fire (i.e. when this happens > send data).
- (b) Here you can also select whether you would like this particular event to fire for all cards across your Hub, or just particular cards of your choosing.
- (c) Click Add.
- (C) Enter your Webhook URL.
- (D) Here you have the option to configure the body fields and HTTP headers. These will enable you to send far more detailed requests to your webhook URL without having to use more code.
- (E) Click Add.
Note: Should you require assistance with the configuration or execution of your webhooks, don't hesitate to reach out to your CSM!
One last note:
At Komo, we pride ourselves on not only the results our clients achieve with us but the service they receive whilst bringing their Hub's to life.
If you ever have any questions about an upcoming activation, how you can best utilise Komo to get the best possible outcome, or just a general query, please don't hesitate to reach out to your Customer Success Specialist or email us at support@komo.tech
We also love your feedback, so please let us know if this article helped you by selecting from the options below.
Louis Docherty
Head of Customer Success