
Set up a personalized URL for your Hub.
Contents:
What is it?
By default, your new Hub's URL will be (your Hub name).komo.site. For example, komohub.komo.site
You have the ability to fully customize and white label your Hub domain and remove the domain .komo.site.
Option 1: komo.site
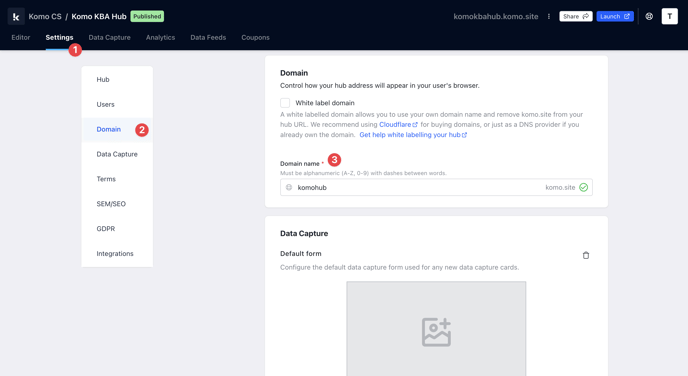
- Navigate to your Engagement Hub.
- (1) Click on Settings and then (2) Domain on the left sidebar.
- (3) You can customize your default (Hub) domain without purchasing another domain by simply changing the text within the box. You will then get a pop-up to confirm this change.
Option 2: Custom domain
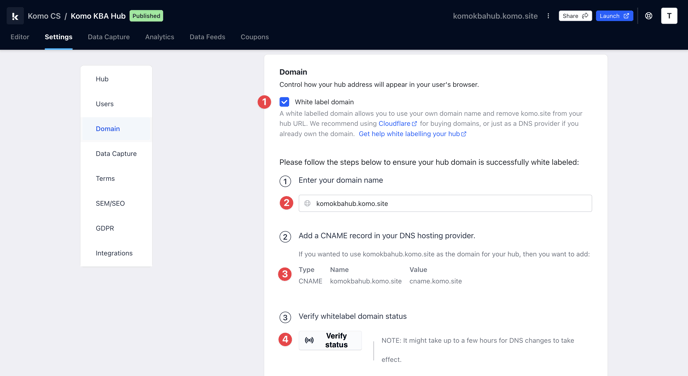
- (1) Tick the White label domain box. This will open a drop-down menu with all the steps to fully white label your Hub.
For more help white labeling using Cloudflare click here.
- (2) Enter your pre-purchased domain in the box.
-
Once you have completed these steps, we will provide you with a CNAME record.
- You will have to enter your DNS configuration within the next 48 hours.
-
Warning: You cannot white label a Hub at the Apex (root) of a domain unless the DNS provider (e.g. Cloudflare) supports CNAME flattening.
For example, you cannot white label 'mydomain.com' with GoDaddy (which doesn't support CNAME flattening), it would need to be 'www.mydomain.com' (a subdomain). However, 'mydomain.com' could be used with Cloudflare which does support CNAME flattening. If you require further assistance with CNAME flattening, reach out to your Customer Success Specialist.
- (3) Next, create your custom CNAME record.
- Go to your DNS provider’s website (e.g. Cloudflare ). If you’re choosing one for the first time, go with one that supports SSL.
- Create a new CNAME (‘canonical name’) record for your custom domain.
- Point it at Komo's host domain - cname.komo.site
See below for a step-by-step guide for Cloudflare.
Add a new site to Cloudflare
On Cloudflare, begin by adding a new site to your account.
If you are using an external registrar, follow the steps Cloudflare provides for updating your Registrar's nameserver settings to point at the Cloudflare servers.
If you buy a domain through Cloudflare, you won't need to change any nameserver settings.
Update the DNS Settings
Once your new site is added to Cloudflare, go to DNS on the side menu and add the following DNS management records:
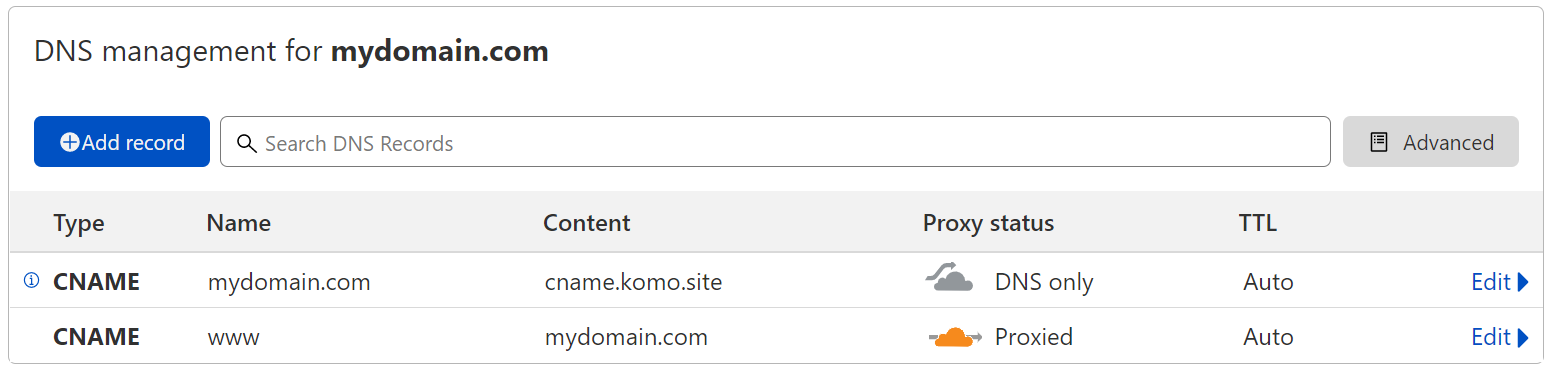
Make sure to replace "mydomain.com" with your own domain (without the "www.").
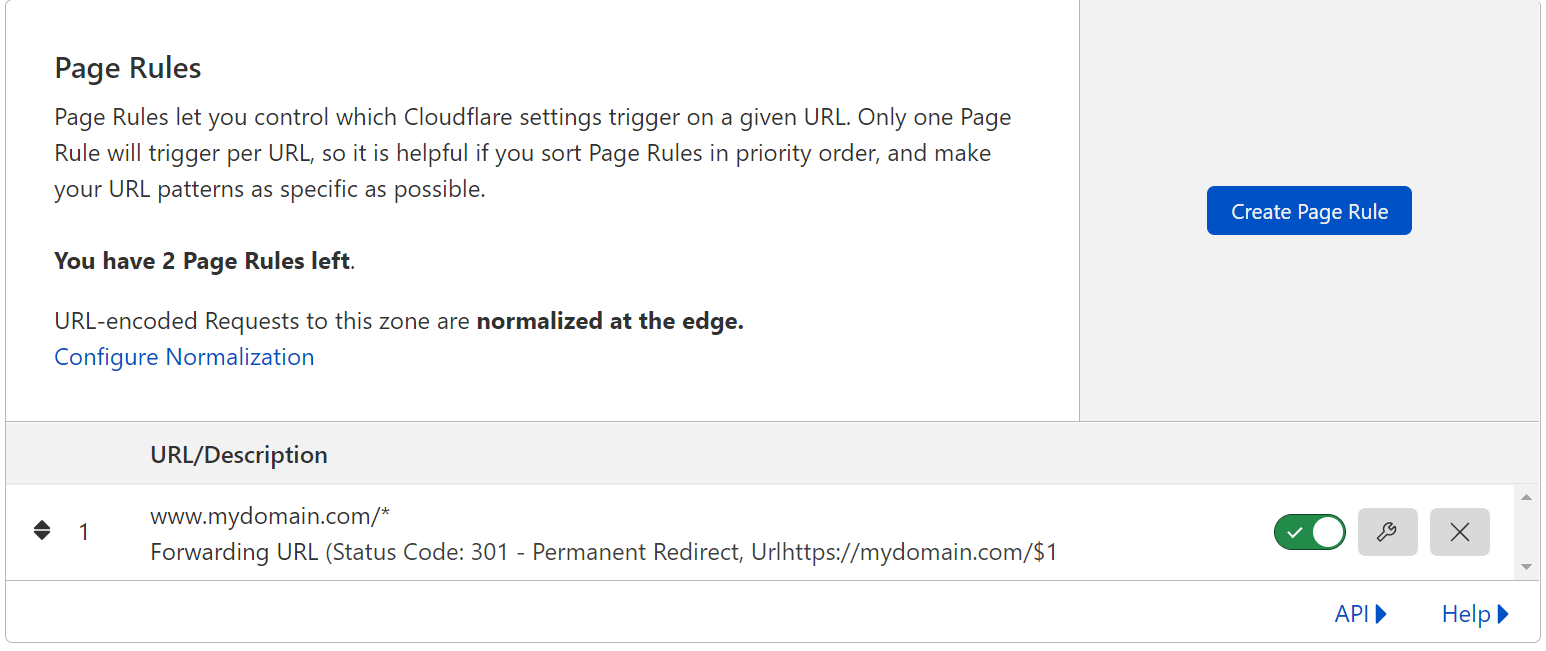
Add Page Rules
On the Cloudflare menu, select Rules > Page Rules. Here we will be adding a rule so that any requests for "www.domain.com" get redirected to "domain.com".
Click on Create Page Rule then follow the procedure below:
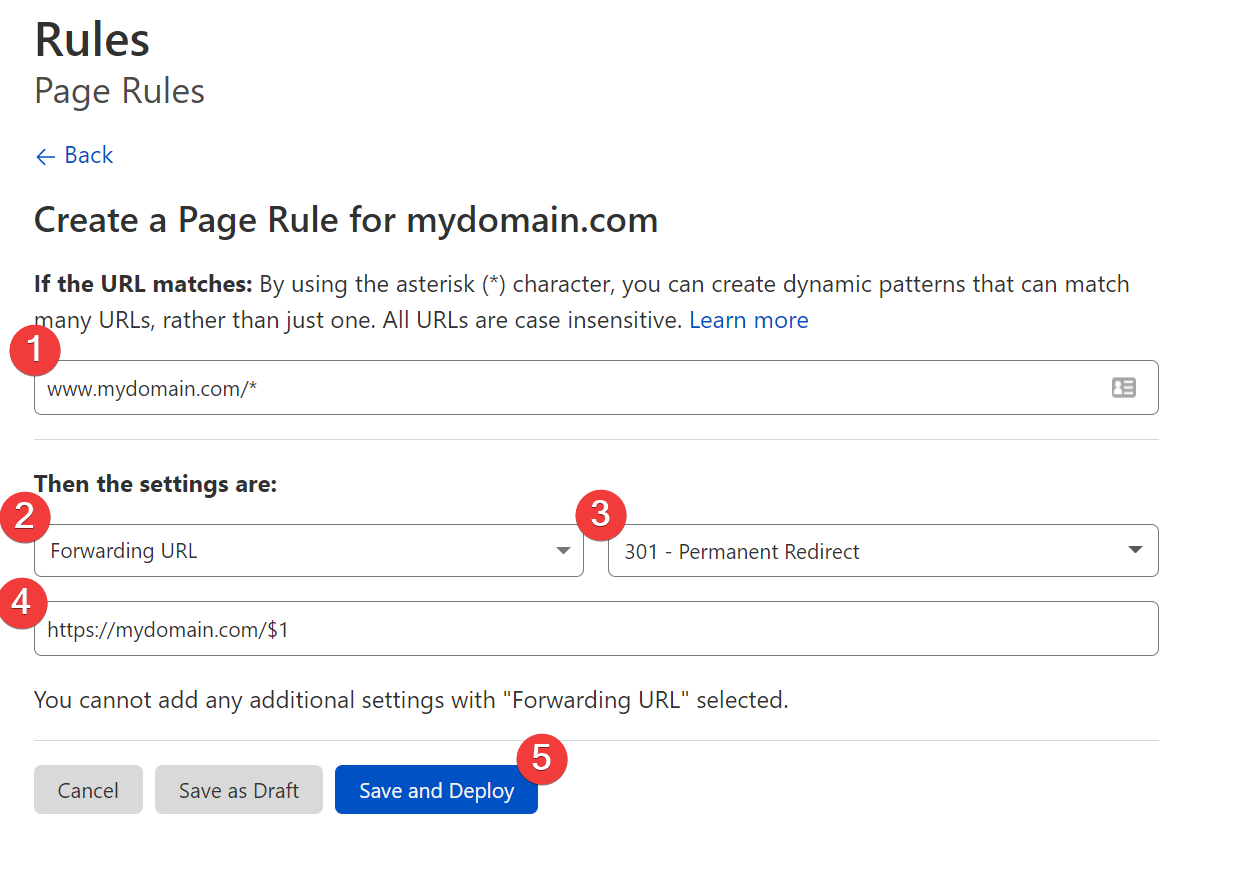
How do I set this up?
- Step 1: Enter your www domain with an asterisk after it e.g. www.mydomain.com/*
- Step 2: Select the "Forwarding URL" setting
- Step 3: Then select "301 - Permanent Redirect"
- Step 4: Enter the redirect address as follows, using your domain name (without www): https://mydomain.com/$1
- Step 5: Click Save and Deploy
This should result in a rule that looks like the following:
- (4) Finally, verify the status of your white label. Once the CNAME has been pointed toward the Komo portal, click the Verify Status button to confirm the white label domain status and link to your domain.
Note: This may take a few hours to update.
One last note:
At Komo, we pride ourselves on not only the results our clients achieve with us but the service they receive whilst bringing their hubs to life.
If you ever have any questions about an upcoming activation, how you can best utilize Komo to get the best possible outcome, or just a general query, please don't hesitate to reach out to your Customer Success Specialist or email us at support@komo.tech
We also love your feedback, so please let us know if this article helped you by selecting from the options below.
Louis Docherty
Head of Customer Success