
What is it?
Communication Subscriptions allow for granular opt-in and consent control at the Contact and Workspace levels, ensuring privacy compliance, enhancing opt-in management for integrations, and streamlining opt-ins before marketing communications. Ultimately you are able to simplify consent while providing better data protection.Watch it come to life
How do I do it?
- Step 1: Create your subscription
- Step 2: Add subscription consent field to forms
- Step 3: Send communications to subscribed groups
Step 1: Create your subscription
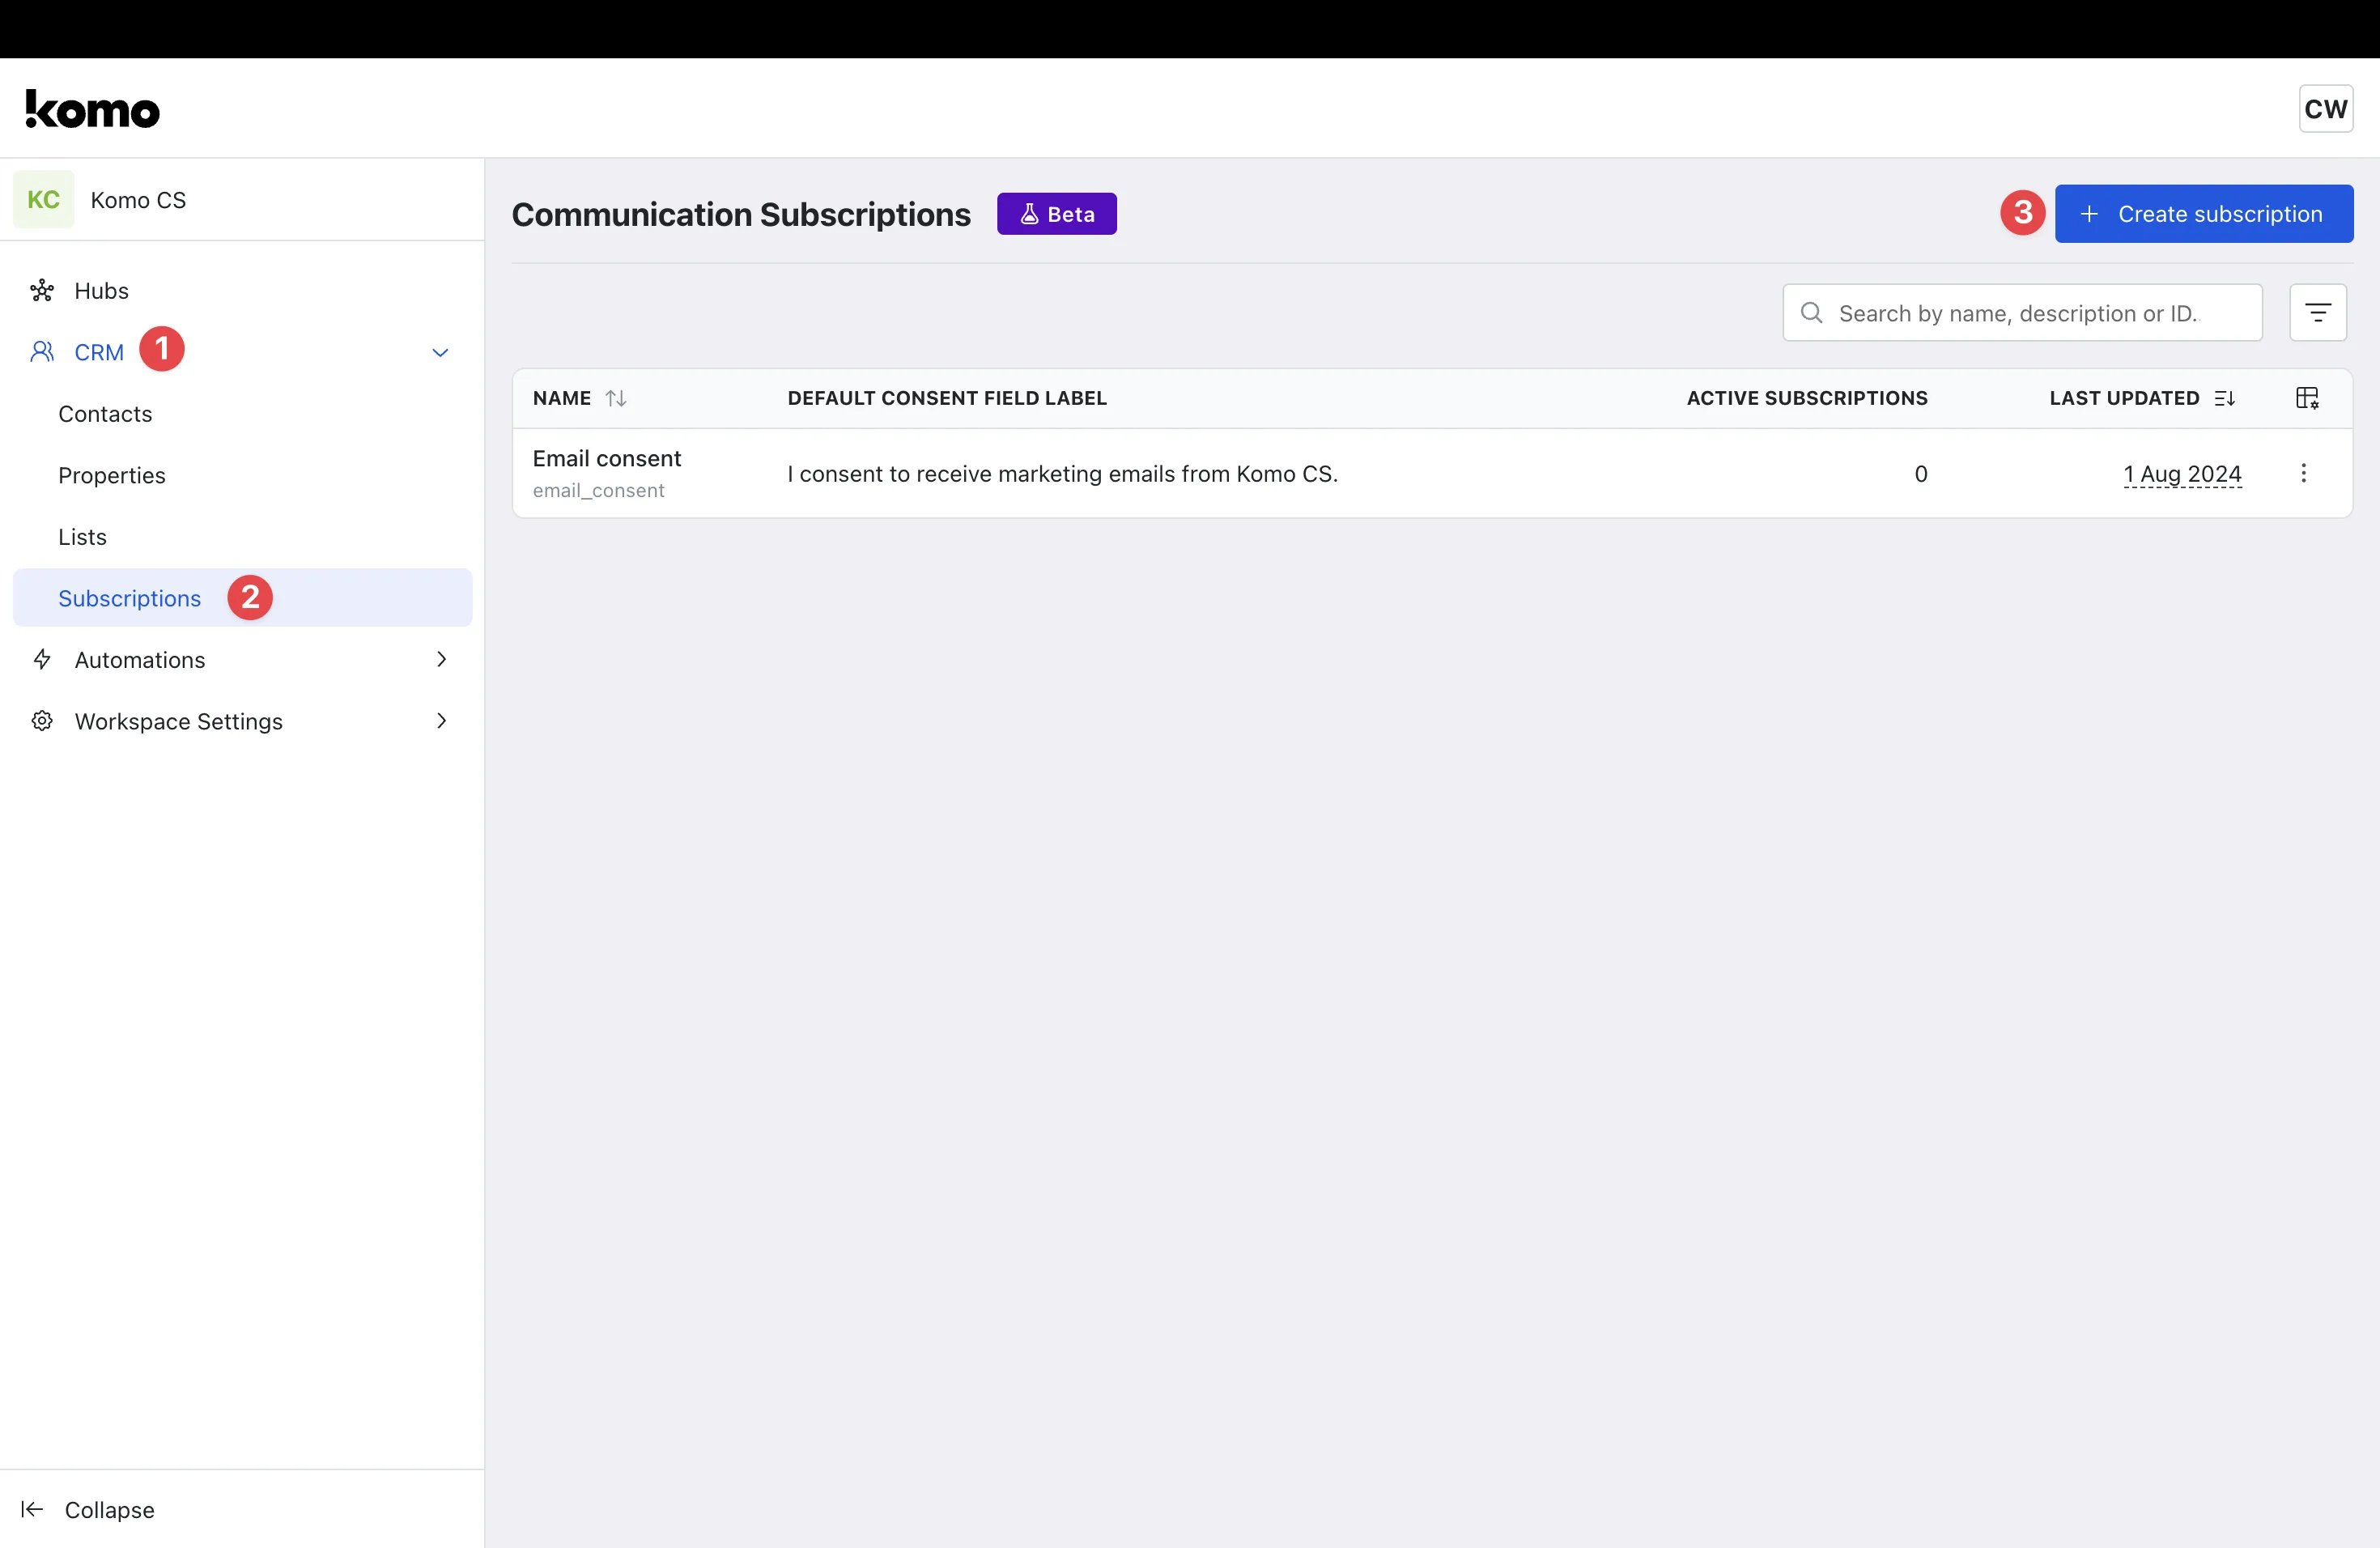
- Navigate to your Workspace.
- (1) Click on CRM.
- (2) Click on Subscriptions.
-
(3) Select + Create subscription.
You will see a default subscription titled ‘Email Consent’. This can be edited or deleted by clicking the 3 dots on the right-hand side of the subscription.
Creating a Subscription
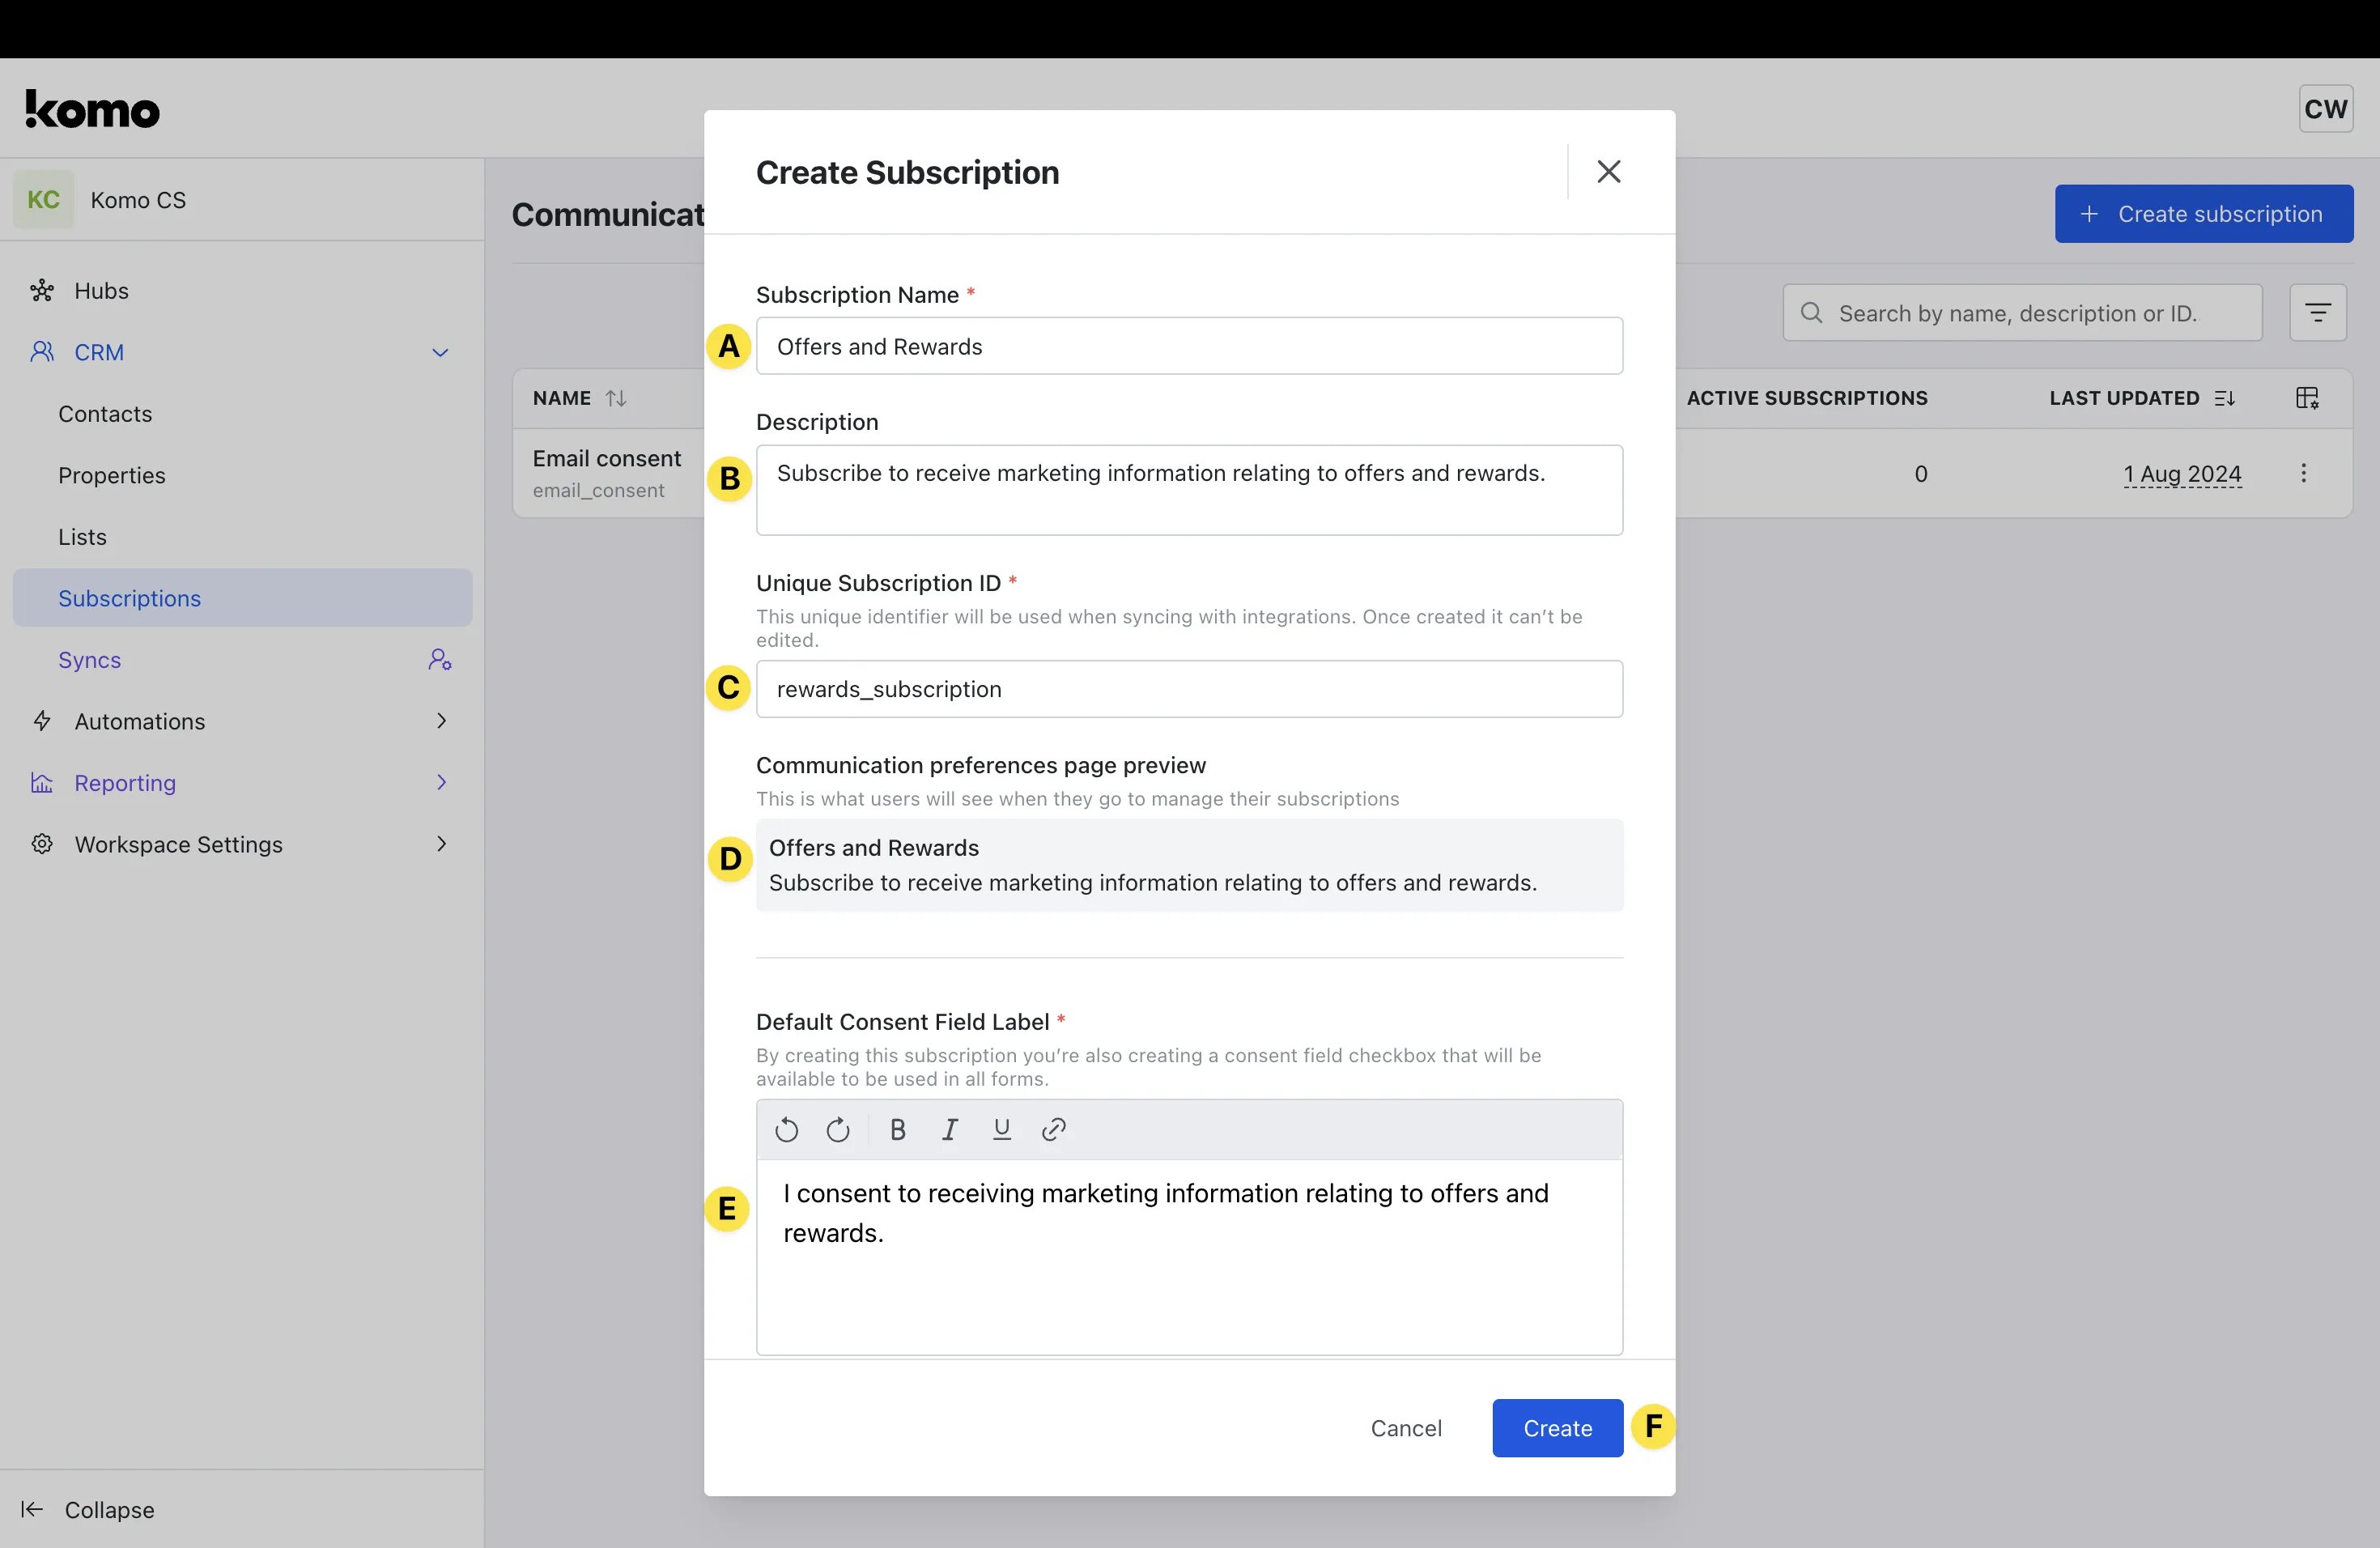
- (A) Give your subscription a meaningful Name. This name will help with searching for the consent group when adding to forms.
- (B) Provide a relevant Description for your subscription. This is automatically added to the Communications preference page and will be viewable by users when managing subscription preferences.
- (C) Type in a Unique Subscription ID. This will be referenced when syncing with integrations. Make sure you are satisfied with the ID as it can’t be edited once the subscription is created.
- (D) Review the Communication preference preview. This is auto-filled based on the information you inputted above and will be what users see when managing their subscriptions.
- (E) Type in your Default Consent Field Label. This is the label that will appear alongside the form checkbox when users provide consent.
- (F) Click Create to finalize the creation of the subscription.
Step 2: Add subscription consent field to forms
- Once you have set up your subscriptions, you can now add it to the relevant card forms.
- Navigate to the relevant Card and access the Card Settings.
- Click on the Data capture dropdown, select Form from the options, and select Form in the middle of the screen.
- Click the + sign at the bottom of the form.
- Scroll down your existing contact properties column and select the Subscription you created in Step 1.
- You will then be able to edit the Consent Field settings, including marking the checkbox as required and editing the field label.
- You will now see that the Subscription Consent Checkbox has been added to the form.