
What is it?
Vault Mastercards are digital prepaid cards that can be instantly issued to prize winners via automated workflows. These digital cards can be accessed on recipients’ phones and used wherever traditional Mastercards are accepted. Continue reading to learn how you can effortlessly distribute Vault Mastercards to your prize winners.How do I do it?
Step 1: Provide Vault Campaign IDs
- Ensure you have a Campaign set up with Vault. Once everything is approved, you will need to provide your Customer Success Manager with access and share your credentials. Please forward this request to Vault with your CSM’s details. When granted access, your CSM will then complete the backend connection on your behalf. If you have any issues or require further assistance, please reach out to your Customer Success Manager directly.
Step 2: Create your prize
- Prior to creating your distribution workflows, you will need to ensure you have created your prize. You will not be able to link your workflow until this prize is created. For detailed information on how to create prizes, please read this article.
Step 3: Build your workflow
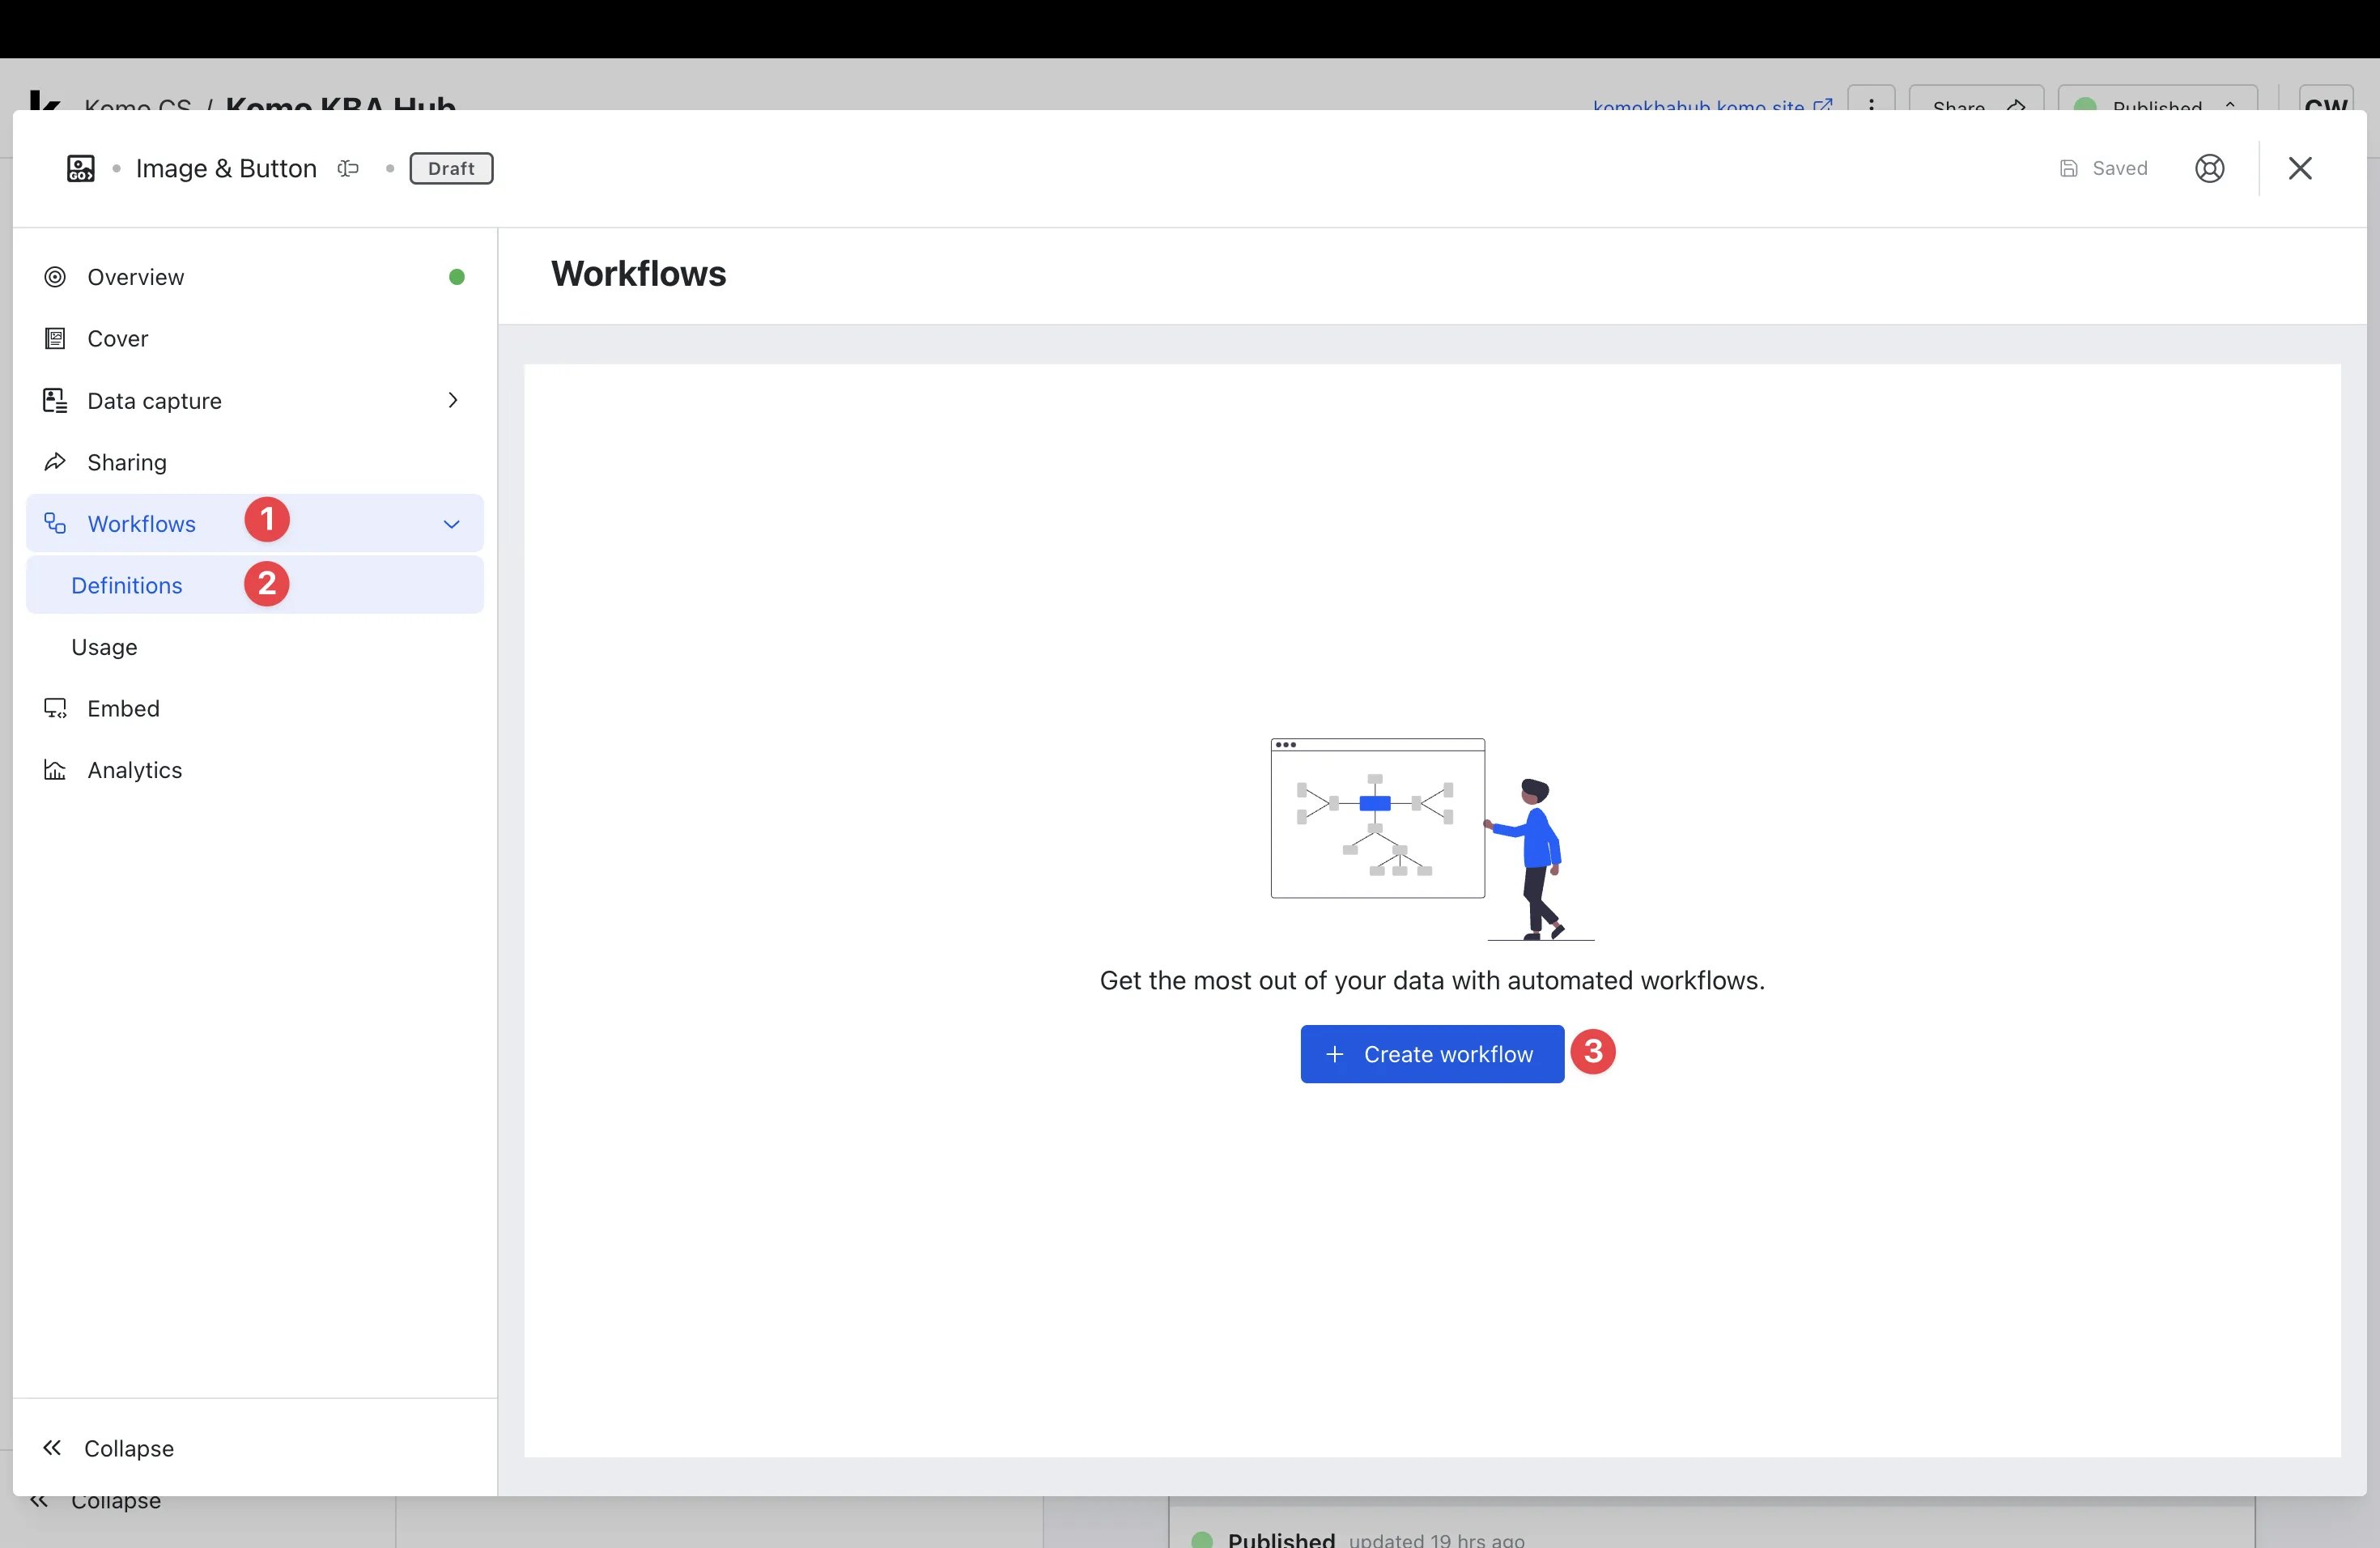
- Navigate to your Card and go into the Card Settings.
- (1) Click on Workflows.
- (2) Click on Definitions.
- (3) Select + Create workflow.
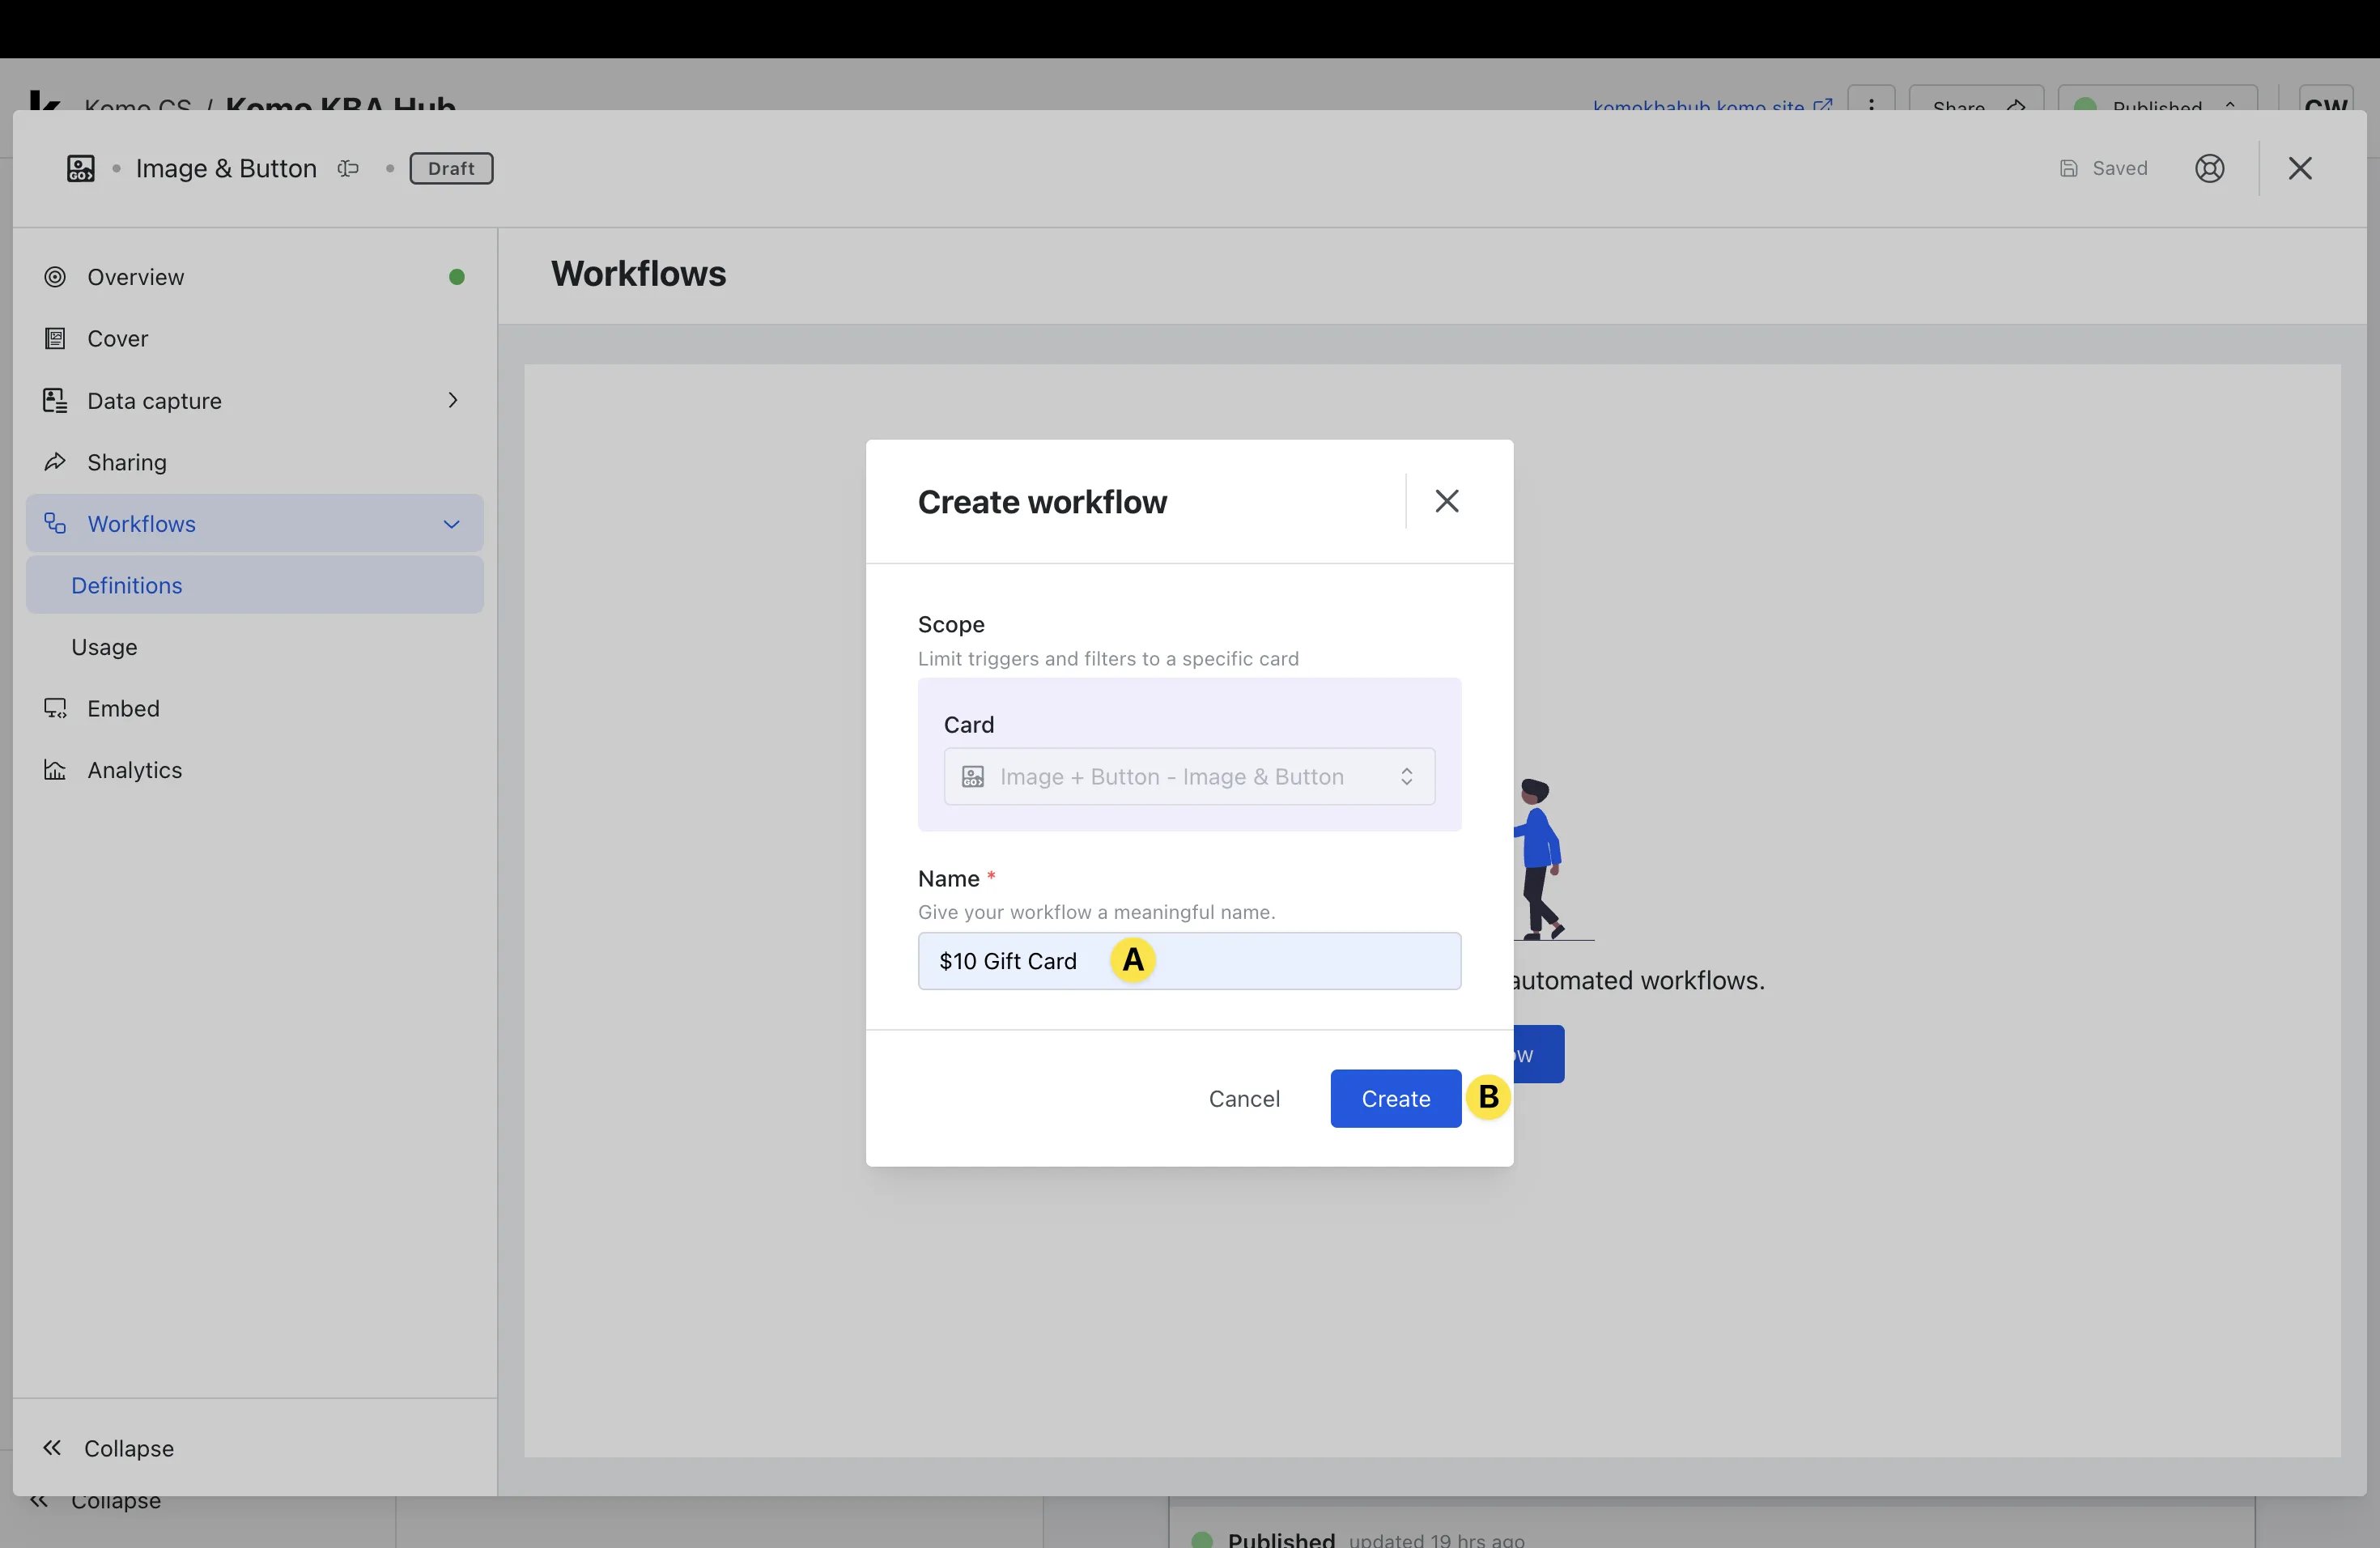
- (A) Give your workflow a meaningful Name.
- Note: This is internal only but we recommend that the naming aligns with the prize on offer for clarity.
- (B) Click Create.
- (A) Give your workflow a meaningful Name.
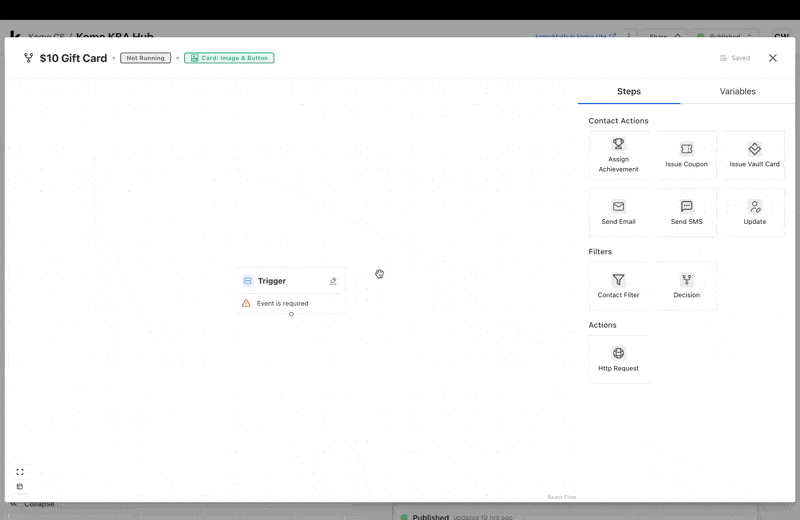
- You can now start building out your workflow.
- Select the pencil icon next to Trigger.
- Select Prize Awarded from the Execute flow on dropdown.
- Click + Add filter, select Prize is and then select the appropriate Prize from the dropdown (you created this prize in Step 2).
- Click Save and exit the modal by clicking X.
- Drag the Issue Vault Card workflow module and drop it below the Trigger module.
- Click on the circle at the bottom of the Trigger module, drag and drop on the circle of the Contact Vault Card Issue module.
- Select the pencil icon next to Contact Vault Card Issue.
- Select your Campaign ID from the dropdown (this is the ID you provided in Step 1).
- Type the appropriate Gift Card value in the Amount field.
- Set you Limit per contact as per your game rules (we recommend leaving blank for unlimited).
- Click Save and then exit the modal by clicking X.
- Finish building your workflow by clicking Save.
Step 4: Activate your workflow
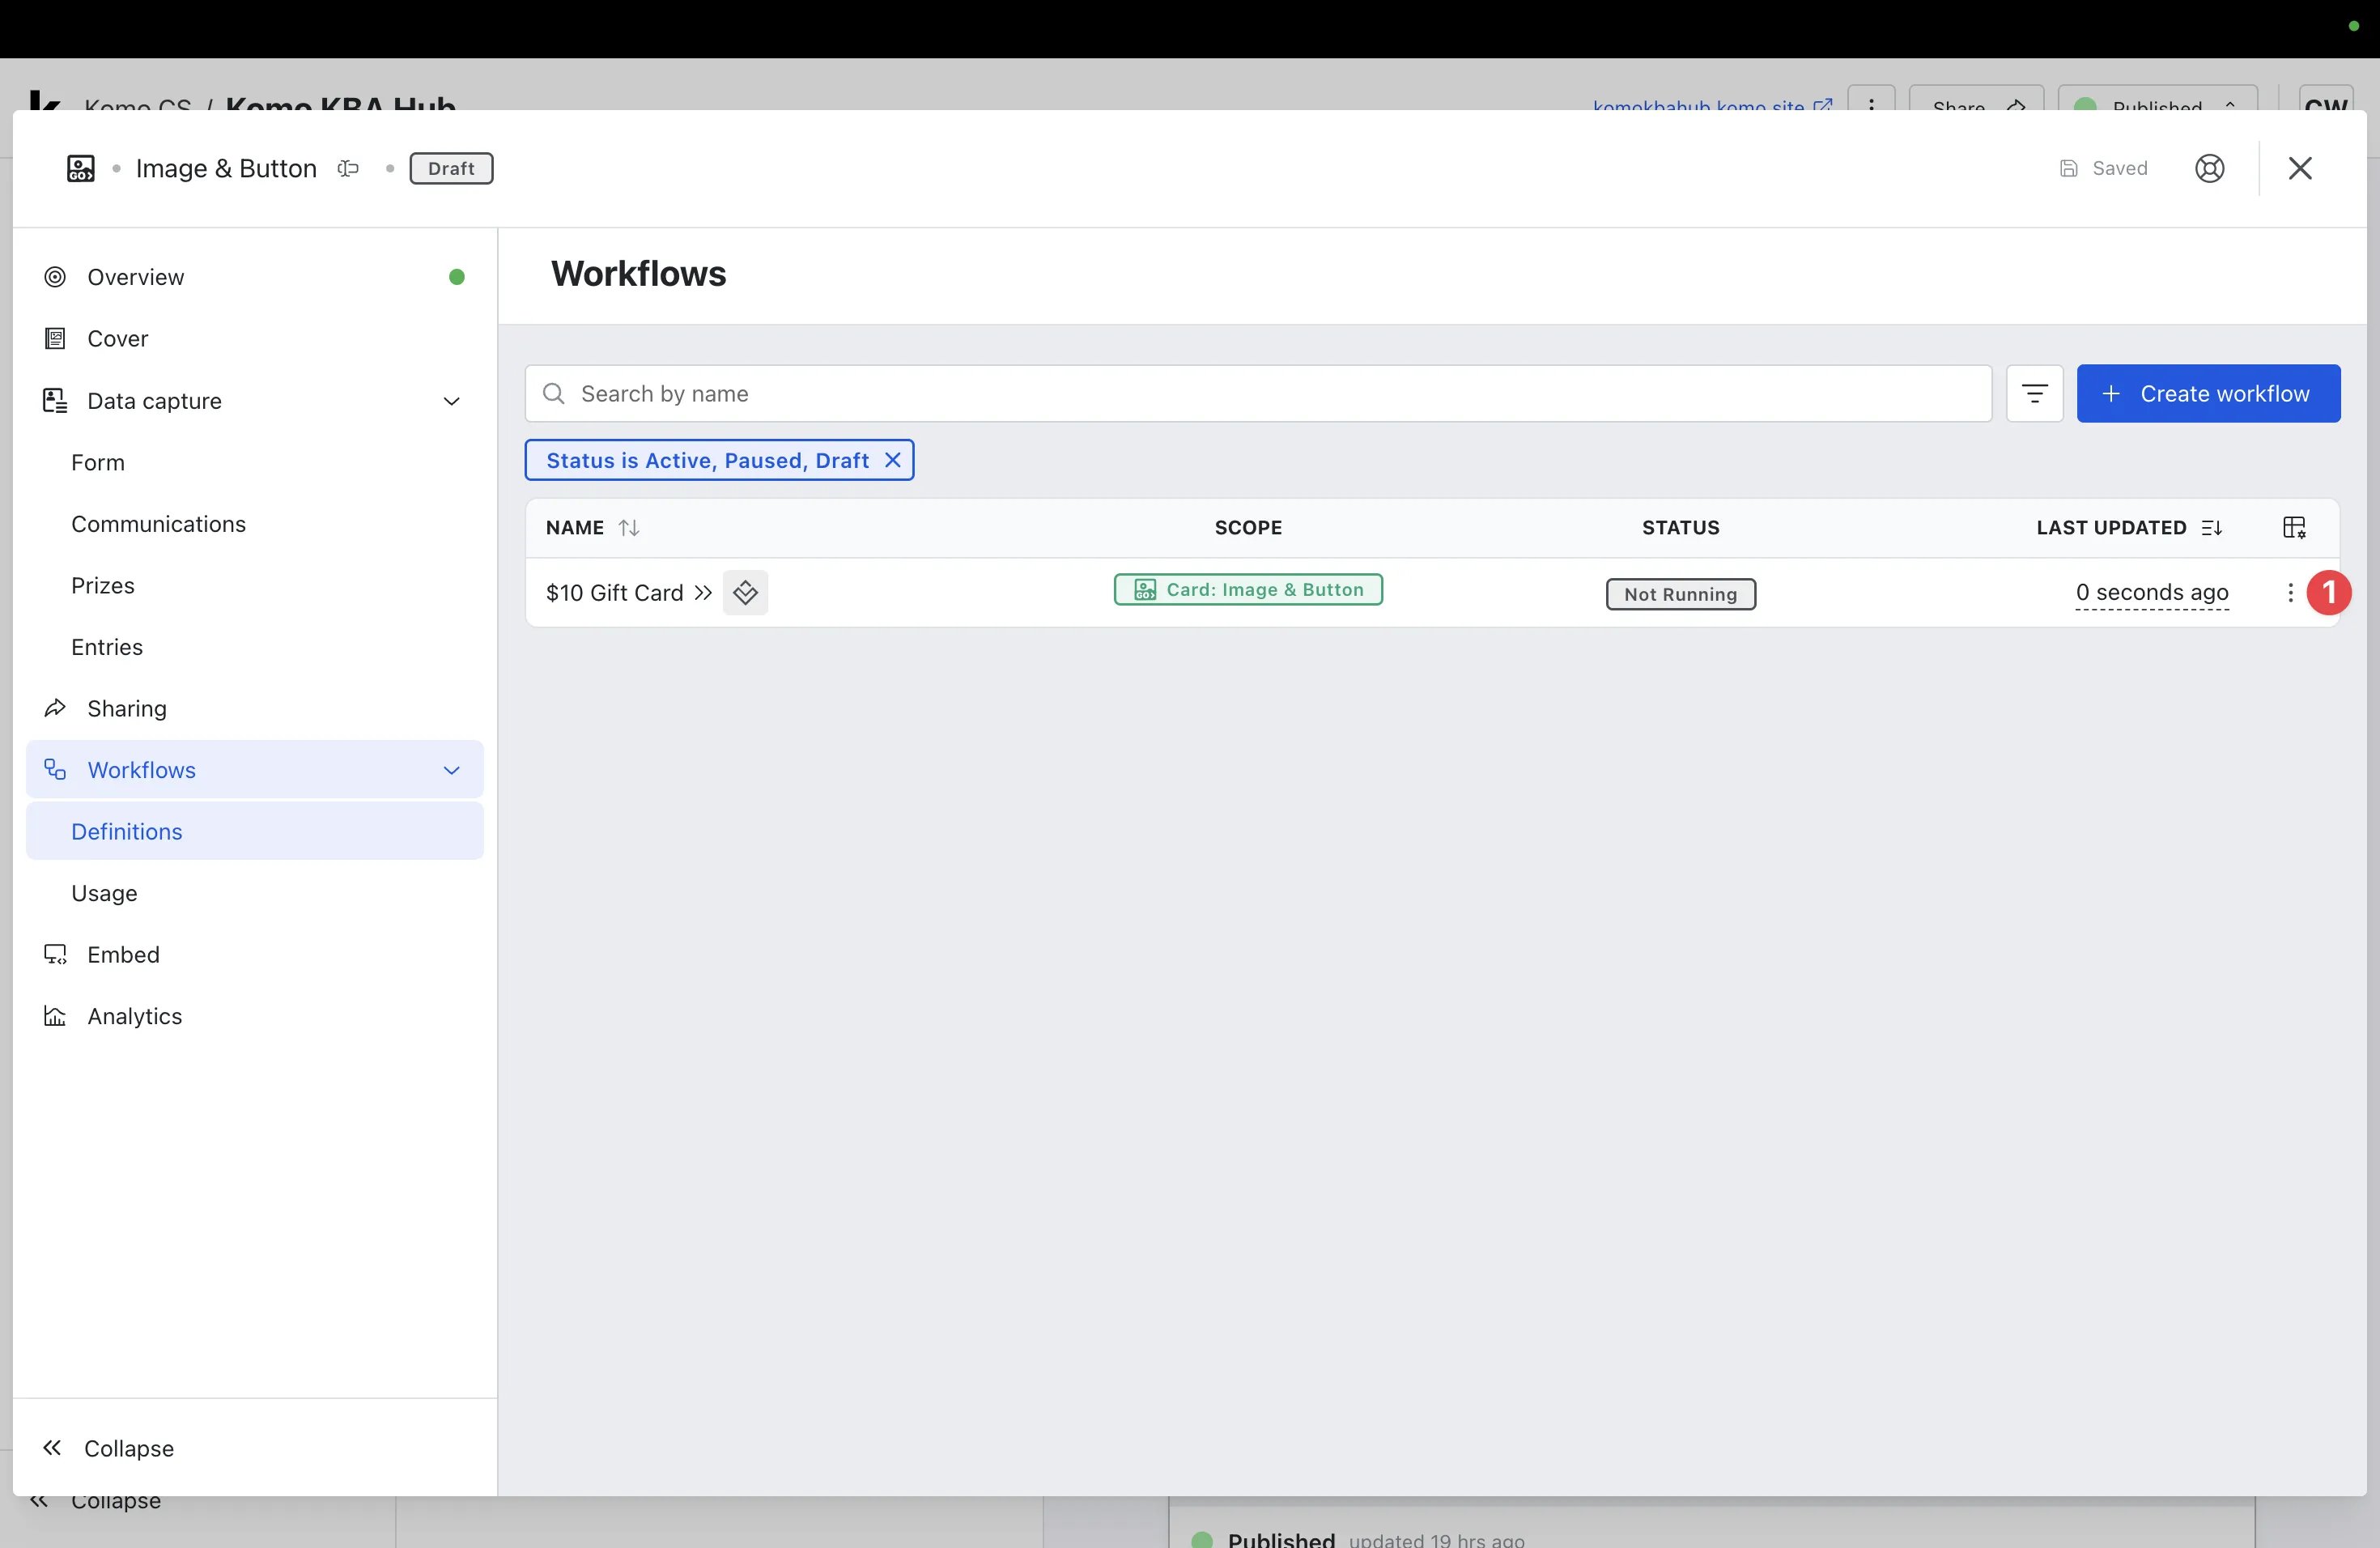
- You will now have to Run your workflow for it to begin working.
- (1) Click the three dots to access the additional actions.

- (A) Run - Click this to run your workflow.
- (B) Edit - Here you can make edits to the workflow you set up.
- (C) Rename - Select this if you would like to rename your workflow.
- (D) Delete - Click this if you would like to delete your workflow.
- Once you have selected Run, your workflow will be live and you can move onto testing!
Step 5: Test your workflow
- Repeat Step 2, Step 3 and Step 4 to create a test prize and workflow.
- Once you have set up your test prize and workflow, you will then need to test the Card. For information on how to test your card, please read this article.
- Once you’ve tested the card and entered your details, you can then test the workflow.
- Navigate to the Card Settings and select Prizes under the Data Capture dropdown.
- Select the three dots (actions) next to your Test Prize.
- Click Select recipients to award.
- You should now see the contact details you submitted when working through the Card experience.
- Check the box next to your contact details and click Review.
- You can now review the details of the contact and click Award Prize.
- A pop-up should appear confirming that Awarding prizes have been completed. Confirm that the Status box next to your test prize also displays Awarded.
- When you are satisfied that your test workflow is operating as expected, it is best to ensure the workflow is paused by navigating to your test workflow under Definitions, clicking the three dots (actions) next to your test workflow (as detailed in Step 4) and selecting Pause.
Step 6: Monitor your workflow
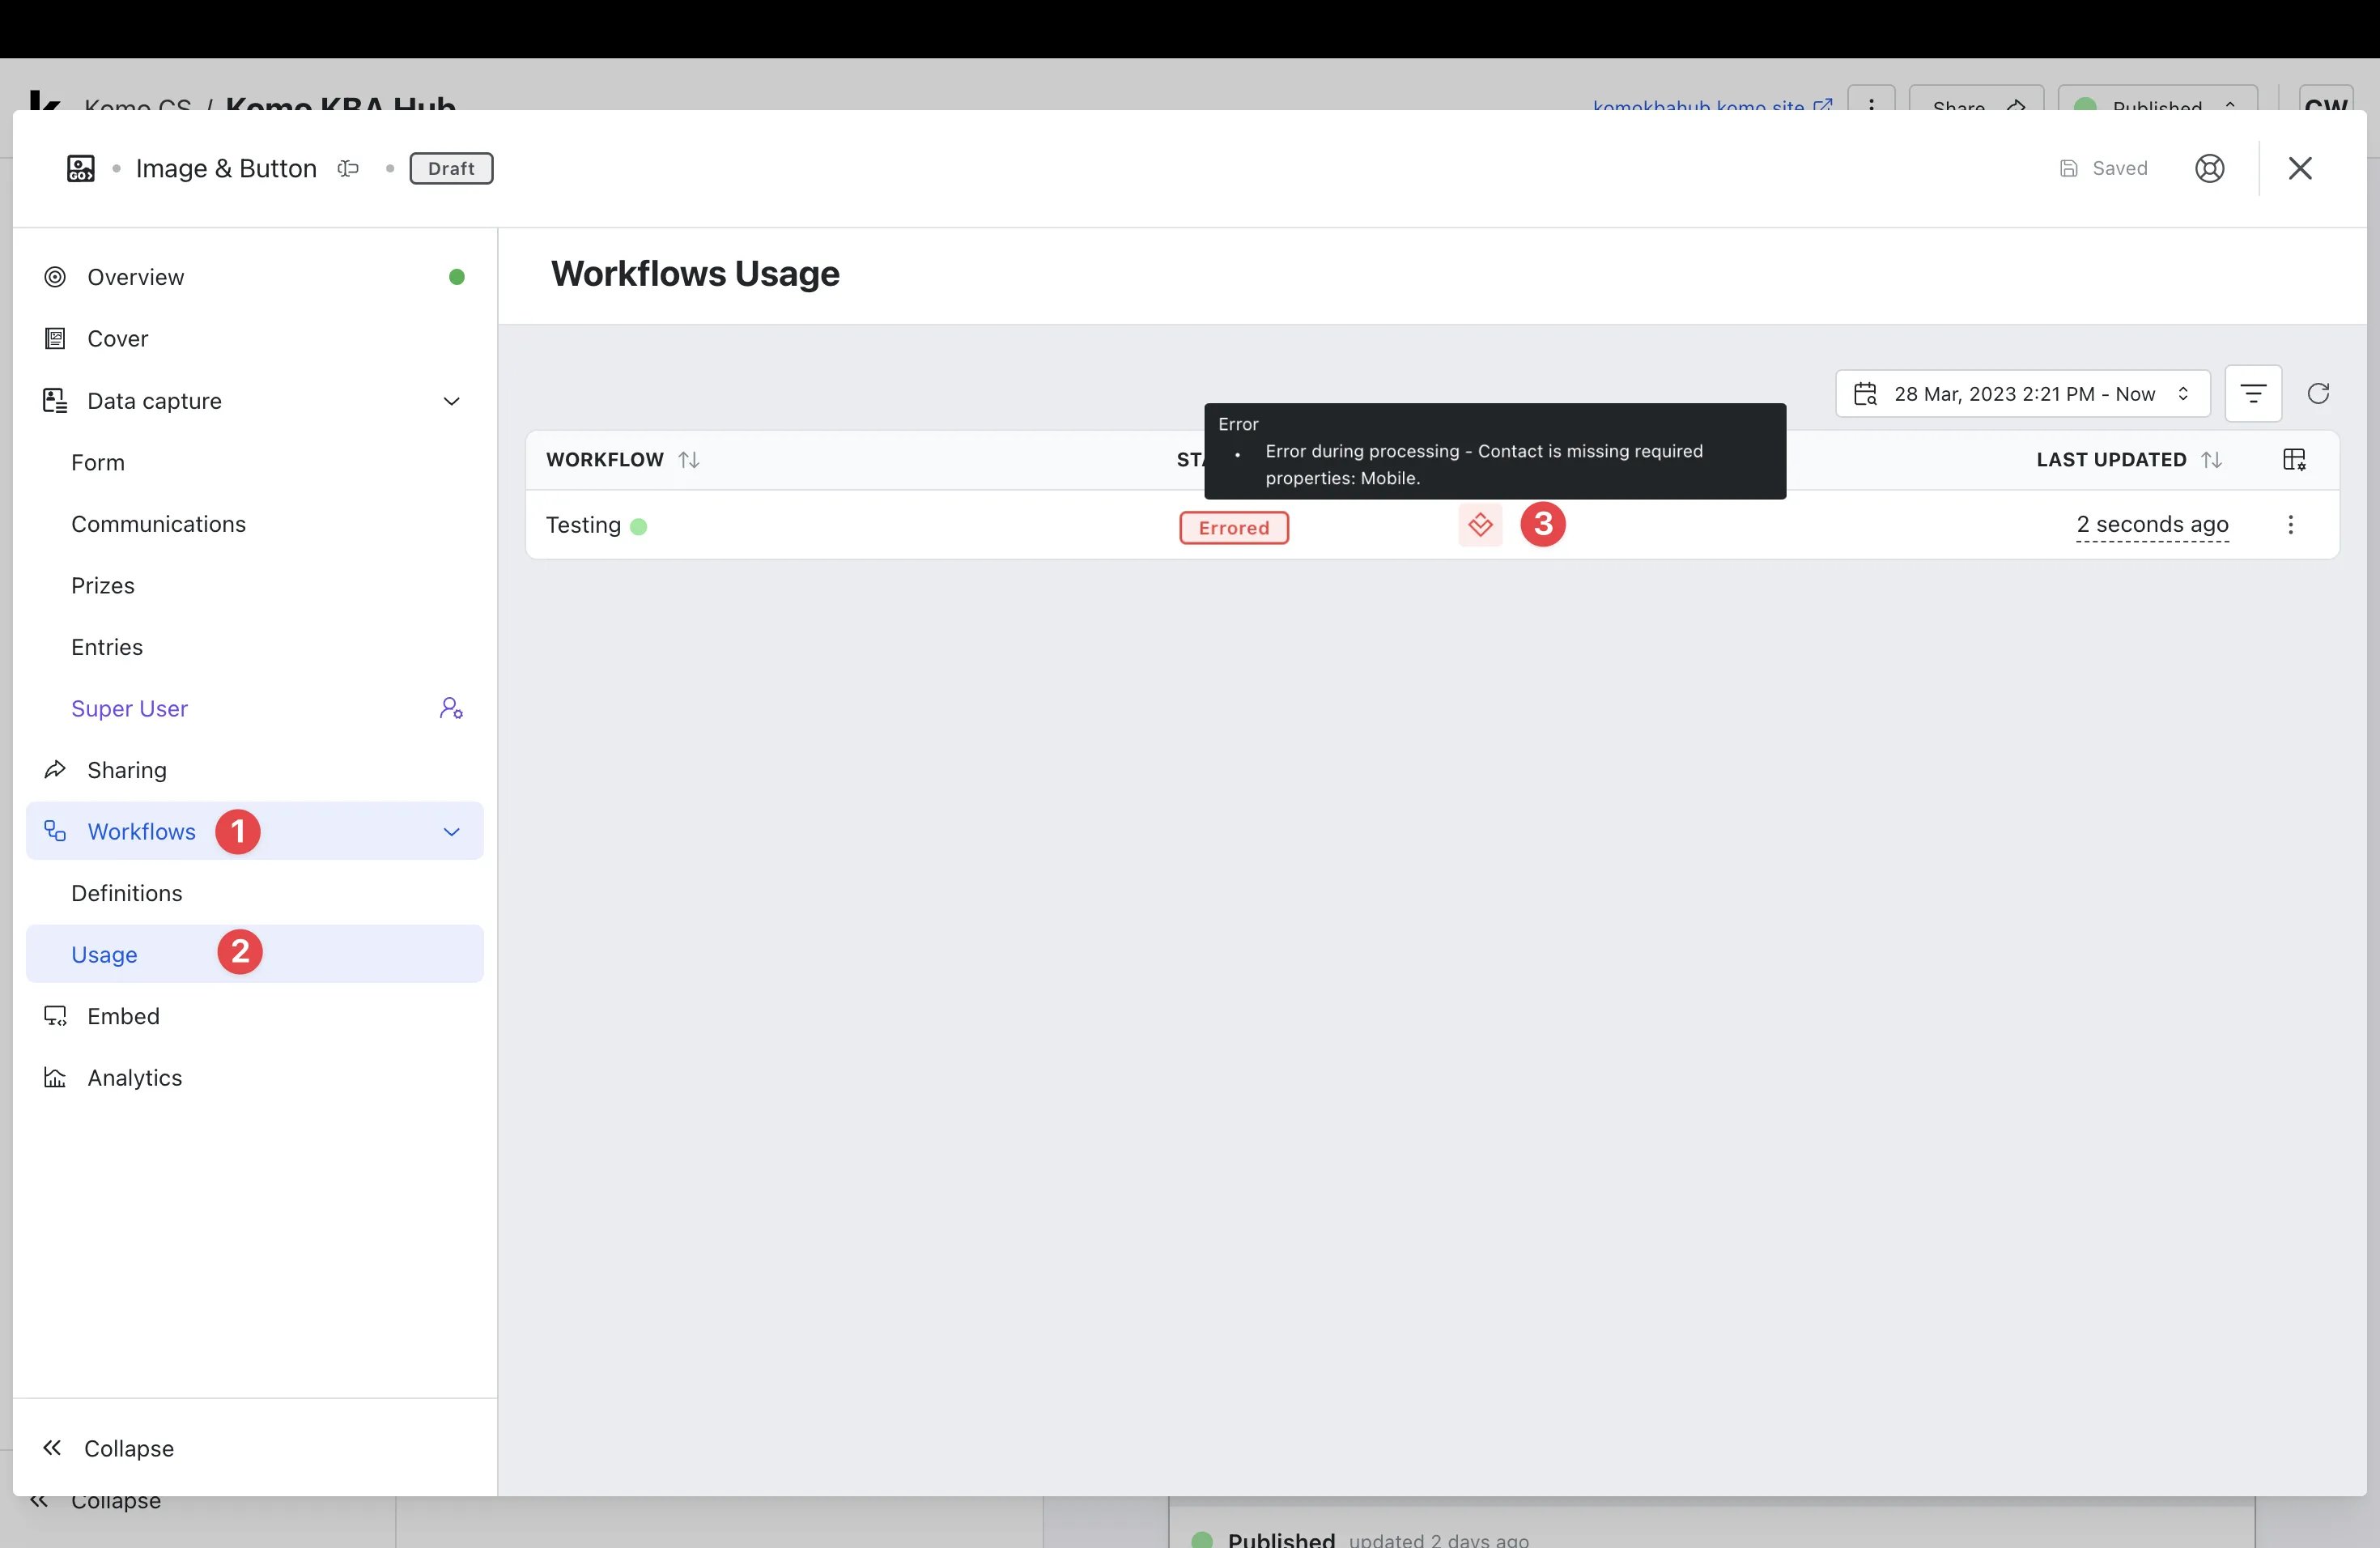
- It is important to monitor your test workflow to ensure it is running as expected.
- (1) Navigate to the Workflows dropdown.
- (2) Select Usage.
- (3) View the STATUS and INFO. If the status displays an error, we recommend hovering your mouse over the error icon under INFO.
- You will then be provided with a summary of the error (you can also click for more detailed information that will enable you to troubleshoot).