How to create a Webhook
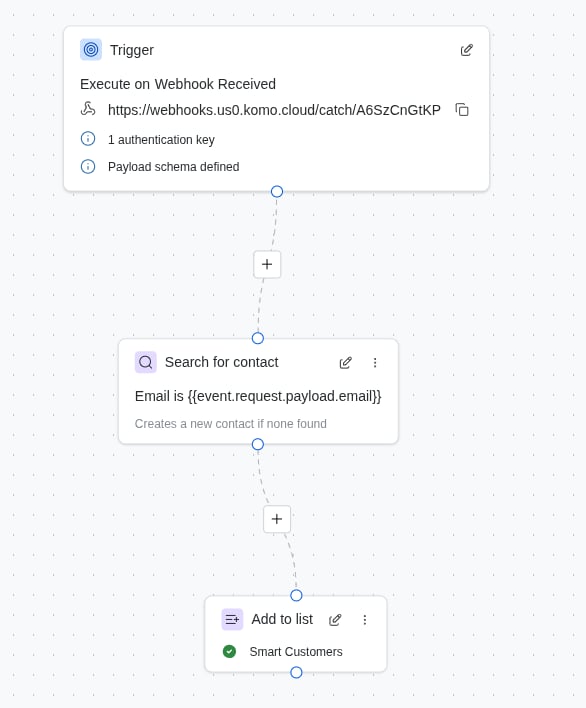
First, create a new Workflow, and set the Trigger to “Webhook Received”. You can optionally add Authentication Keys and a defined Payload Schema (JSONSchema) if you like.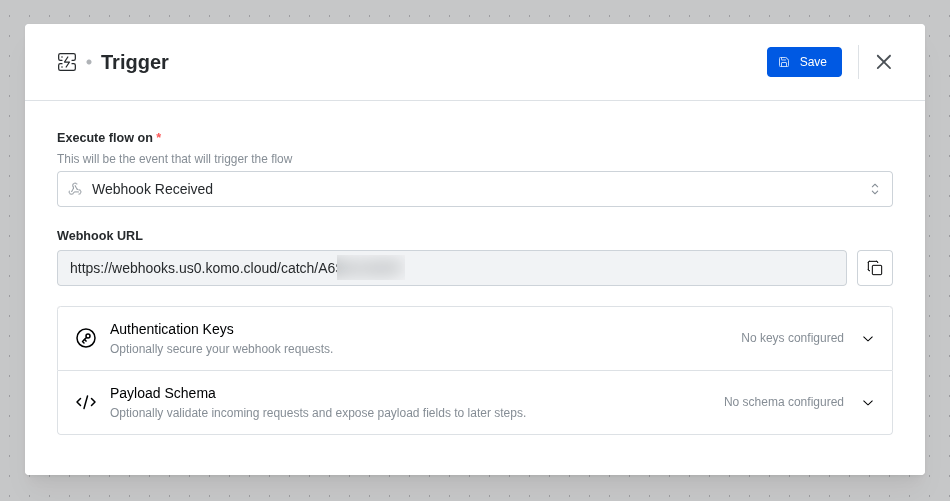
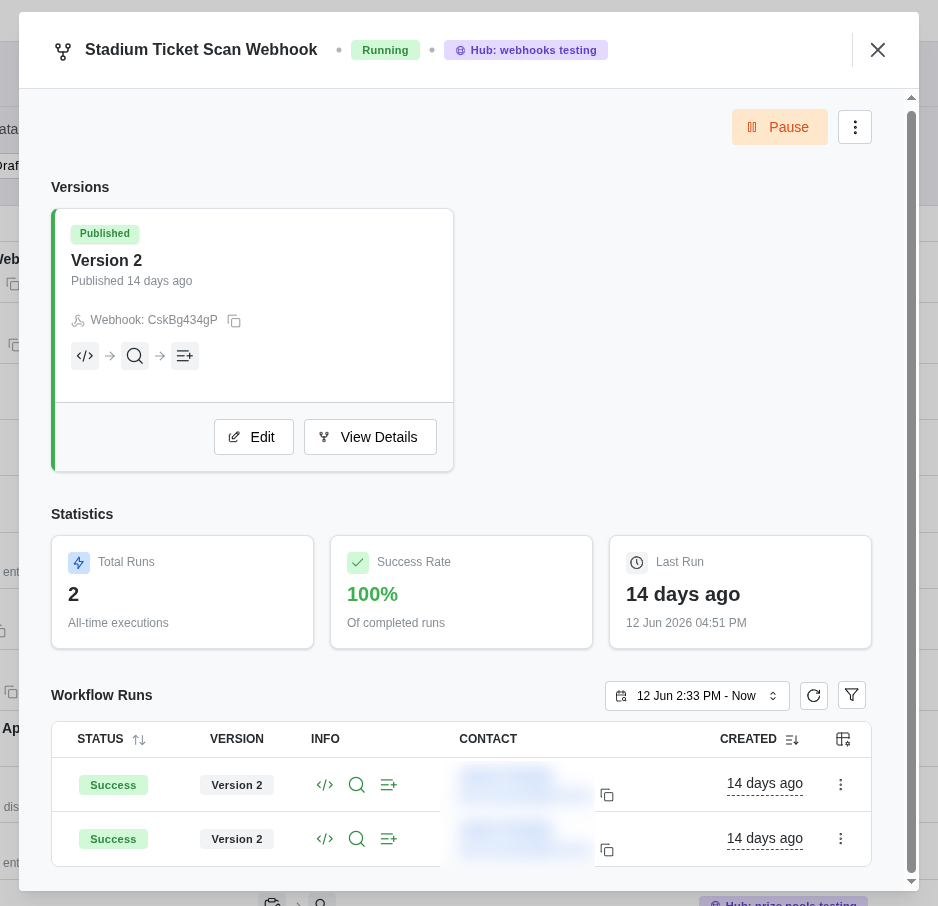
Publish and test your workflow
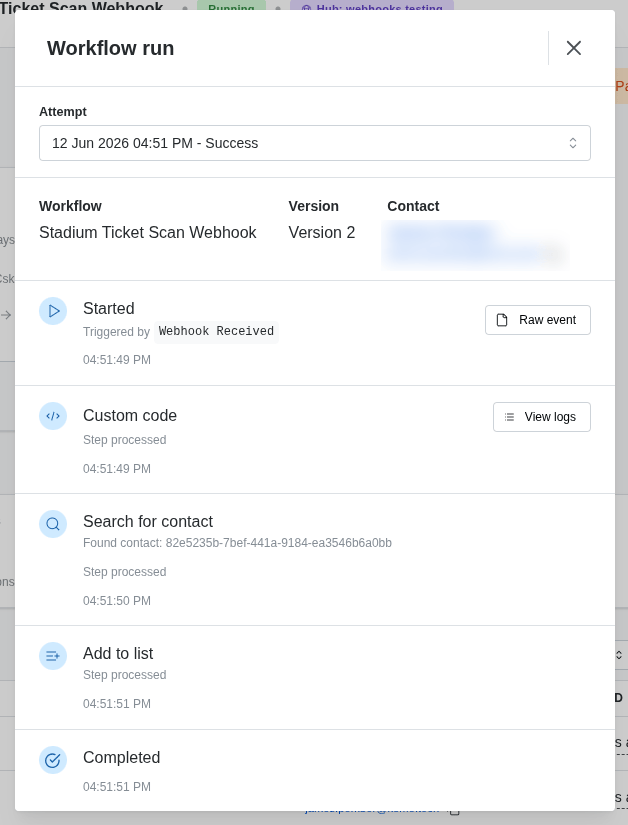
Next, you can publish and test your Workflow. Set the Workflow to Published, and then you can start sending requests to your Webhook URL. Use the HTTP POST method. Ensure you are using the Authentication Key and adhering to the Payload Schema if these have been defined. Once you have sent a request, you will see the request in the Workflow Runs tab, or via the Workflow Summary modal.