
What is it?
Any card with a data capture can have prizes, and communications that go to winners or entrants.How do I set it up?
- Step 1: Add a Data capture
- Step 2: Set up your Prizes
- Step 3: Set up your Prize communications
- Step 4: Add additional Communications
- Step 5: Set up Marketing Email Communications
Step 1: Add a Data capture
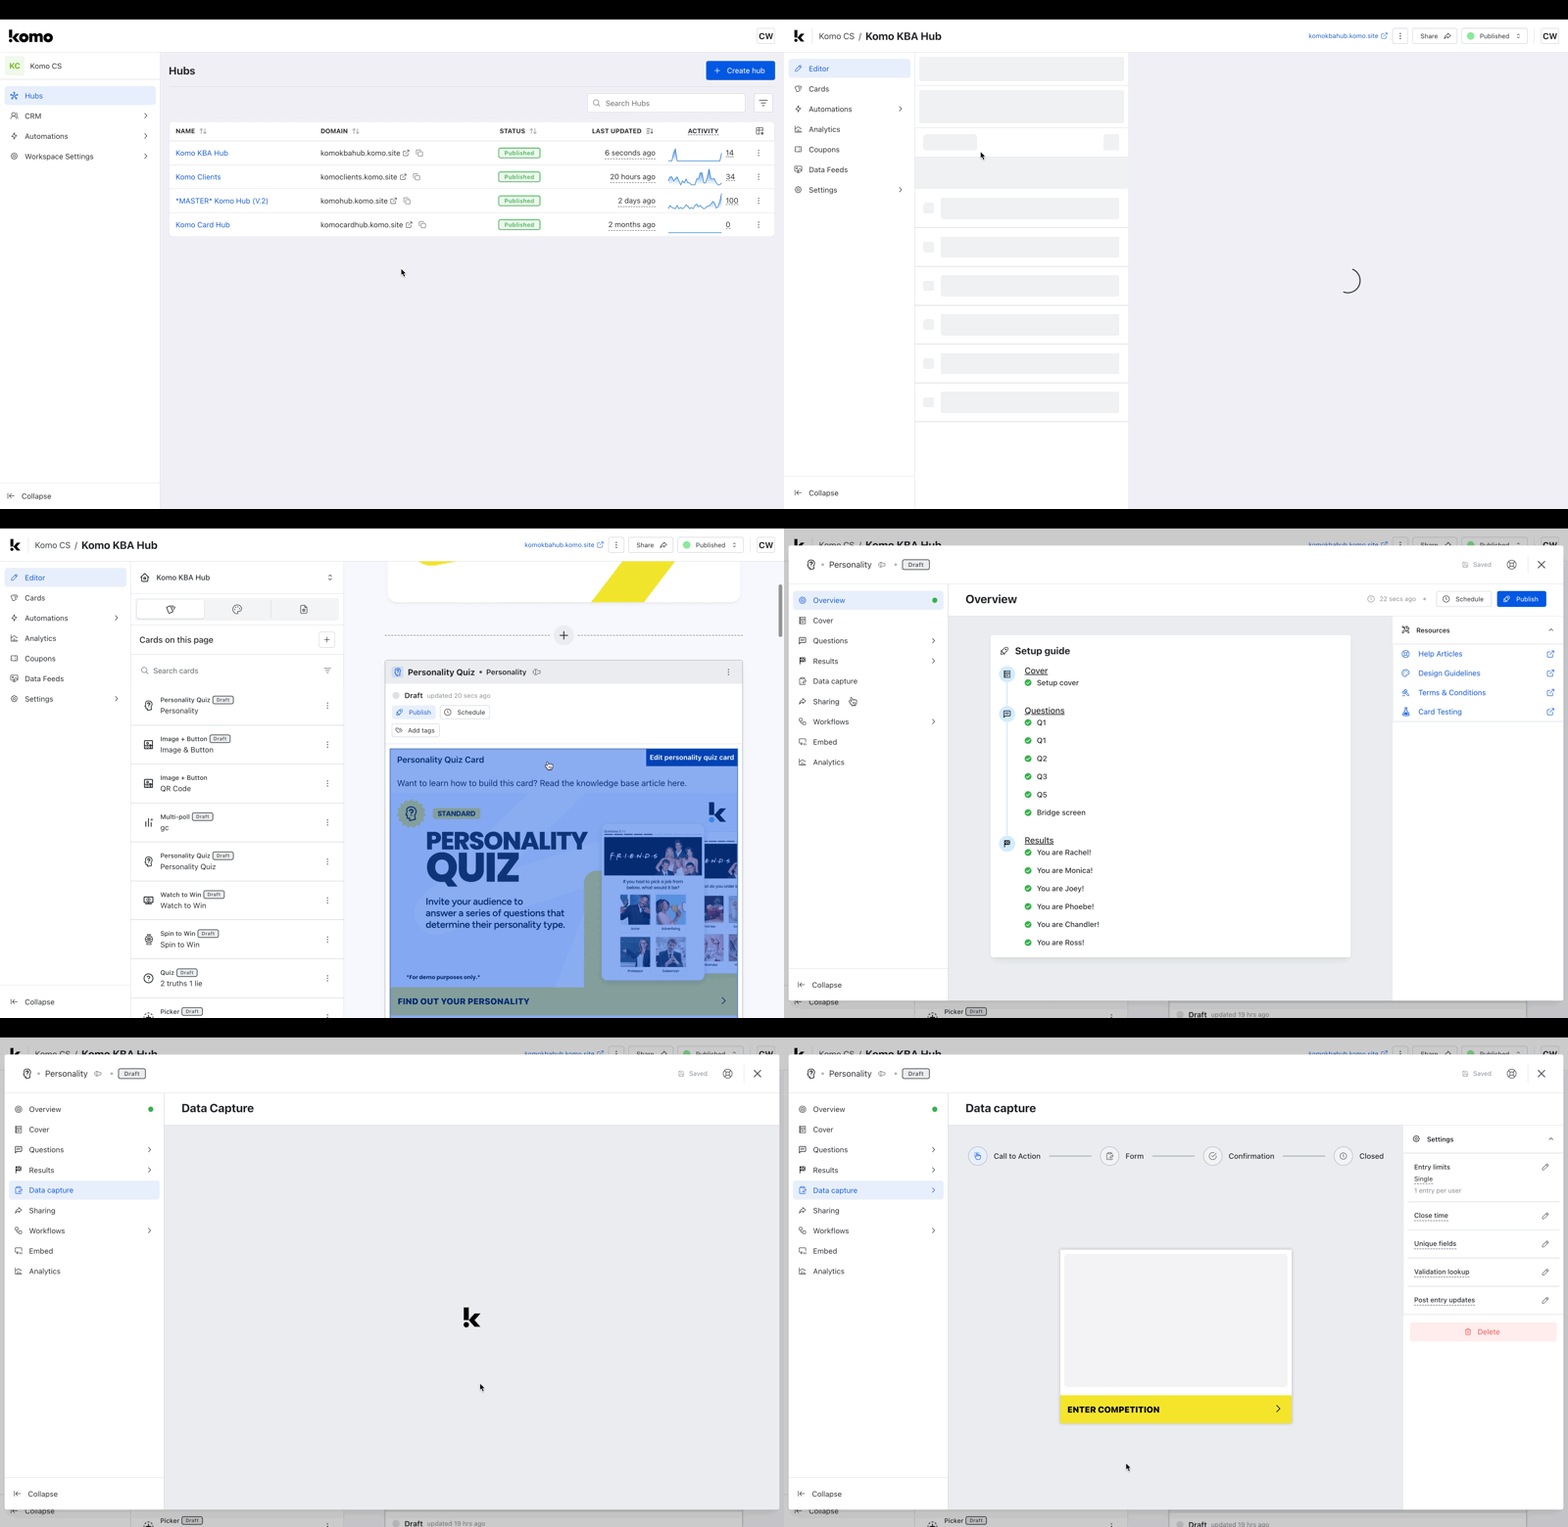
- Open your Engagement Hub and go to the card settings.
- Click Data capture, then + Add Data Capture.
Step 2: Set up your Prizes
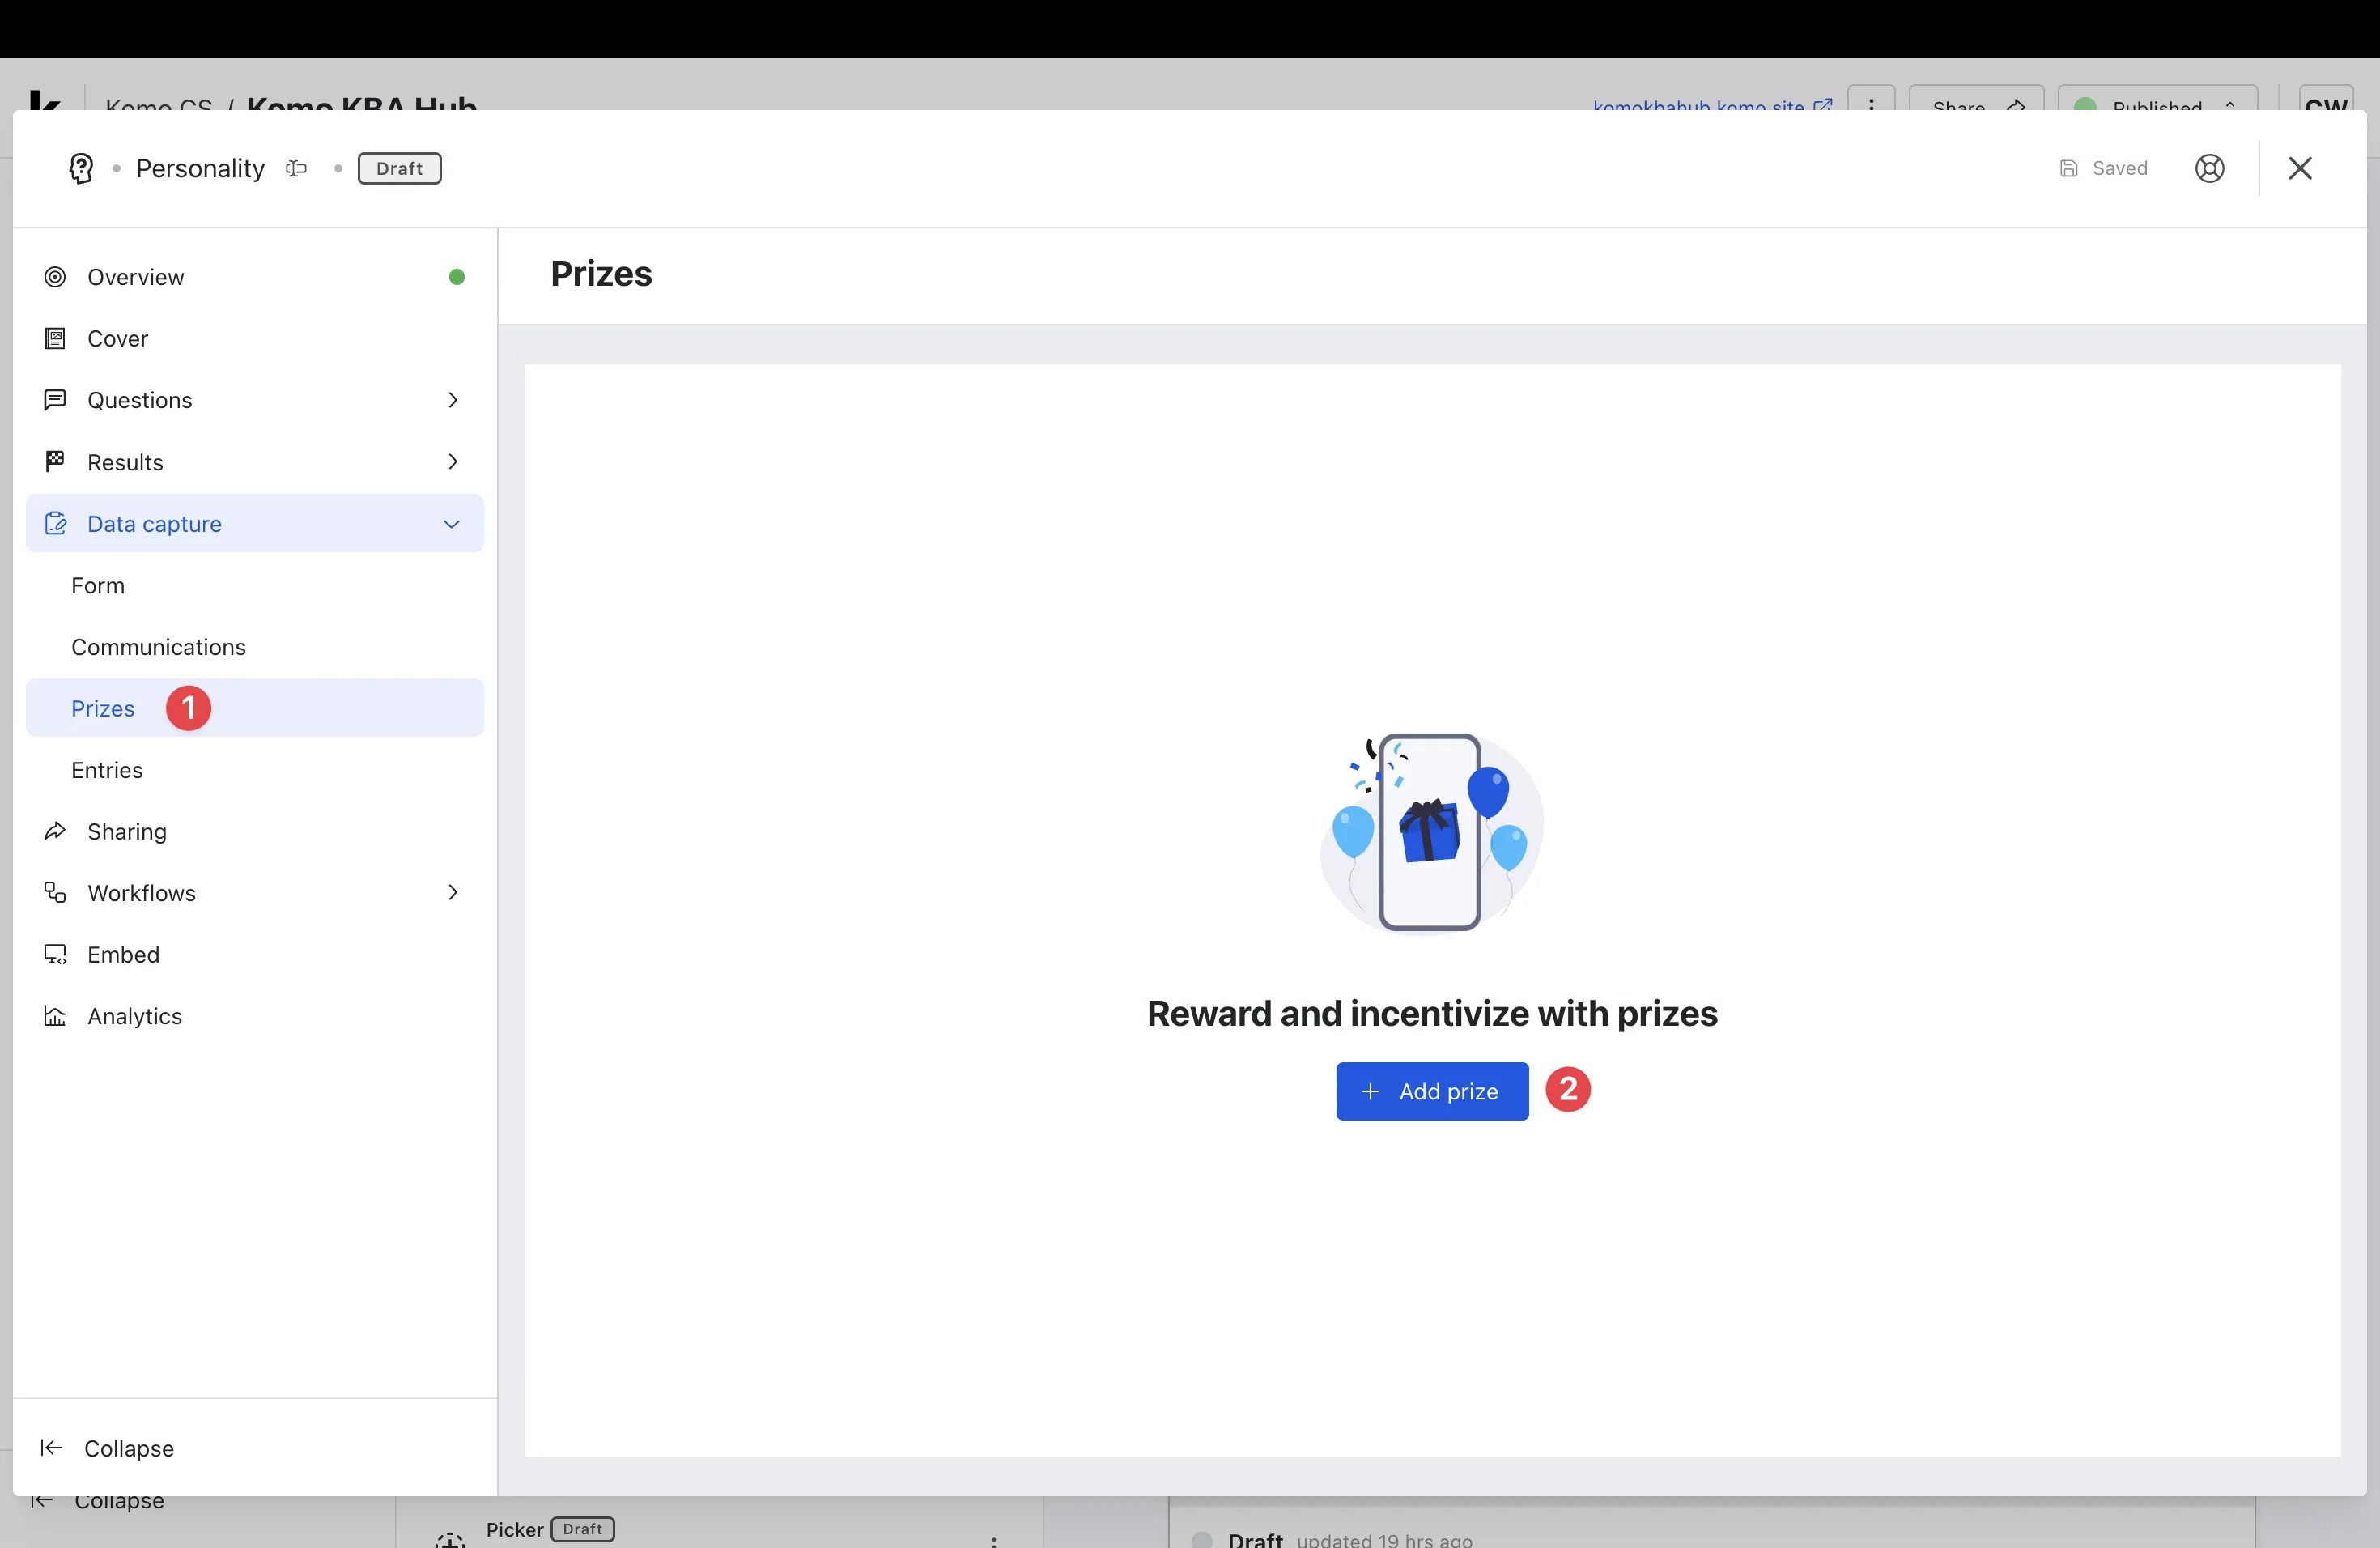
- (1) Click the Prizes tab under Data capture.
- (2) Click + Add prize.
On Live Predictor, Treasure Hunt, Spin to Win and Scratch and Win, Prizes is its own tab in the card settings. On Live Trivia it’s Prizes and Comms.
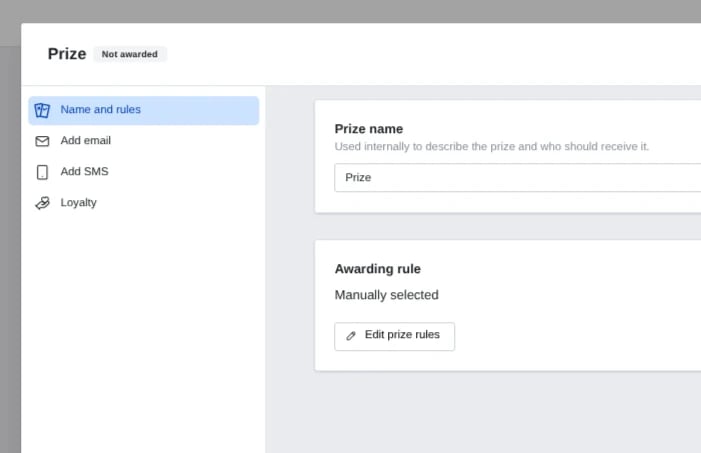
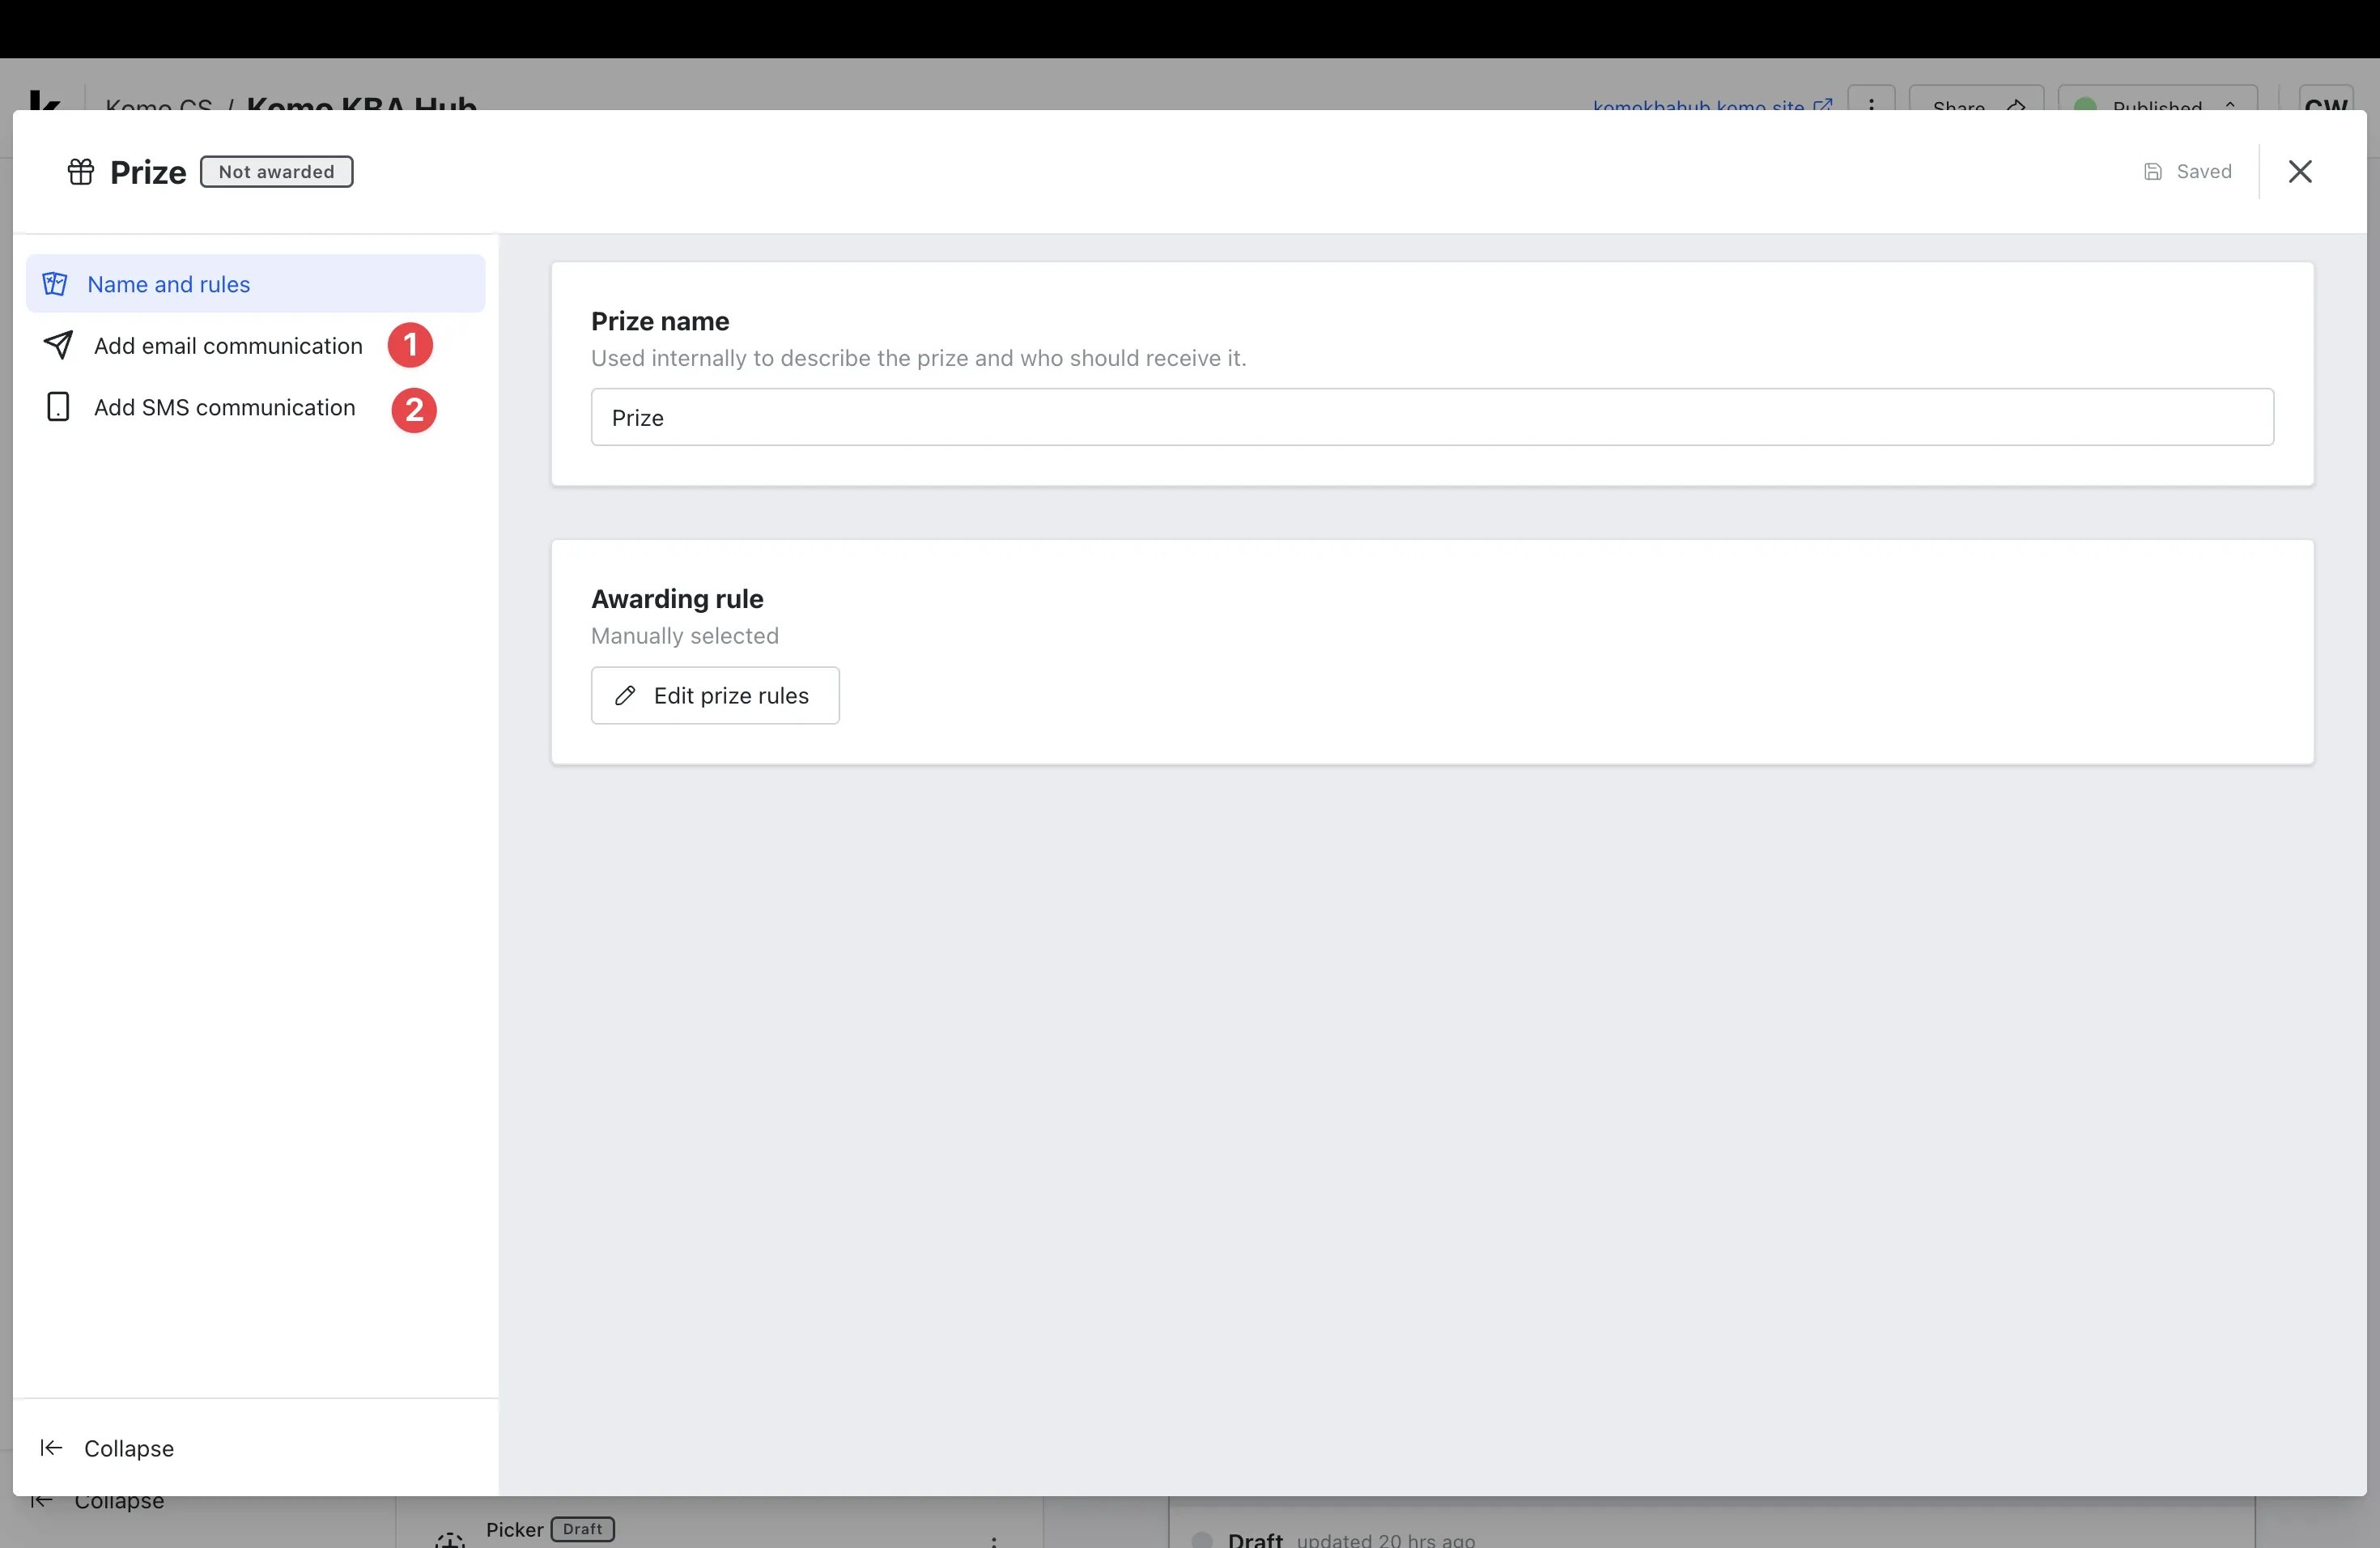
- (A) Enter a Prize name (internal only).
- (B) Click Edit prize rules to open the Edit awarding rule window.
- Manual (pick winners later)
- Manual (rule based)
- Continuous
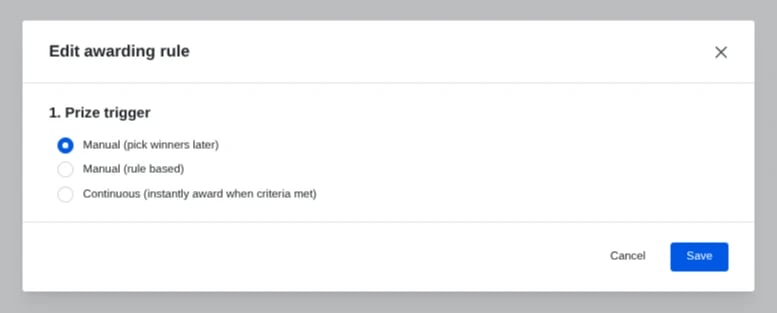
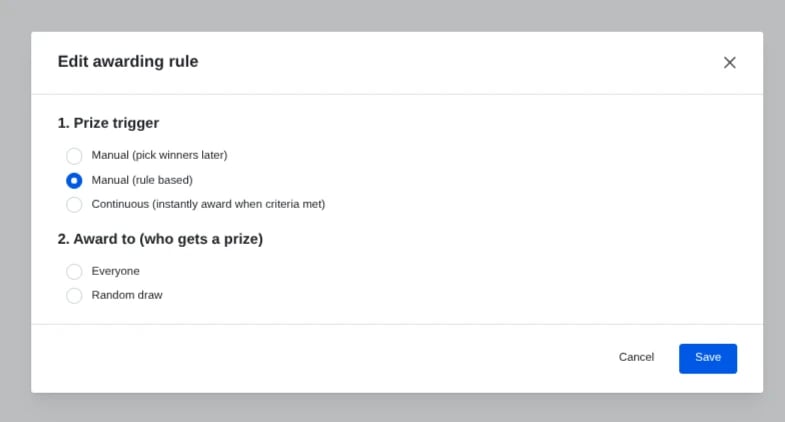
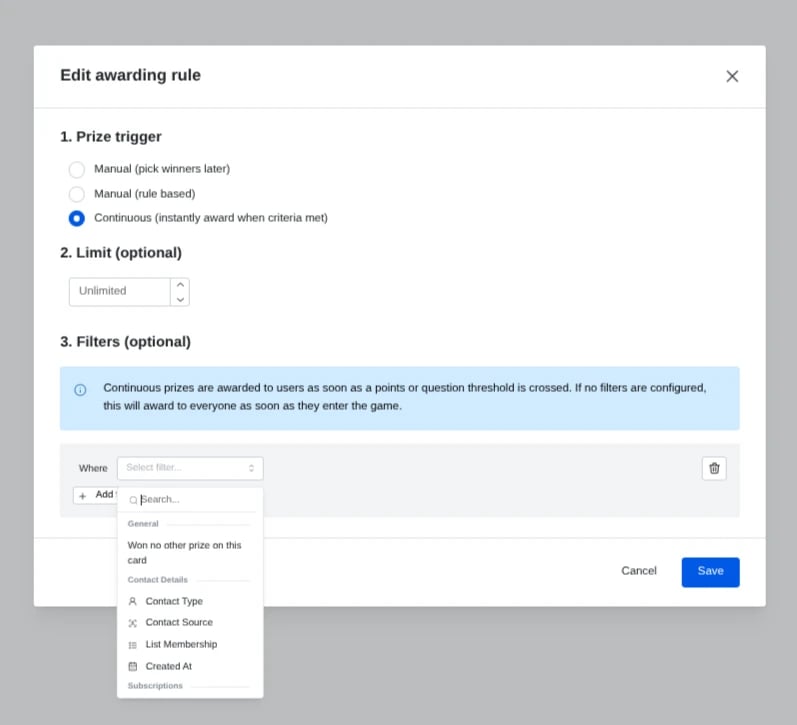
Awarding rule options
Awarding rule options
- Prize trigger: Manual (pick winners later), Manual (rule based), or Continuous (awards instantly when an entry meets the criteria). Options depend on the card type.
- Award to (Manual (rule based) only): Everyone, Ranked, Random draw or Closest guess.
- Limit and Filters (optional): cap how many are awarded, and award only to entries that match filters such as an answer, a result, a score or Won no other prize on this card.
Step 3: Set up your Prize Communications
-
(1) Use Add email to create the prize email. Your form needs an email field.
Setting your Email Communication
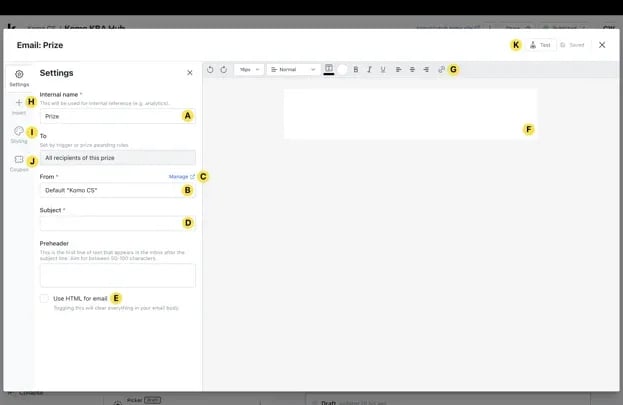
- (A) Enter an Internal name.
- (B) Select a sender name, or (C) click Manage to add one.
- (D) Enter the email subject line.
- (E) Turn on Use HTML for email to paste your own HTML.
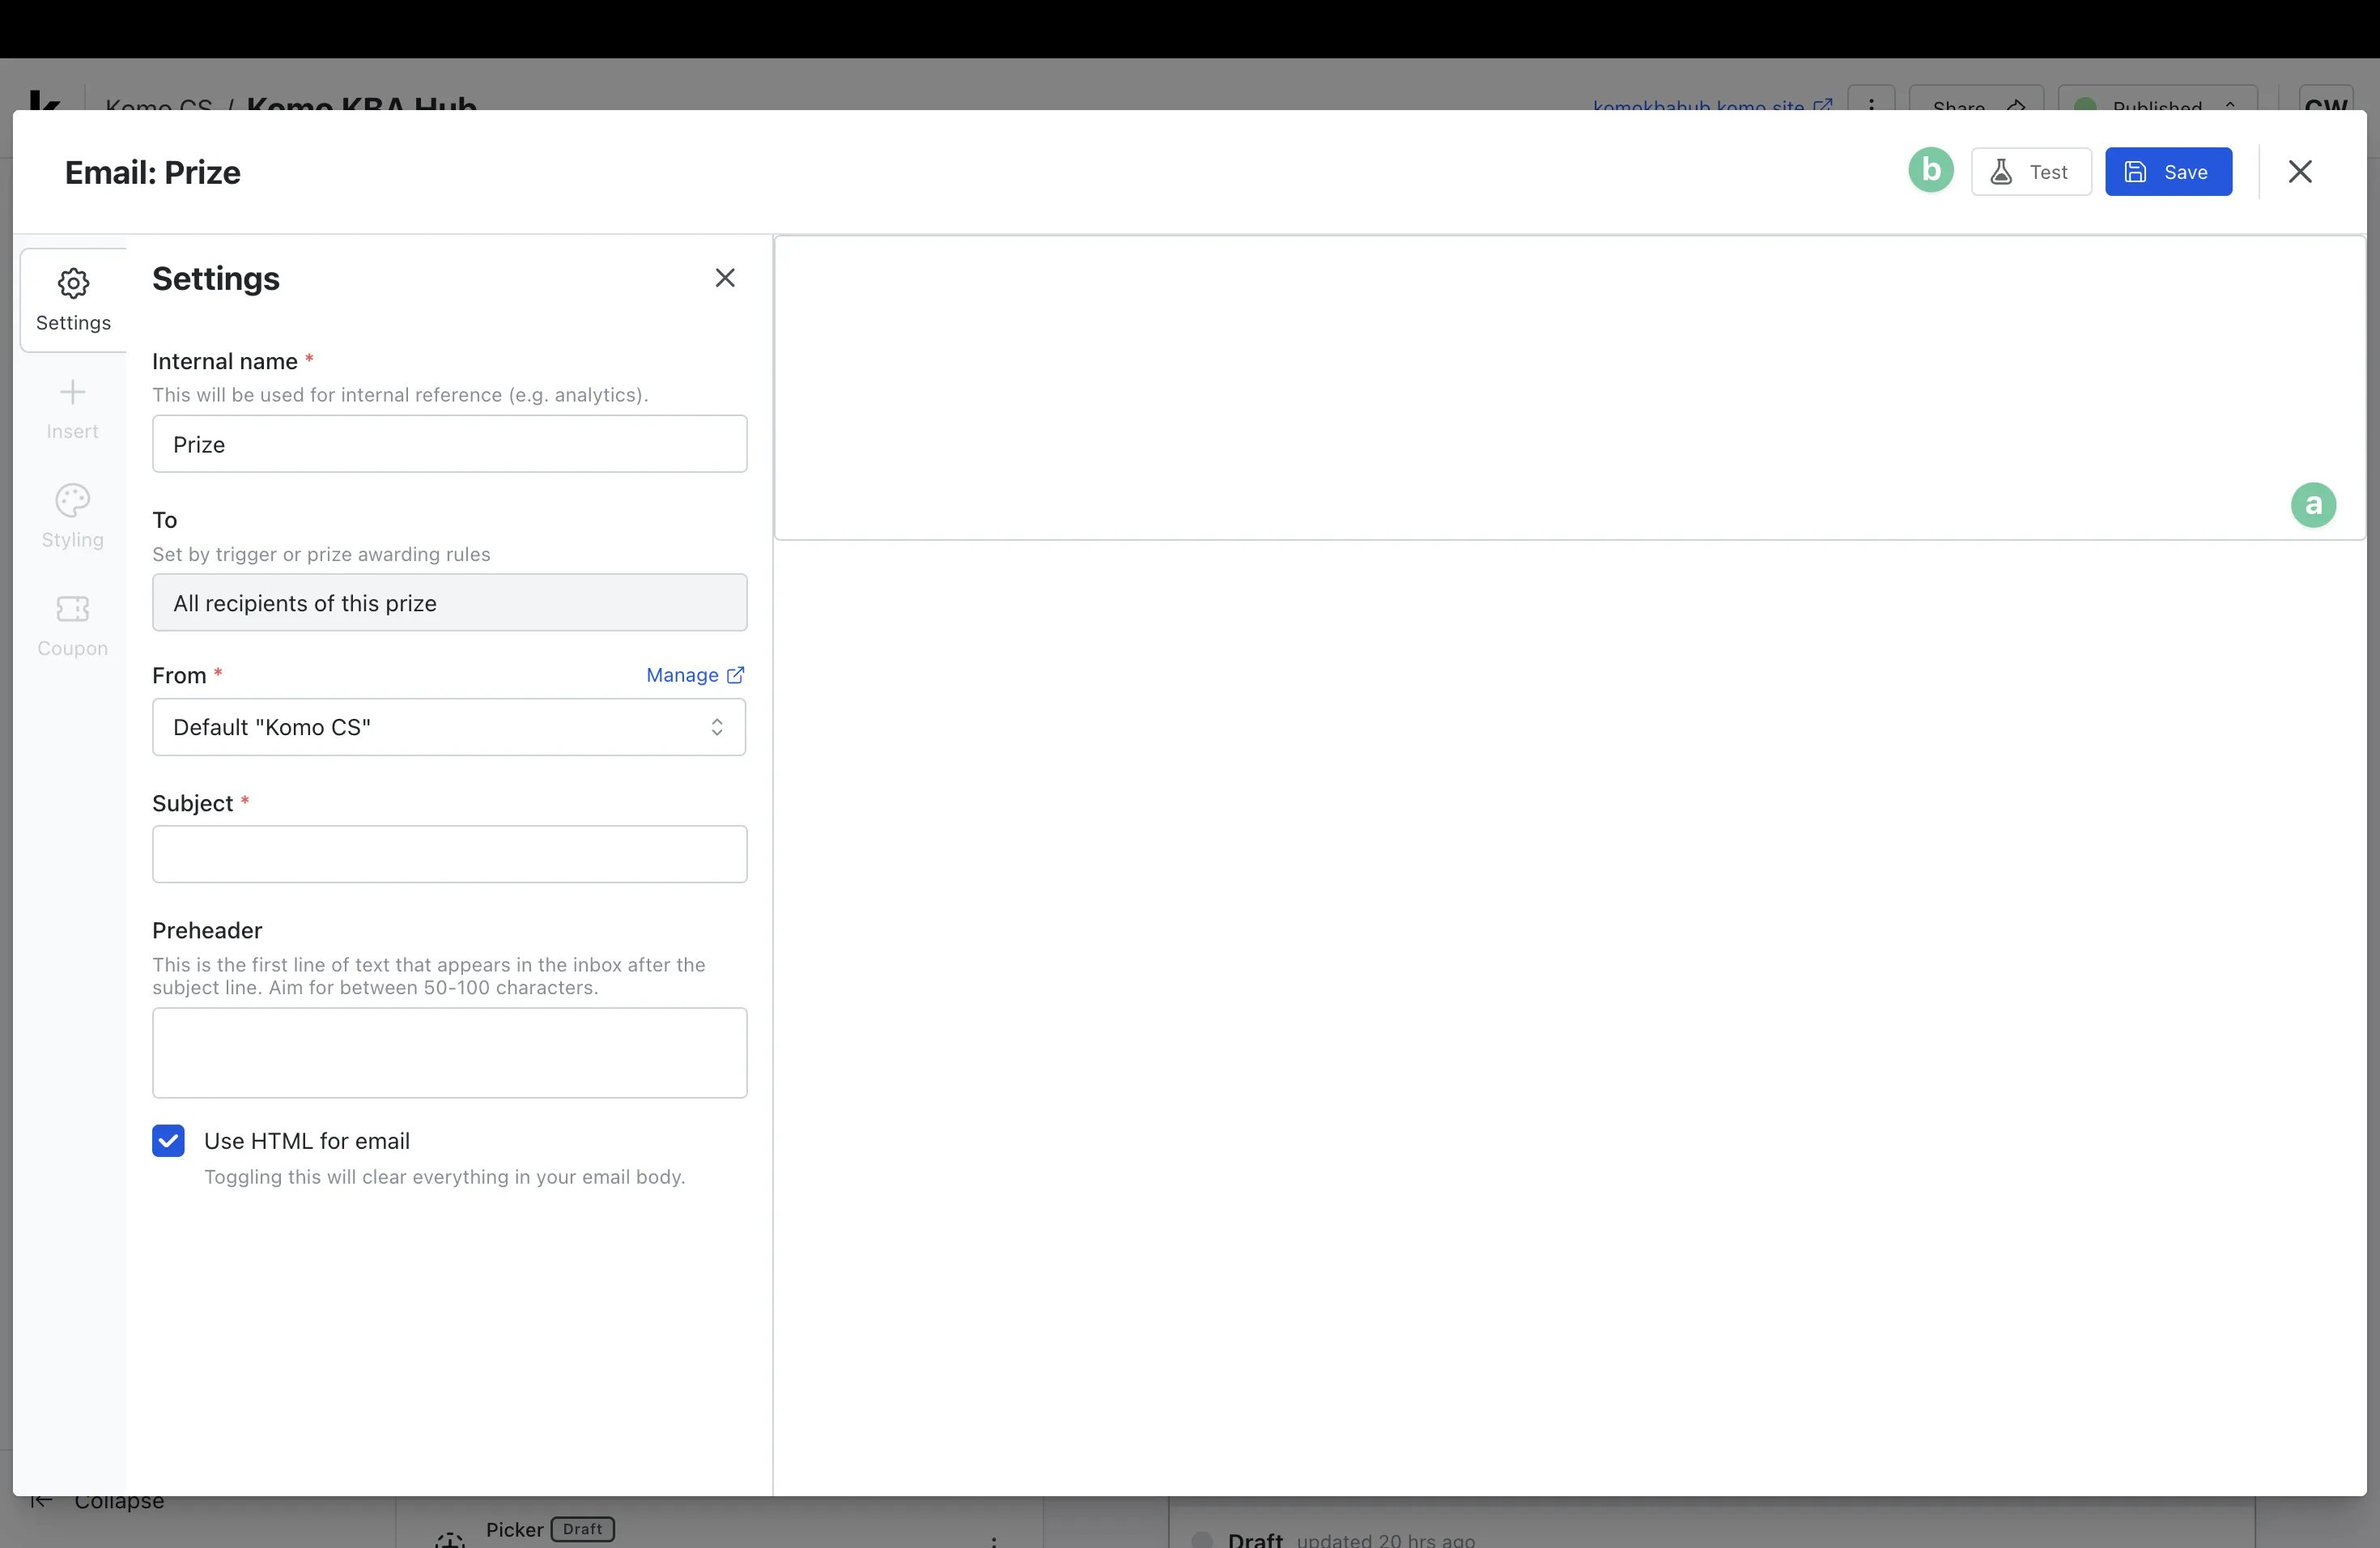
- (a) Paste your HTML email code.
- (b) Test your email and preview the code.
- With HTML on, the Insert panel isn’t available, so images need a full public URL. See How do I add images to an HTML email?
- (F) Build your email, using (G) the toolbar.
- (H) Use Insert to add more to the email body.
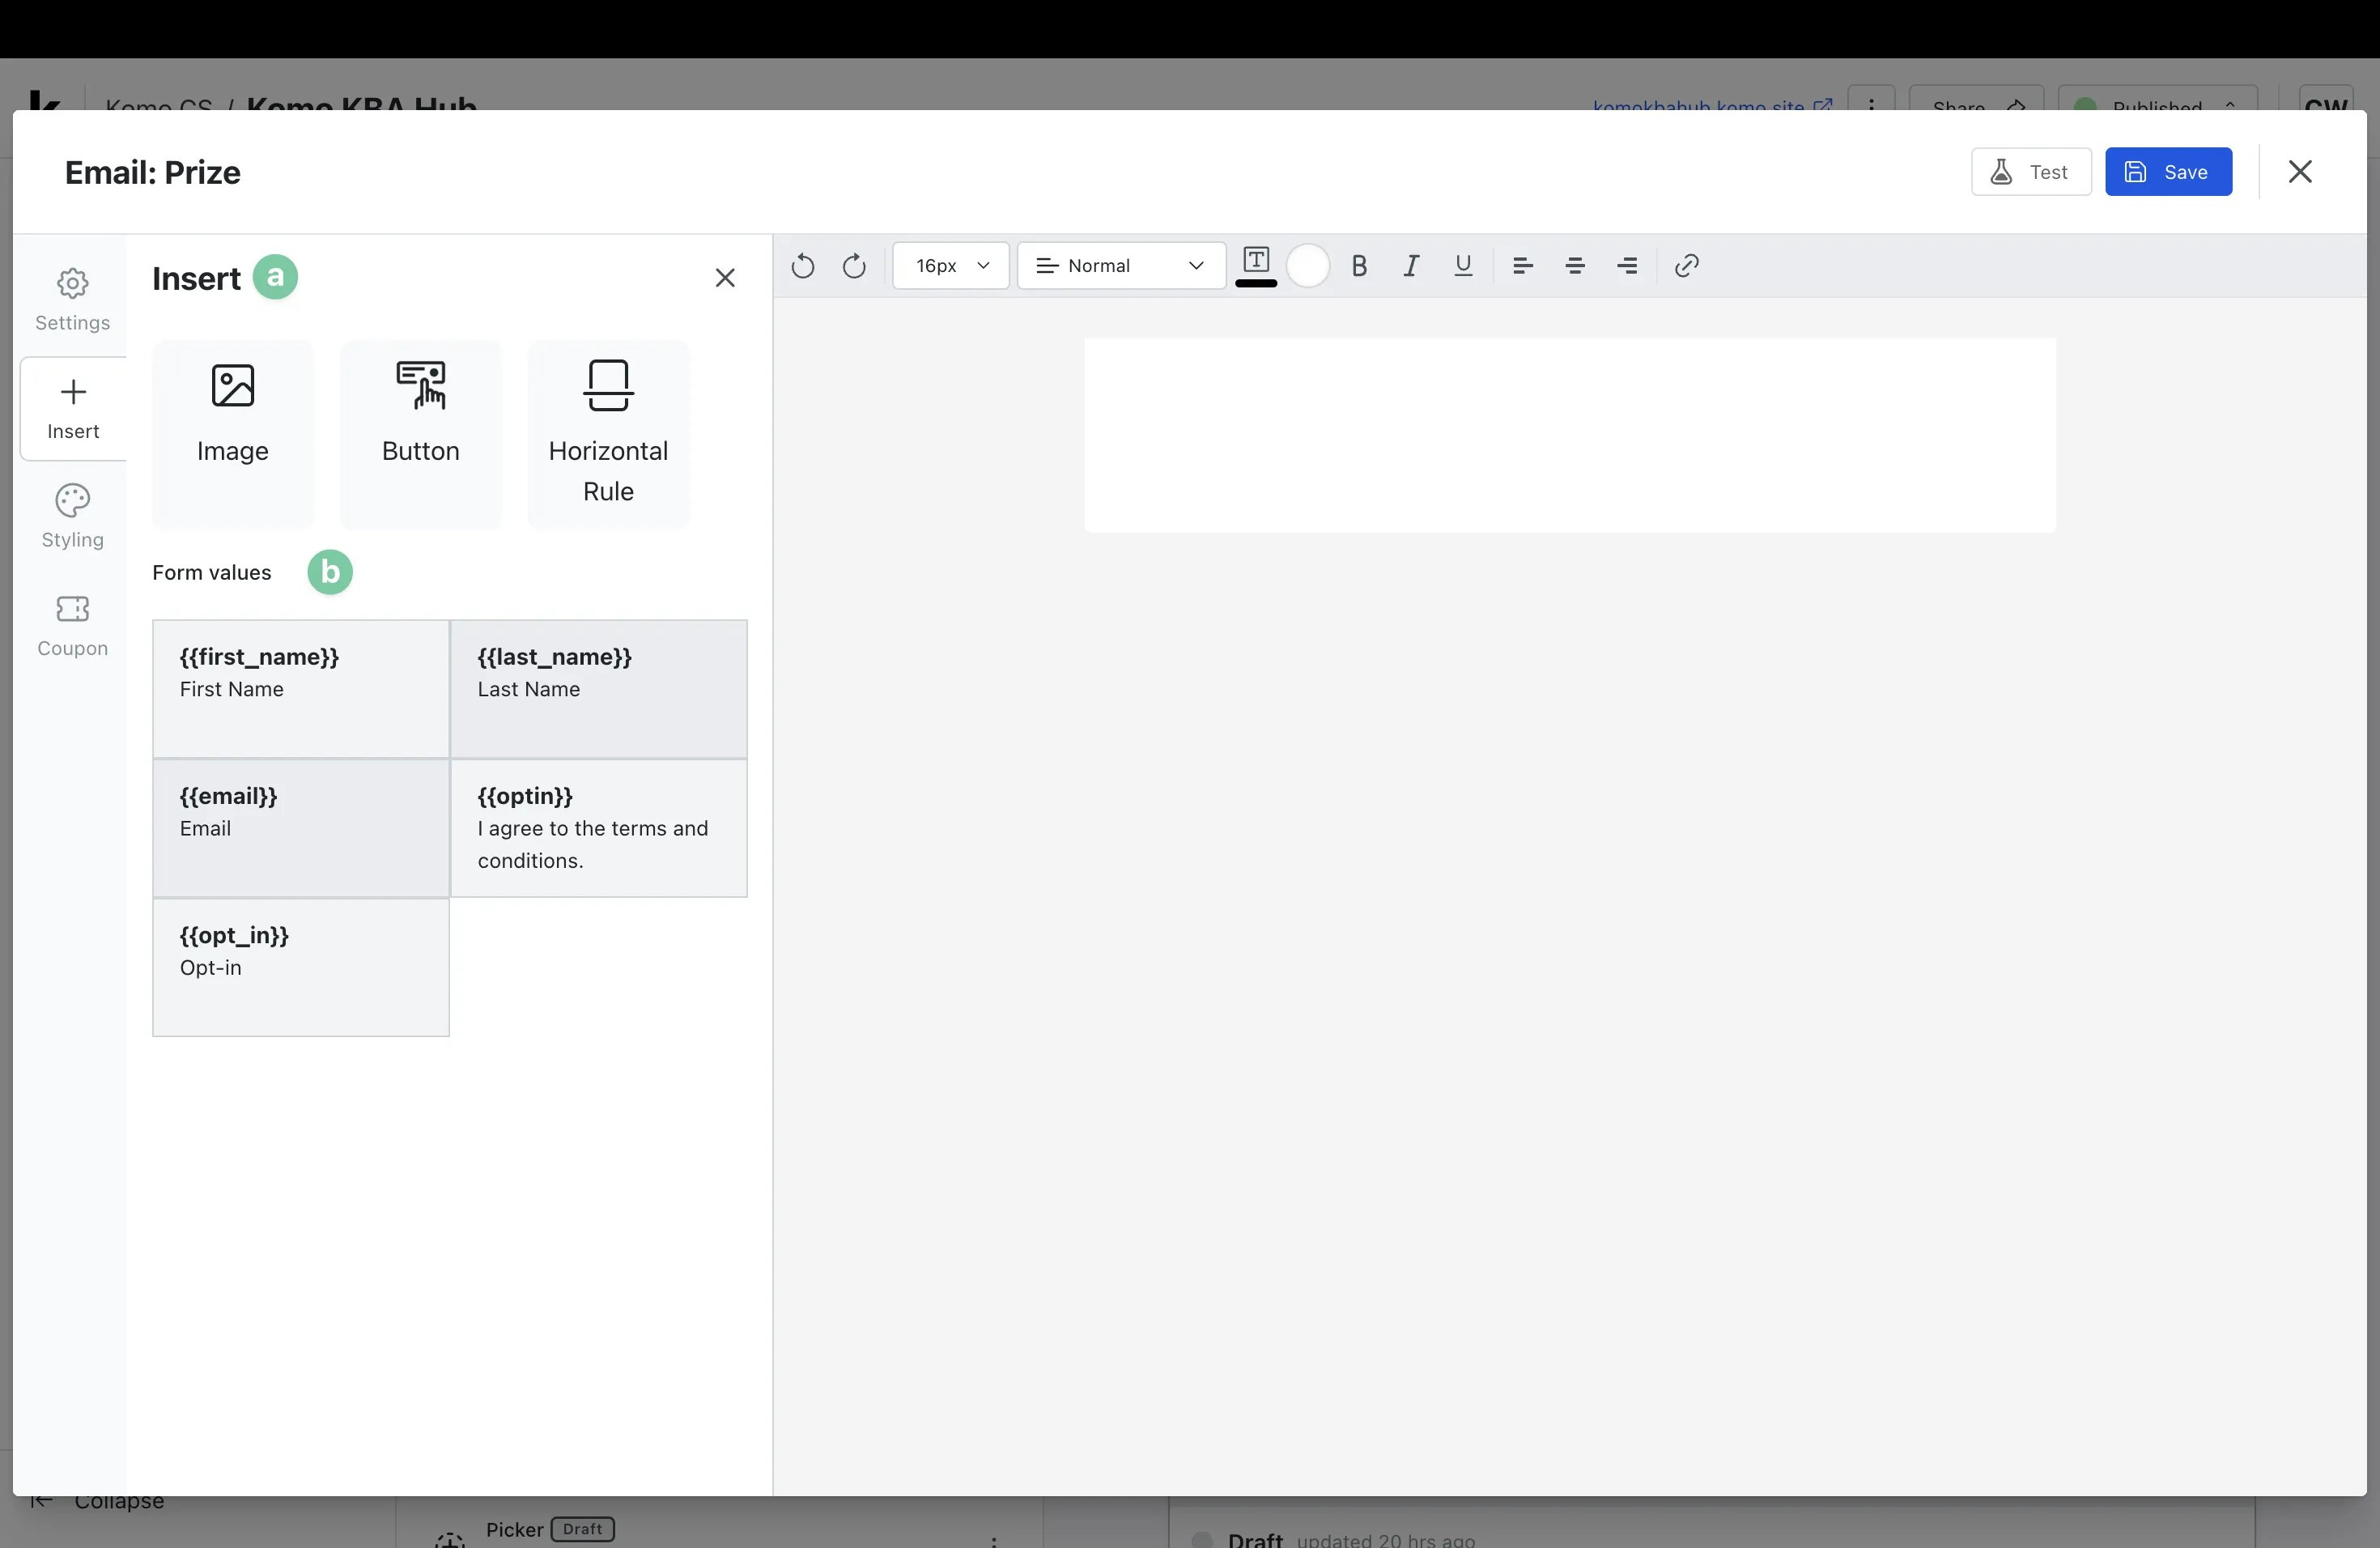
- (a) Add images, call-to-action buttons, or a horizontal rule.
- (b) Add the entrant’s form answers from Form values to personalize the email.
- (I) Set the body and container colors.
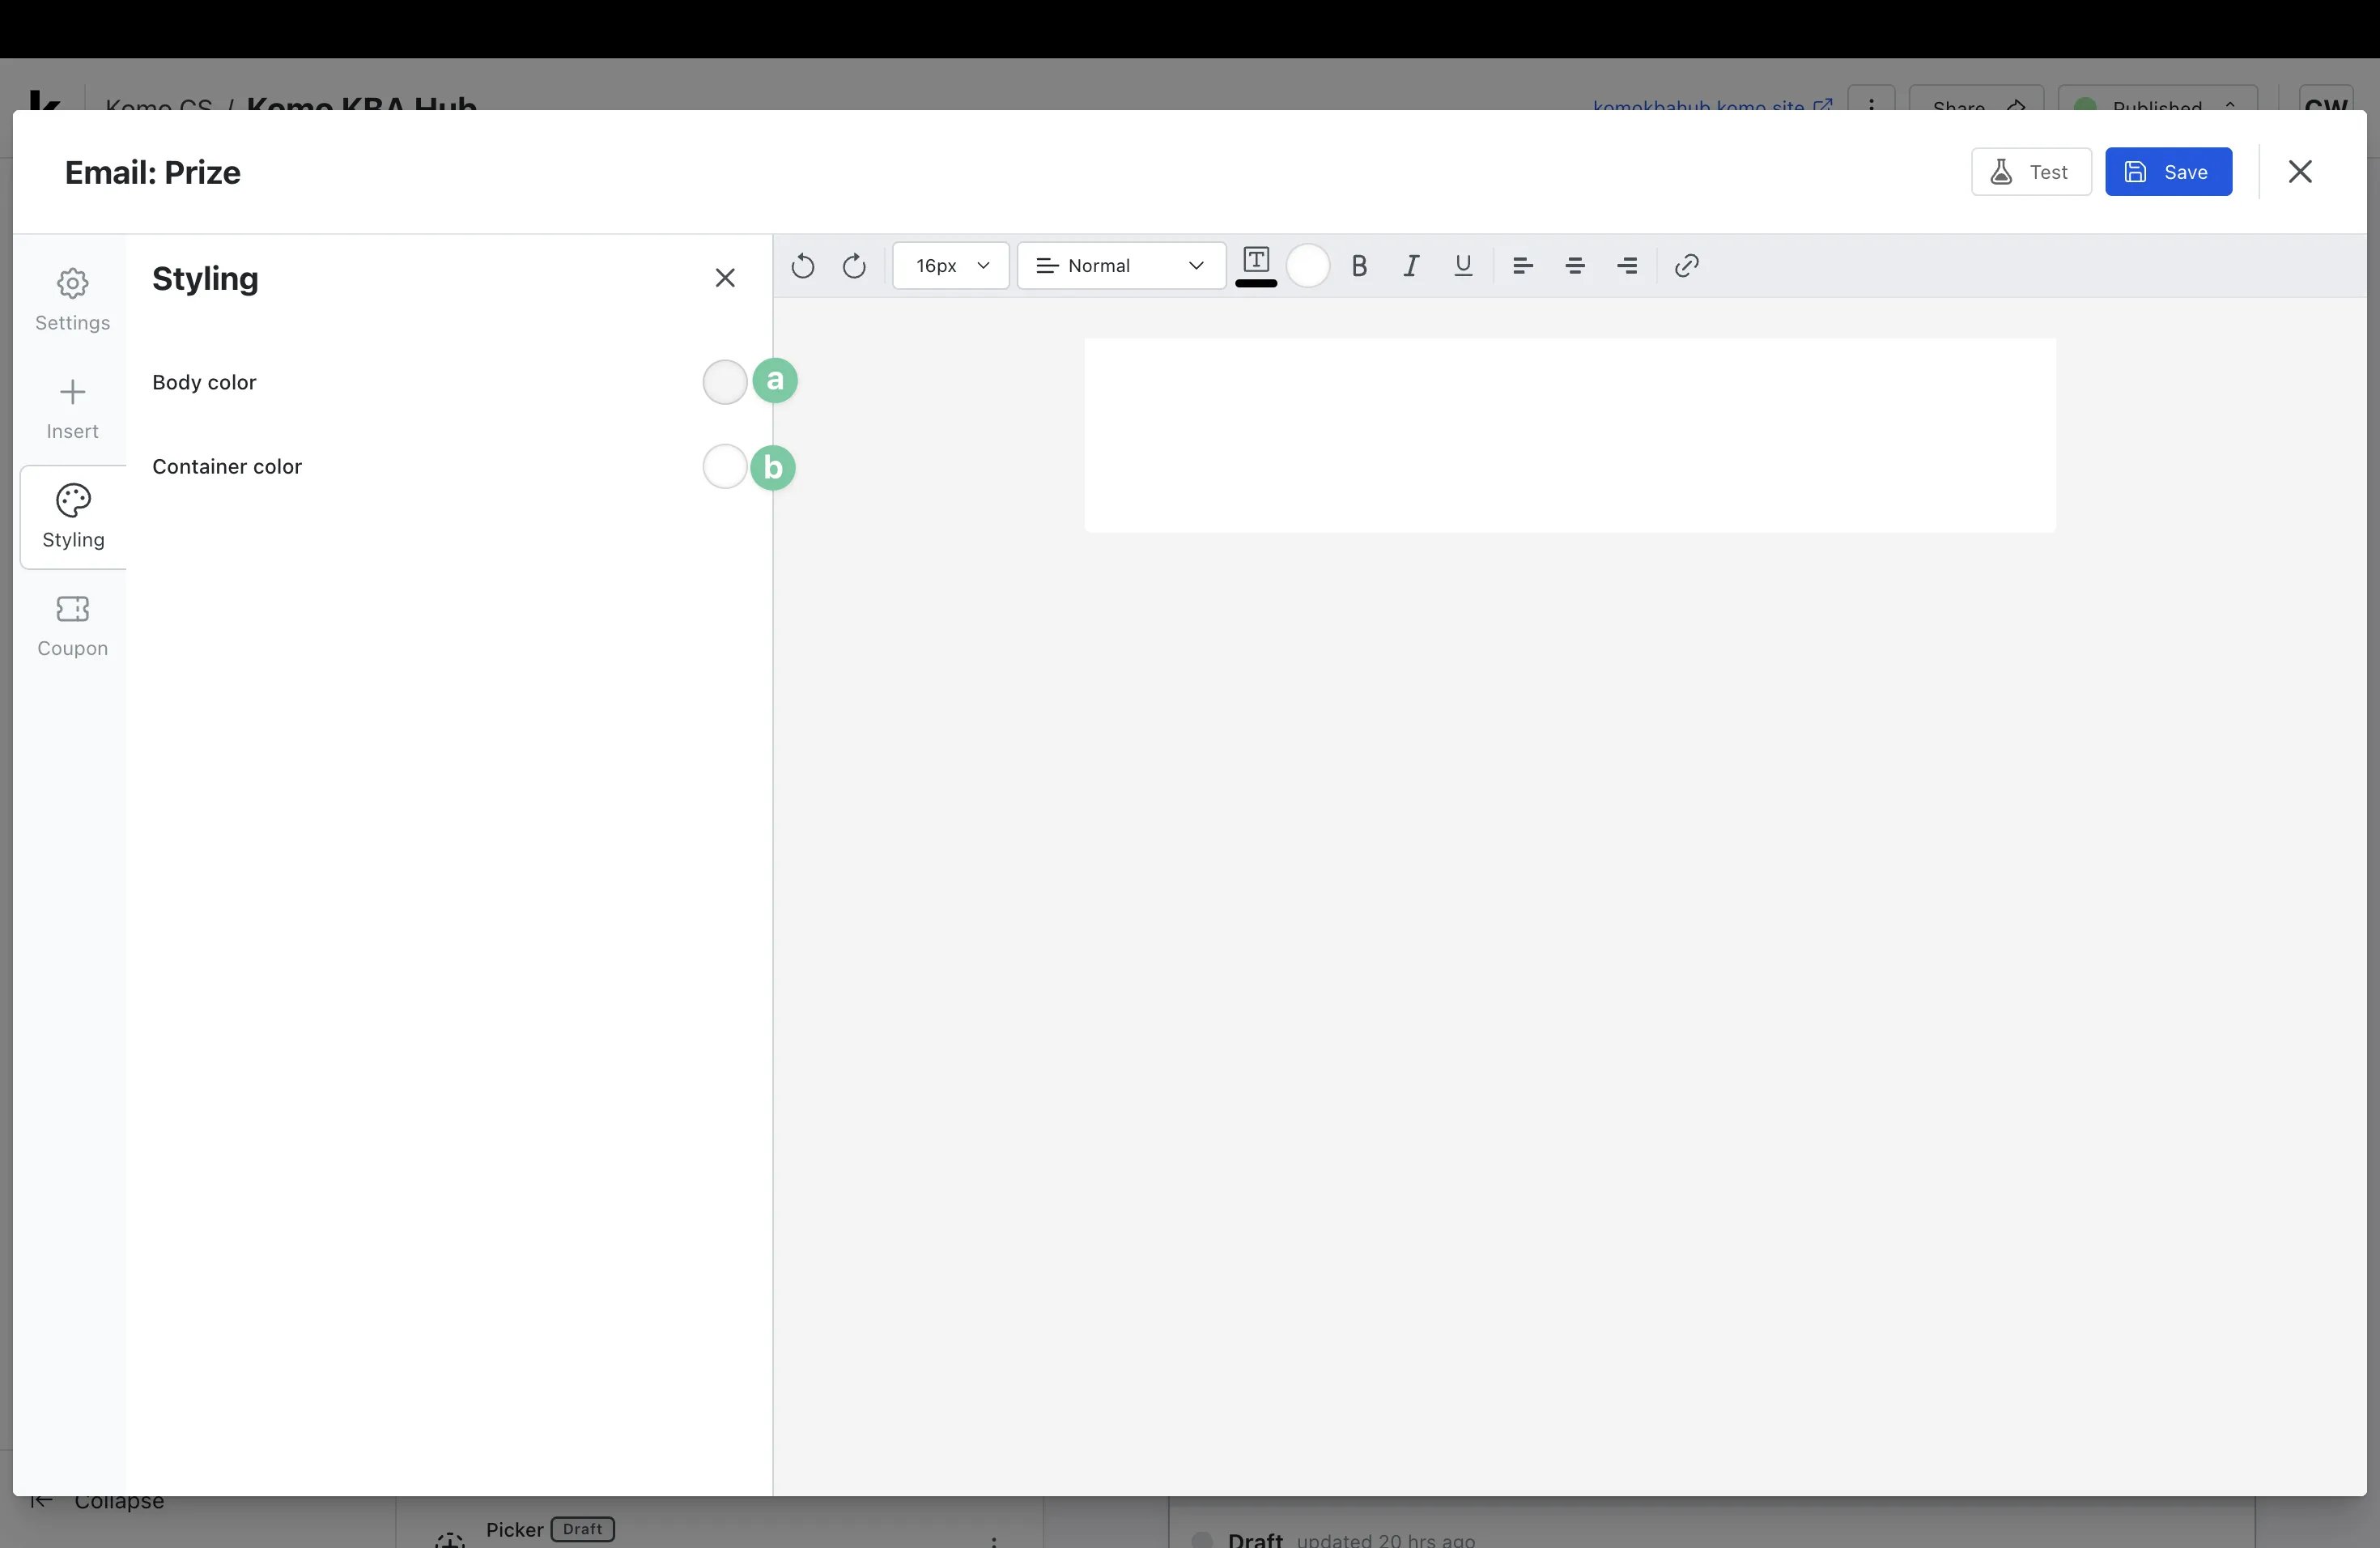
- (a) Sets the background behind the email container.
- (b) Sets the background behind the email body.
- (J) Attach a coupon: select it from the drop-down, then insert the coupon code in the email body.
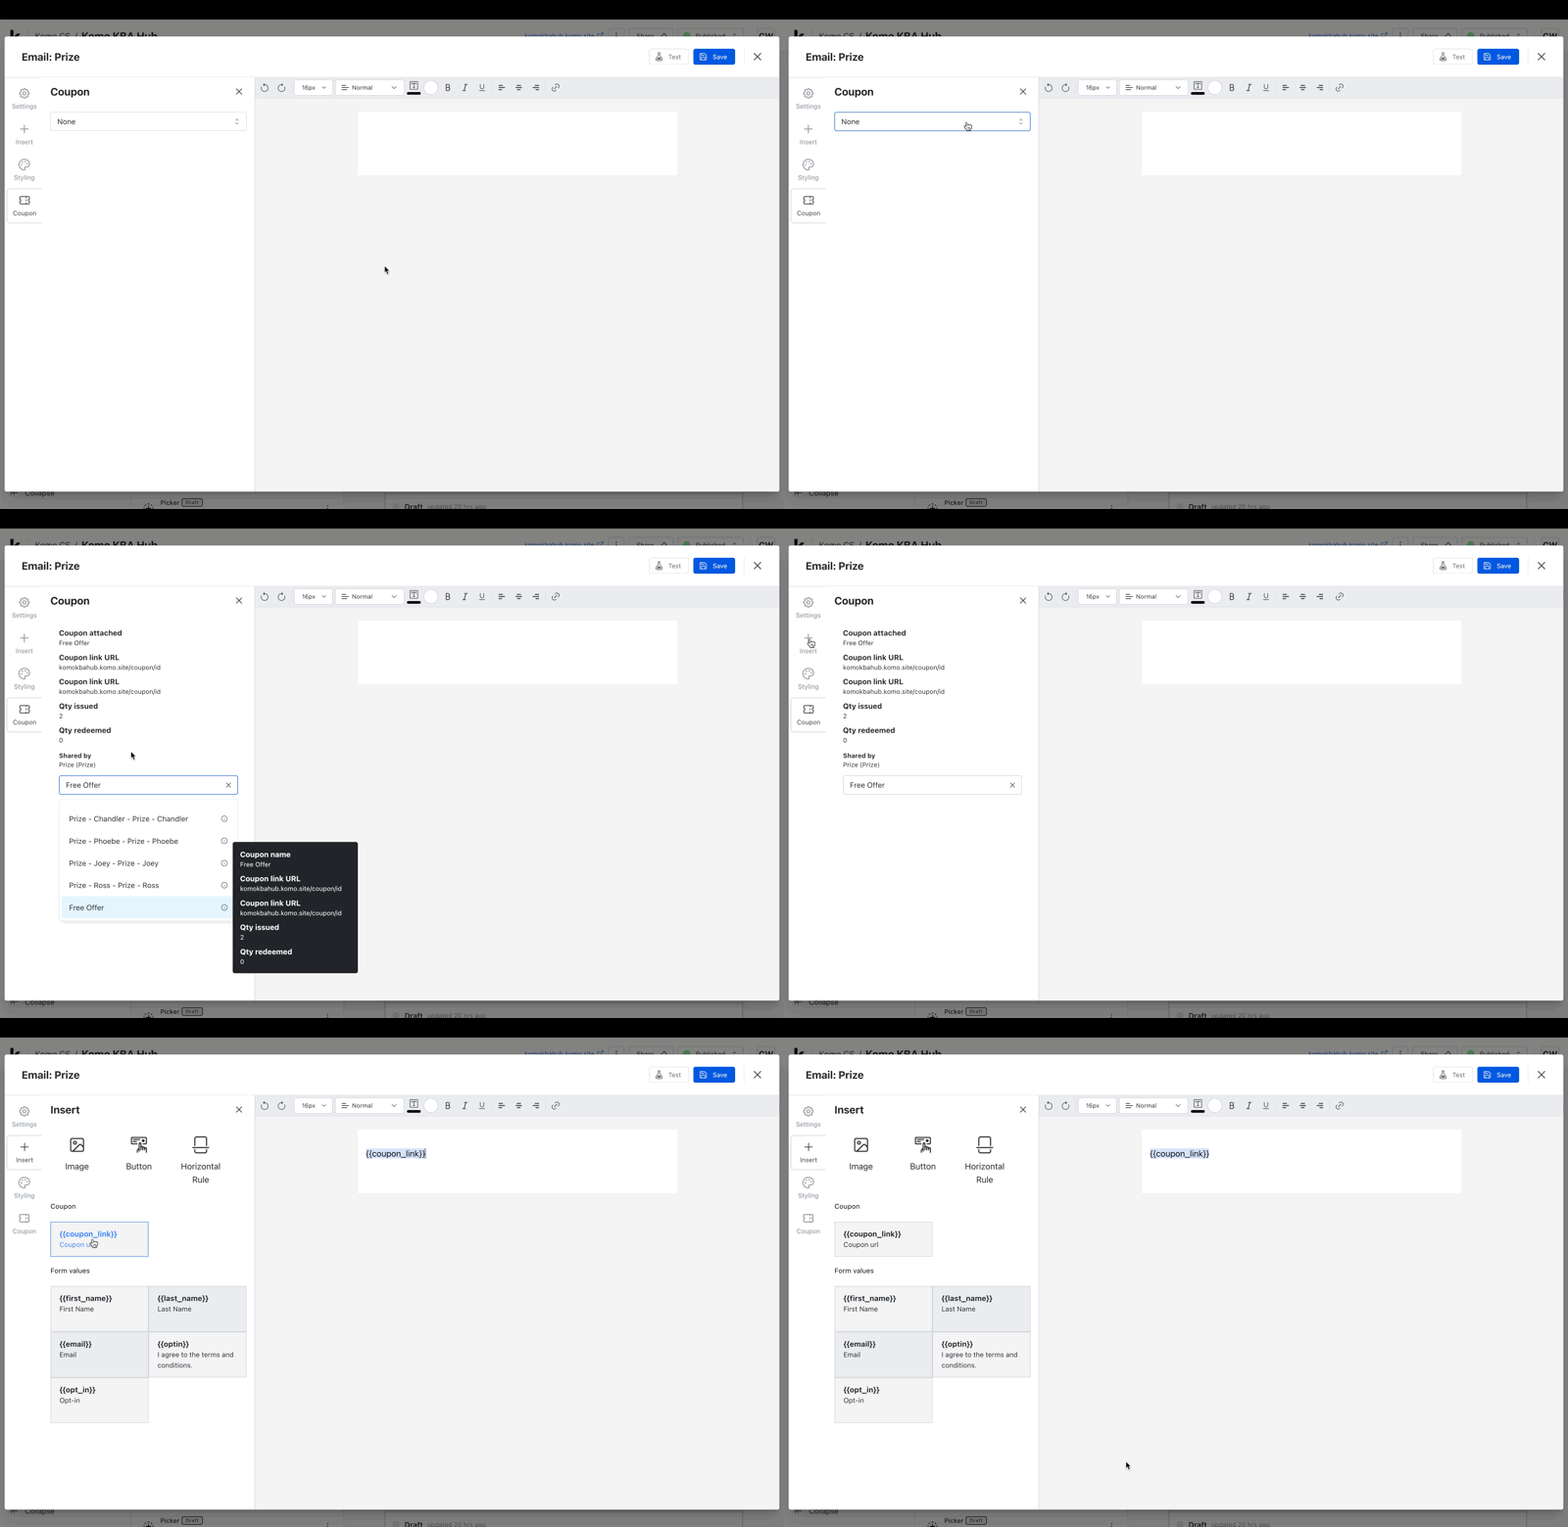
- (K) Test the communication.
-
(2) Use Add SMS to create a prize SMS. Your form needs a mobile field, and you need a connected Twilio account and SMS sender (set up SMS senders).
Setting your SMS Communication
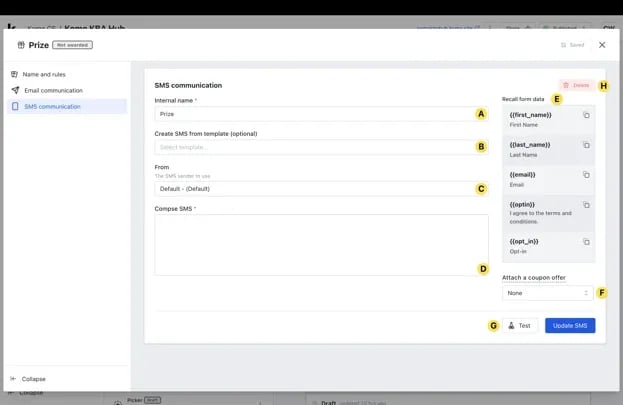
- (A) Enter an Internal name.
- (B) Start from a template if you like.
- (C) Select the sender name from your Twilio account.
- (D) Write your SMS.
- (E) Copy codes from Form values into the SMS to personalize it.
- (F) Attach a coupon, then copy its code into the SMS.
- (G) Test or (H) Delete the SMS.
Step 4: Add additional Communications
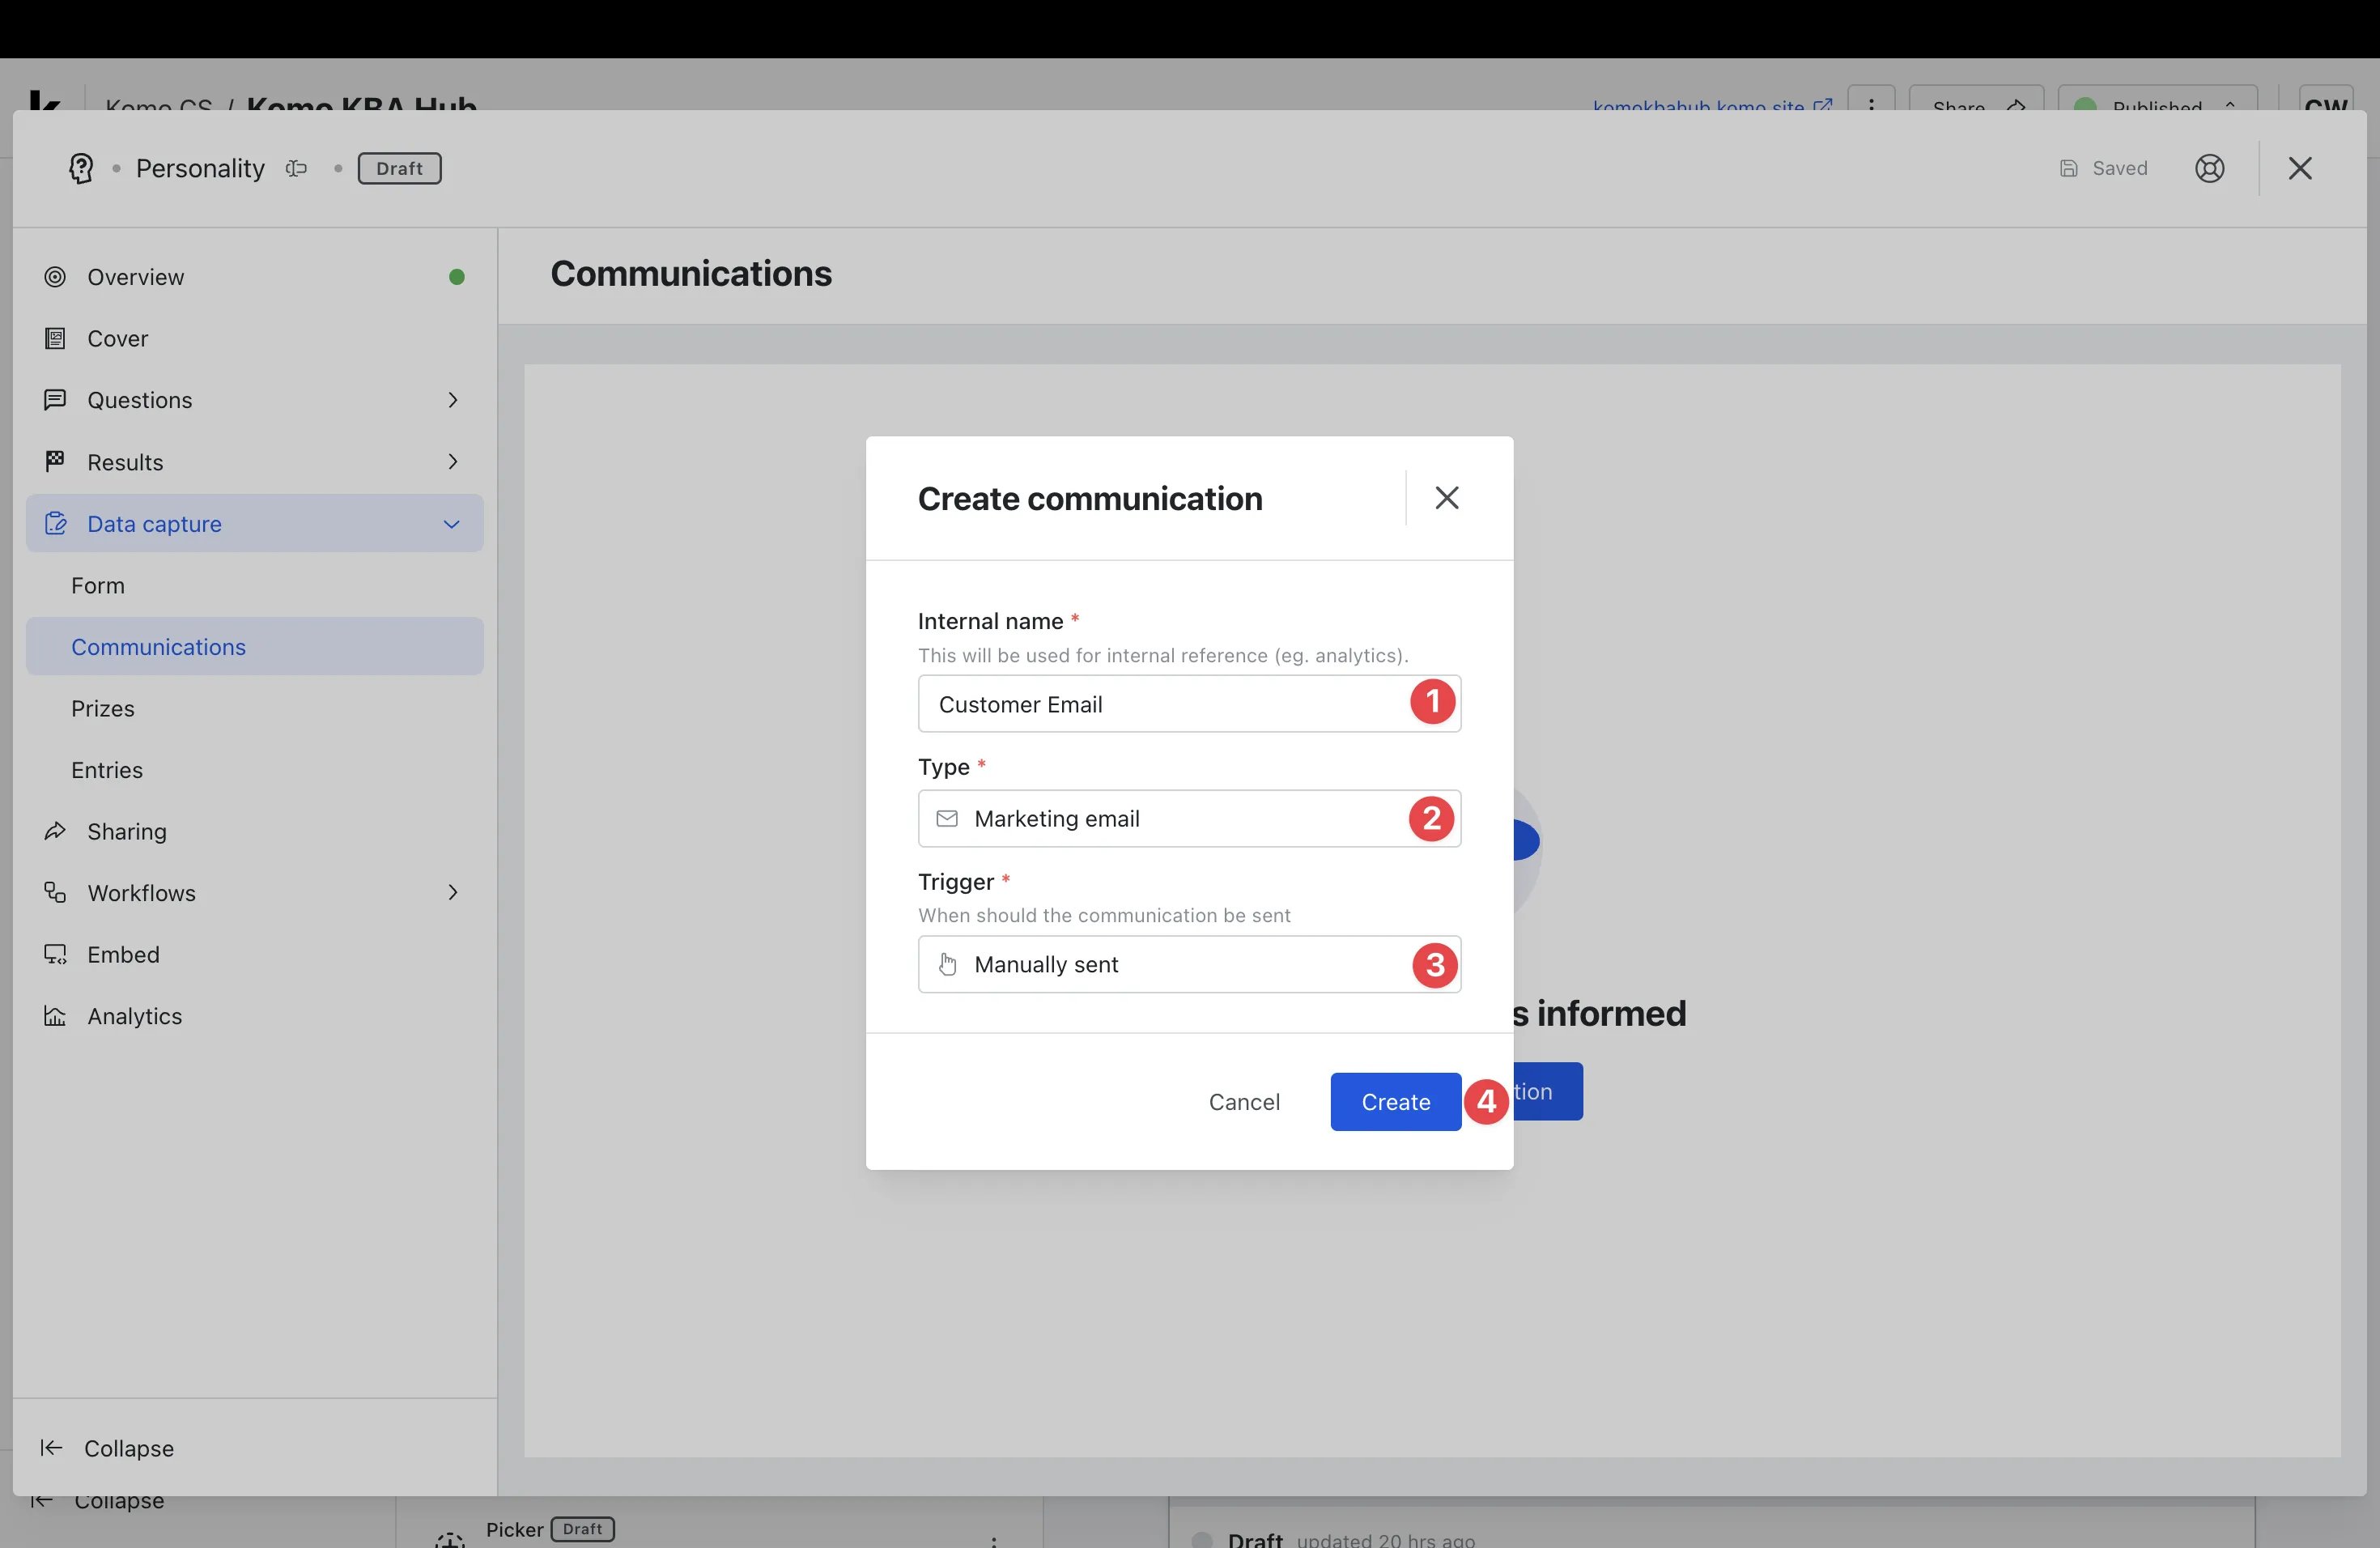
- Click the Communications tab, then + Add communication.
- (1) Enter an Internal name.
- (2) Select the Type: transactional email, marketing email or SMS.
- (3) Choose the Trigger:
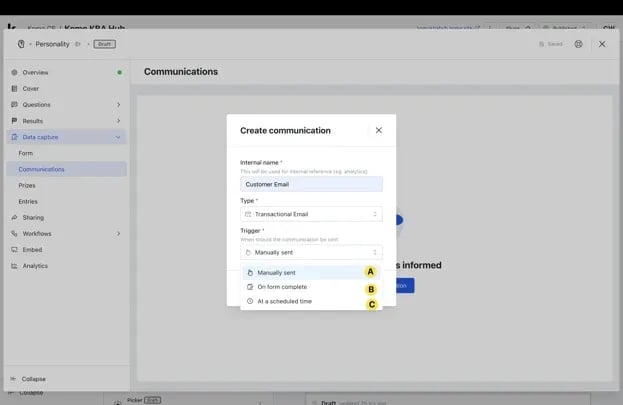
- (A) Manually sent.
- (B) On form complete.
- (C) At a scheduled time.
- (4) Click Create.
Step 5: Set up Marketing Email Communications
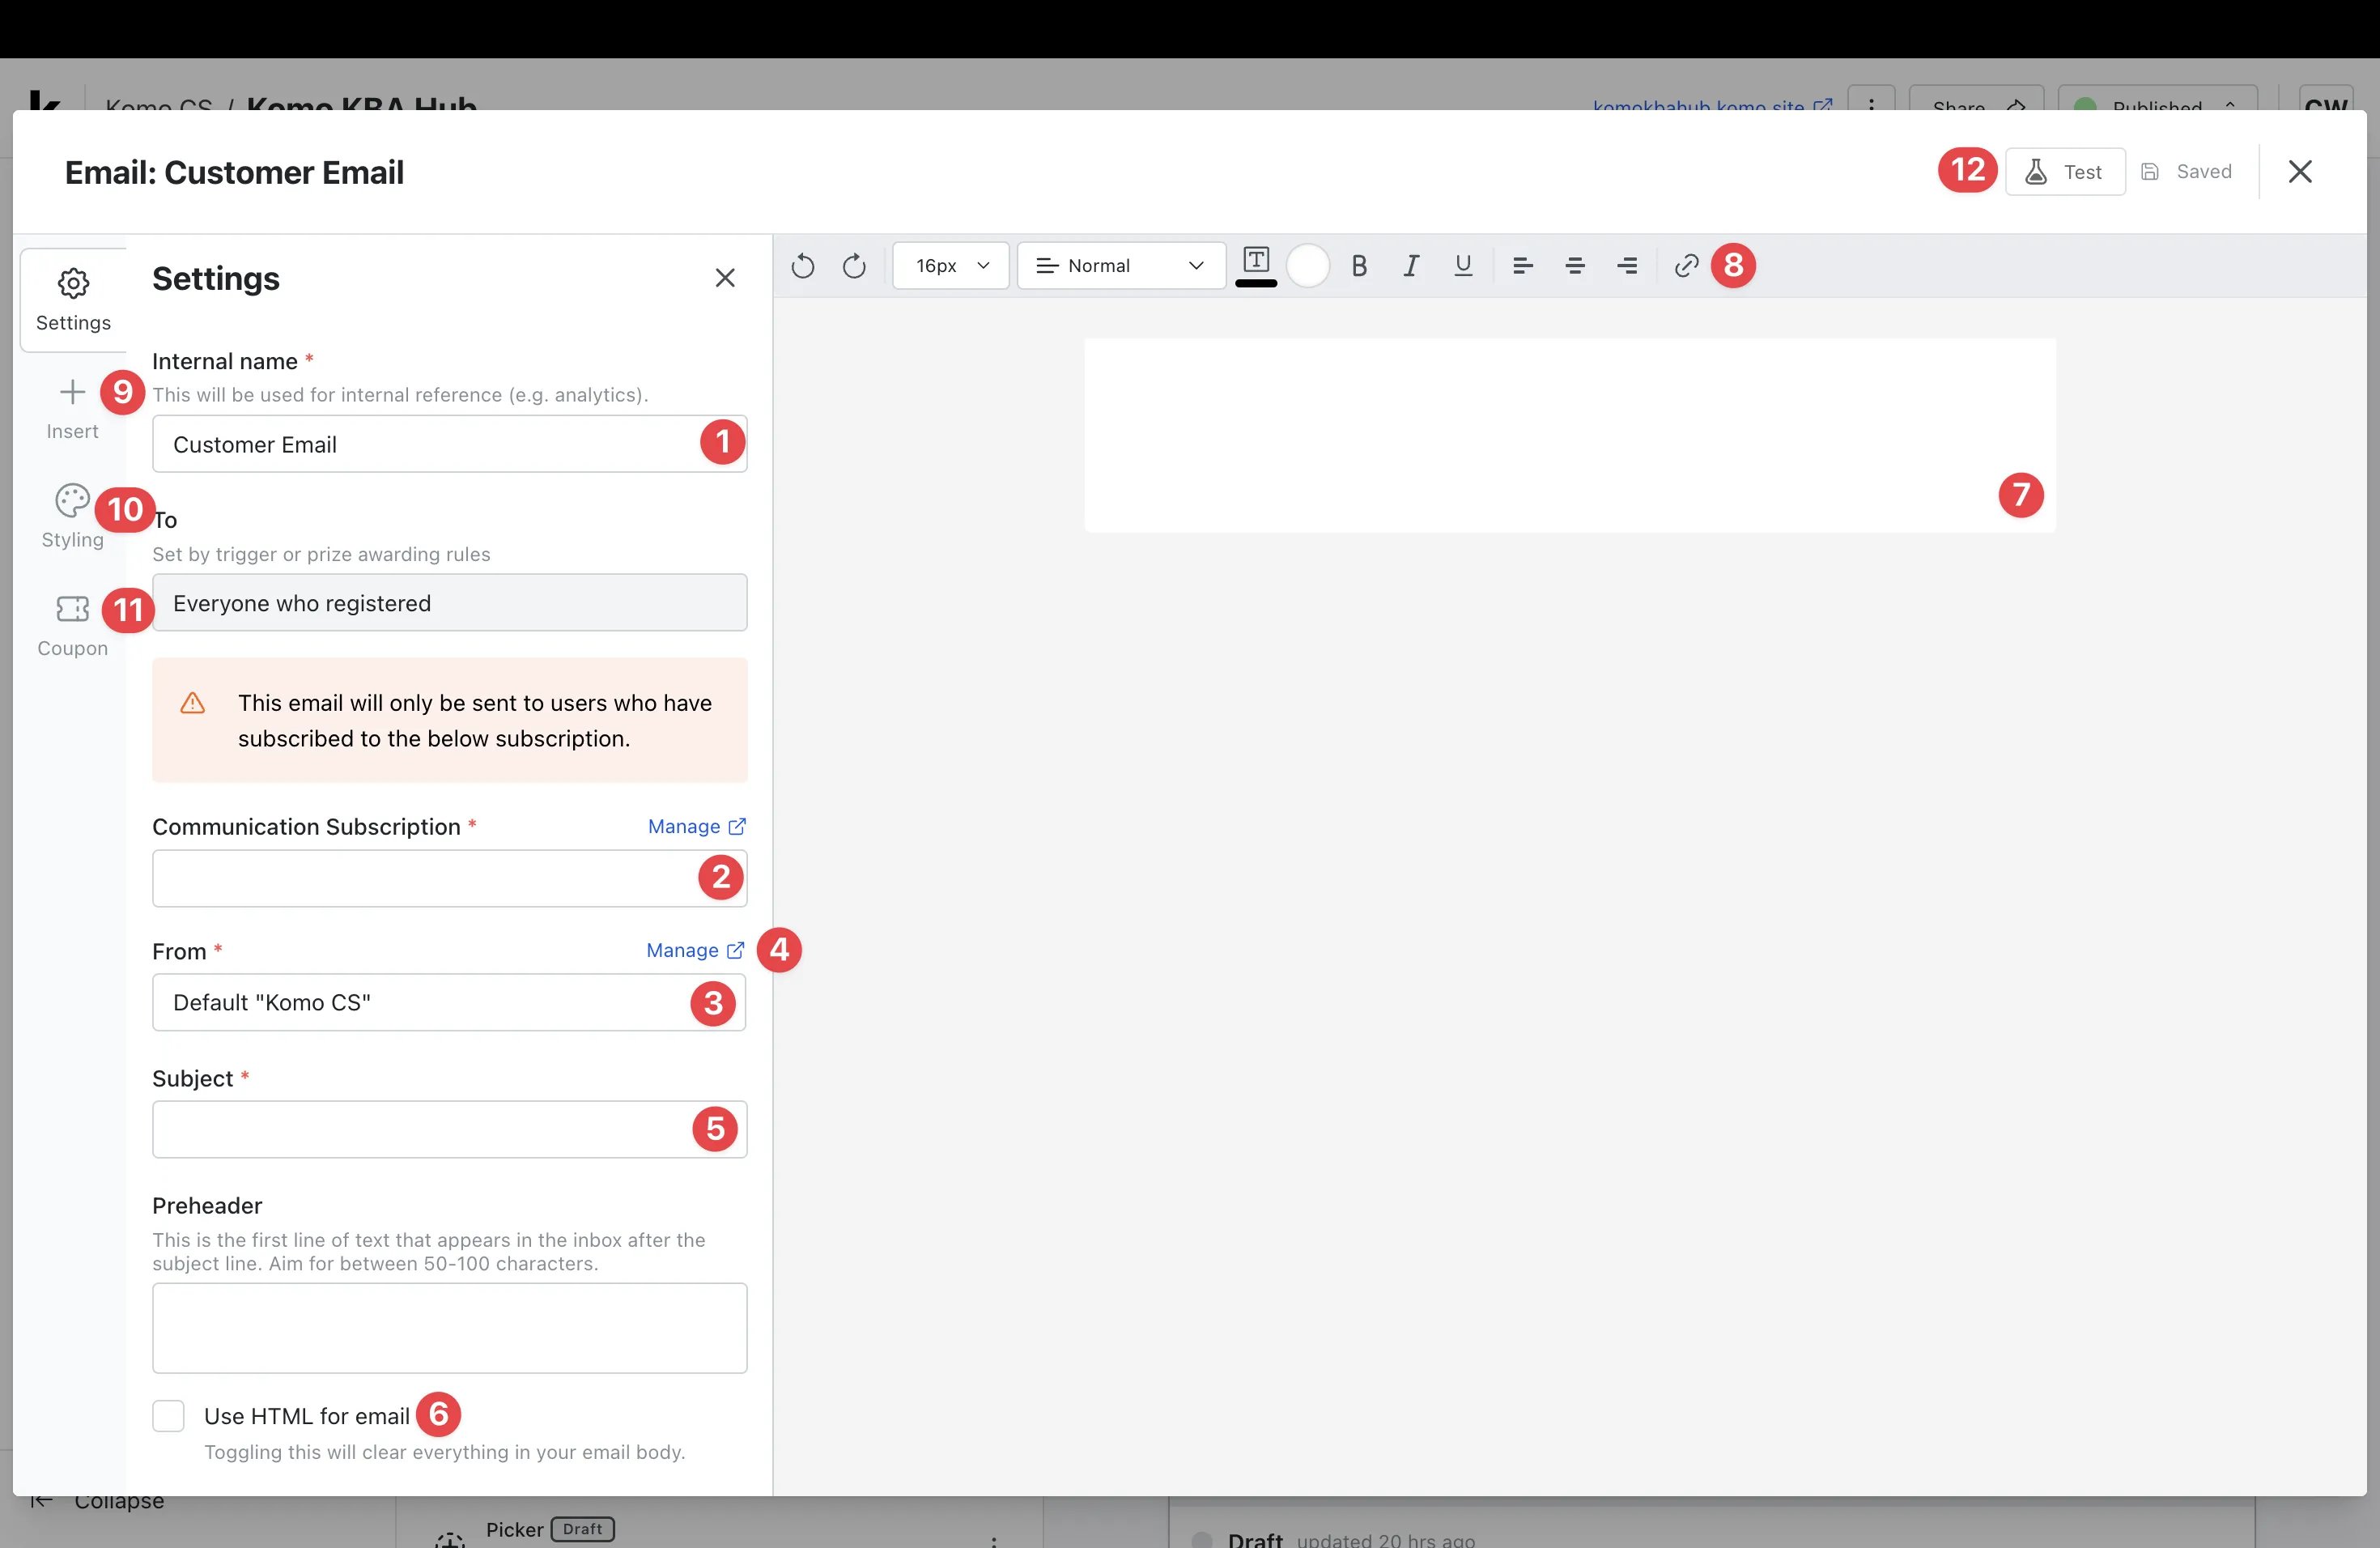
- (2) Select the Communication Subscription to send to. Only contacts opted in to it receive the email. See Communication Subscriptions.
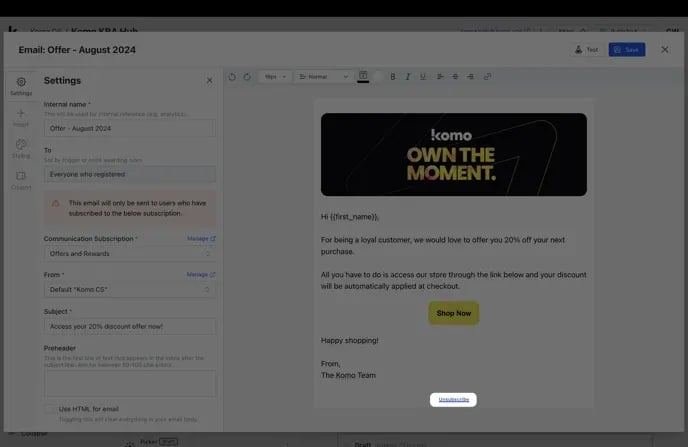
- (9) Insert the unsubscribe URL code in the email body (required). Link it to your unsubscribe text.
Example of unsubscribe URL code
Communication Design Guidelines
Learn different communication materials sent to players and users
FAQ
What is the difference between a marketing and transactional email?
A marketing email promotes your brand. A transactional email gives the recipient information they need, usually after an action they took, such as entering.What happens when a user unsubscribes?
They’re removed from the communication subscription they opted out of and no longer receive emails sent to it.How do I add images to an HTML email?
When Use HTML for email is turned on, you paste your own HTML, and the Insert panel (where you’d normally add an Image) isn’t available. Every image in your HTML needs a full public URL in itssrc.
Images you’ve uploaded to Komo already have a public URL on Komo’s CDN (for example https://cdn.<region>.komo.site/media/image/...). There isn’t a copy-link button for it yet, so to get the URL:
- Open a page in Komo where the image is shown, such as your Hub or a card preview.
- Right-click the image and choose Copy image address (or find the image’s
srcin your browser’s developer tools). - Paste that URL into the
srcof the<img>tag in your HTML.
How do bonus entries work?
Bonus entries give an entrant extra chances in a Random draw. Each bonus entry counts as another ticket in the draw, but one entry can still only win a given prize once. If Group by email is turned on for the prize, each email address counts once and bonus entries are ignored. You can add bonus entries:- Automatically, with the Assign bonus entries step in a workflow.
- For one entry, with Award bonus entries in the card’s Entries table.
- For several entries at once, by selecting them in the Entries table and clicking Add bonus entries.