
Set up SSO on a hub
- Open your hub and go to Contacts.
- In the OAuth Single Sign On (SSO) panel, click Enable.
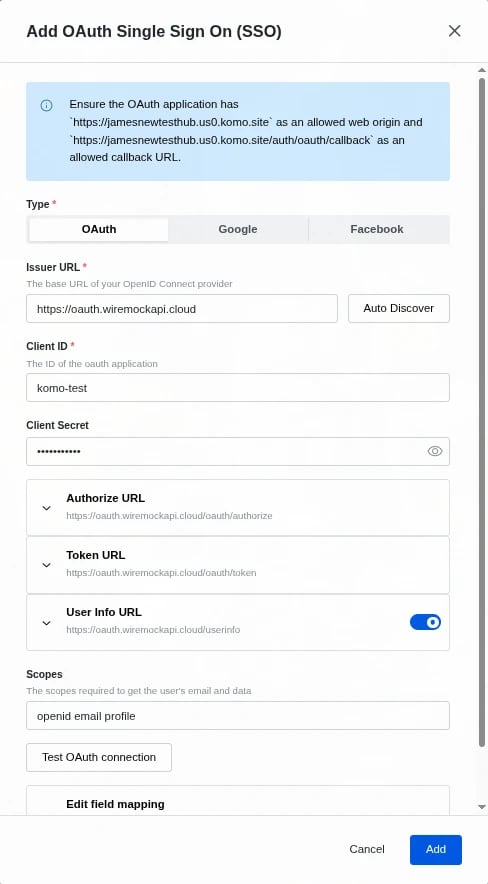
- Choose the Type: OAuth, Google or Facebook.
-
Enter your provider’s details:
- Google: Client ID and Client Secret.
- Facebook: App ID and App Secret.
- OAuth: Client ID, Client Secret, Issuer URL and Scopes. Click Auto Discover to fill in the authorize, token and user info URLs from your provider’s
.well-known/openid-configuration.
-
In your provider, allow your hub URL as a web origin and
<your hub URL>/auth/oauth/callbackas the callback or redirect URL. The modal shows the exact values for your hub. - Click Test OAuth connection, then Add.
How it works
- Card data capture forms show a Sign in button under the form header, above the fields. You can change its text and colours in the form editor.
-
Players can still fill in the form as a guest. The or continue as guest divider under the button can be turned off with Show Guest Divider on the form’s Styling tab. To require sign-in, use an Access Policy.
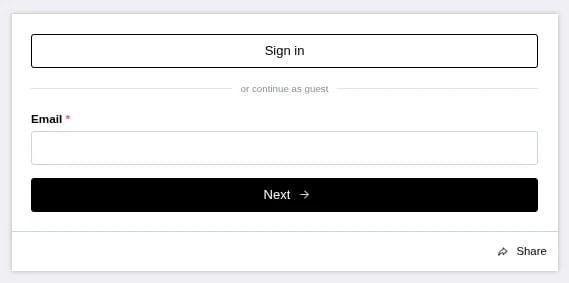
- Signing in verifies the player’s email and saves their provider details to their contact, using your field mapping. Form fields are then pre-filled from the contact, and fields set to Hide field if the contact already has a value for it are hidden.
- Once a player is signed in, the button no longer shows on the hub’s forms.
- To also show a sign-in icon in the hub header, open Contacts → Form verification → Manage forms and emails → Sign In and turn on Show Sign In Button. With SSO on, it starts the SSO sign-in.