
What is it?
A Contact in Komo is the representation of a customer or your end-user. Contact Verification is a way of verifying that a person is who they say they are so we can keep all customer data secure (our first priority) and provide a smooth experience for returning contacts.How does it work?
When Contact Verification is turned on, when a user enters their email into a form, we check to see if we have seen it before, in other words, whether a Contact exists with that email yet or not. If a Contact exists, we will make sure that we merge any new information with the existing Contact, help them to prefill form values that they have already provided and slow down any potential spammers by forcing users to verify their email if they change their email.When does a user need to verify their email?
A user only needs to verify their email if they change it. This increases the amount of effort required for a user to ‘spam’ a competition and ensures that contact profiles aren’t “dirtied” with invalid information. To retrieve an on-going gameplay in the case of: Live Predictor, Live Trivia, Q&A & Treasure Hunt. For these games, we will look up the email they entered and if there is an existing and on-going gameplay found we will force the user to verify themselves (if they haven’t already) before giving them access to the existing gameplay. This ensures we never allow people to “hijack” someone’s gameplay. If the sign-in button is turned on or the Verify on first submission is turned on, verification will also be required.Why do we automatically merge two Contacts?
Automatic merging of Contacts takes place to reflect updates that have been made to Contact details when a user fills out a form multiple times. The key scenario where this takes place is when you have a user fill out a form, only to enter an additional email in a new form within the same session (ie. on the same device and using the same browser). This typically takes place when you have two different people fill out a form on the same device. When this occurs, those two Contacts will be automatically merged and the email that was provided most recently will be reflected in the Contact. It’s important to note that entries will still be reflected as separate entries, however they will share the same Contact email address.How do I set it up?
- Step 1: Set up your verification form
- Step 2: Adjust Verification display settings
- Step 3: Design Verification Email
- Step 4: Add a Sign-In button (Optional)
Step 1: Access Form Verification Configuration
- Navigate to your Hub settings and head to the User section.
- Click on Manage forms and emails under Form verification.
Step 2: Adjust Verification display settings
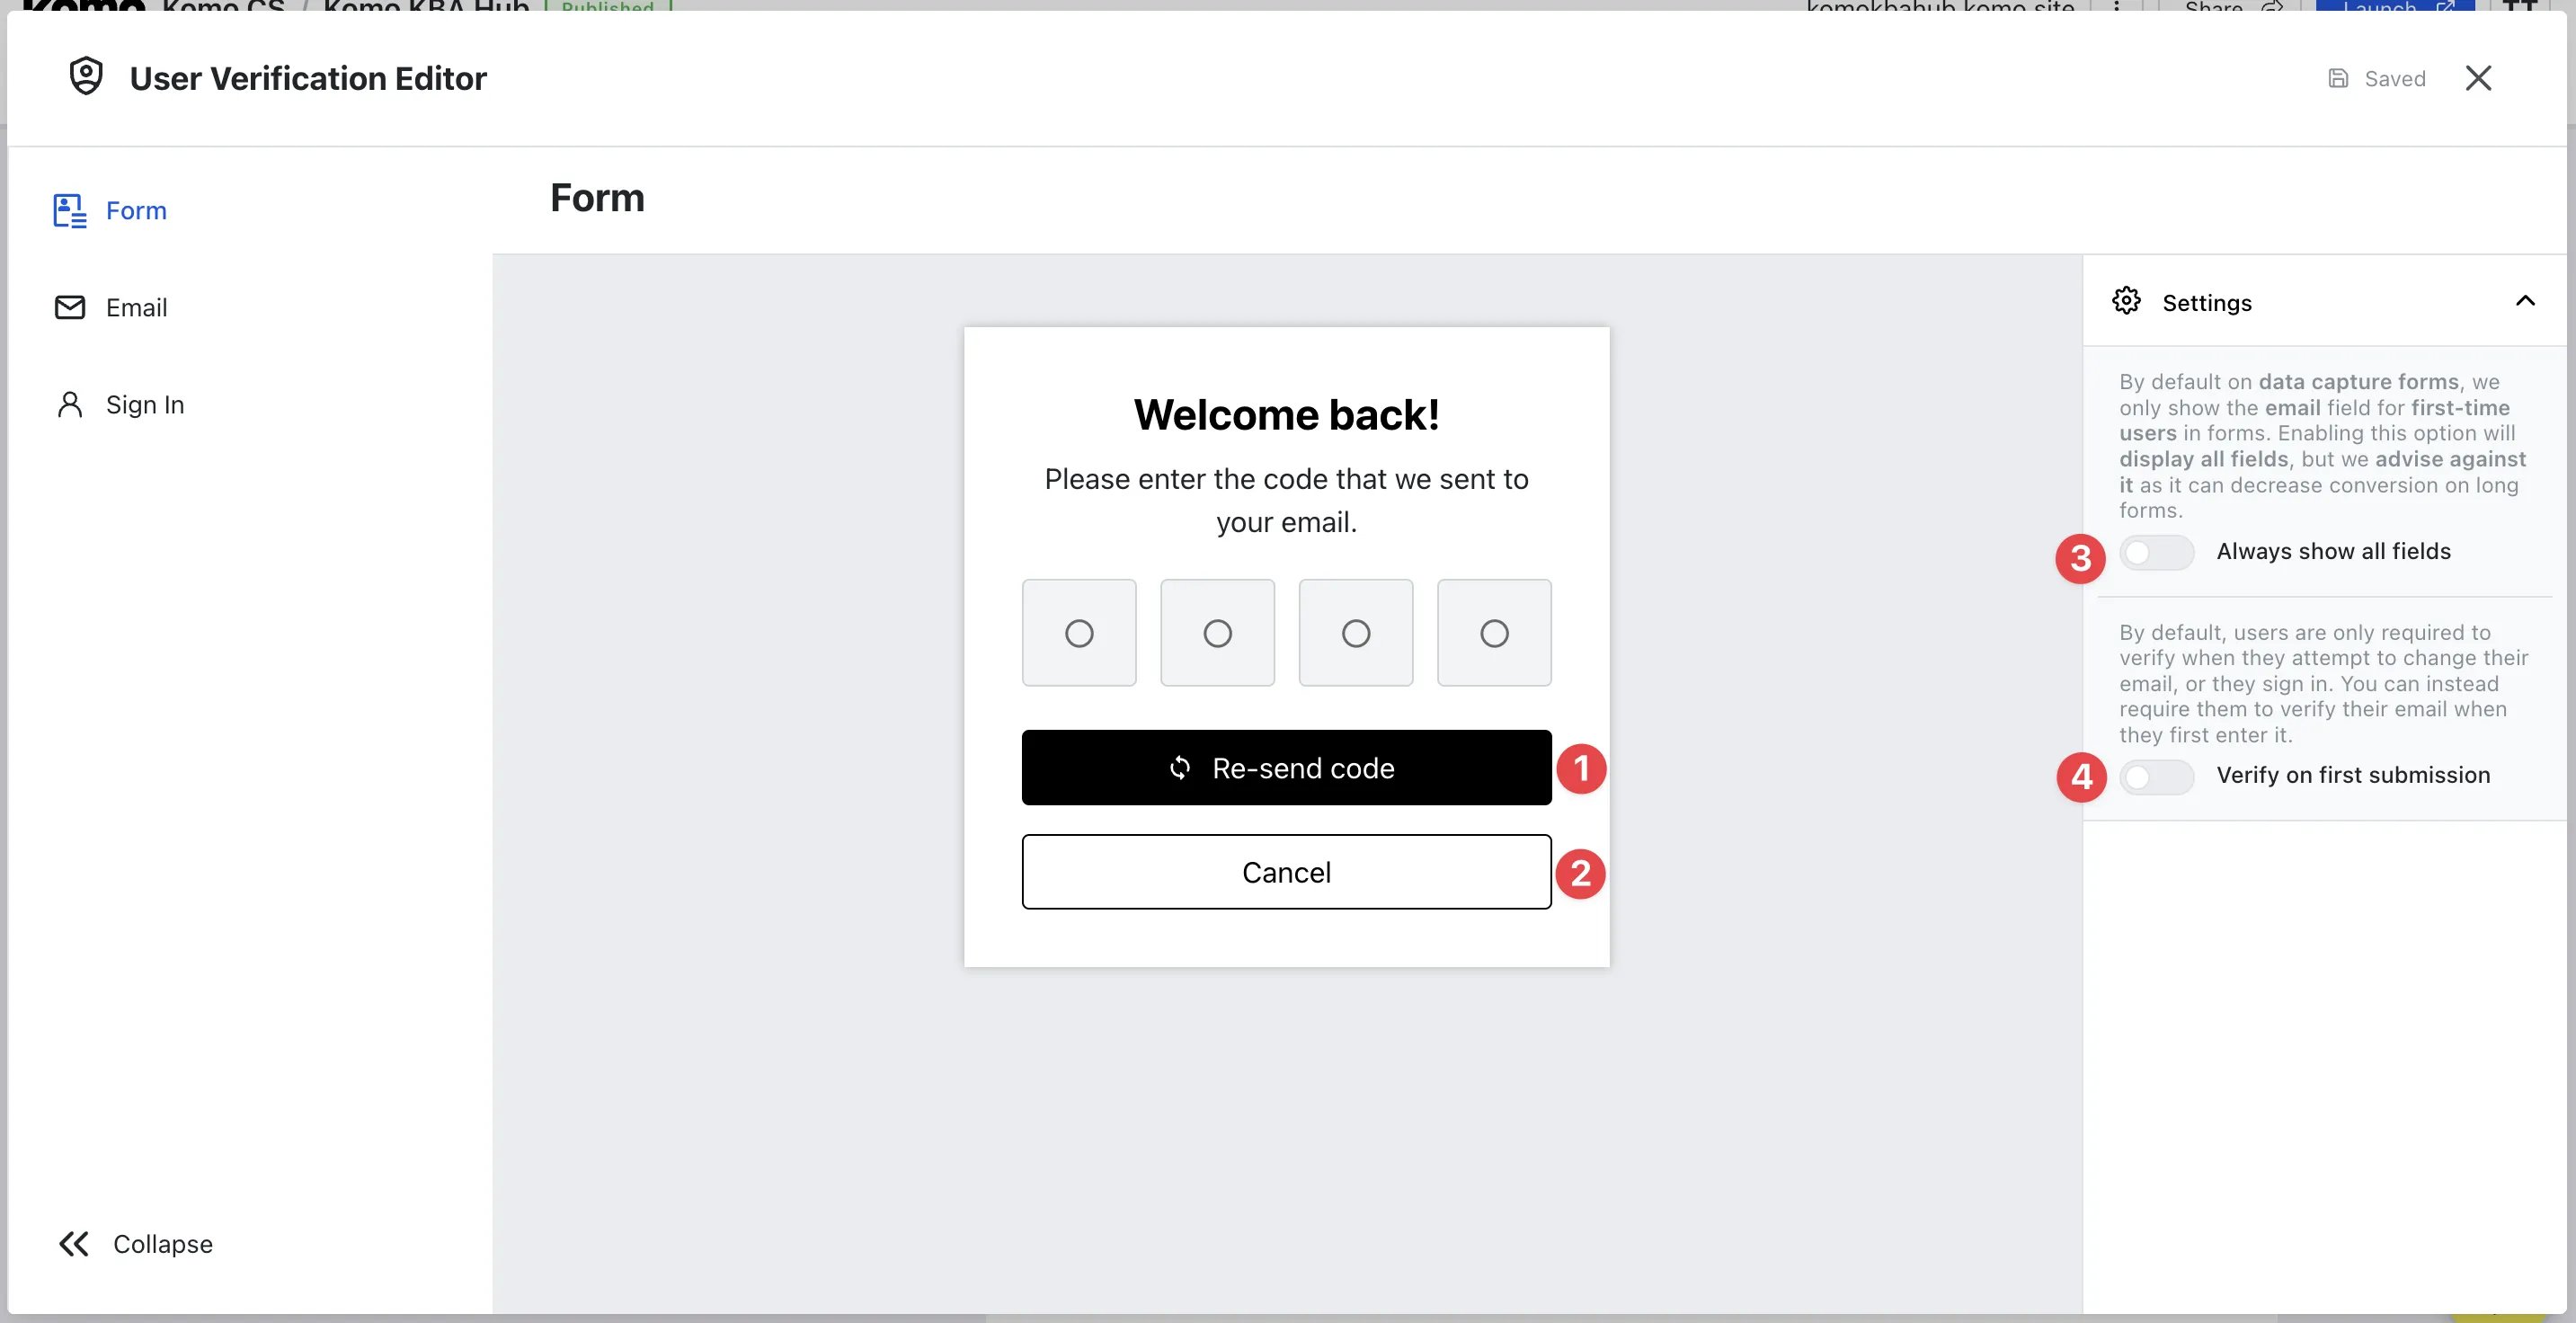
- (1) + (2) Click here to edit the text and CTA colours.
- (3) This option is whether you want to show the user all the form fields upfront.
If this is disabled, users will enter their email first and then see the rest of the fields once their email has been verified.
Below is an example of when no settings are enabled.
- (4) The second setting forces all users to verify their email the first time they enter.
Below is an example of when verify on first submission is enabled.

Step 3: Design Verification Email
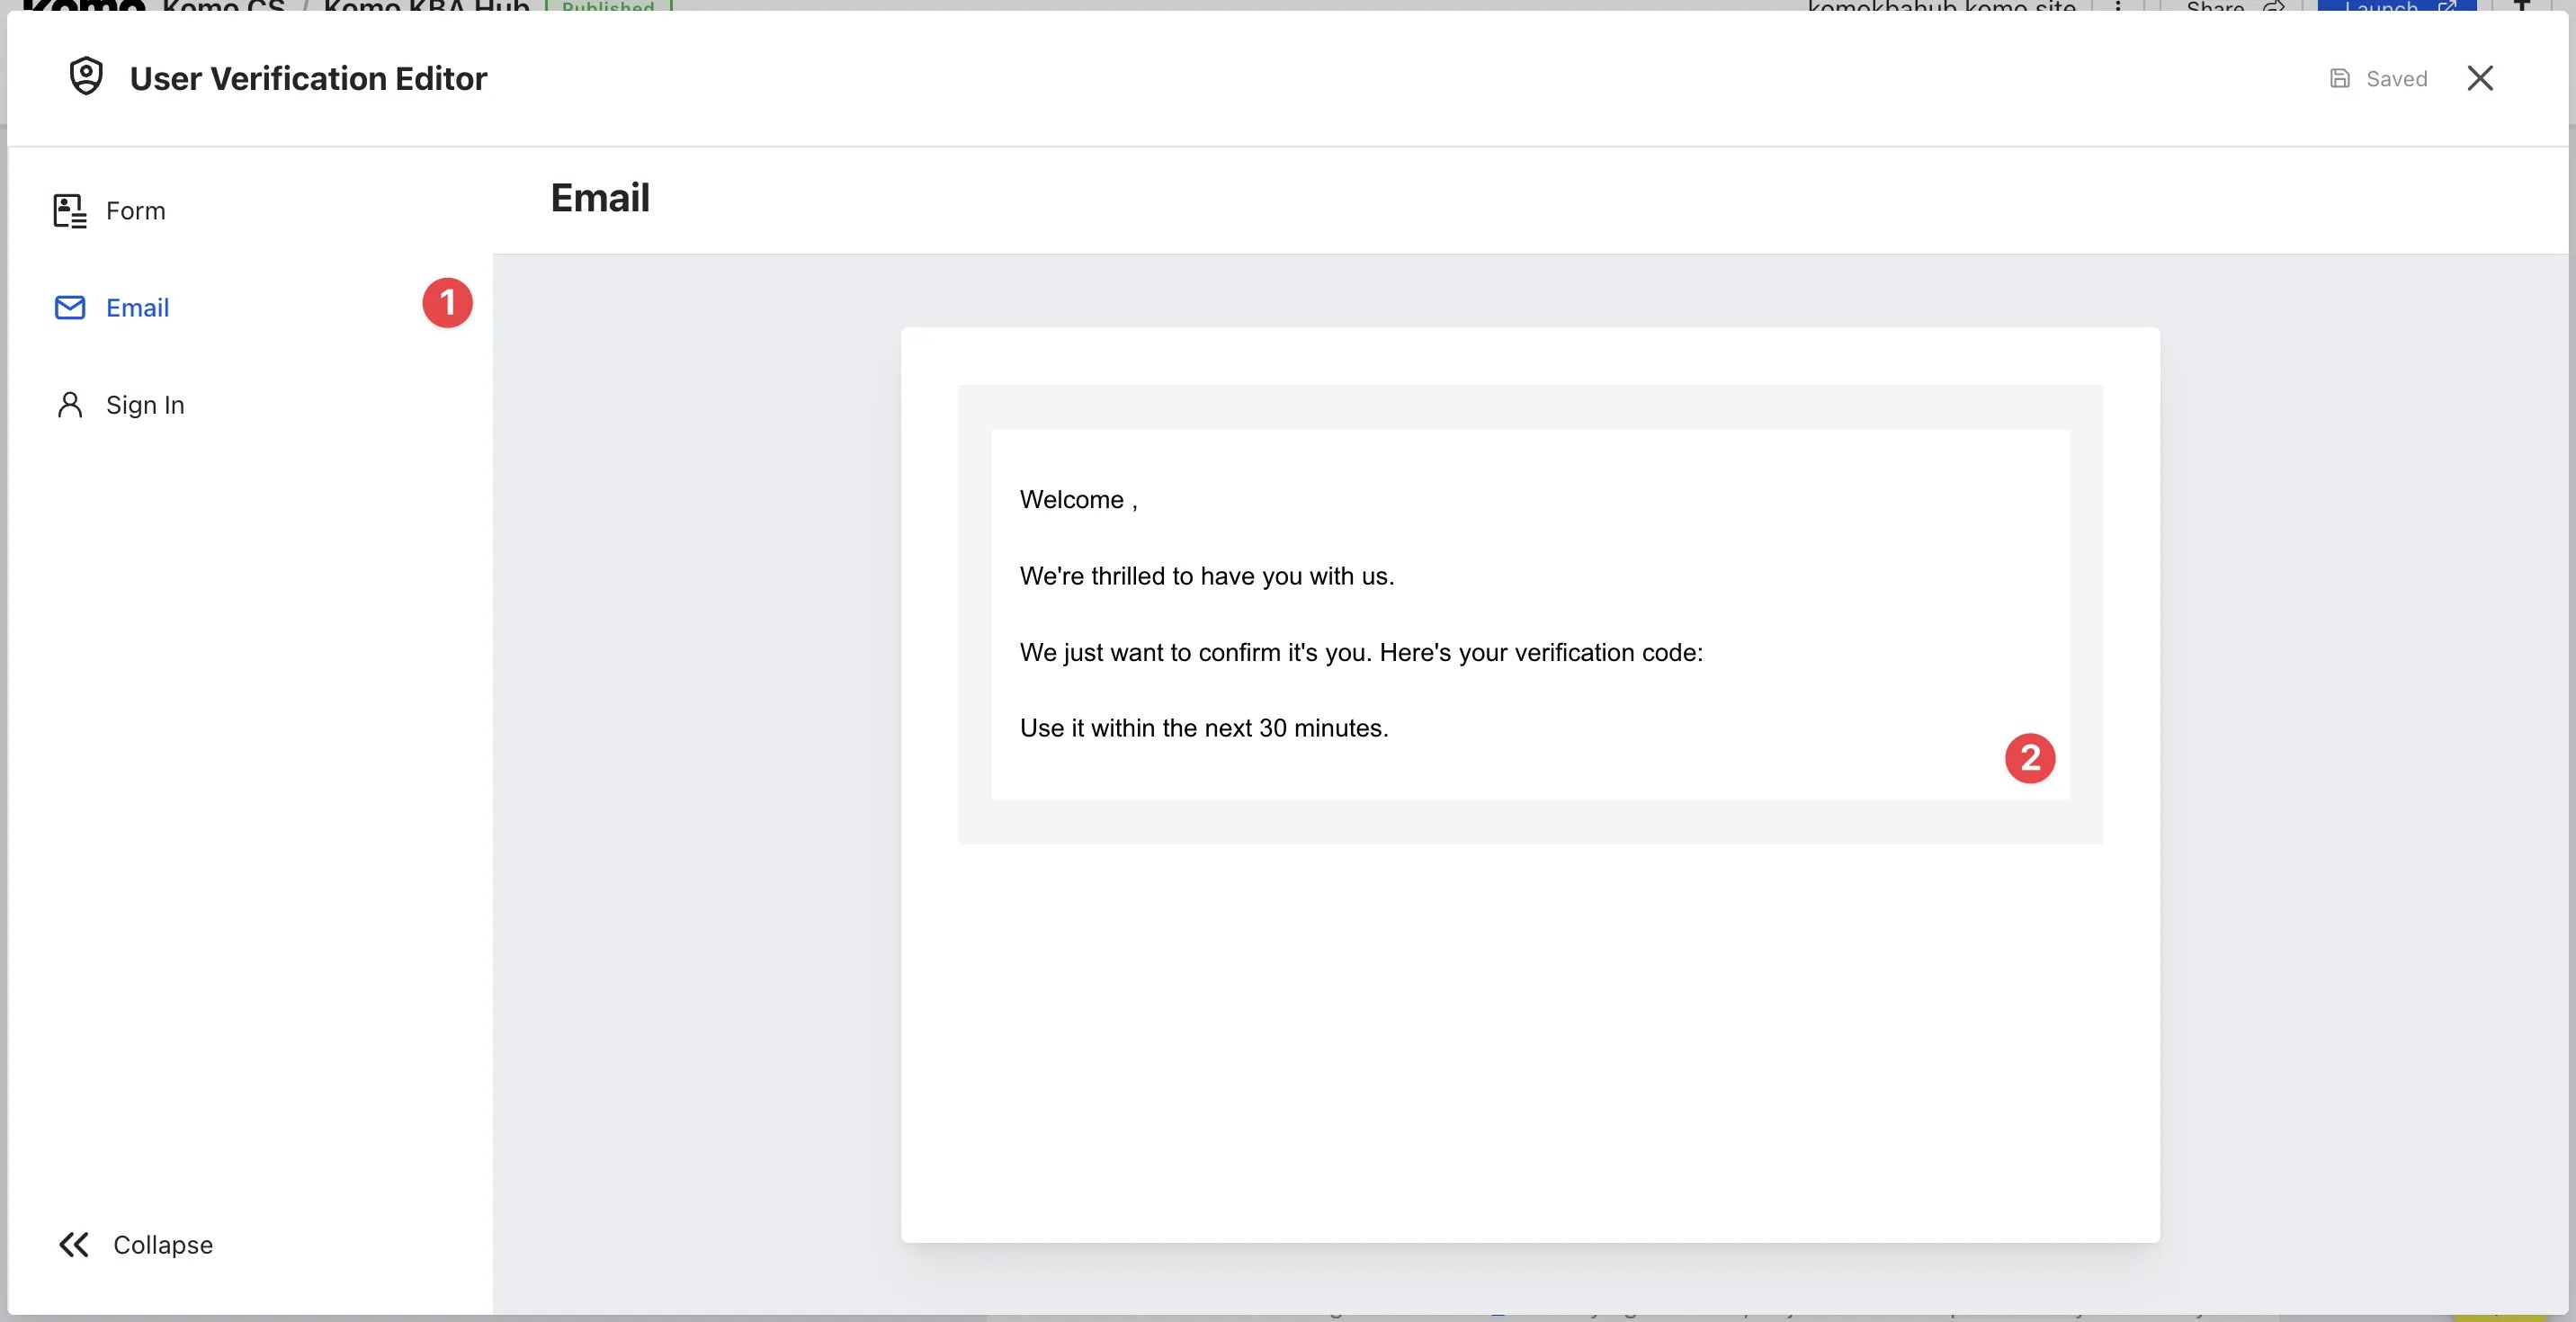
- (1) Navigate to the Email tab.
- (2) You can configure and design the email sent to the user with their verification code. Learn more about email communications here.
Below is an example of when users update or change their email from an existing entry.
Step 4: Add a Sign-In button (Optional)
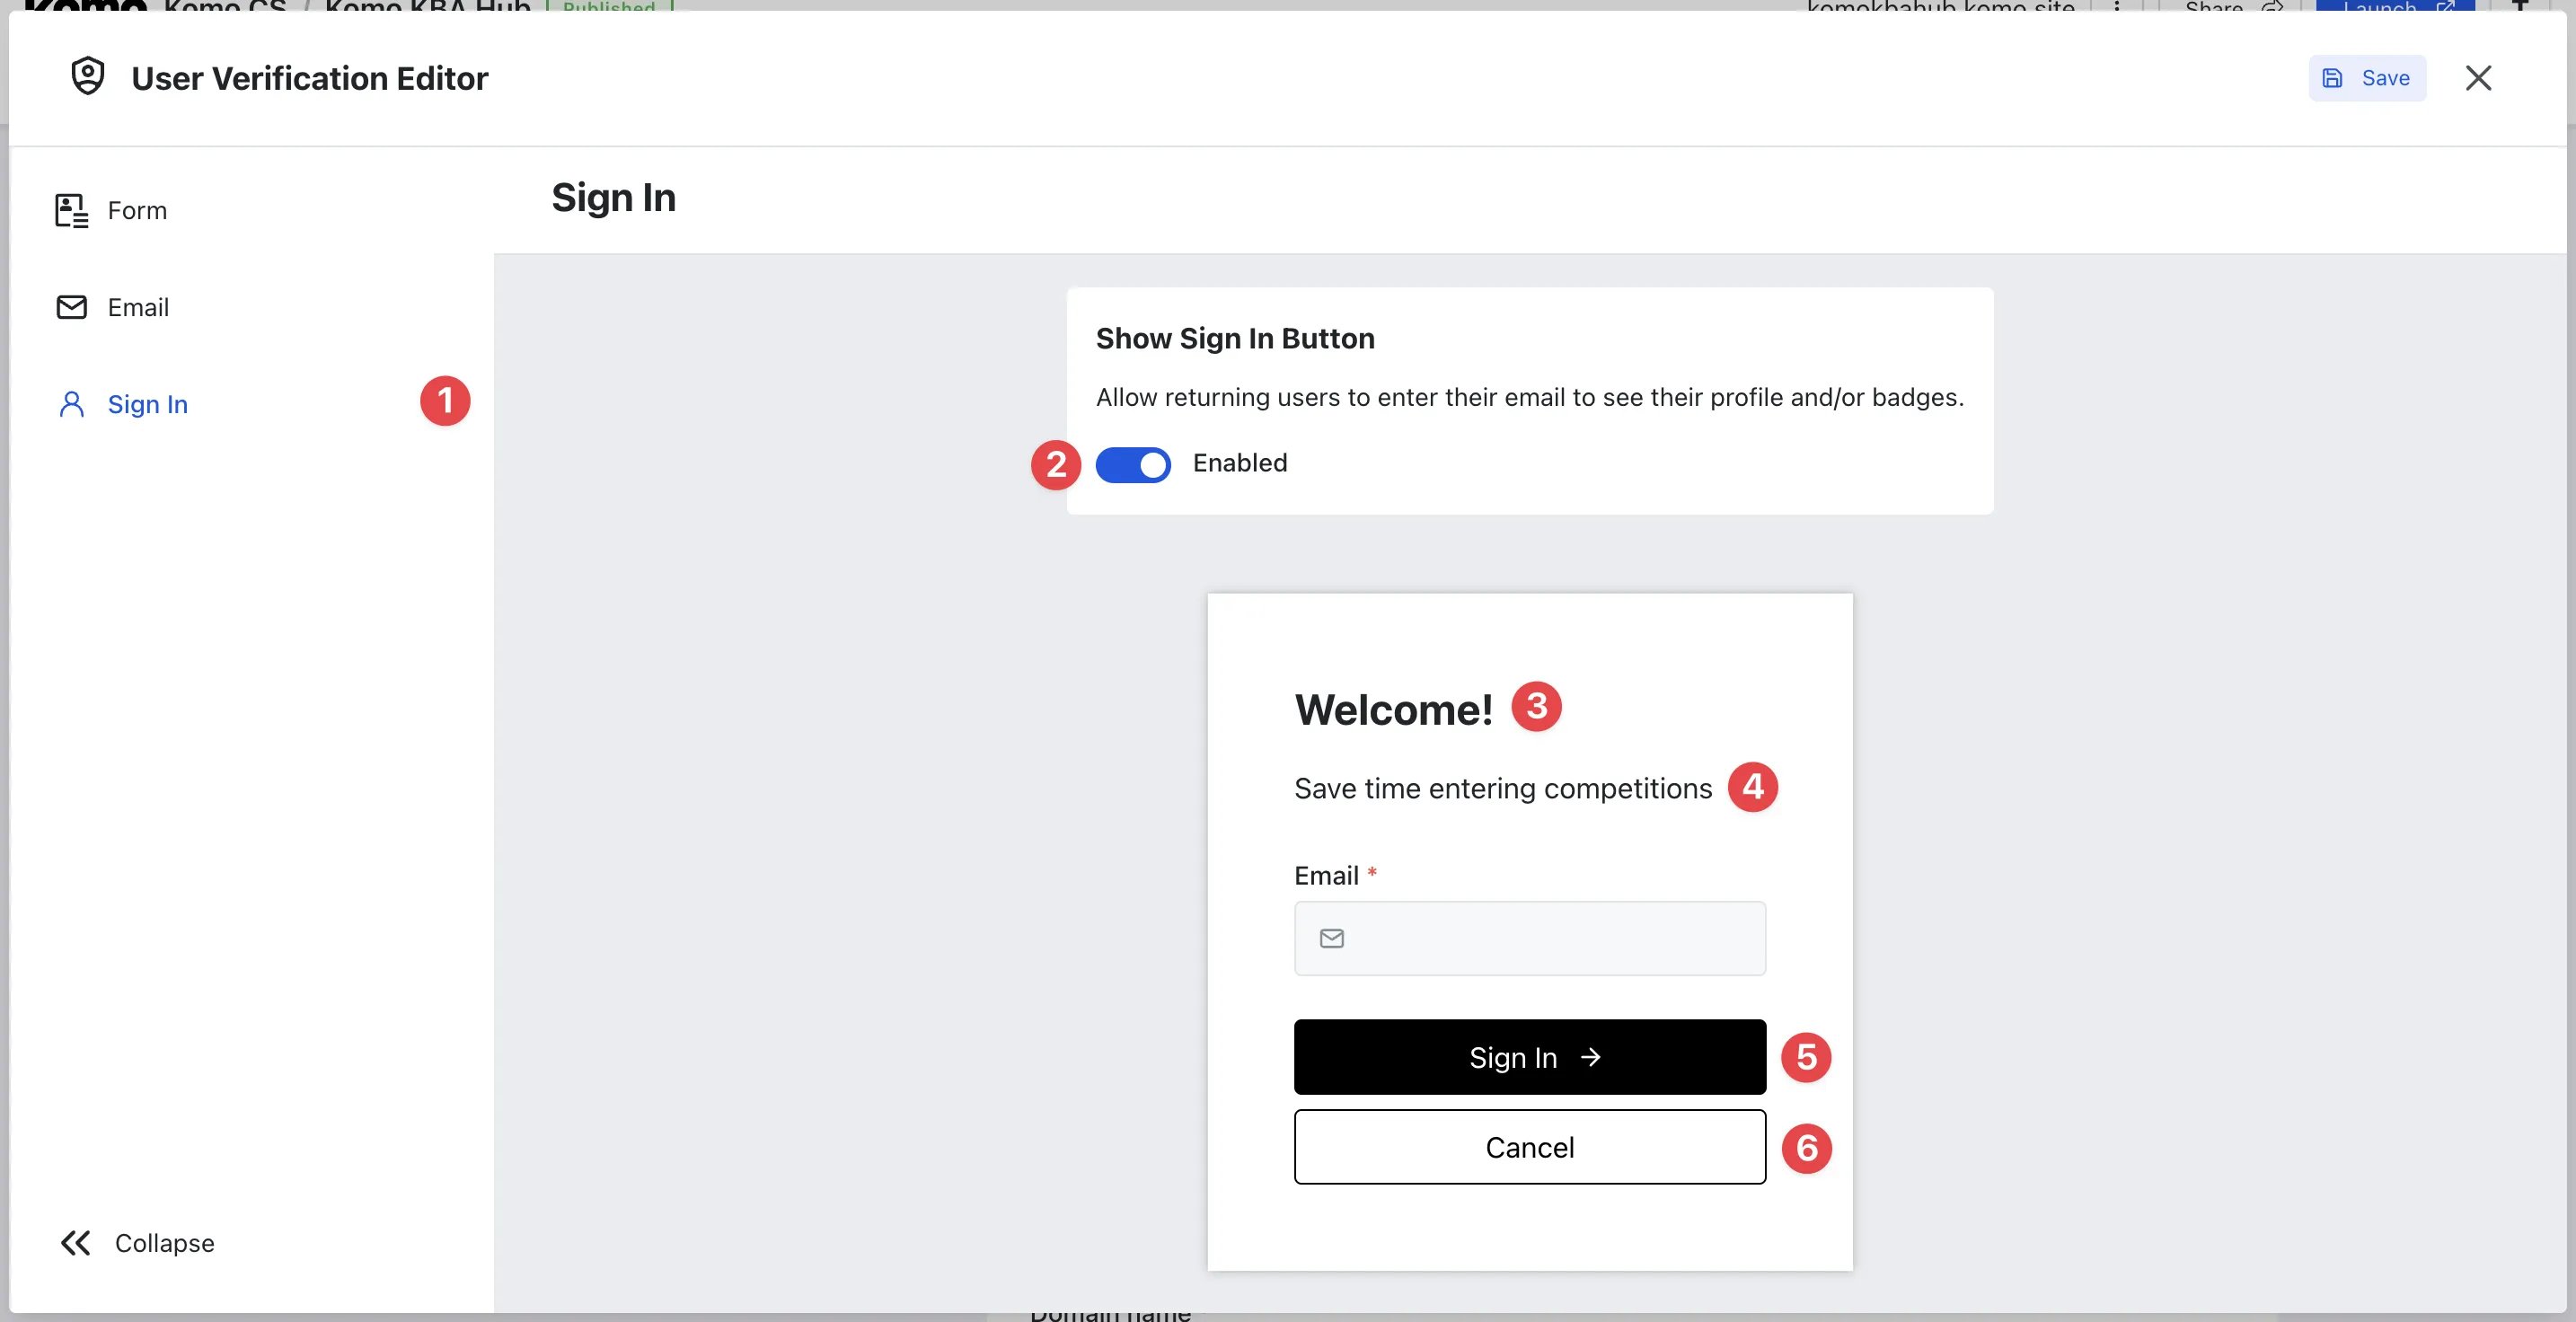
- (1) Head to the Sign in tab.
- (2) Enable the feature for the sign in button to appear on your Hub.
The sign-in button will help the contact verify with the hub outside of a form, which means they can see any previously earned badges or configured profiles on the site.\
- (3) + (4) Update the message on the sign-in form.
- (5) + (6) Click here to edit the text and CTA colours.