
What is it?
Use workflows to add, update and remove contacts in Mailchimp automatically when your chosen conditions are met. This article walks through building one.How do I do it?
Step 1: Connect the Mailchimp Connected App
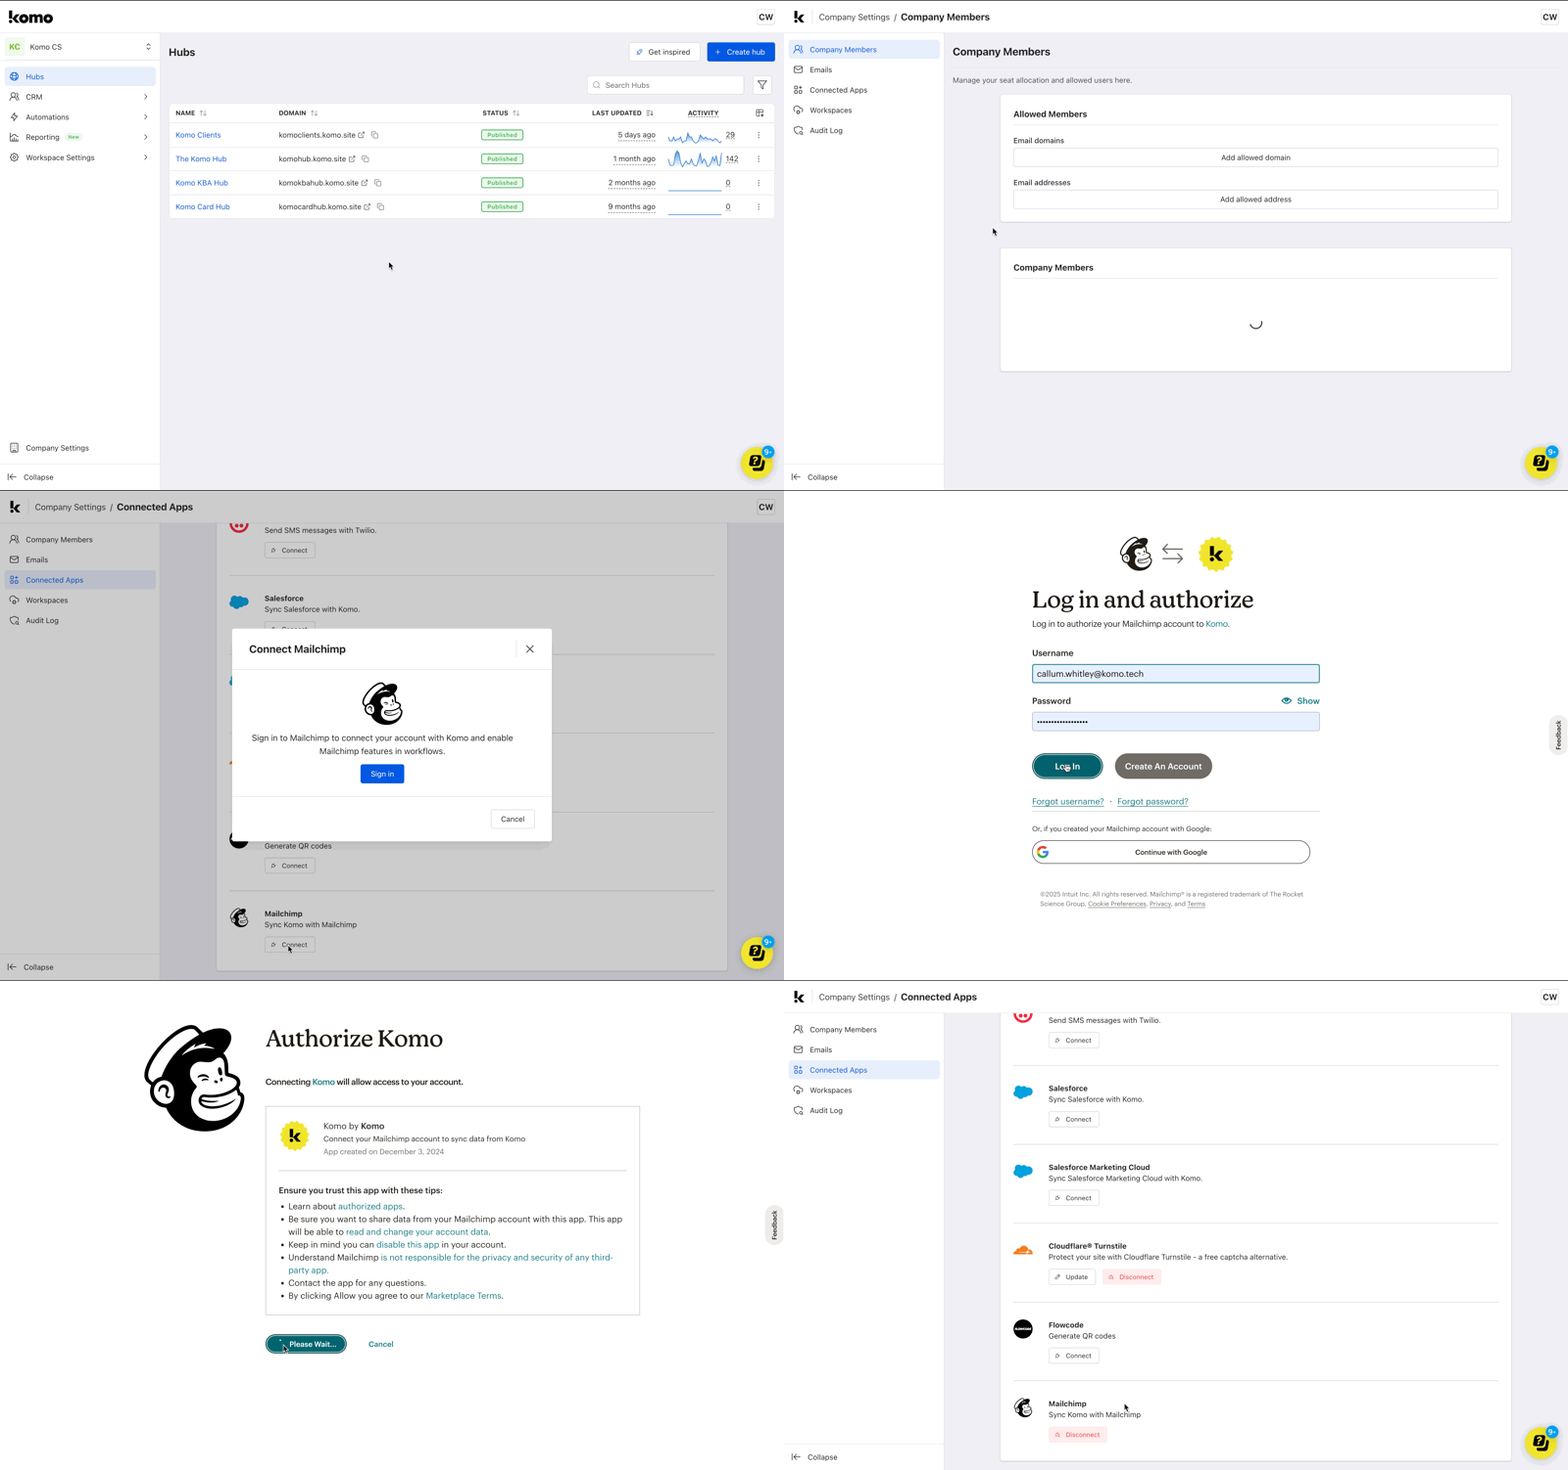
You need a Mailchimp account before you connect it to Komo. See Mailchimp’s guide to creating an account.
- Click the Workspace initials in the top right corner, then click Company Settings.
- Click Connected Apps in the left-hand menu.
- Click Connect next to Mailchimp.
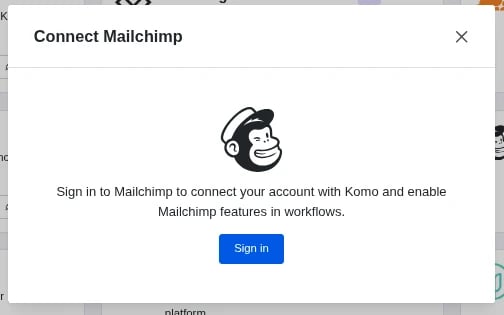
- Click Sign in and log in to Mailchimp.
- Click Allow to authorize the connection.
Step 2: Build your workflow
-
Workflows can be created at the workspace, hub or card level. This article uses the card level; the steps are the same at the workspace or hub level, where you open workflows from the left-hand toolbar. See workflows for contact lists for the workspace level.
First, set up a data capture form with the contact property fields and consent fields you need. See data capture forms and consent fields.
- Open your Engagement Hub and the card with the data capture form you want to sync contacts from.
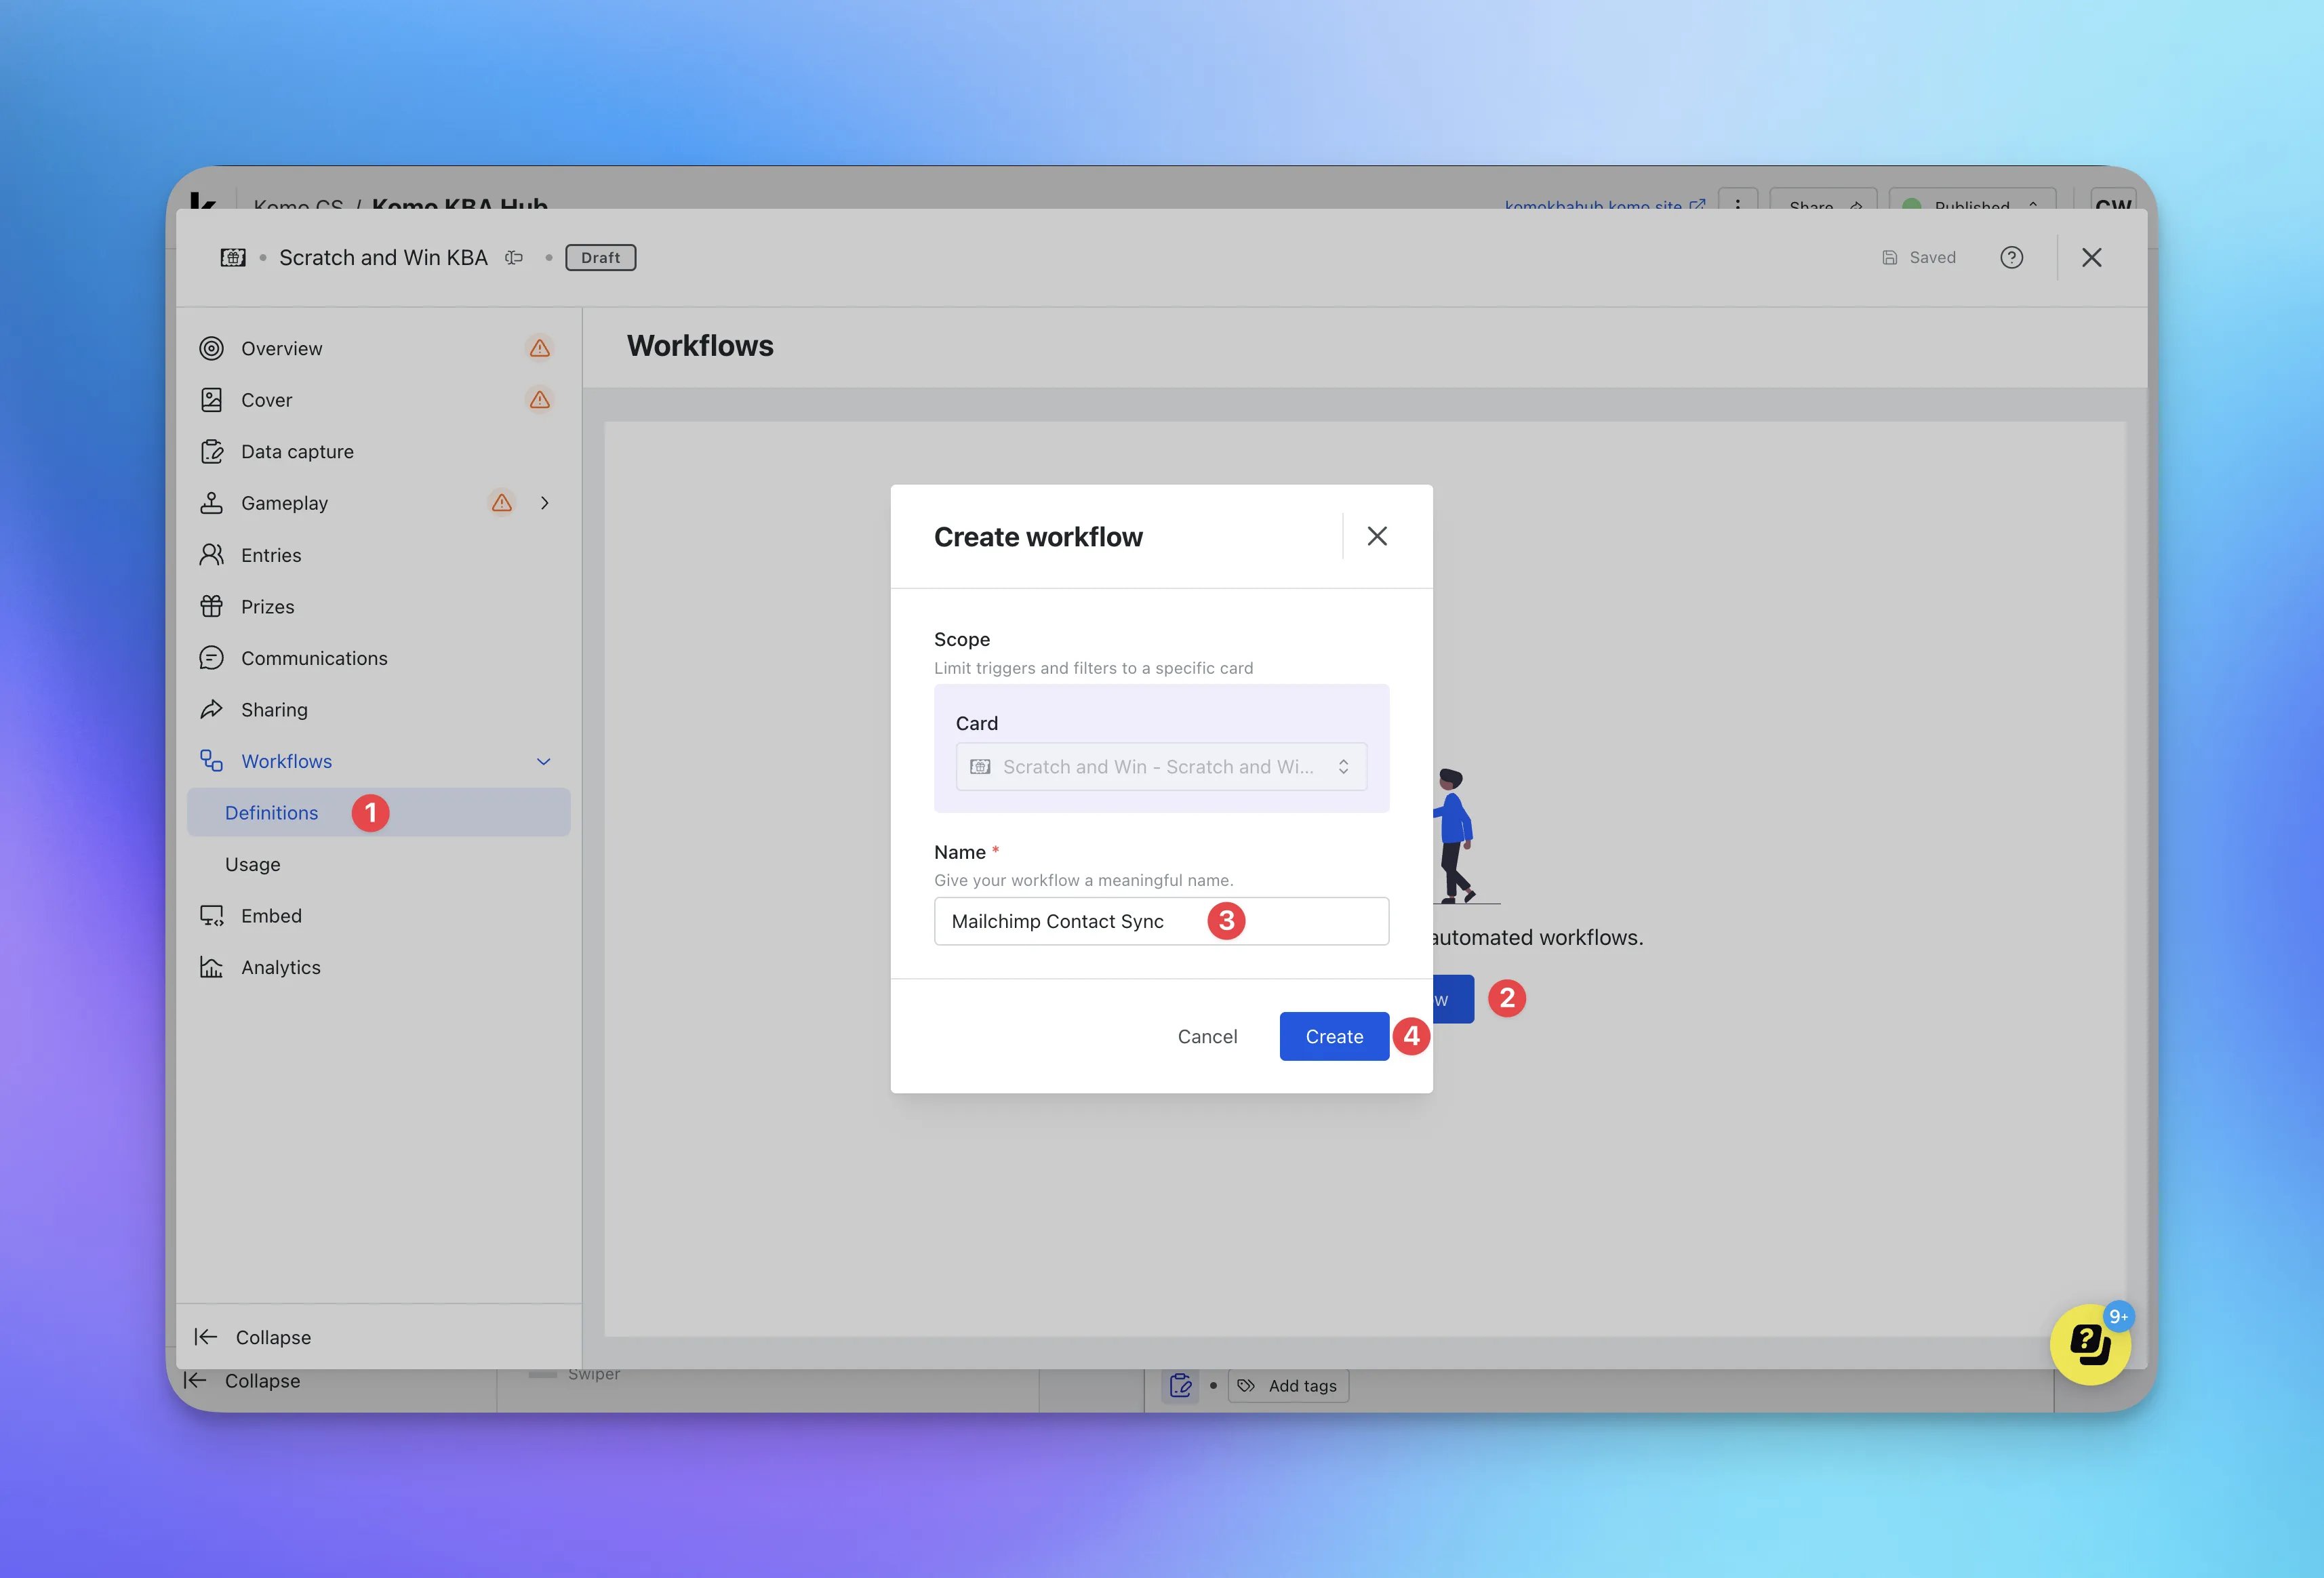
- (1) Click Definitions under the Workflows dropdown.
- (2) Select + Create Workflow.
- (3) Give your workflow a clear Name (internal only).
- (4) Click Create.
- Select the pencil icon next to Trigger.
- Select the event that will trigger your workflow from the Execute flow on dropdown. In this case, we will select Data captured.
- Click Save and then select the X to exit the modal.
- Drag the Filter module below the Trigger module, then drag the Trigger’s Output node onto the Filter’s Input node.
- Select the pencil icon on the Filter module and set the conditions that must be met. In this case, the workflow only runs when the Email consent subscription is Active.
- Click Save and then exit the modal by clicking X.
- Drag the Mailchimp action module you need below the Filter module. This example uses Add/Update Member.
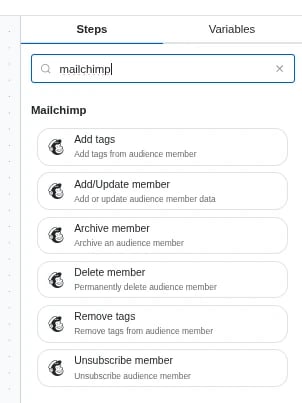
- Drag the Filter’s Success Output node onto the action’s Input node.
- Click the Pencil icon on the Action module.
- Select the Mailchimp audience and map the contact properties you collect to the matching Mailchimp audience fields (you can copy and paste the merge fields from the right-hand column).
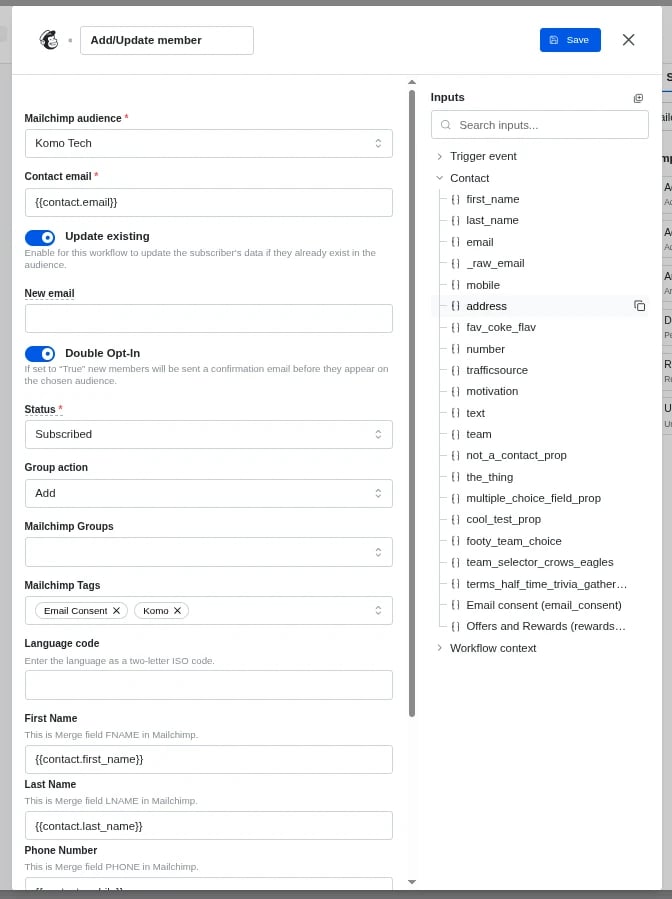
- Click Save and then exit the modal by clicking X.
- Click Save in the top right-hand corner.
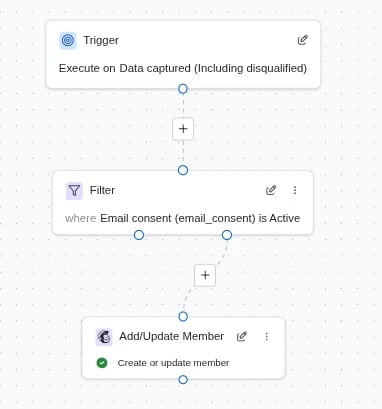
- To start the workflow, click the 3 dots next to it, select Run, then Yes, start it.
Step 3: Test your workflow
- Exit the Card settings, click the 3 dots at the top right of the card and select Visit single card.
- Fill out the data capture form, ticking the consent field checkboxes, then click the X to exit.
- Go back to your Engagement Hub, open the Card settings and select Usage under the Workflows dropdown.
- A Success tag in the status field for your contact means the workflow ran.
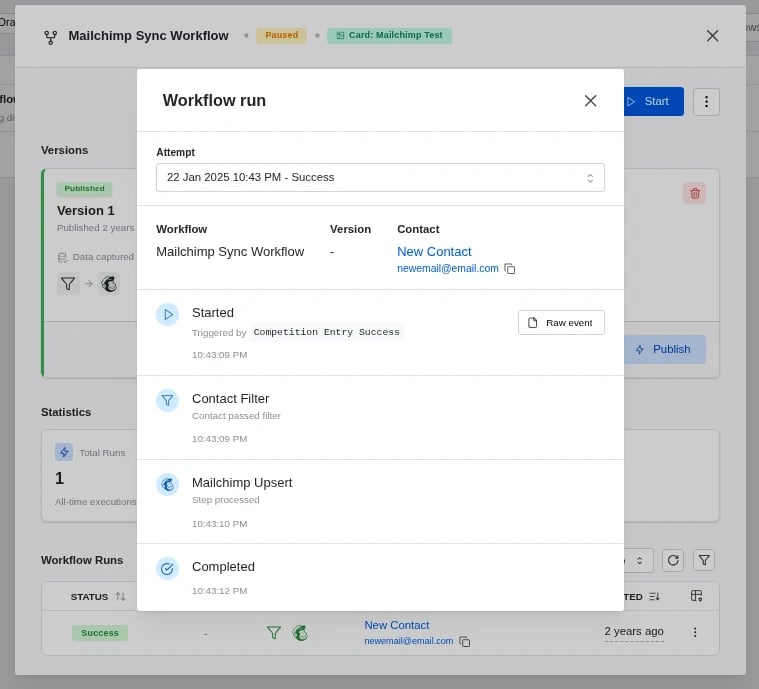
- In Mailchimp, go to All Contacts under the Audience dropdown to confirm the contact was added. If it isn’t there, refresh your browser.