
What is it?
The Memory Challenge is a fun, interactive memory game where users will need to match the exact pairs or associations before time runs out. Score points for every match, lose points for mismatches, and gain bonus points for streaks!How do I build one?
Step 1: Add a Memory Challenge to your Hub
- Navigate to your Engagement Hub
- Once there click the Plus icon, from here select Games and then Memory Challenge
- You will then see your new card has been added to your Engagement Hub
Step 2: Add a Cover image
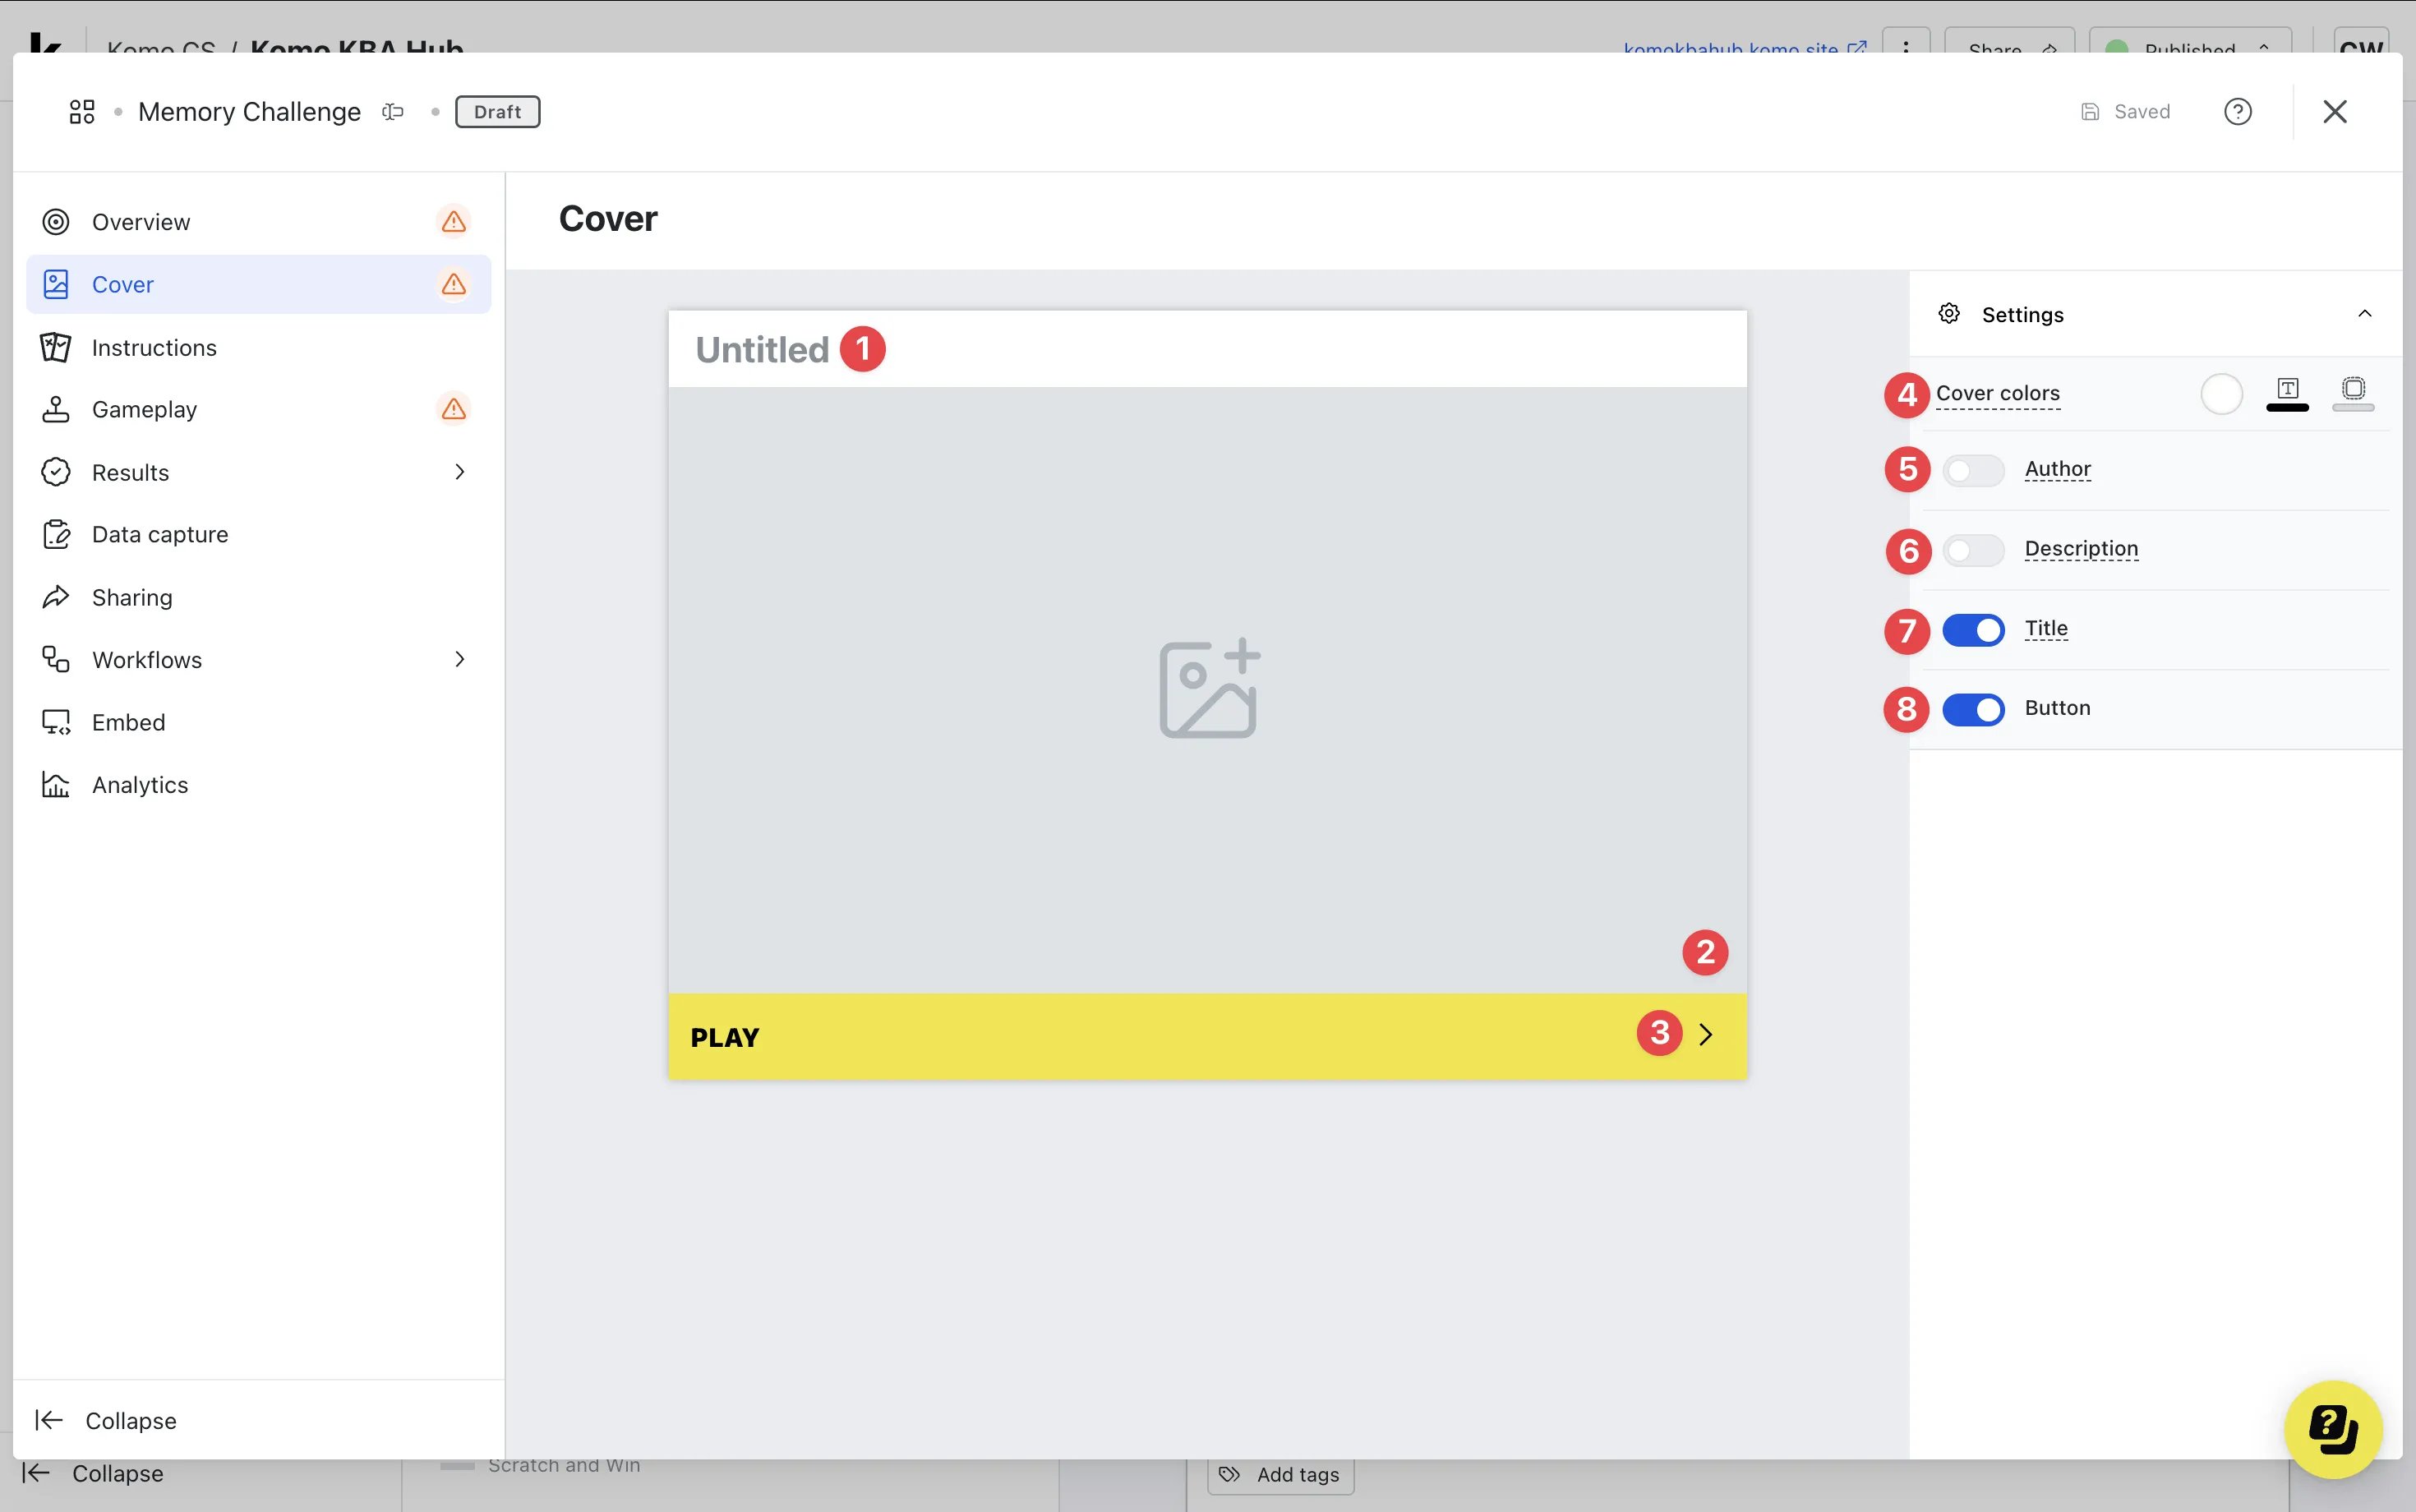
- Clicking on the Memory Challenge will open the editing module
- (1) By clicking here you can add a title to your Memory Challenge card
- (2) This is where you can upload a cover image
- (3) Here you can edit the color and copy of the call-to-action bar or (8) toggle this off here
- (4) Set the Outer card shell colors (description and share bar)
- (5) You can add an Author tag by displaying the brand or person who’s responsible for the card content
- (6) Add a Description to the card
- (7) Here you can disable the title
Step 3: Edit the Instructions screen
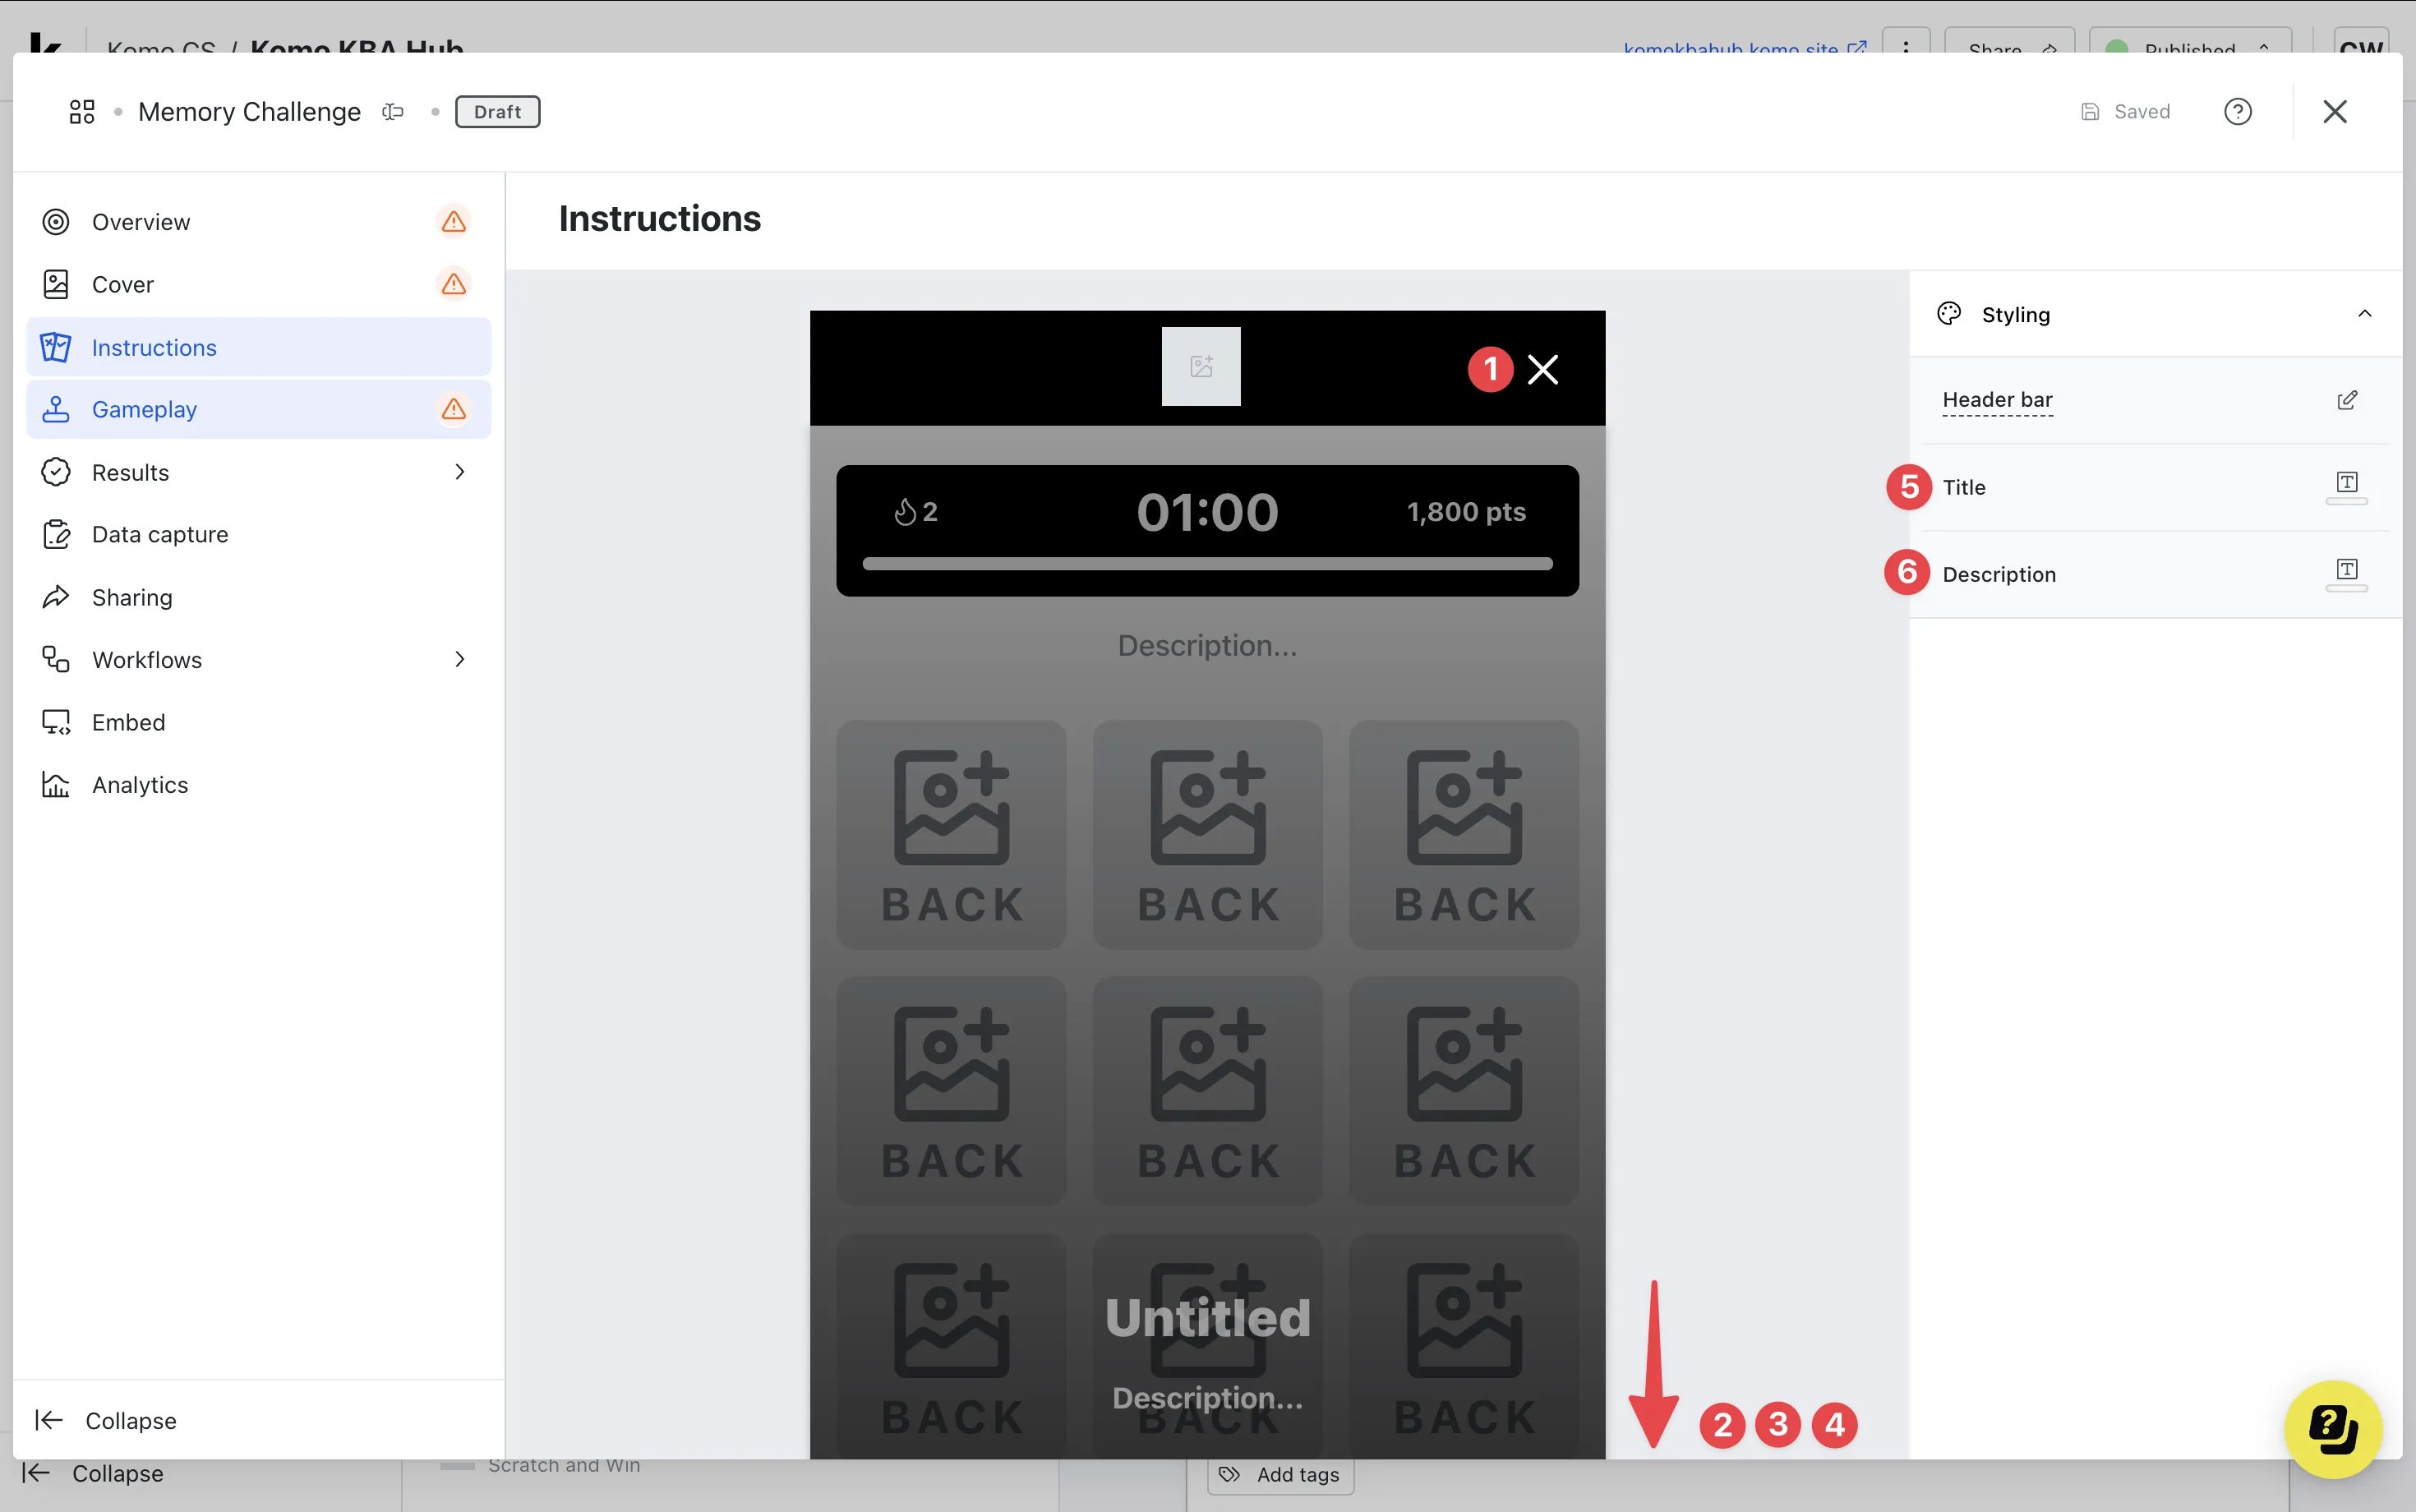
- (1) Edit the header bar here by altering the color and uploading your logo
- (2) Scrolling down, add a title to the instructions and (5) change the font color here
- (3) Include a description and (6) change the font color here
We recommend putting the rules of the game here. E.g. Match all the pairs in under 60 seconds to win!
- (4) Alter the call-to-action bar here
Step 4: Edit the Gameplay screen
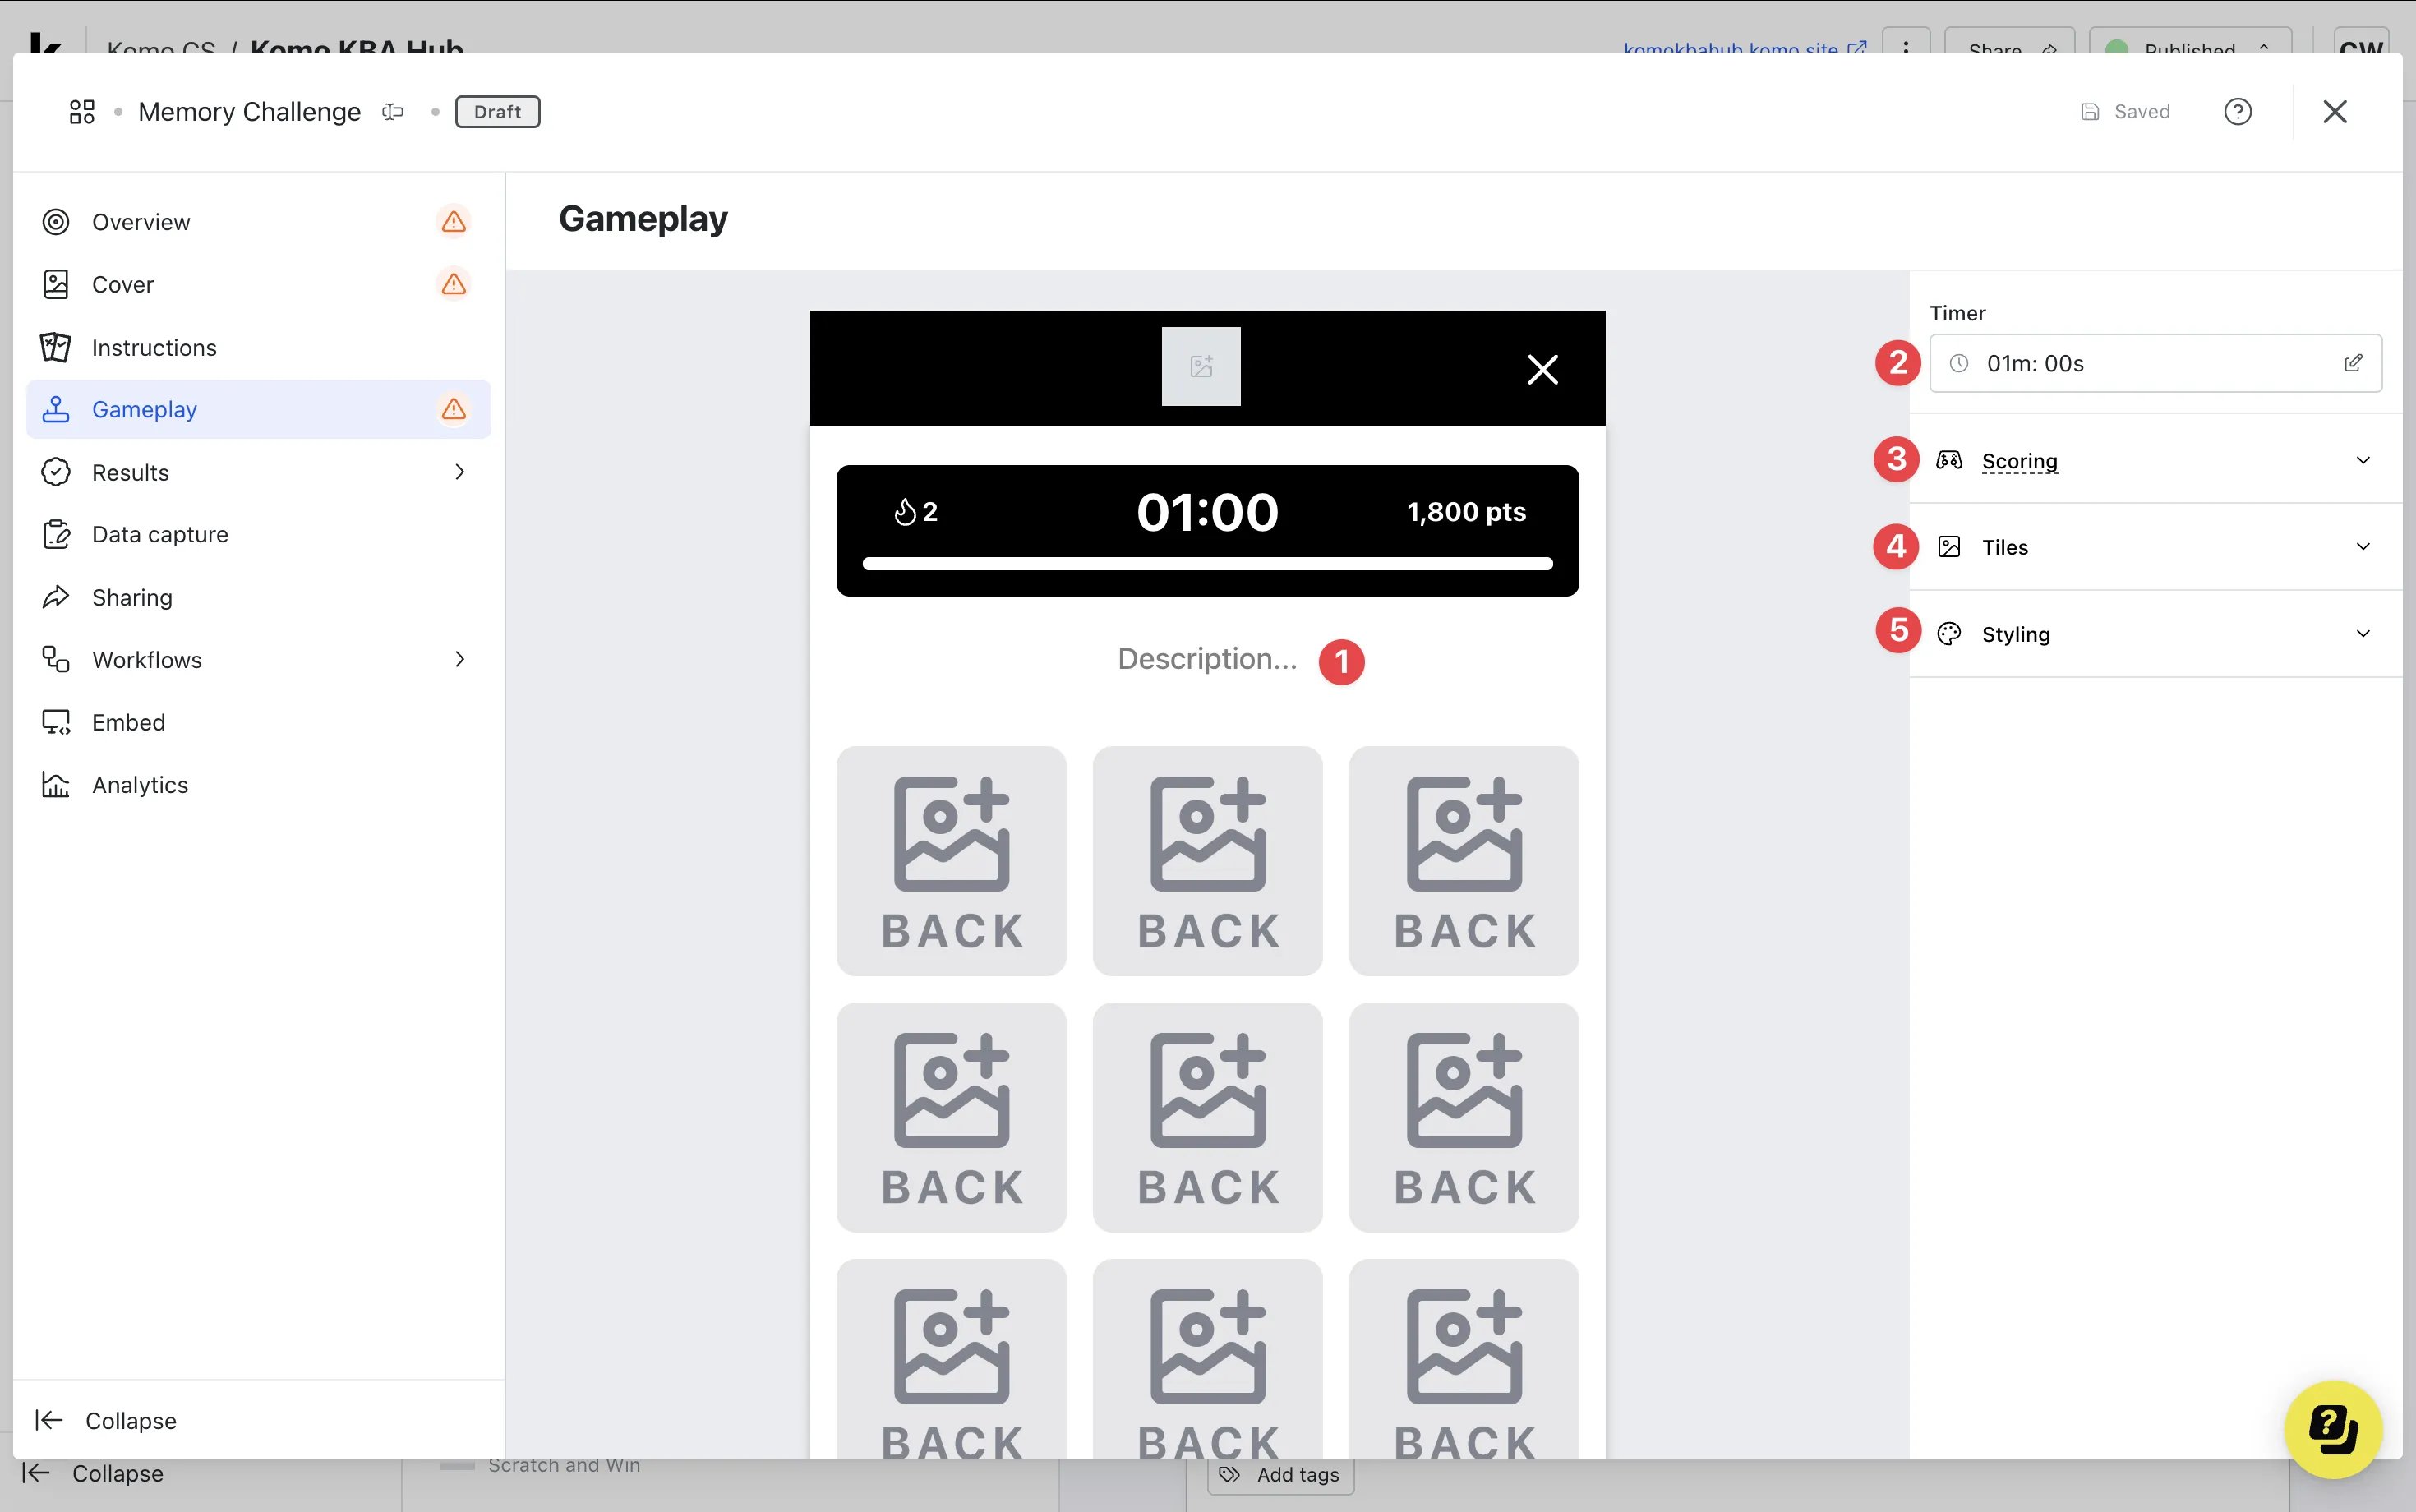
- (1) Add a description to the game
- (2) Click here to edit the timer
-
(3) Here is where you’ll edit the scoring table
Editing the Scoring Table
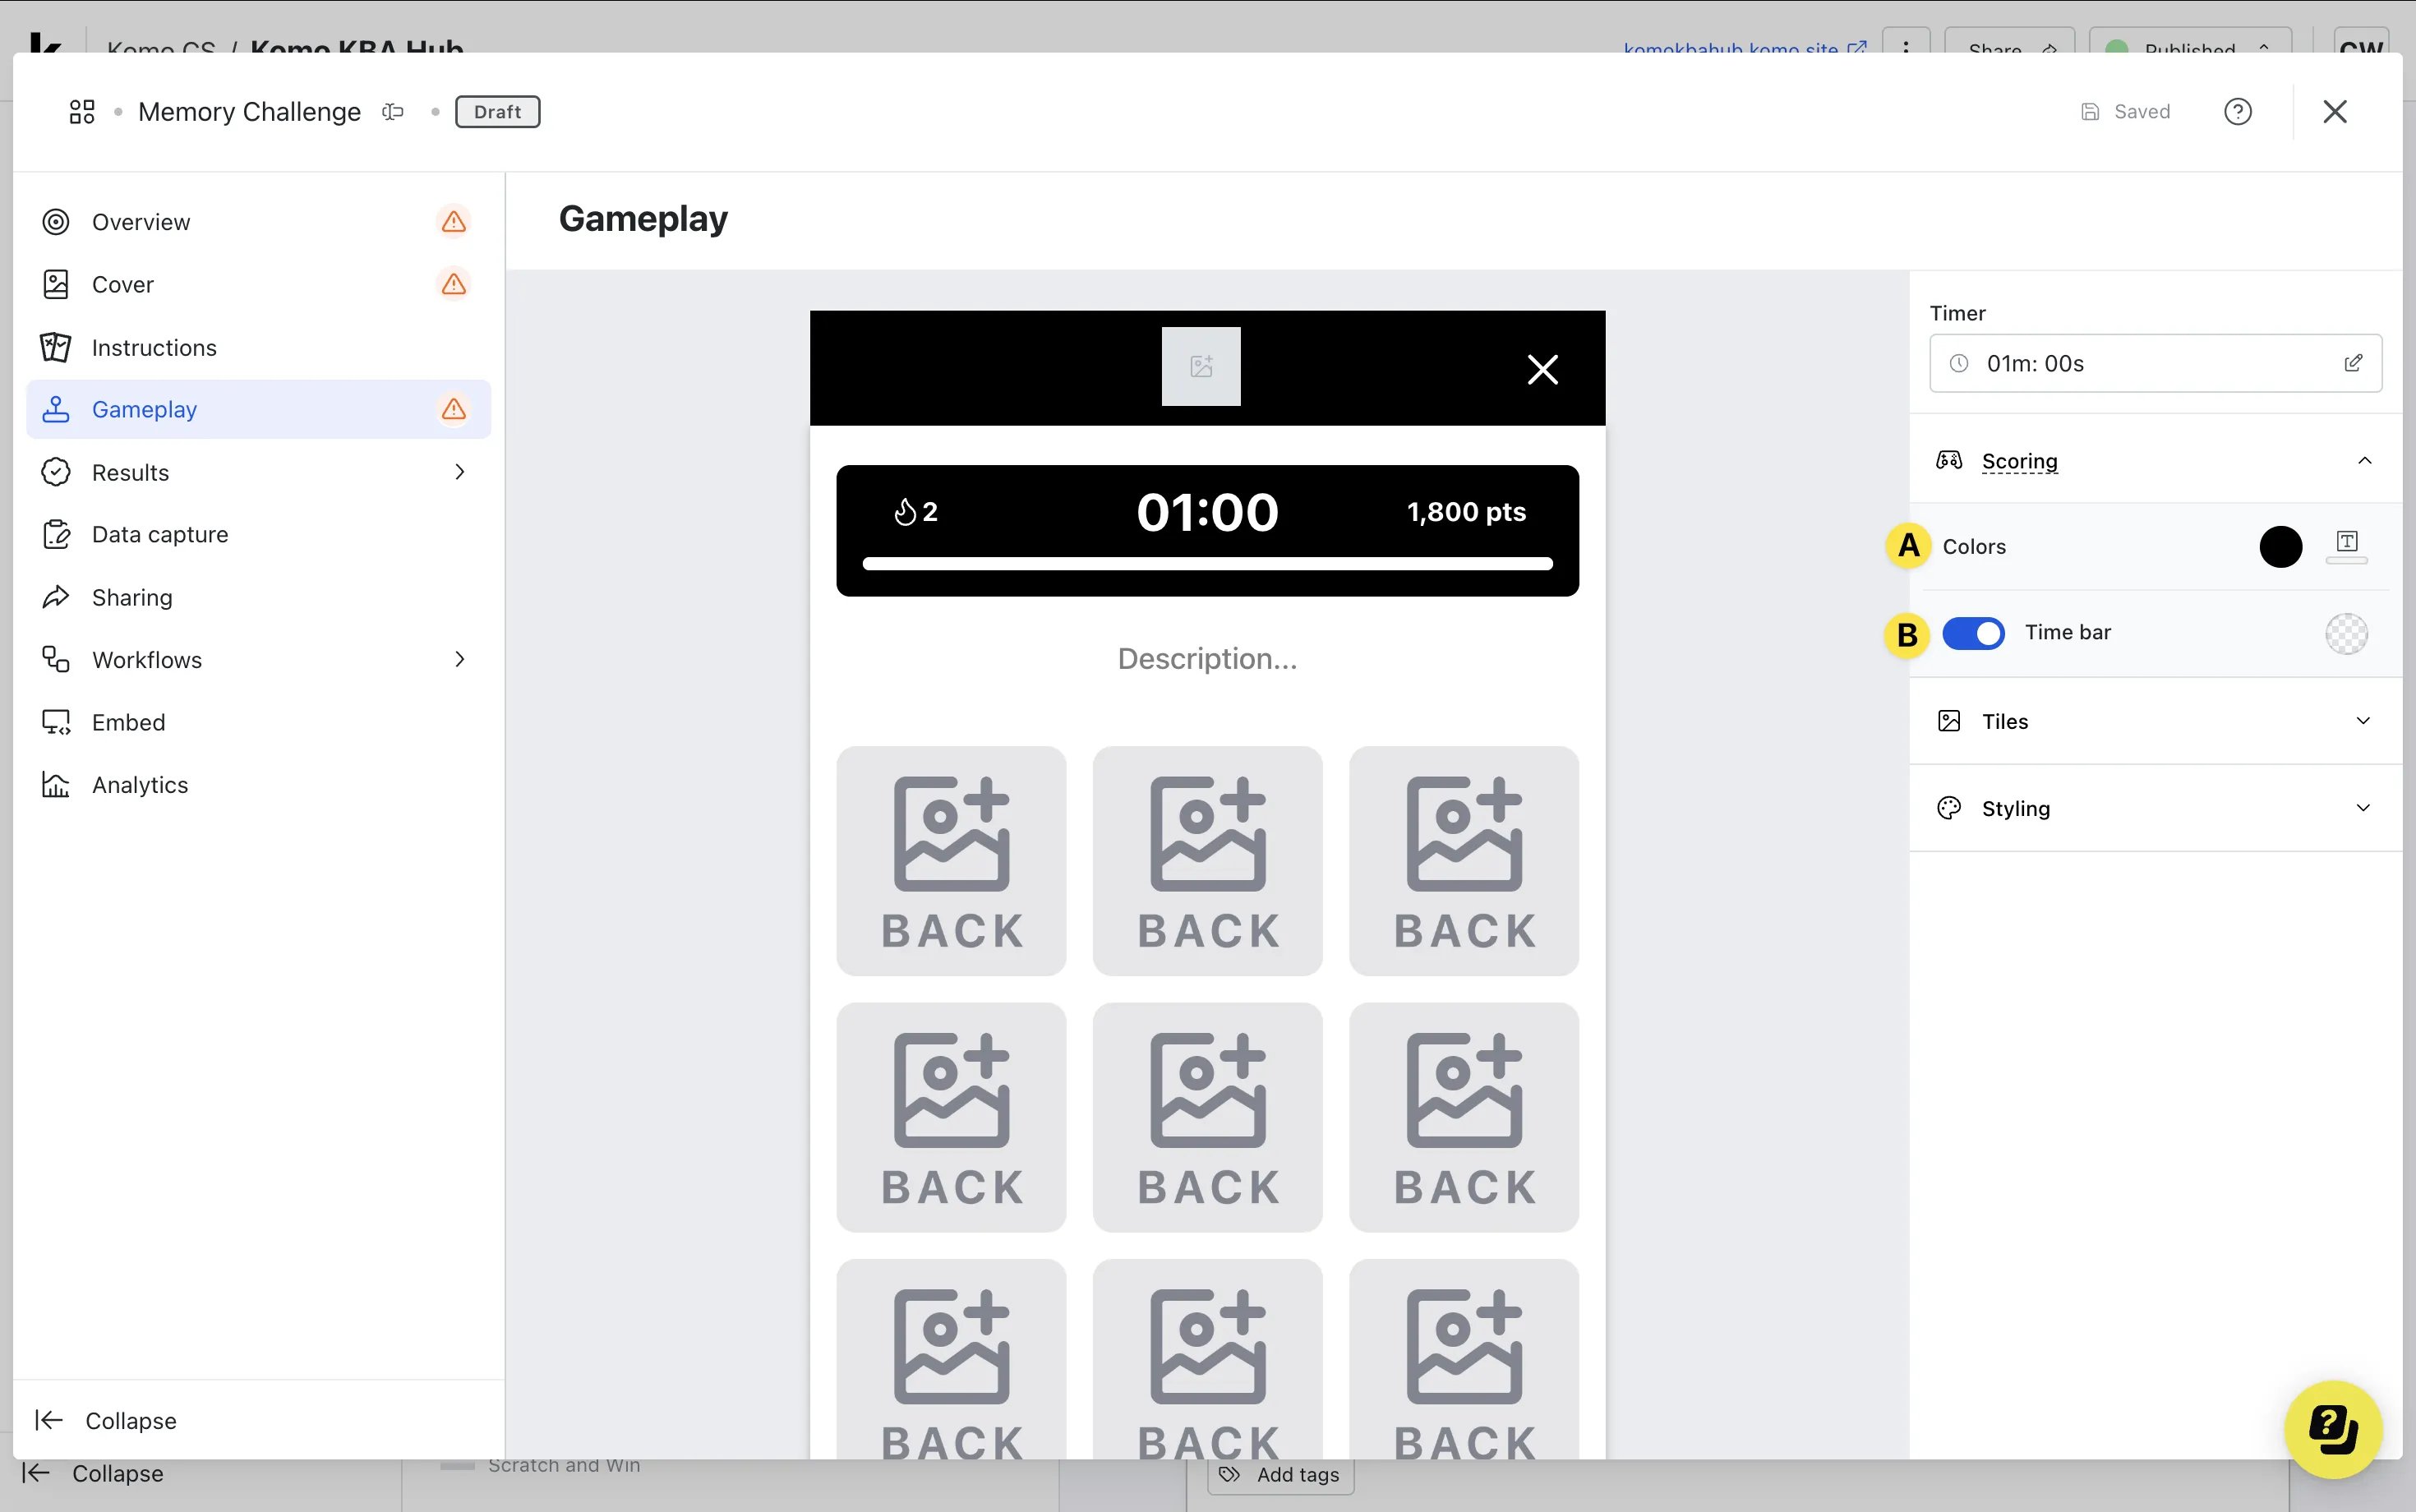
- (A) Alter the background color of the table and text color here
- (B) Edit the timer bar color or toggle off this feature here
-
(4) Here is where you’ll upload all your game assets
Uploading Gaming Assets
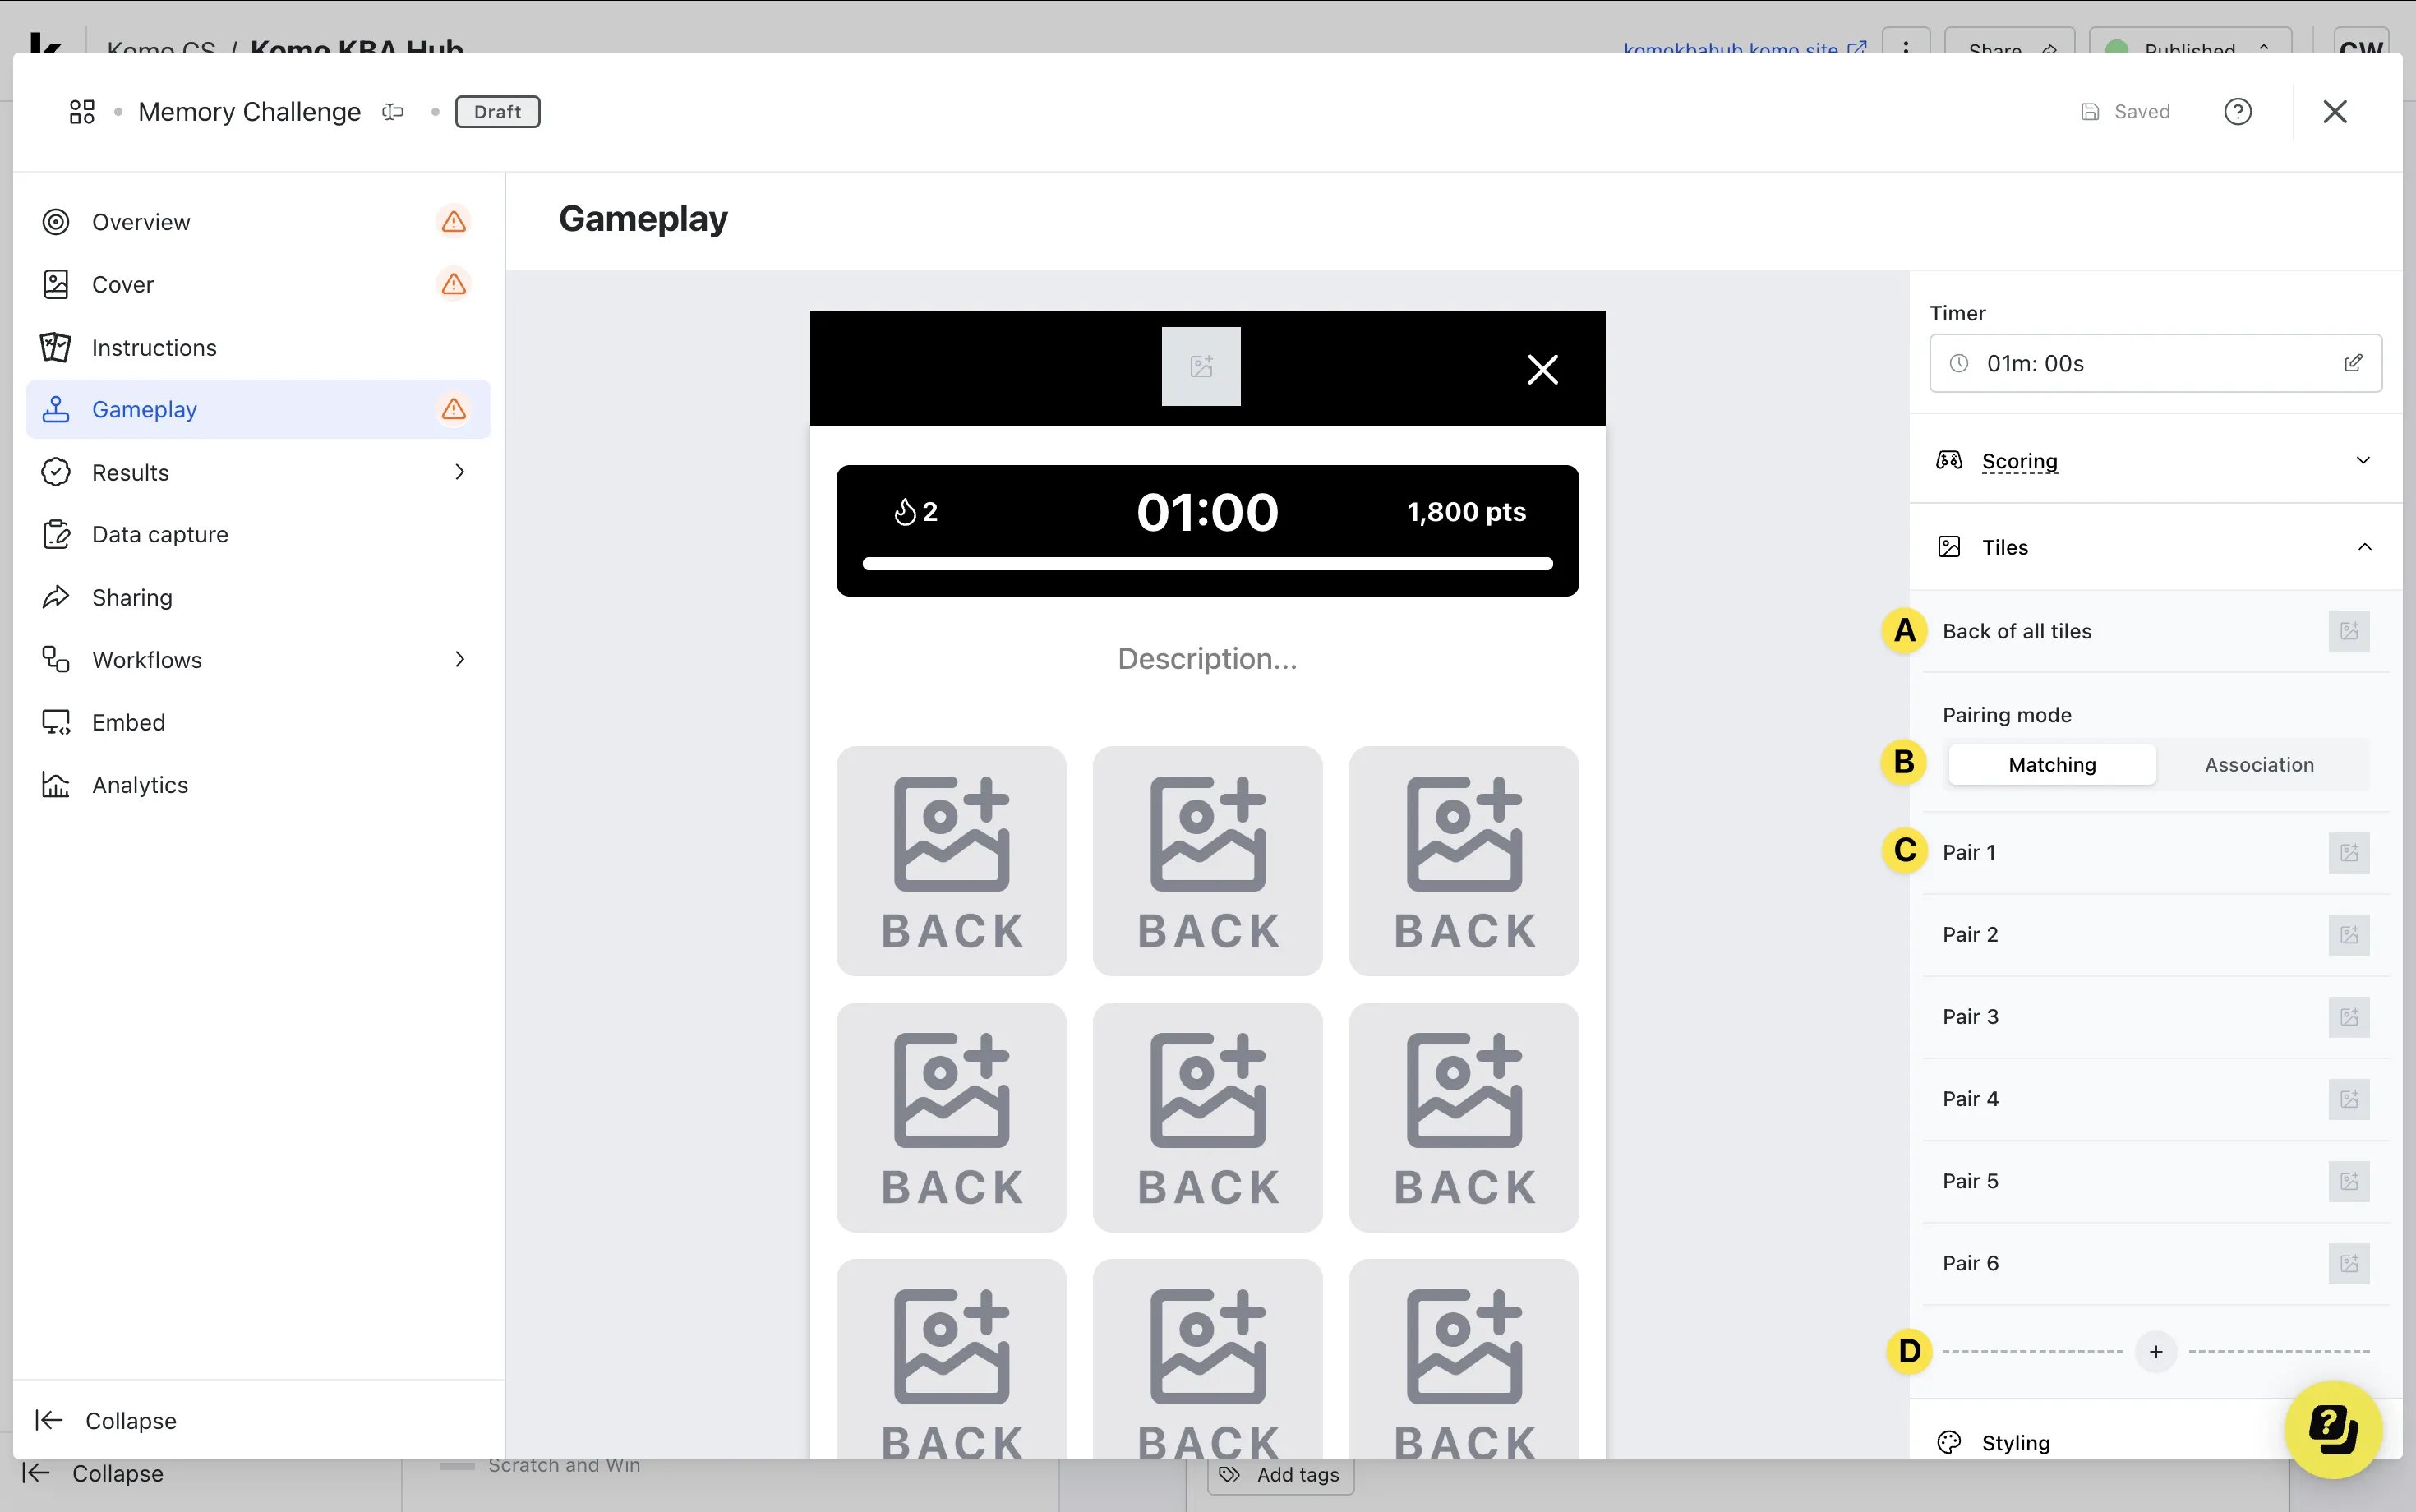
- (A) Upload an image for the back of the tiles (we recommend using your logo in the designs here)
- (B) Here you can select whether you want the pairs to be exact matches (ie. two pizza slices) or associated images (ie. pizza slice and Italian Flag)

- (a) If the Association pairing mode is chosen, you can upload two different images for each pair here
- (C) If the Matching pairing mode is chosen, you can upload your single image for each paired here
- (D) You can add more pairs to the game using the plus icon
-
(5) Click here to edit the gameplay styling
Editing the Gameplay Styling

- (A) Edit the header bar here
The settings made in Step 3(1) will be the same for all screens.
- (B) Change the description text color here
- (C) Upload an image for the background or select a solid color
- (A) Edit the header bar here
Step 5: Edit your Result screens
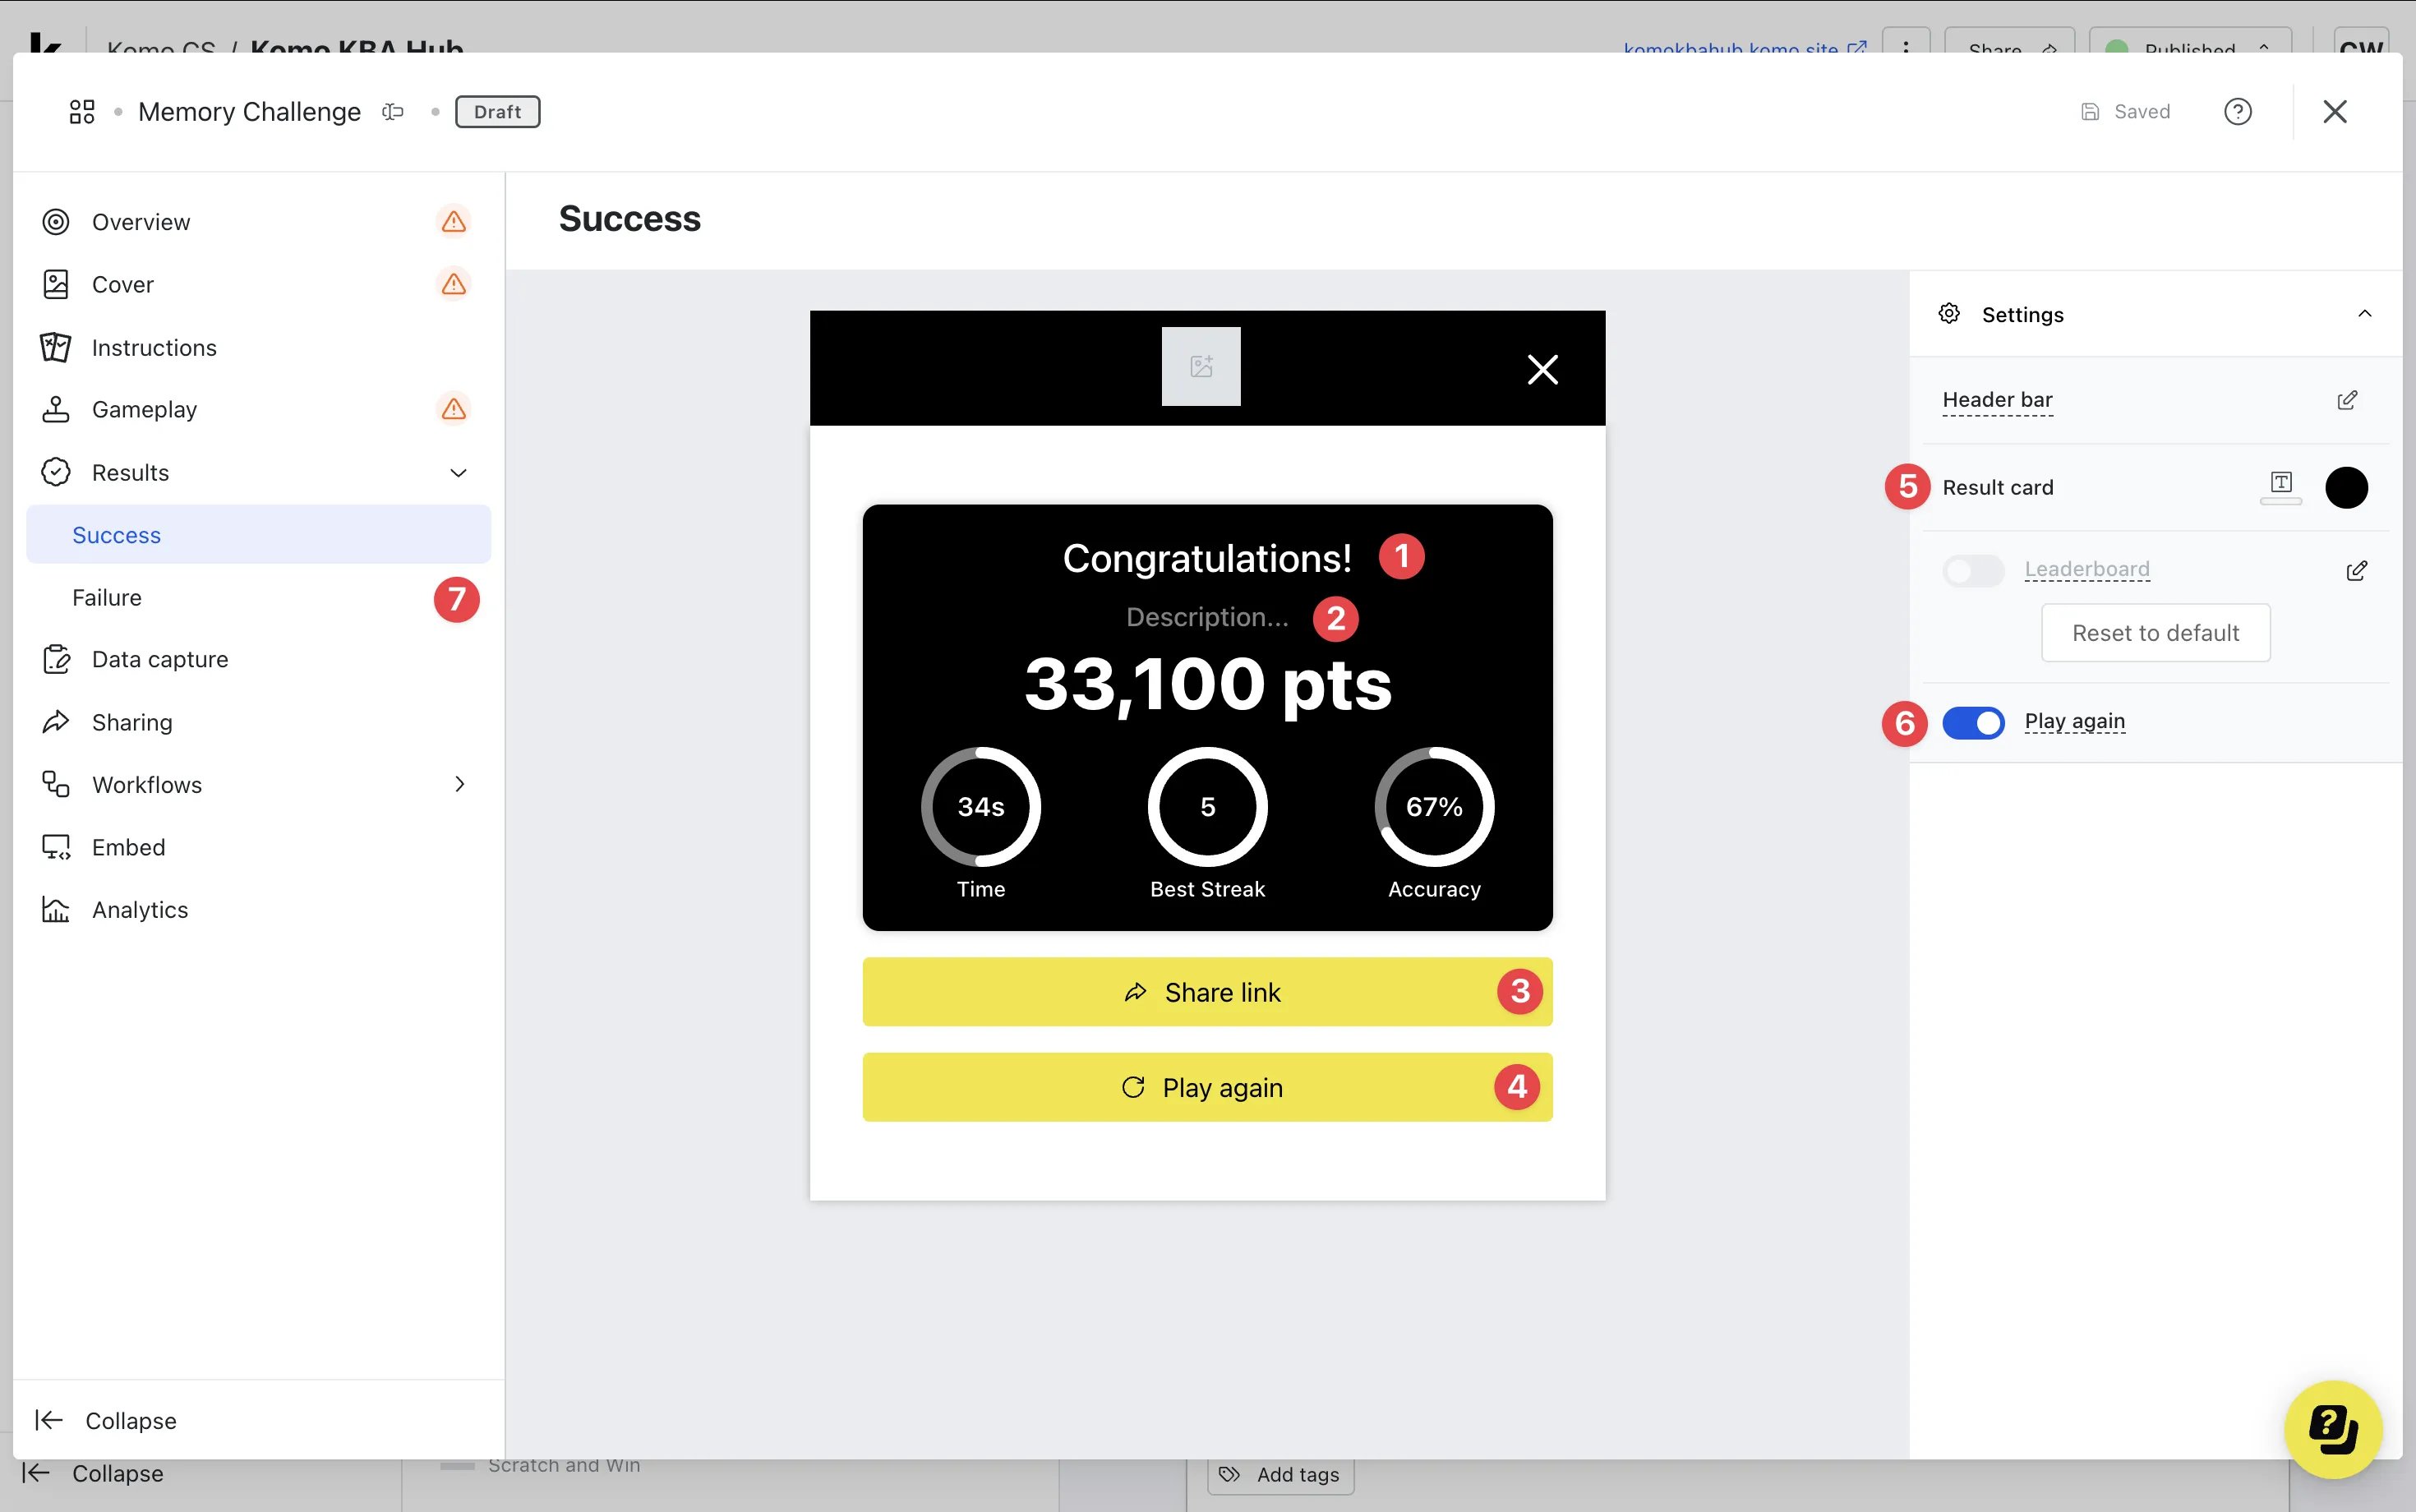
- (1) Add a title to the winning screen
- (2) Add a description to the result screen
- (3) You can alter the color and copy of the share call-to-action bar
- (4) Alter the color and copy of the play again call-to-action bar or (6) disable the button here
- (5) Edit the result card background and text color here
-
(7) Click here to edit the failure screen
Editing the Failure Screen
 The settings made in Step 5(5) will also apply to this screen.
- (A) Add a title to the failure screen
- (B) Add a description to the screen
- (C) Alter the color and copy of the play again call-to-action or (D) you can disable this button here
Step 6: Set up your Data capture (Optional)
Whilst adding a competition to your Memory Challenge is recommended to collect data, it is not always required and can be used purely as an engagement piece.Ready to set up your competition?
Step 7: Attach a Leaderboard (Optional)
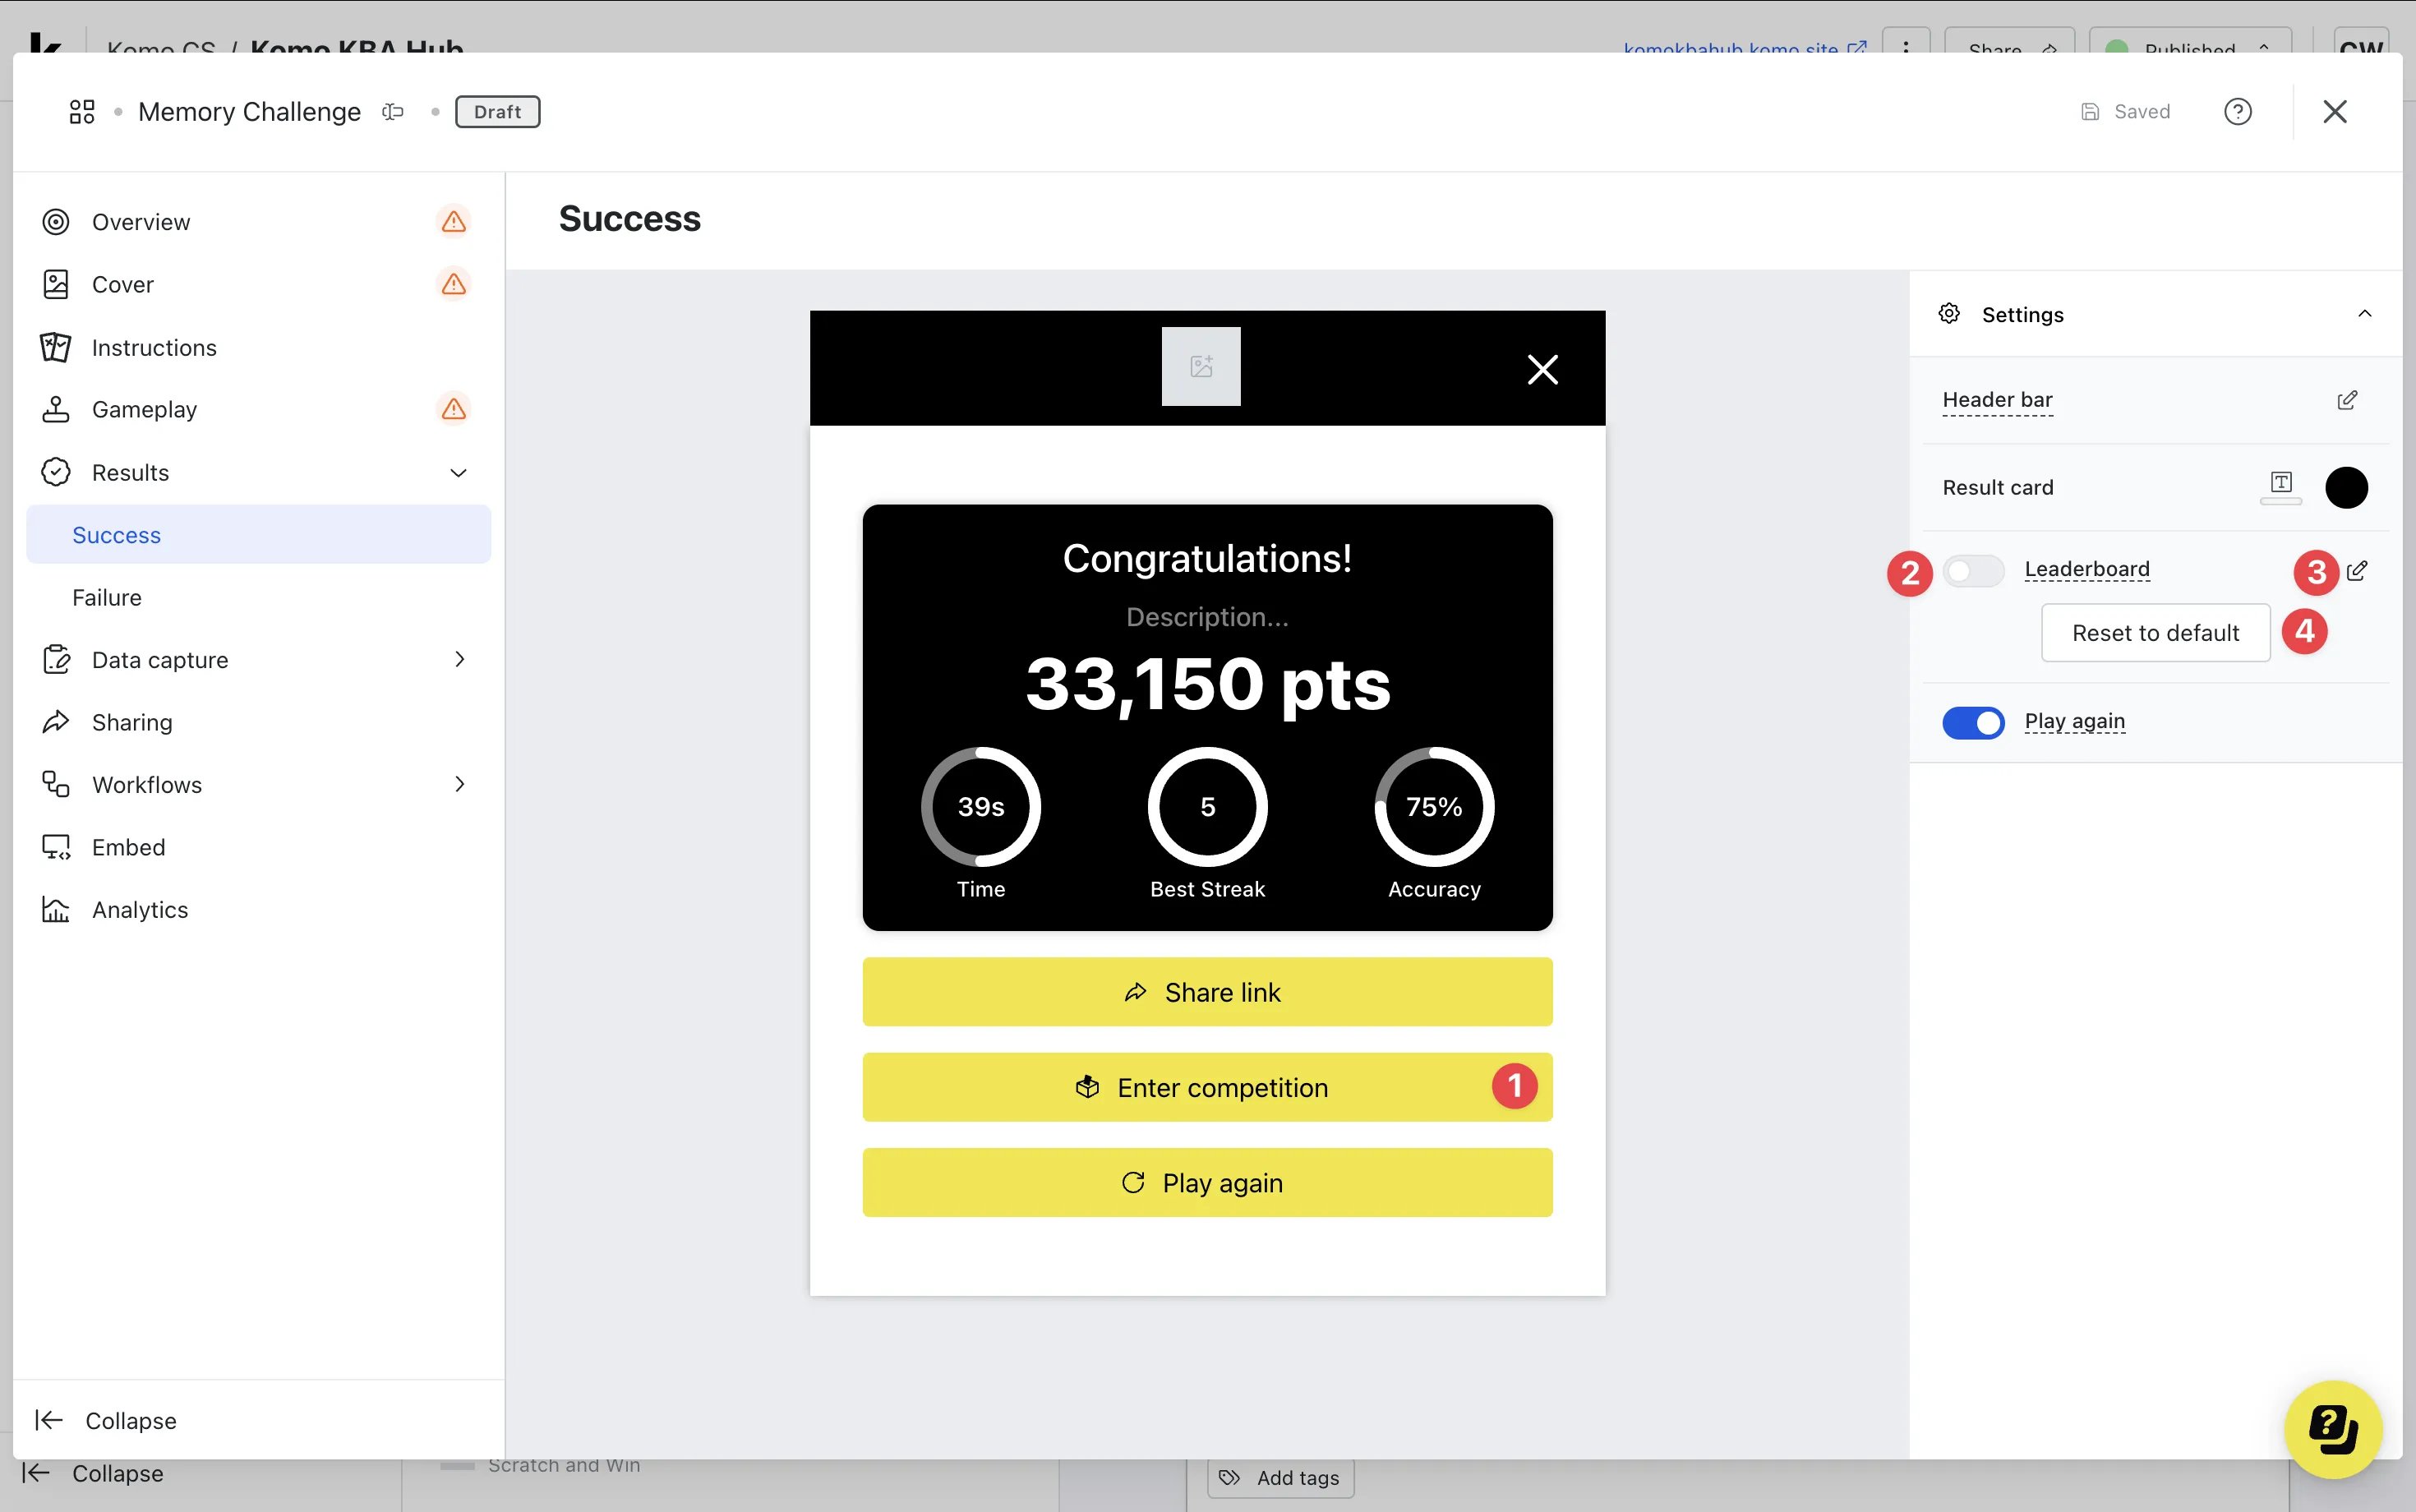
- After you have added a data capture to the card, head back to the success screen
- (1) Edit the enter competition call to action
- (2) Using the toggle, enable the leaderboard
-
(3) Click on the edit icon to set up the leaderboard
Setting Up the Leaderboard
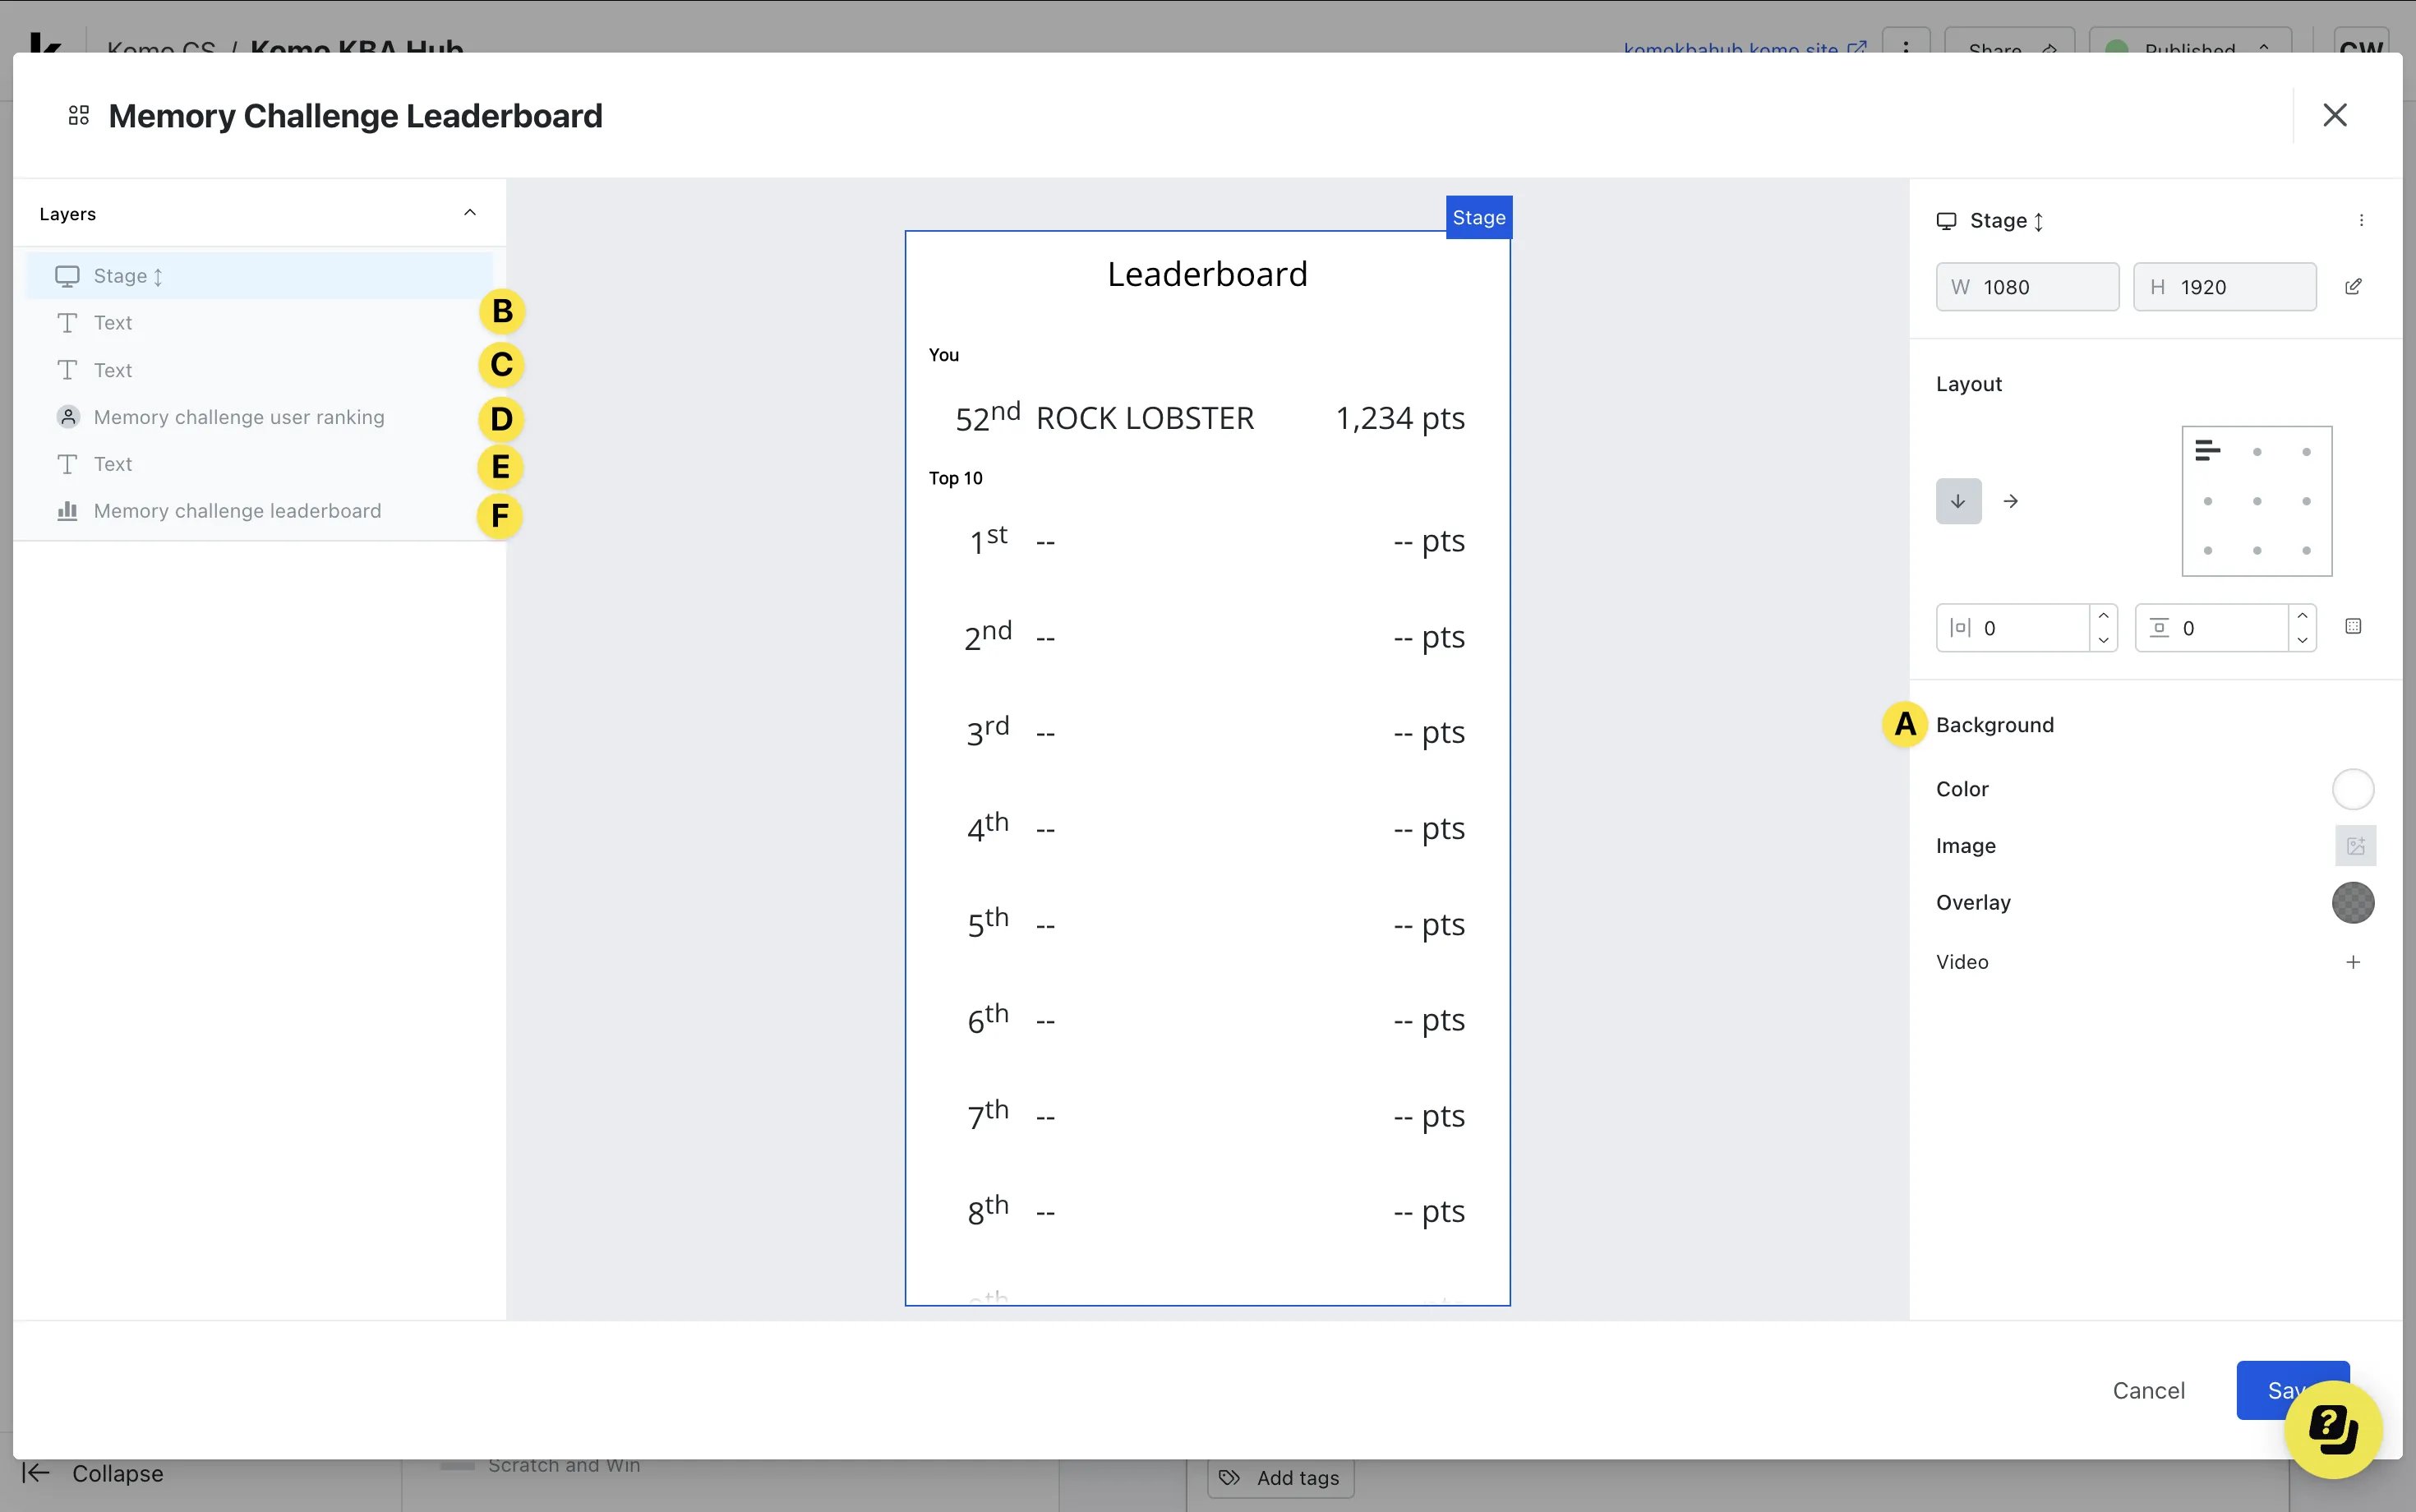
- (A) You can add a background to the leaderboard by setting a solid color or uploading an image
-
(B) Click here to enter the Leaderboard title settings
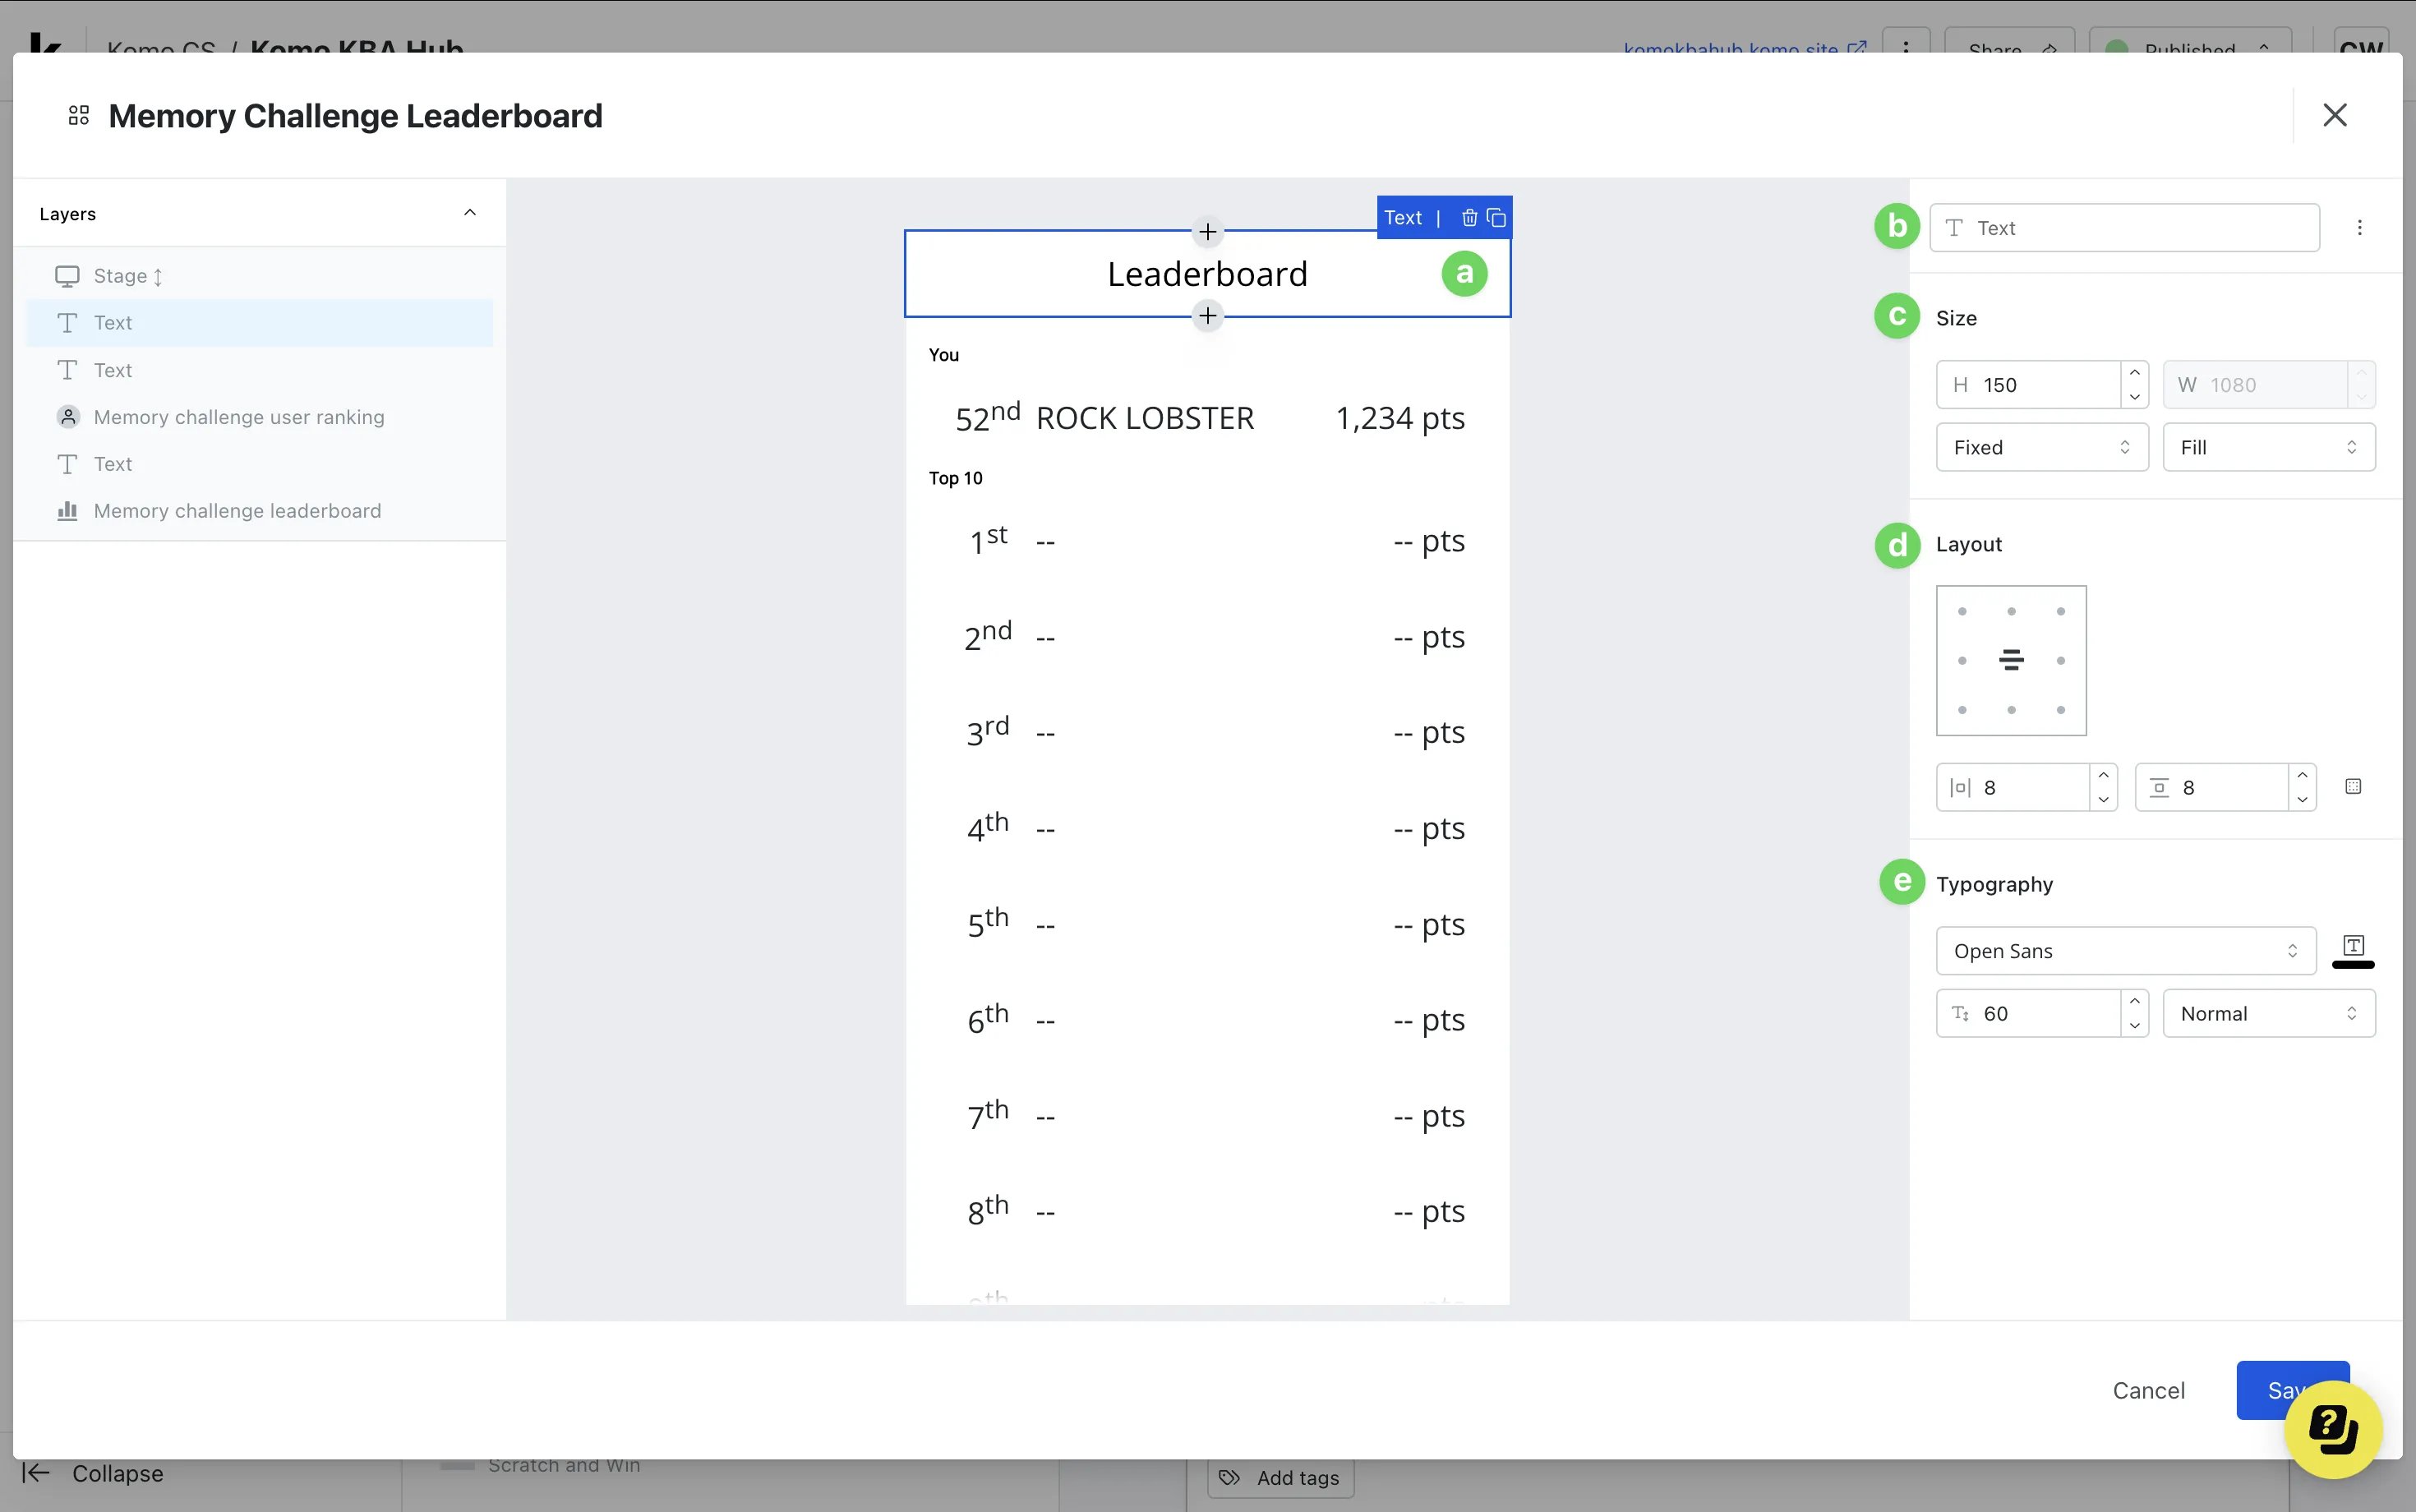
- (a) Here you can change the title of the leaderboard
- (b) You can label the cell and clicking on …, you can clone and delete this layer
- (c) Edit the cell size here
- (d) Using the grid layout, you can select your preferred text alignment. The boxes below allow you to alter the horizontal and vertical padding
- (e) Alter the typography here. Change the title font, size and color
-
(C) Click here to enter the user ranking title settings
Follow Steps 3B(a-e).
-
(D) Here is where you’ll edit the user ranking settings
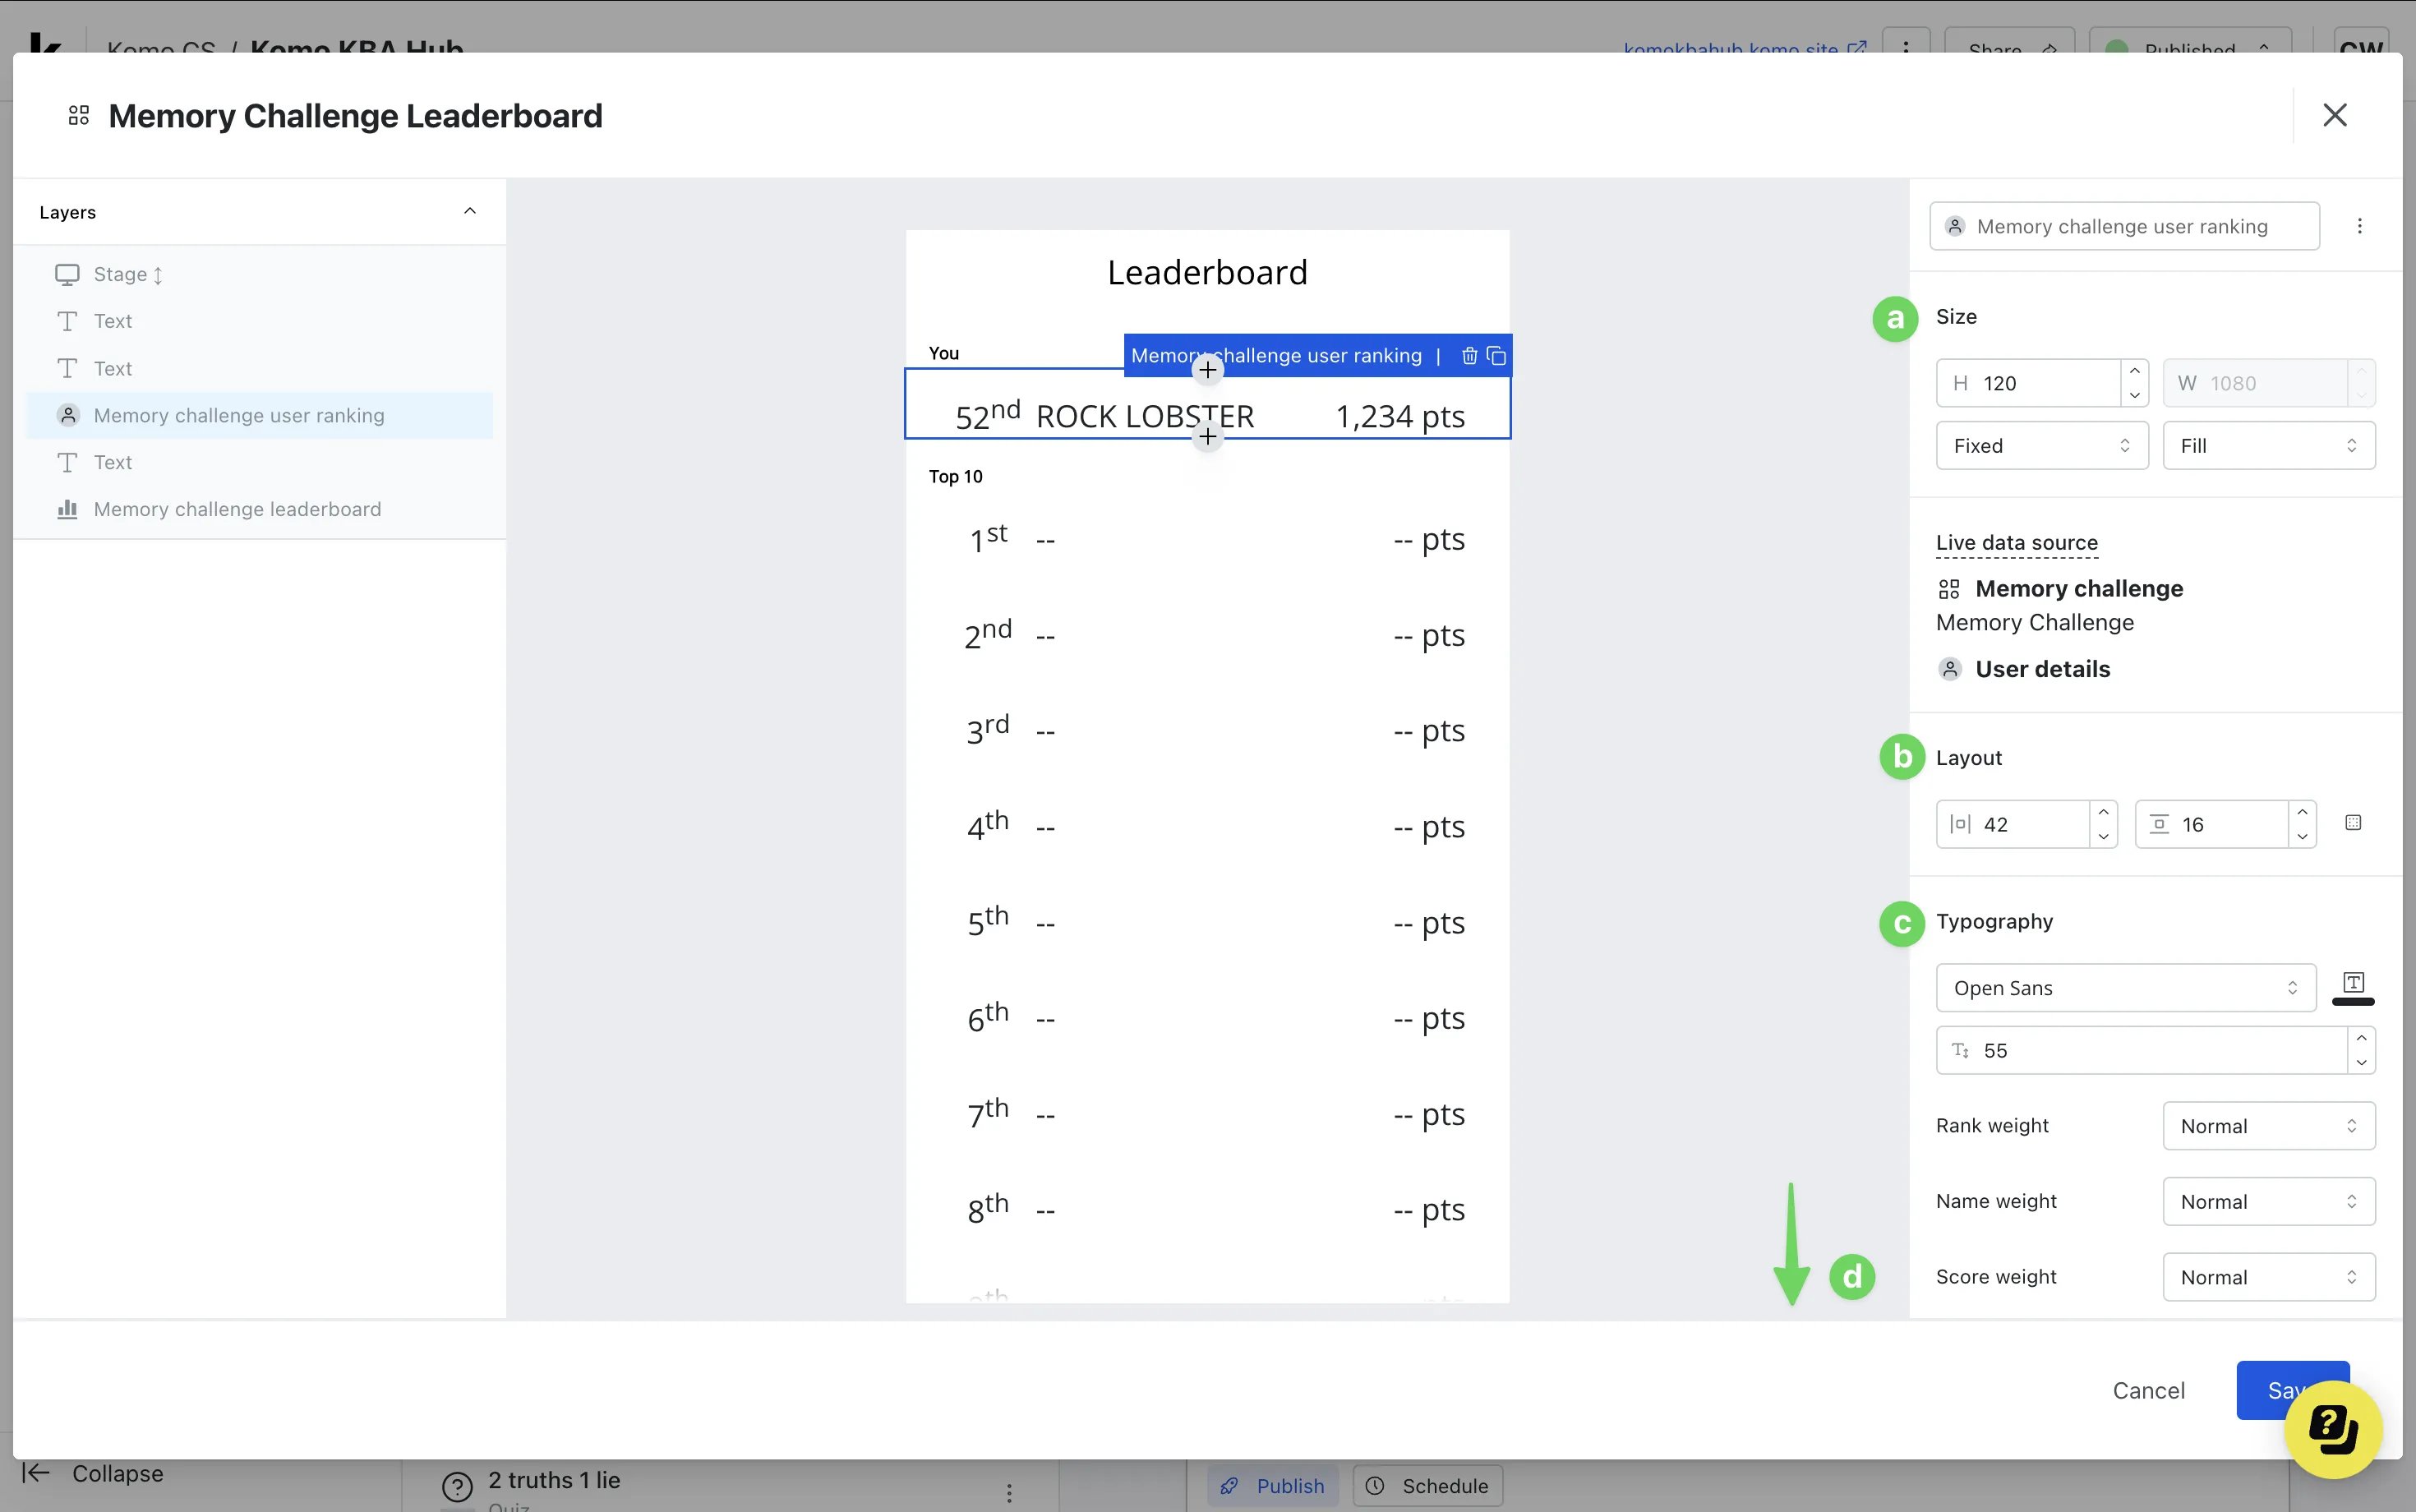
- This is an example of the user’s ranking. This will update with the user’s data once they have played the Memory Challenge.
- (a) Edit the cell size here
- (b) Alter the horizontal and vertical padding
- (c) Here you can edit the typography. Change the title font, size and color
- (d) Scrolling down, you can add a background color to the user ranking and adjust the border radius
-
(E) Click here to enter the leaderboard ranking title settings
Follow Steps 3B(a-e).
-
(F) Here is where you’ll edit the leaderboard ranking settings
 Follow Steps 3D(a-d).
- (a) Here you can adjust the number of positions shown on the leaderboard and the configuration for display names
- (b) Alter the spacing between the rank items using the first setting, and the boxes below allow you to alter the horizontal and vertical padding
- (c) Scrolling down, you can edit the animation. Changing the duration of the scroll (milliseconds) and the delay
This setting works best if you have more than 10 rank items, or if you can’t view all the items on one page.
- (4) Reset the leaderboard to the original settings
Step 8: Publish your Card
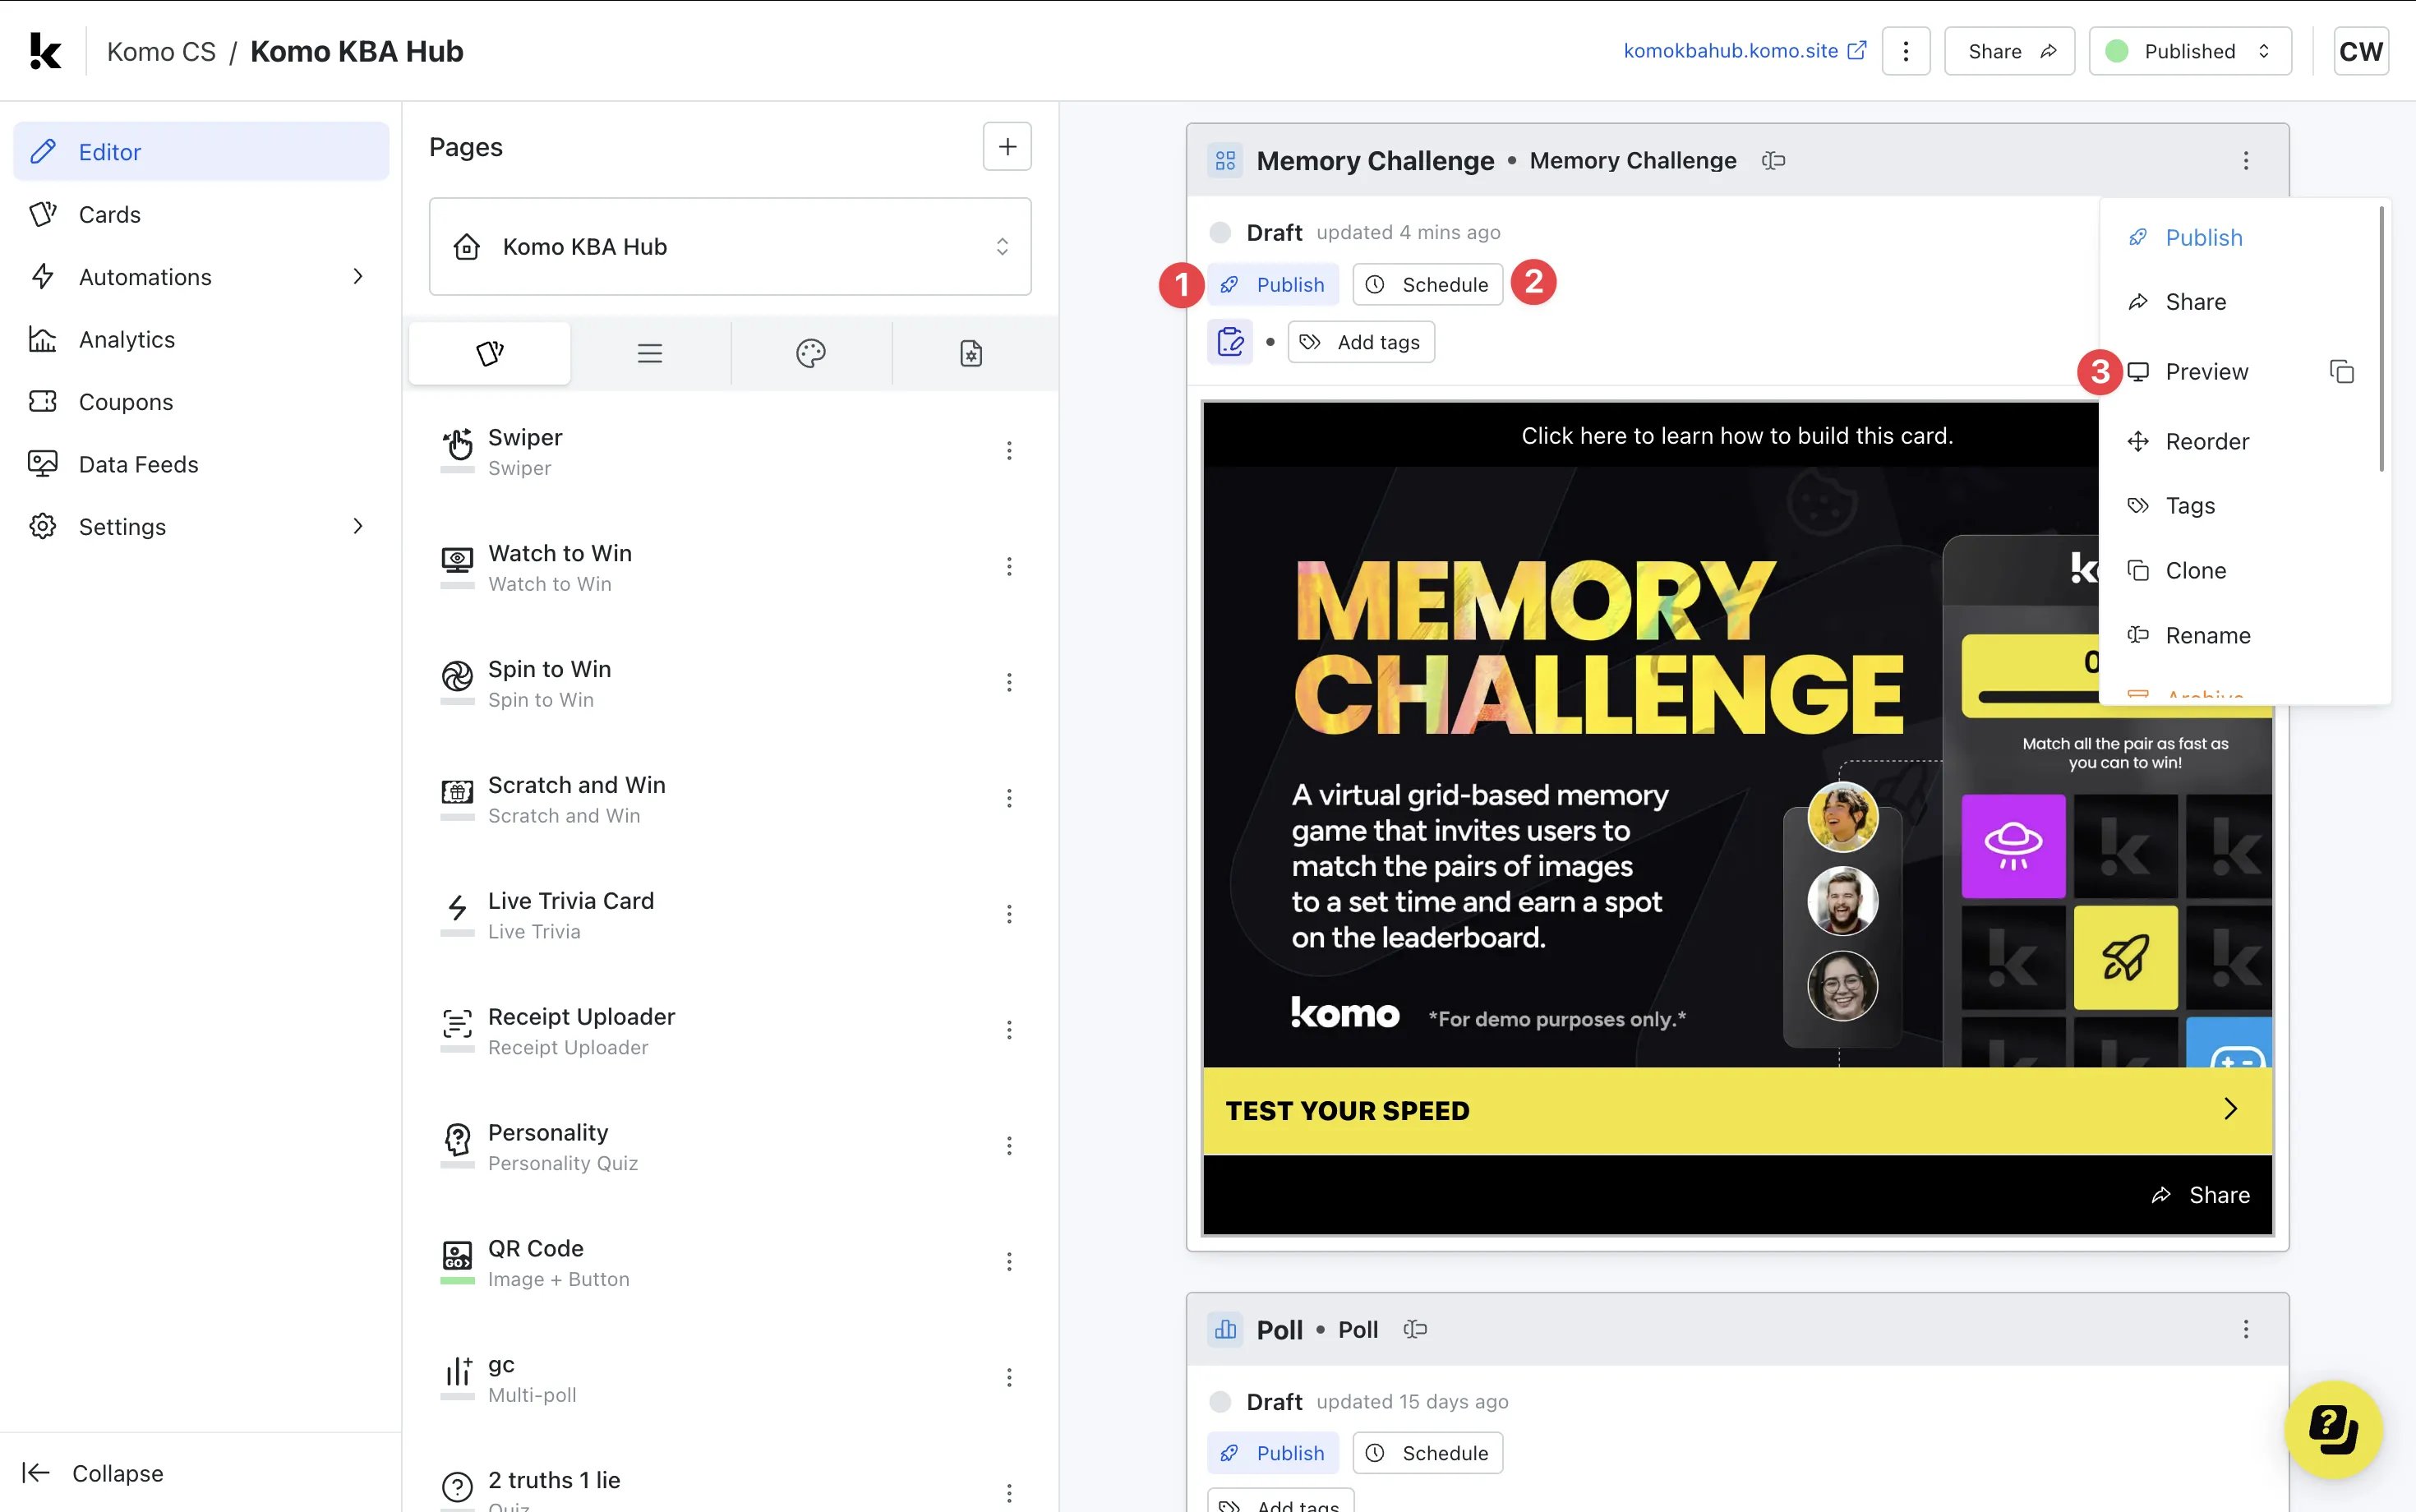
- (1) Publish your card manually and instantly for the world to see
- (2) Schedule your card to be published and unpublished at set dates and times
- (3) Click on … to Preview and interact with the card on the front end from a user’s perspective before publishing it. See how to test your card here
All competition entries will be recorded and will impact the card analytics.
”Go live” checklist
Ready to go live with your Memory Challenge? We recommend reviewing the following list before launching and double-checking if you have:- All images uploaded are the correct dimensions. Export image files in 2x to ensure none of the images appear pixelated
- You have set the timer for the game
- Hyperlinked your T&Cs to the opt-in-field, which is created in the data capture section of the settings tab if you have a competition attached
- All your result screens are set up
- All your communications (Registration, Winner/s, Everybody Else) are fully set up and ready to send
- If you have a competition attached, ensure your Prizes and the awarding rules are set up correctly
- If you are using coupons, make sure the coupons created are set up correctly. Check the coupon limits are set, the copy for each screen is right and you have linked the appropriate coupons to your communications