
Watch it come to life
What is it?
Matterport allows you to share 3D virtual tours on your Hub.Things to note
- Only Public Matterport models can be embedded.
- You’ll need to copy the embed code following clicking the play button
- The Matterport experience is different between desktop and mobile devices.
- On desktop browsers, visitors to your Hub will be able to interact with Matterport without leaving the Hub. They can interact with the 3D space directly in the Matterport embed card.
- On mobile browsers, visitors to your hub will be taken to the dedicated Matterport viewer page for the embedded space.
- This limitation is applied by Matterport and cannot currently be changed.
- Don’t have a Matterport account? Click here to check it out.
How do I build one?
- Step 1: Add a Matterport Embed card to your Hub
- Step 2: Paste the link to the card
- Step 3: Publish your card
Step 1: Add a Matterport Embed card to your Hub
- Navigate to your Engagement Hub.
- Once there click Add Content, from here select Embeds and then Matterport.
- You will then see your new card has been added to your Hub.
Step 2: Paste the link to the card
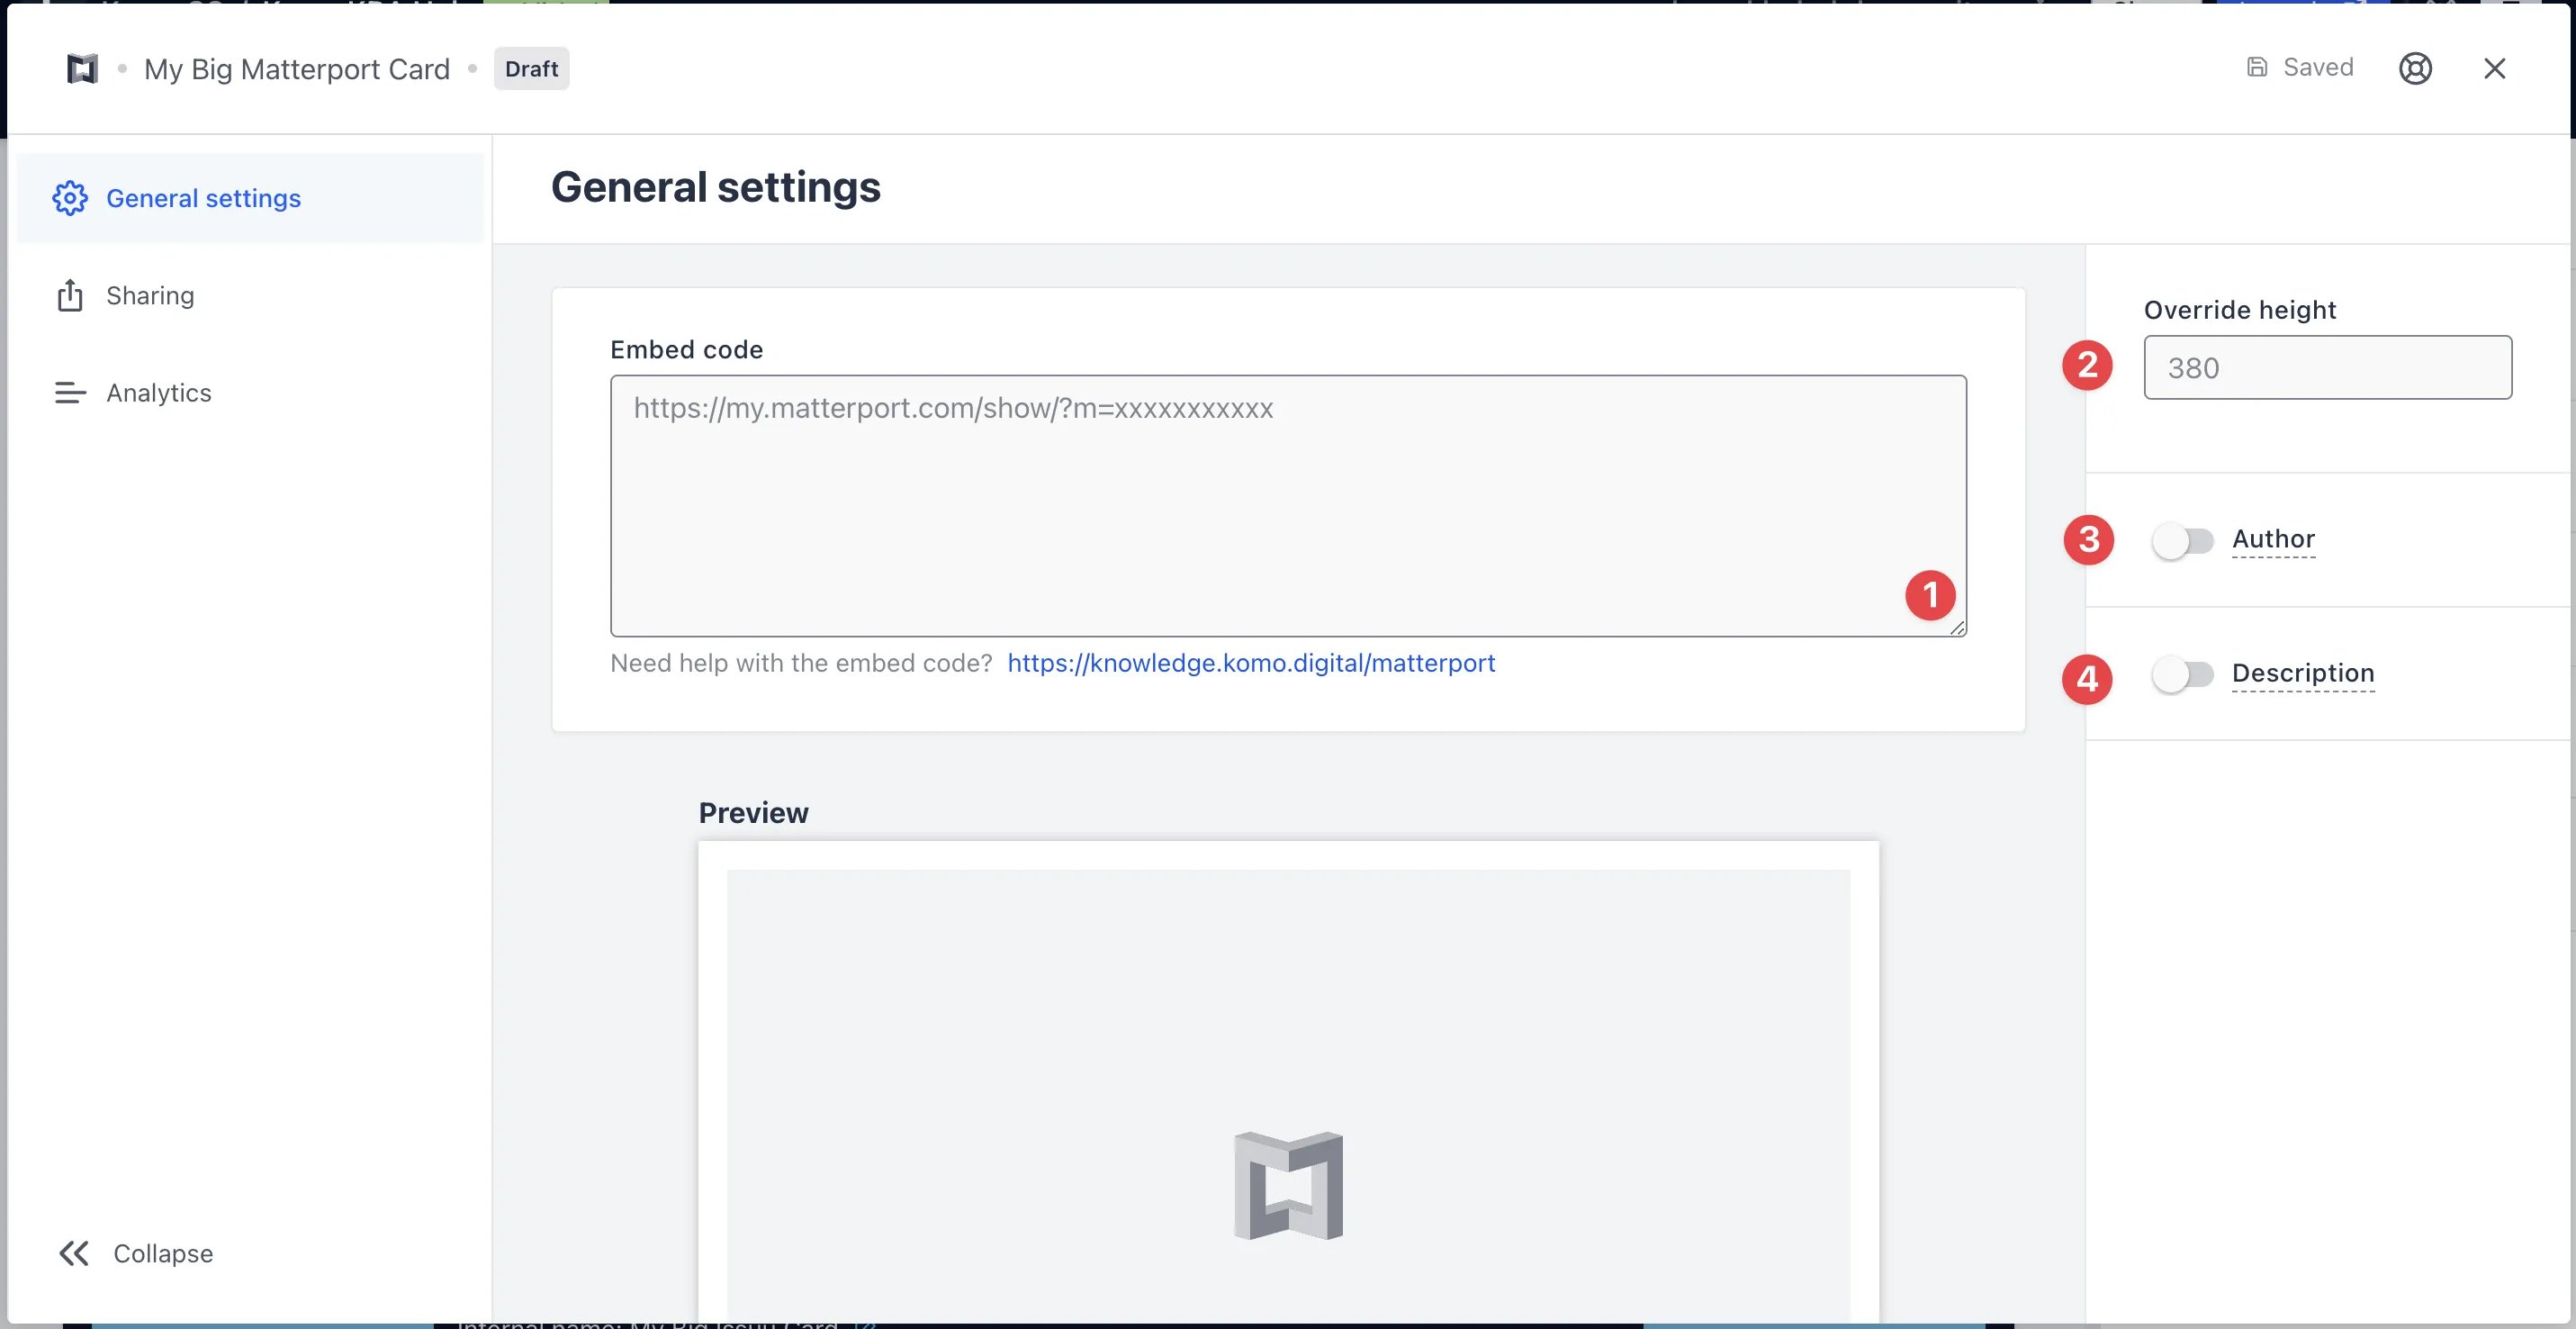
- Clicking on Matterport will open the editing module.
-
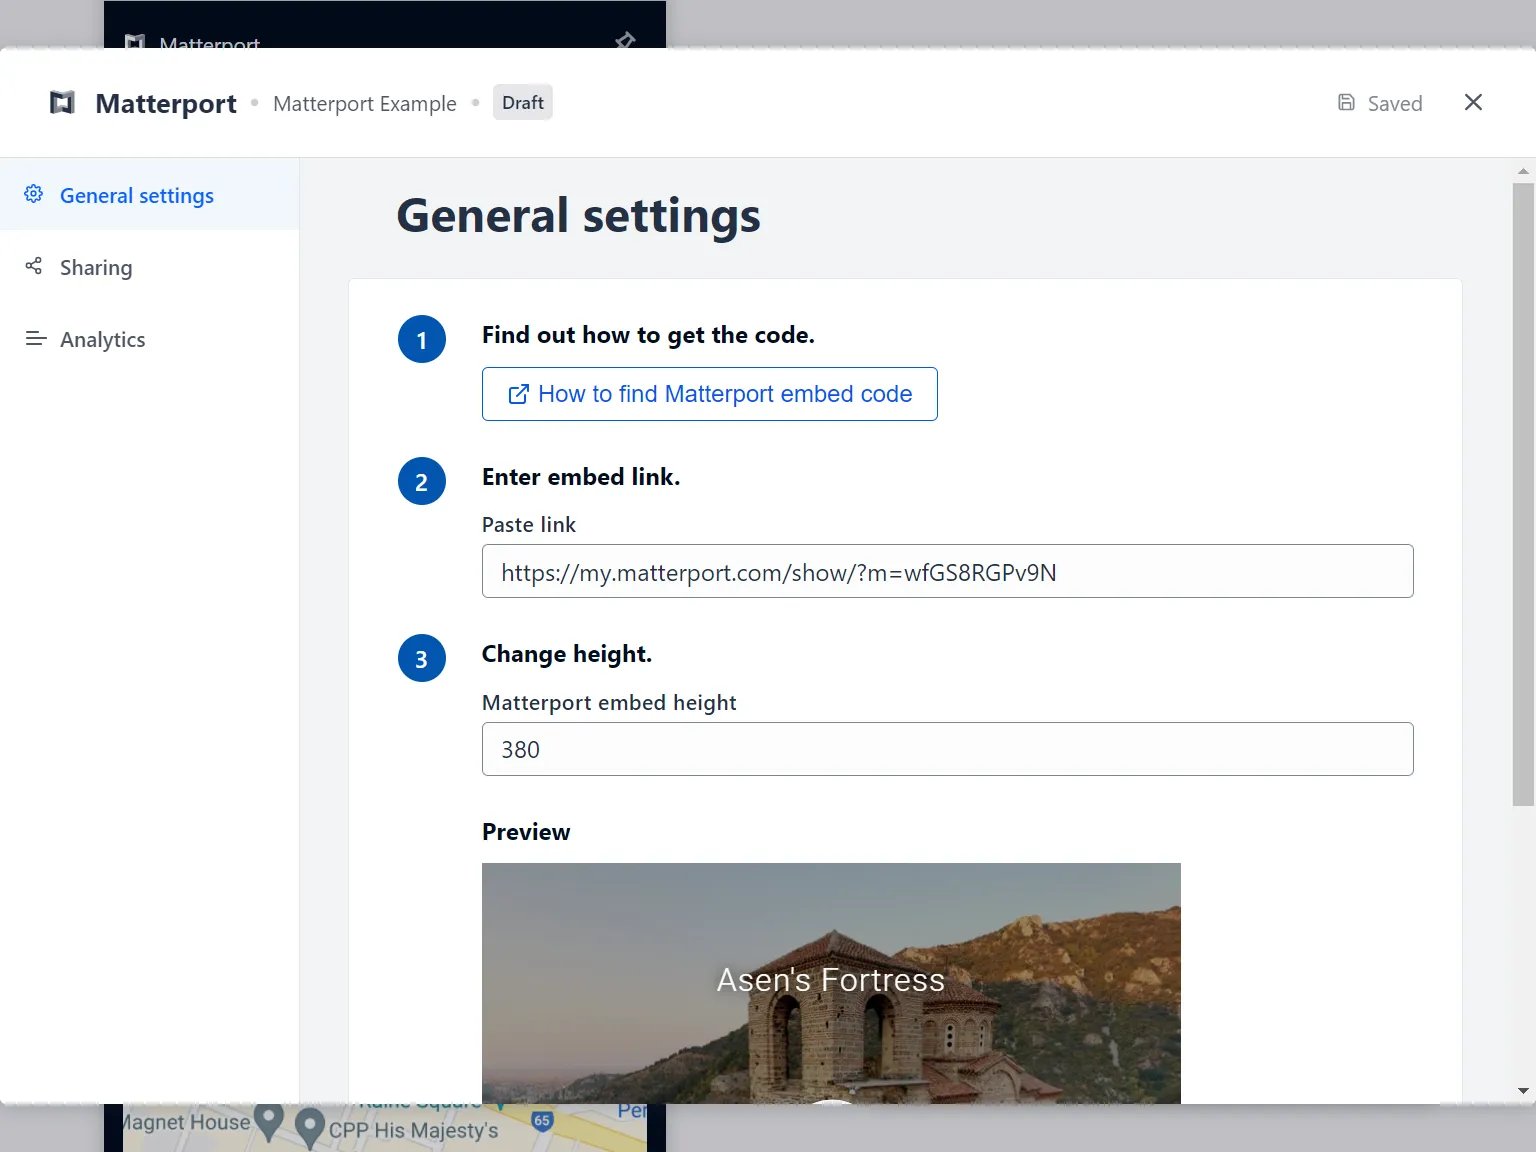
(1) Get the embed code and paste it here and a preview will appear below.
Getting the Matterport Embed Code
Visit the Matterport space you want to embed.
Once you start the 3D experience, by clicking the large play button icon, you can then click on the “Share this Space” button at the bottom right.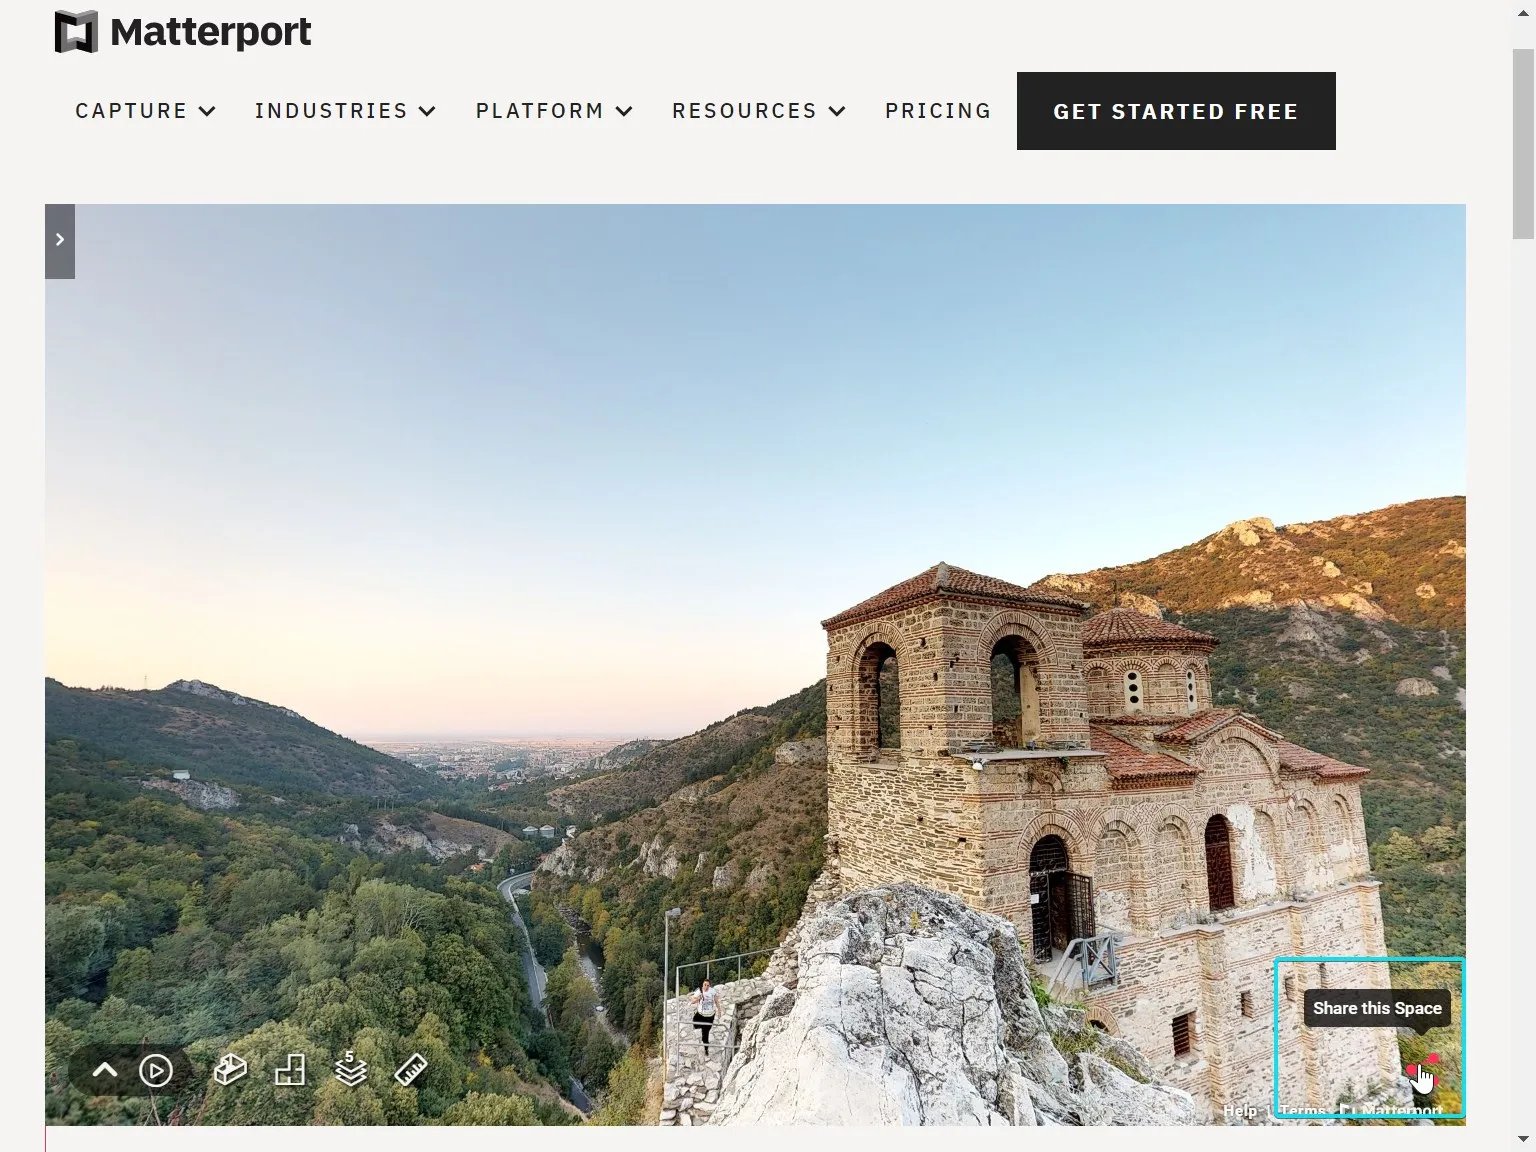
Copy the URL
The link should be in the format https://my.matterport.com/show/?m=xxxxxxxxxxx
- (2) You can also adjust the height of the embedded card here. Keep in mind the different experiences between desktop and mobile as called out at the start of this article.
- (3) You can add an author tag by displaying the brand or person who’s responsible for the card content.
- (4) Add a description to the card.
Step 3: Publish your card
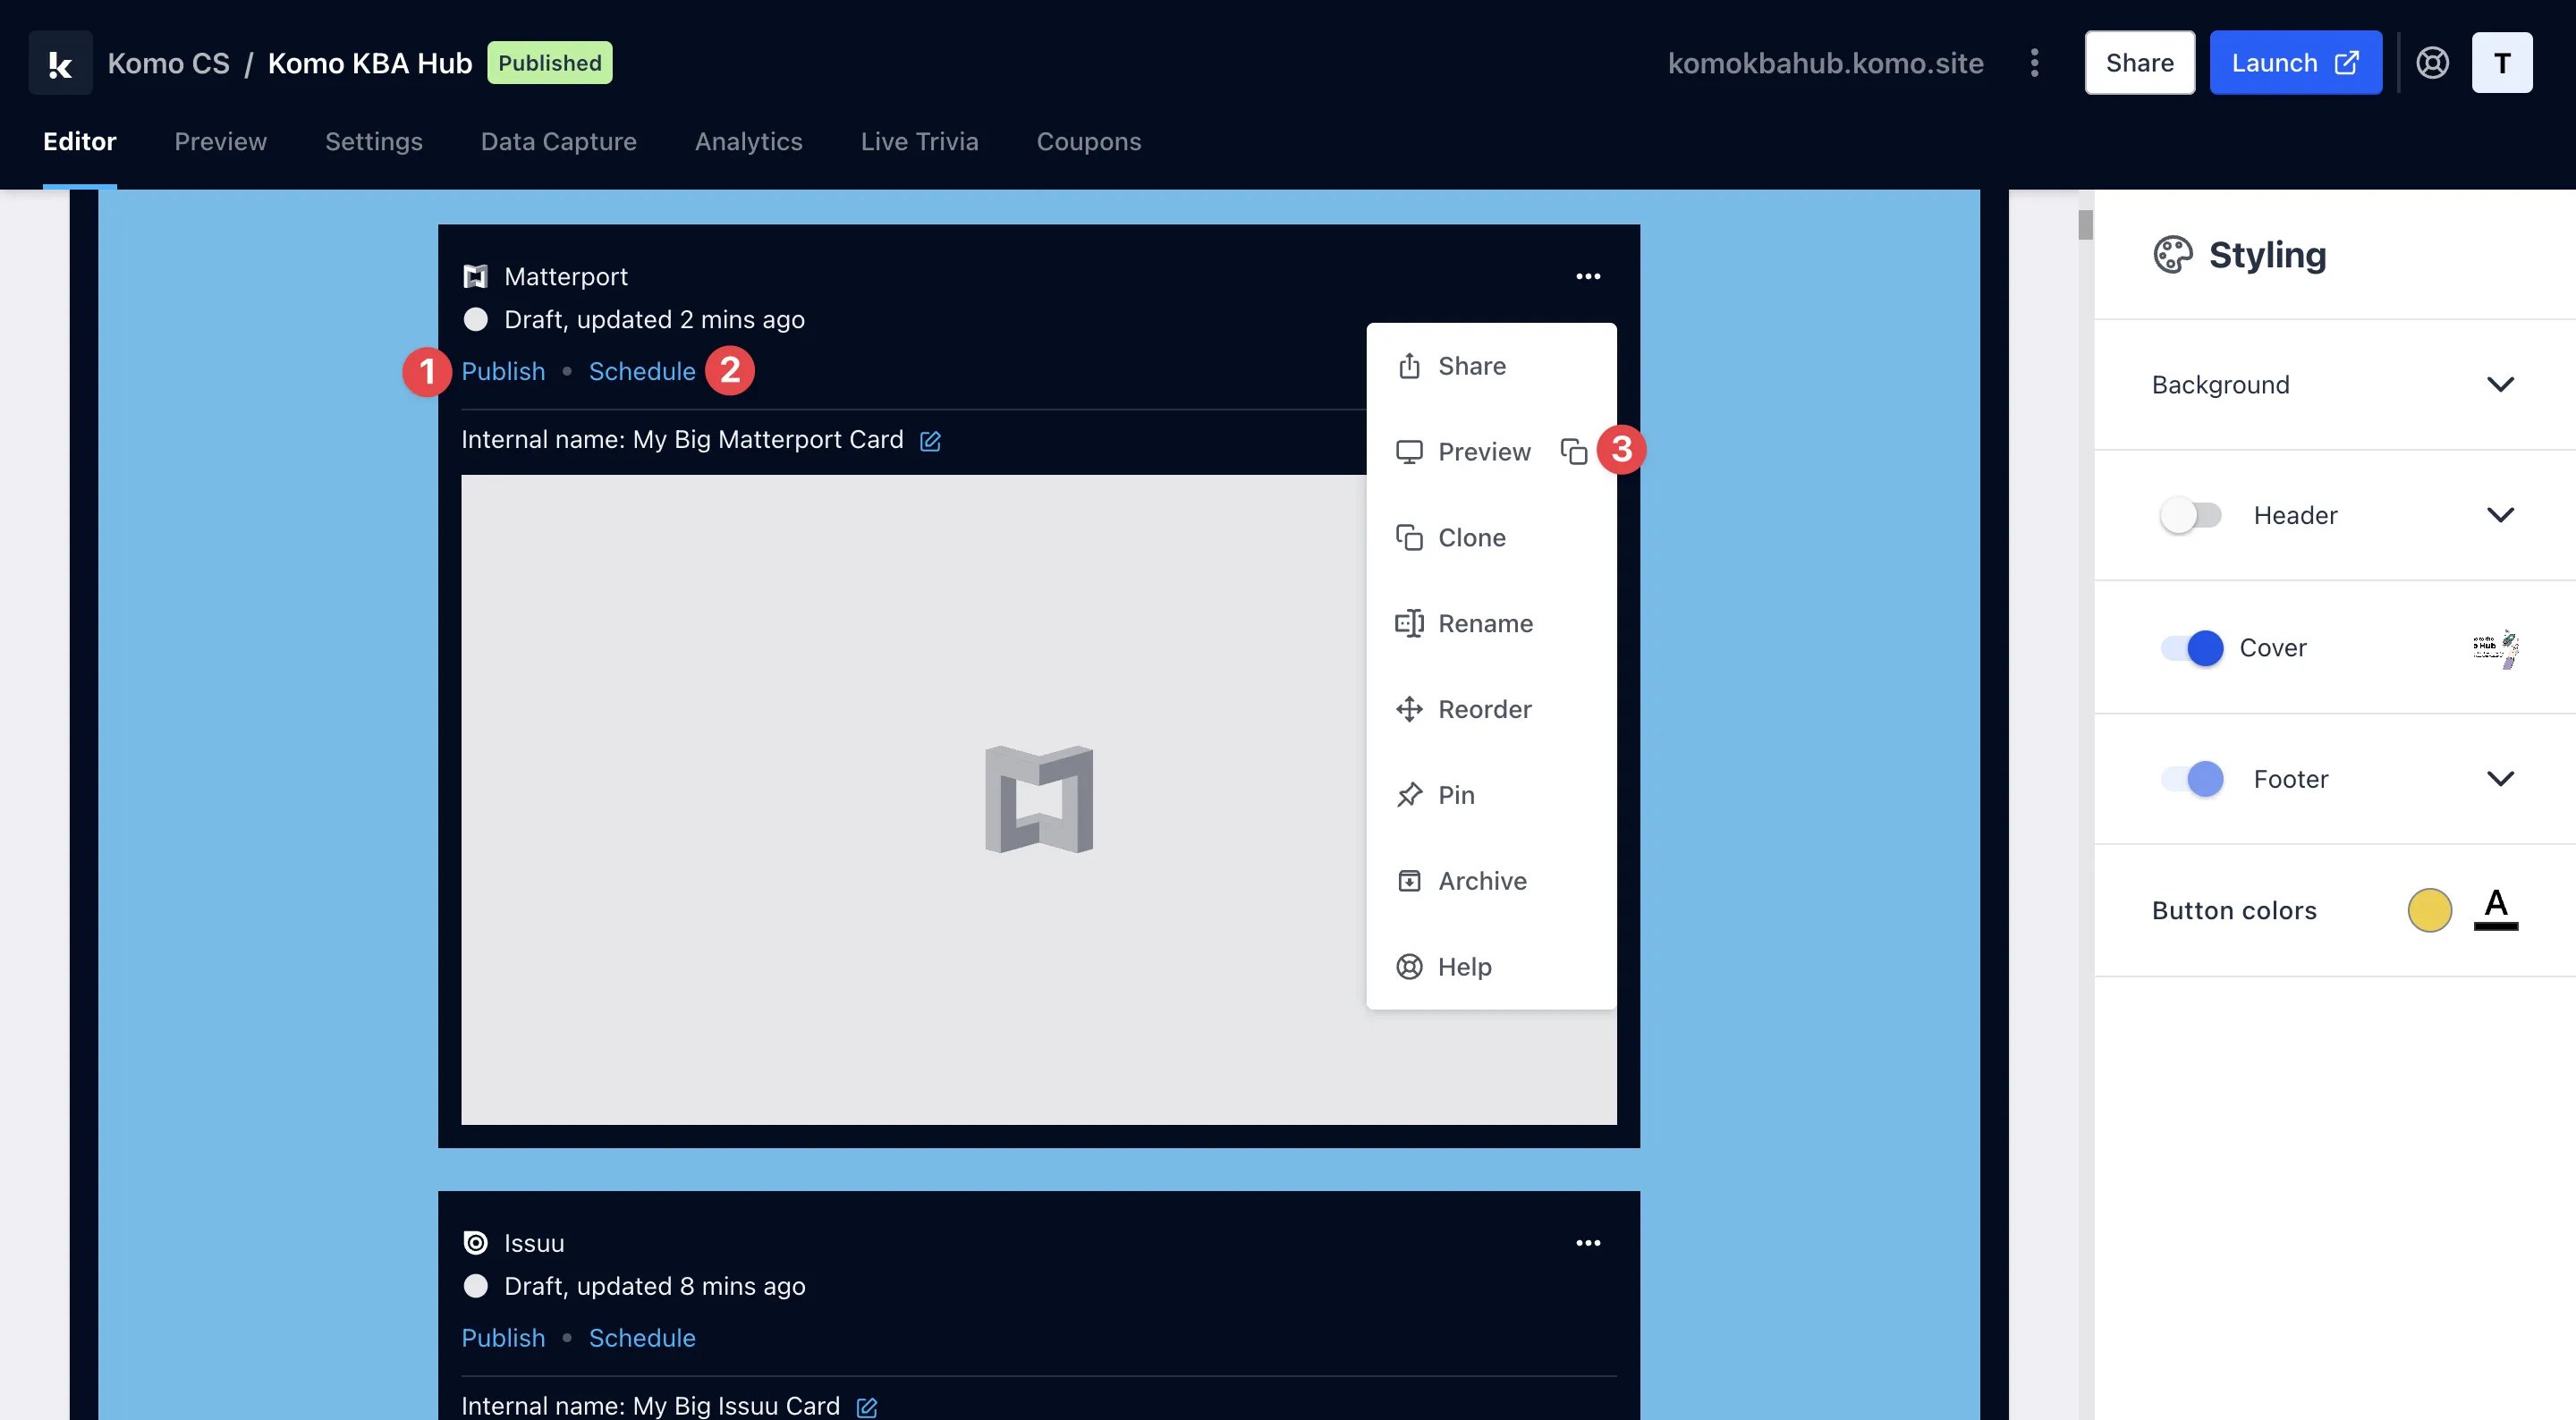
- (1) Publish your card manually and instantly for the world to see.
- (2) Schedule your card to be published and unpublished at set dates and times.
- (3) Click on … to Preview and interact with the card on the front end from a user’s perspective before publishing it.
All competition entries will be recorded and will impact the card analytics.